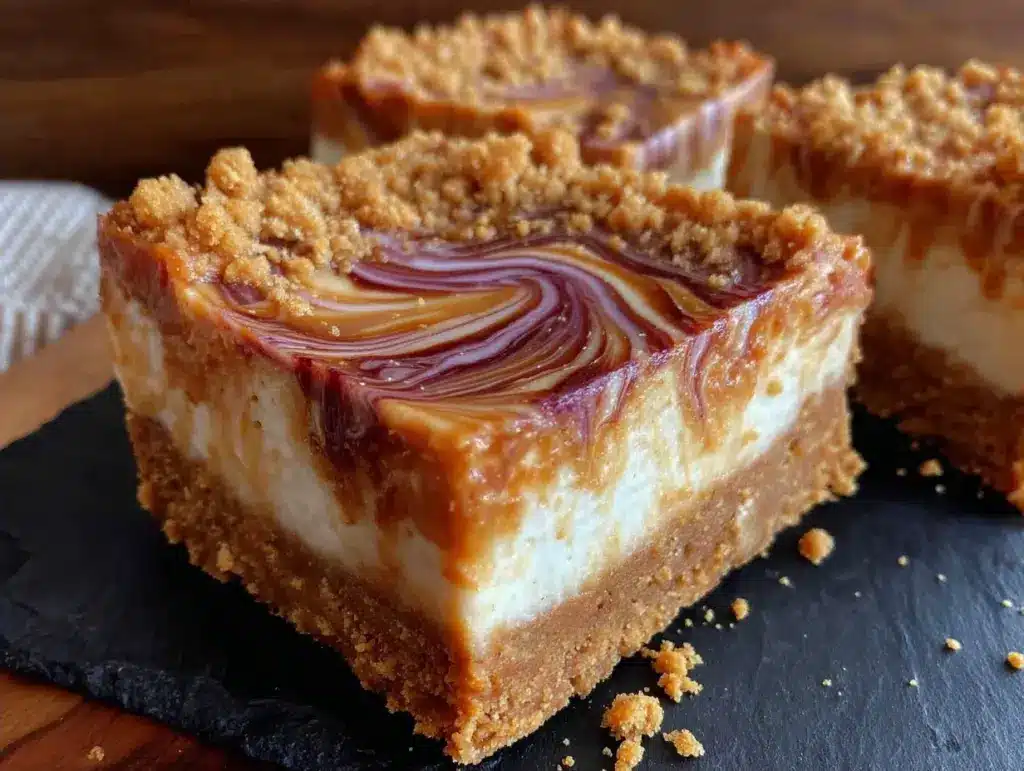
It started with a craving I couldn’t explain. I was standing in the grocery store aisle, staring at a jar of Biscoff spread, and suddenly I knew exactly what I needed to make. It wasn’t a fancy dessert. It wasn’t even baked. It was just… creamy, crunchy, and impossibly easy. I rushed home, threw together what I thought would be a simple snack, and ended up eating half the pan before it had even set.
That was three weeks ago. Since then, I’ve made these no-bake Biscoff cheesecake bars at least five times. My pantry is permanently stocked with the stuff. My family treats them like currency. They’re the reason I’ve started buying extra boxes of Lotus biscuits on sight. If you’ve never had that distinct, caramelized, spiced-cookie-butter flavor, you’re missing out on one of the most addictive taste experiences in modern baking. And if you have? You already know I’m right.
Here’s the thing about these bars: they require zero oven time. No preheating, no worrying about cracks in your cheesecake, no standing over a hot stove. Just mix, press, chill, and slice. It’s the kind of dessert that feels like cheating, but tastes like you spent all day in the kitchen. I’ve tested this recipe with different types of cream cheese, different amounts of sugar, and even tried swapping the crust, but this specific combination of cookie butter swirl and tangy cream cheese filling is the winner. Hands down.
I love making these for potlucks because they travel well. I’ve served them at office parties, birthday celebrations, and casual dinner nights. Every single time, the reaction is the same: surprise that it’s so easy, followed by immediate requests for the recipe. It’s become my go-to “I need to impress people but I’m tired” solution. And honestly? The no-bake key lime pie cups are great too, but there’s something about the rich, spiced depth of Biscoff that just hits different. It’s cozy without being heavy. Sweet without being cloying.
Why You’ll Love These No-Bake Biscoff Cheesecake Bars
There are a lot of reasons I keep coming back to this recipe, but let’s be real: it’s the flavor and the ease that keep me hooked. Here’s why these bars have earned a permanent spot in my dessert rotation.
Zero Baking Required — Seriously, no oven needed. This means no heating up your kitchen in the summer, no preheating wait time, and no risk of your cheesecake cracking. I made these during a heatwave last July, and my apartment stayed perfectly cool. It’s basically dessert hacking.
Flavor Explosion — The combination of tangy cream cheese, sweet cookie butter, and crunchy biscuit crust is unmatched. The Biscoff spread adds this deep, toasty, almost gingerbread-like spice that balances the richness of the cream cheese perfectly. It’s complex flavor in a simple package.
Make-Ahead Friendly — These bars taste better after they’ve chilled overnight. The flavors meld together, the texture firms up, and it becomes this perfect, sliceable treat. I often make them on Sunday for the week ahead. They keep in the fridge for up to five days, though I doubt they’ll last that long.
Gluten-Free Option Available — Not everyone needs gluten-free, but it’s great that it’s easy to make. I use gluten-free digestive biscuits for the crust, and honestly? You can’t tell the difference. The texture is just as crunchy, and the flavor holds up. It’s inclusive dessert-making at its finest.
Impressive but Lazy — When I bring these to a gathering, people assume I bought them from a fancy bakery. They don’t realize I spent ten minutes mixing and ten minutes pressing. It’s the perfect balance of looking put-together and actually being effortless.
So basically, if you want a dessert that tastes incredible, requires minimal effort, and makes you look like a pro baker, these are it. I’ve tried chewy smores cookie bars before, and while those are great, they’re messy to eat. These bars are clean, neat, and just as satisfying.
Ingredients You’ll Need
One of the best parts about this recipe is how simple the ingredient list is. You don’t need a pantry full of exotic spices or rare items. Here’s what you’ll need to make these no-bake Biscoff cheesecake bars, along with my honest tips on why each one matters.
For the Crust:
Lotus Biscoff Cookies (300g / about 2.5 cups crumbs) — This is the star. You can use the actual Lotus brand, or any similar speculoos/gingersnap cookies. If you can’t find them, look for “spiced cookie” or “gingersnap” at your local grocery store. Crush them finely—almost like sand. I use a food processor, but you can also put them in a ziplock bag and smash them with a rolling pin. It’s a satisfying way to de-stress after a long day.
Unsalted Butter (100g / ½ cup, melted) — This binds the crust together. Use real butter, not margarine. The flavor makes a huge difference in the crust. Melt it in the microwave or on the stove. It should be liquid but not hot.
Sugar (2 tablespoons / 25g) — Optional, but I recommend it. The cookies are already sweet, but a little sugar helps the crust crisp up slightly. If you’re watching sugar intake, you can skip this, but don’t say I didn’t warn you.
Pinch of Salt — Just a tiny pinch to balance the sweetness. It wakes up the flavor.
For the Filling:
Cream Cheese (500g / 18oz, full-fat, softened) — This is non-negotiable. Use block cream cheese, not the tub stuff. The tub stuff has higher water content and won’t whip up as smoothly. Let it sit on the counter for 30 minutes before you start. Softened cream cheese mixes evenly; cold cream cheese creates lumps. I learned this the hard way with a lumpy, grainy filling that looked terrible.
Biscoff Cookie Butter Spread (150g / ⅔ cup) — This is what makes it “Biscoff” cheesecake. Use the smooth spread, not the crunchy kind (unless you like texture surprises, which I don’t in my cheesecake). This adds that caramelized, spiced flavor. I buy the big jars because I use them for everything—from toast to these bars.
Heavy Cream (240ml / 1 cup, cold) — This gives the filling its light, airy texture. Whip it to stiff peaks before folding it in. If you use whipped topping (like Cool Whip), it works too, but fresh whipped cream tastes richer and lighter. I prefer fresh because it doesn’t have that chemical aftertaste.
Powdered Sugar (100g / 1 cup) — This sweetens the filling and helps stabilize the whipped cream. Sift it if it’s clumpy. Nobody wants a mouthful of sugar lump.
Vanilla Extract (1 teaspoon) — Just a splash to round out the flavors. Use real vanilla, not imitation. It makes a subtle but noticeable difference.
For the Swirl:
Biscoff Spread (2-3 tablespoons) — Just a little extra for the marbling effect. It makes the bars look professional and adds bursts of intense flavor in every bite.
Equipment Needed
You don’t need fancy gadgets for this. Here’s what I actually use in my kitchen.
9×13 Inch Pan — I use a metal pan because it conducts heat evenly (even though we’re not baking, it helps with cooling). Line it with parchment paper, leaving an overhang on the sides. This is crucial for lifting the bars out later. If you don’t lift them out, cutting them becomes a nightmare.
Food Processor — For crushing the cookies. It takes 30 seconds. If you don’t have one, use a rolling pin and a ziplock bag. It’s more work, but it works.
Hand Mixer or Stand Mixer — You need to whip the cream cheese and cream until smooth and airy. A hand mixer is fine, but a stand mixer is faster and less tiring. I’ve done it by hand before, and my arm was sore for hours. Don’t do that to yourself.
Spatula — For folding the whipped cream into the cream cheese mixture. Use a silicone spatula. It scrapes the bowl clean and doesn’t scratch your mixing bowl.
Knife or Bench Scraper — For cutting the bars. A sharp knife works best. Wipe the blade between cuts for clean edges. I use a bench scraper to lift the bars out of the pan.
Measuring Cups and Spoons — Standard stuff. Accuracy matters less here than in baking, but it’s still good to be close.
How to Make It: Step-by-Step
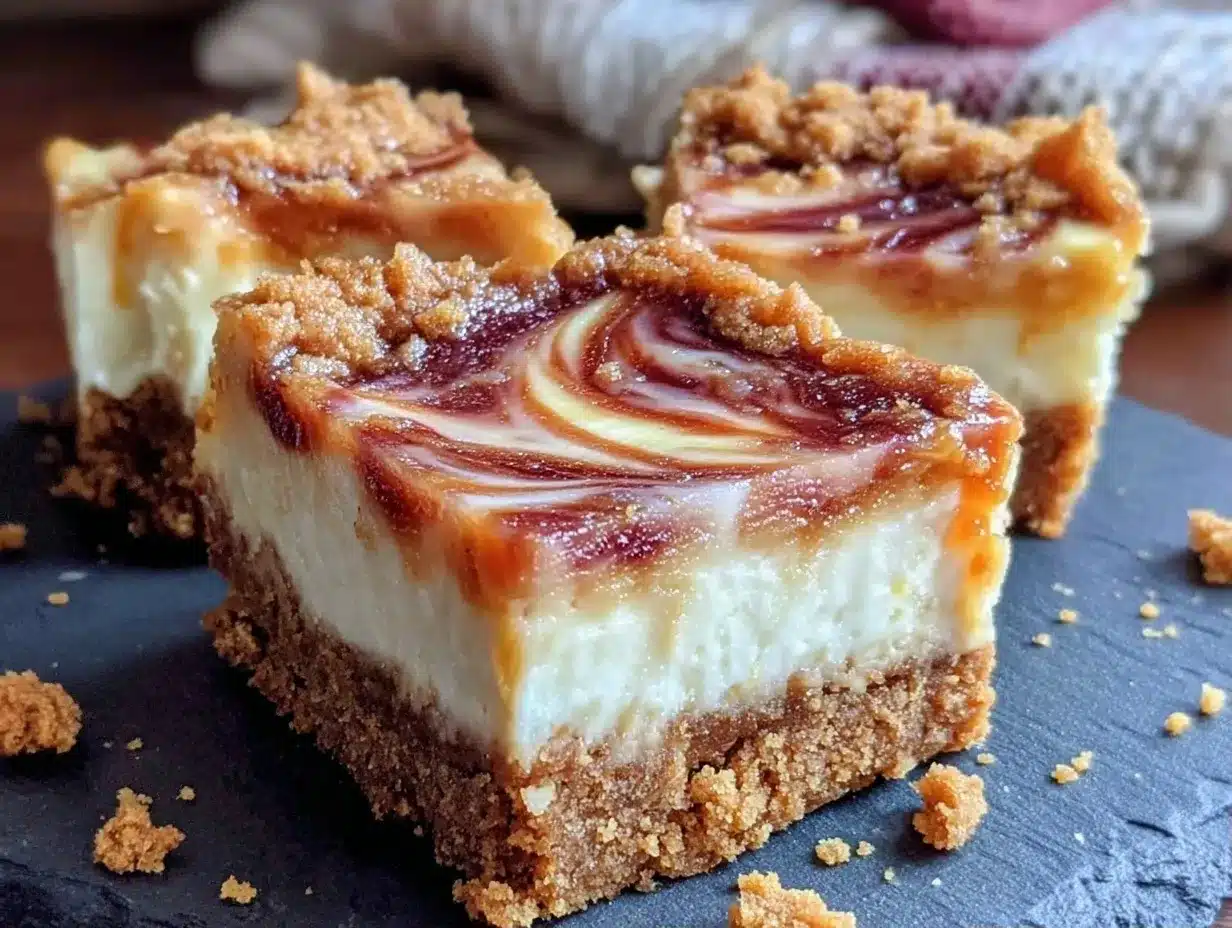
Alright, let’s make these no-bake Biscoff cheesecake bars! I’m walking you through exactly how I do it, including the little tricks that make the difference between good and great.
Step 1: Prepare the Pan
Line your 9×13 inch pan with parchment paper. Leave a few inches of overhang on the long sides. This is your handle for lifting the bars out later. Without this, you’ll be digging pieces out with a spoon, and that’s not elegant. Spray the parchment lightly with cooking spray to help the crust stick.
Step 2: Make the Crust
Crush your Biscoff cookies into fine crumbs. You want them almost powdery, not chunky. In a bowl, mix the crumbs with melted butter, sugar, and a pinch of salt. The mixture should look like wet sand. If it’s too dry, add a little more butter. If it’s too wet, add more crumbs. Press this mixture firmly into the bottom of your prepared pan. Use the bottom of a glass or measuring cup to pack it down tight. This prevents the crust from crumbling later. I usually press it all the way up the sides a bit for a “bar” effect, but flat is fine too.
Step 3: Whip the Cream
In a large bowl, whip the cold heavy cream to stiff peaks. It should hold its shape when you lift the beaters. Don’t over-whip it into butter, but don’t under-whip it either. Stiff peaks are key for a light filling. Set this aside.
Step 4: Mix the Cream Cheese
In a separate large bowl, beat the softened cream cheese until smooth and creamy. There should be no lumps. Add the powdered sugar and vanilla extract. Beat until combined. This should take about 2 minutes. If you’re using a hand mixer, scrape down the sides of the bowl once or twice.
Step 5: Add the Cookie Butter
Add the Biscoff spread to the cream cheese mixture. Beat on low speed until just combined. You don’t want to overmix it now, or you’ll deflate the air you’re about to add. It should be a smooth, pale orange mixture.
Step 6: Fold It Together
Gently fold the whipped cream into the cream cheese mixture. Use a spatula and fold from the bottom up. Turn the bowl and fold again. Stop when you see no more white streaks. Be gentle here! You want to keep as much air in the mixture as possible. This is what makes the filling light and fluffy, not dense and heavy.
Step 7: Spread and Swirl
Pour the filling over the crust. Spread it evenly with a spatula. Smooth the top. Now, take the extra 2-3 tablespoons of Biscoff spread and drop small spoonfuls over the top. Use a knife or skewer to swirl it into the filling. Don’t over-swirl. You want random, artistic swirls, not a perfect pattern. It’s messy, but that’s the fun part.
Step 8: Chill
Cover the pan with plastic wrap or a lid. Refrigerate for at least 4 hours, but overnight is best. This is the hardest part—waiting. But it’s necessary for the bars to set. If you cut them too soon, they’ll be mushy. Trust the process.
Step 9: Cut and Serve
Once set, lift the bars out of the pan using the parchment overhang. Place on a cutting board. Use a sharp knife to cut into squares. Wipe the knife clean between cuts for neat edges. Dust with powdered sugar if you want to look fancy. Serve and enjoy.
Expert Tips & Tricks
Here’s everything I’ve learned from making these dozens of times. These tips will save you from my mistakes.
Softened Cream Cheese is Key
I cannot stress this enough. Cold cream cheese creates lumps. If you forget to take it out, cut it into small cubes and microwave in 5-second bursts until it’s soft. But don’t melt it! Soft, not liquid.
Cold Cream for Whipping
Your cream must be cold. If your bowl and beaters are warm, the cream won’t whip. Keep your bowl in the fridge for 15 minutes before whipping. It’s a small step that makes a big difference.
Don’t Skip the Chill Time
I know you want to eat it now. But if you cut it too soon, it won’t hold its shape. 4 hours is the minimum. Overnight is ideal. The texture improves significantly with time.
Sharp Knife for Clean Cuts
A dull knife will smash the bars. Use a sharp knife. Dip it in hot water and wipe it dry between cuts for the cleanest edges. It’s a pro trick that makes a huge difference in presentation.
Customize the Swirl
You can swirl in chocolate sauce, caramel, or even fruit puree if you want. But the Biscoff swirl is the classic for a reason. It complements the flavor perfectly.
Storage is Simple
These bars keep well in the fridge for up to 5 days. Store them in an airtight container. They actually taste better on day 2 or 3 as the flavors meld.
Variations & Substitutions
Once you’ve nailed the basic version, here’s how you can mix it up. I’ve tried all of these.
Gluten-Free Version
Use gluten-free digestive biscuits or gluten-free speculoos cookies for the crust. Everything else is naturally gluten-free. The texture is the same, and the flavor is identical. I’ve used brands like Schär and Bob’s Red Mill, and they work great.
Lighter Version
Use light cream cheese and reduce the heavy cream to ½ cup, whipping it with a little more powdered sugar for stability. It’s lighter, but still tasty. I make this when I’m trying to be “healthy,” but honestly, the full-fat version is worth the calories.
Chocolate Swirl
Instead of Biscoff swirl, drizzle melted chocolate over the top. It creates a marbled effect that’s beautiful and delicious. I did this for a dinner party, and it was a hit.
Strawberry Swirl
Blend fresh strawberries with a little sugar and swirl it in. It adds a fruity brightness that cuts through the richness. Great for spring.
Dairy-Free Option
Use vegan cream cheese and coconut cream (chilled, so you can whip it). It’s different, but still creamy and delicious. My lactose-intolerant friend loves this version.
Serving & Storage
How to Serve:
I usually serve these straight from the fridge. They’re best cold. I pair them with a cup of black coffee or a glass of cold milk. But here are other ways I’ve enjoyed them:
Toppings:
I like to dust them with powdered sugar right before serving. You can also add a dollop of whipped cream or a few crushed Biscoff cookies on top for extra crunch.
Side Dishes:
These are a dessert, so they don’t need sides. But if you’re having a party, I serve them with fresh raspberry lemonade spritzer to cut the richness. The acidity balances the cream perfectly.
Storage Instructions:
Store in an airtight container in the fridge for up to 5 days. They don’t freeze well because the texture of the cream cheese and whipped cream changes when thawed. They can become watery. Make them fresh or store in the fridge.
Reheating:
Don’t reheat these. They’re meant to be eaten cold. If you’re feeling adventurous, you can warm them slightly, but I don’t recommend it. The texture is best chilled.
Nutrition Information
I’m not a nutritionist, but here’s the breakdown if you’re tracking. Keep in mind that this is a rich, creamy dessert, so portions matter.
Per Serving (based on 12 bars):
| Nutrient | Amount |
|---|---|
| Calories | 280 |
| Protein | 4g |
| Carbs | 32g |
| Fiber | 1g |
| Sugar | 24g |
| Fat | 16g |
| Saturated Fat | 9g |
| Cholesterol | 45mg |
| Sodium | 180mg |
What’s Good:
– Decent protein from the cream cheese
– No baking means no added oils from frying
– Can be made gluten-free easily
What to Know:
– Higher in sugar from the Biscoff spread and powdered sugar
– Contains dairy and gluten (unless modified)
– Rich in saturated fat from the cream cheese and butter
My Take:
Look, this is a dessert. It’s sweet, creamy, and indulgent. It’s not a health food. But it’s way better than store-bought bars, and you know exactly what’s in it. When I want to make it lighter, I use the light cream cheese version and reduce the sugar. But usually? I just eat one or two and enjoy it.
Final Thoughts
So that’s my go-to no-bake Biscoff cheesecake bars! I’ve probably talked your ear off at this point, but when you make a recipe this often, you have a lot to say about it.
This has saved dessert nights more times than I can count. It’s my answer to “what’s for dessert” when I’m tired, don’t want to bake, and still want something that tastes really good. My kids are happy, my husband’s happy, and I’m happy because I’m not stressed about cooking.
Make it yours! Try different swirls, swap in your favorite cookies, adjust the sugar to your taste. The best recipes are the ones you adapt to your family’s tastes.
If you make this, drop a comment and let me know what you think! I love hearing how recipes turn out in your kitchen. And if something doesn’t work, tell me that too—I’m here to help troubleshoot.
Happy cooking! And I hope your kitchen smells half as good as mine does right now.
Frequently Asked Questions
Q: Can I use crunchy Biscoff spread instead of smooth?
A: You can, but the texture will be different. The smooth spread creates a uniform, creamy filling. The crunchy spread will give you little bits of cookie in every bite. I prefer smooth for a classic cheesecake texture, but crunchy is fine if you like texture.
Q: Why did my filling turn out watery?
A: Usually, this happens if the cream cheese wasn’t softened properly, or if you overmixed it after adding the whipped cream. Make sure your cream cheese is smooth before adding the sugar. And fold the whipped cream gently to keep the air in.
Q: Can I make this ahead for a party?
A: Absolutely! In fact, it’s better made ahead. Make it 24 hours before the party. The flavors will meld, and the bars will set perfectly. Just keep it in the fridge until you’re ready to serve.
Q: Can I freeze these bars?
A: I don’t recommend it. The cream cheese and whipped cream texture changes when frozen and thawed. It can become grainy or watery. It’s best to make them fresh or store in the fridge for up to 5 days.
Q: Can I use a different pan size?
A: Yes, but the thickness will change. If you use an 8×8 inch pan, the bars will be thicker and you’ll need to adjust the cutting. If you use a 9×13 inch pan, they’ll be thinner. I recommend 9×13 for the best balance of crust to filling.
Q: Can I use whipped topping instead of heavy cream?
A: Yes, you can. It’s easier and doesn’t require whipping. But fresh whipped cream tastes lighter and richer. If you use whipped topping, make sure it’s thawed and smooth before folding it in.
Q: How do I cut clean edges?
A: Use a sharp knife. Dip it in hot water and wipe it dry between cuts. This helps the knife glide through the cold cheesecake without sticking. It’s a small trick that makes a big difference in presentation.
Pin This Recipe!
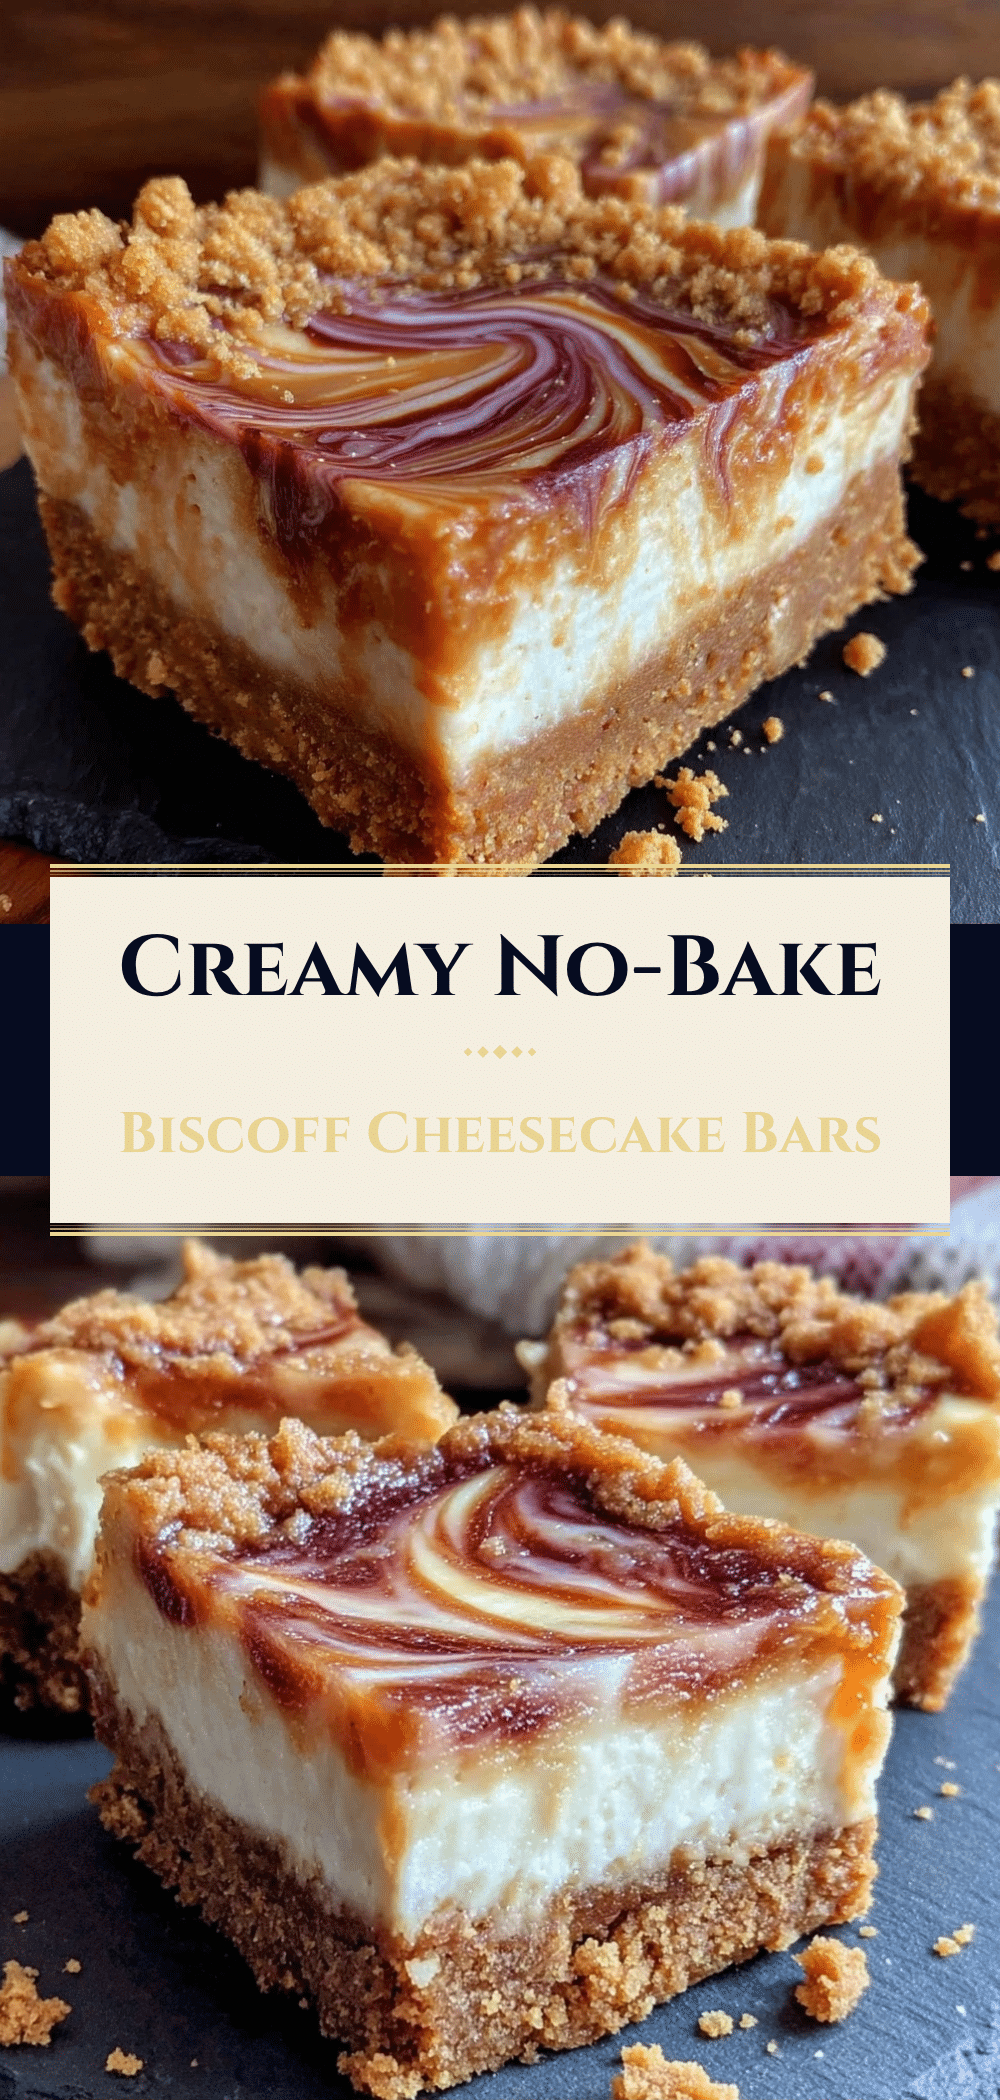
No-Bake Biscoff Cheesecake Bars: 3-Ingredient Cookie Butter Swirl
- Total Time: 4 hours 20 minutes
- Yield: 12 servings 1x
Description
These no-bake Biscoff cheesecake bars are an incredibly easy, creamy, and crunchy dessert that requires zero oven time. With a spiced cookie butter crust, tangy cream cheese filling, and a rich Biscoff swirl, they are perfect for make-ahead entertaining.
Ingredients
- 300g Lotus Biscoff Cookies (about 2.5 cups crumbs)
- 100g Unsalted Butter (½ cup, melted)
- 2 tablespoons Sugar (optional)
- Pinch of Salt
- 500g Cream Cheese (18oz, full-fat, softened)
- 150g Biscoff Cookie Butter Spread (⅔ cup)
- 240ml Heavy Cream (1 cup, cold)
- 100g Powdered Sugar (1 cup)
- 1 teaspoon Vanilla Extract
- 2–3 tablespoons Biscoff Spread (for swirling)
Instructions
- Line a 9×13 inch pan with parchment paper, leaving an overhang on the sides, and lightly spray with cooking spray.
- Crush Biscoff cookies into fine crumbs. Mix with melted butter, sugar, and salt until it resembles wet sand. Press firmly into the bottom of the prepared pan.
- In a large bowl, whip cold heavy cream to stiff peaks and set aside.
- In a separate bowl, beat softened cream cheese until smooth. Add powdered sugar and vanilla extract, beating until combined.
- Add the Biscoff spread to the cream cheese mixture and beat on low speed until just combined.
- Gently fold the whipped cream into the cream cheese mixture until no white streaks remain.
- Spread the filling evenly over the crust. Drop spoonfuls of extra Biscoff spread on top and swirl with a knife.
- Cover and refrigerate for at least 4 hours, preferably overnight, until set.
- Lift bars out of the pan using the parchment overhang. Cut into squares with a sharp knife and serve chilled.
Notes
Ensure cream cheese is fully softened to avoid lumps. Heavy cream must be cold to whip properly. For clean cuts, dip the knife in hot water and wipe dry between slices. These bars are best stored in the fridge for up to 5 days and do not freeze well.
- Prep Time: 20 minutes
- Cook Time: 0 minutes
- Category: Dessert
- Cuisine: American
Nutrition
- Serving Size: 1 bar
- Calories: 280
- Sugar: 24
- Sodium: 180
- Fat: 16
- Saturated Fat: 9
- Carbohydrates: 32
- Fiber: 1
- Protein: 4
Keywords: no-bake, Biscoff, cheesecake bars, cookie butter, dessert, easy recipe, make-ahead, gluten-free option


