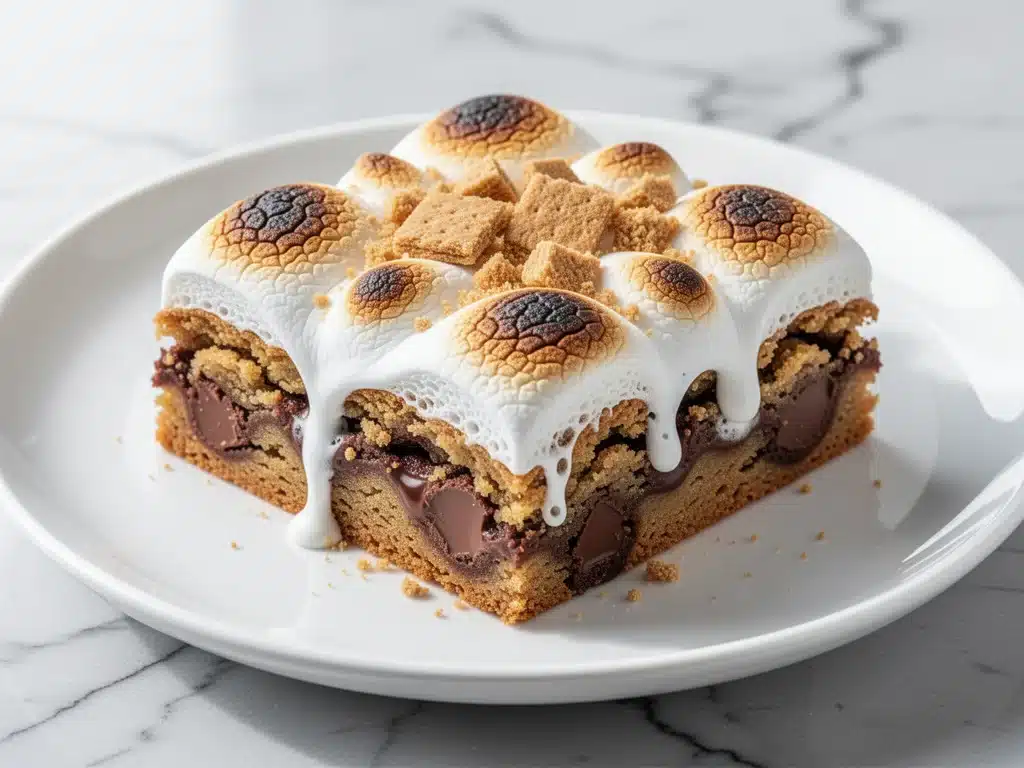
There is a specific kind of magic that happens when you take the classic campfire experience of s’mores and force it into a 9×13 baking pan. I remember the first time I tried this, it was a humid July evening, and we had just come back from a hike that left us all exhausted and craving something sweet. We didn’t have marshmallows that weren’t slightly stale, and we definitely didn’t have a fire going. So, I grabbed a box of graham crackers, a bag of chocolate chips, and the marshmallows hiding in the back of our pantry. I threw them into a pan, hit them with some heat, and waited.
When I pulled that tray out of the oven, the smell alone was enough to make my kids run into the kitchen from three rooms away. The graham cracker base was buttery and crisp. The chocolate was melted into gooey perfection. And the marshmallows? They were golden, puffy, and dangerously sticky. That night, I realized something important: you don’t need a campfire to make the best dessert of your life. You just need a baking pan, a little bit of patience, and the willingness to get your fingers sticky.
Since then, I’ve made these chewy s’mores cookie bars dozens of times. They’ve been the star of birthday parties, the solution for “what’s for dessert” when I’m tired, and the reason my oven is always warm on weekends. Unlike traditional s’mores, which can be messy and require outdoor equipment, these bars are contained, portable, and infinitely more reliable. They’re also what I call “honest comfort food.” There’s no fancy technique here, just layers of familiar flavors that come together to create something truly special. If you’re looking for an easy dessert that feels homemade but requires minimal effort, this is it. It’s the kind of recipe that makes people ask for the source code.
Why You’ll Love This Chewy S’mores Cookie Bars Recipe
I’m not going to lie to you. Baking can be stressful. You have to measure precisely, watch temperatures, and hope the timing is right. But this recipe? It’s forgiving. It’s fun. And it delivers results that taste like you spent all day in the kitchen (even though you didn’t). Here is why these bars have earned a permanent spot in my rotation, right alongside my soft pink frosted sugar cookie bars.
- Zero Campfire Required — Seriously. I’ve made these in the middle of winter when it’s snowing and freezing outside. No bugs, no smoke, just pure chocolate and marshmallow goodness. It’s the best of both worlds.
- Sticky, Chewy Texture — The secret to these bars isn’t just the ingredients; it’s the ratio. I’ve tested different amounts of marshmallows and chocolate, and this balance gives you that perfect chew that keeps you coming back for a second square (or third).
- Super Simple Assembly — You don’t need an electric mixer. You don’t need to make a dough from scratch. You layer ingredients. That’s it. If you can layer, you can make these. I’ve even had my seven-year-old help me make them without a single mess-up.
- Make-Ahead Friendly — These bars actually taste better the next day. The flavors meld together, the chocolate sets slightly, and the graham cracker base gets a little more cohesive. They travel well for potlucks, picnic lunches, or office parties. Just pack them in a container with parchment paper between layers.
- Customizable — Got extra chocolate? Chop up some peanut butter cups. Want a twist? Add a drizzle of caramel. This recipe is a blank canvas for your sweet tooth.
Real talk: this is my go-to dessert when I need to impress but don’t have the energy to bake a complex cake. It looks impressive because of the golden, toasted marshmallows, but the work involved is minimal. It’s the kind of dessert that feels indulgent but is actually quite simple to pull off. And that’s a win in my book.
Ingredients You’ll Need
One of the best things about these chewy s’mores cookie bars is that the ingredient list is short. You probably have most of this already in your pantry. I’m particular about quality here, especially with the chocolate and marshmallows, because when there are only four main components, each one has to shine. Here’s exactly what I use and why.
For the Graham Cracker Base
Graham cracker crumbs (1 ½ cups / 150g) — I buy the pre-crushed boxes for convenience, but if you have whole sheets, you can crush them in a food processor or put them in a ziplock bag and hit them with a rolling pin. The crumbs should be fine, like sand. This ensures a smooth, even base.
Unsalted butter (½ cup / 113g, melted) — Use real butter. Margarine changes the texture and flavor. Melt it completely before mixing with the crumbs. I like to use unsalted so I can control the salt level, but salted works if you reduce any added salt.
Granulated sugar (¼ cup / 50g) — This helps sweeten the base and gives it a slight crispness. Don’t skip it, or the base will taste bland.
Ground cinnamon (½ teaspoon) — This is my secret weapon. A little cinnamon adds warmth and depth that makes the graham cracker flavor feel more complex. It pairs perfectly with the chocolate.
For the Filling Layers
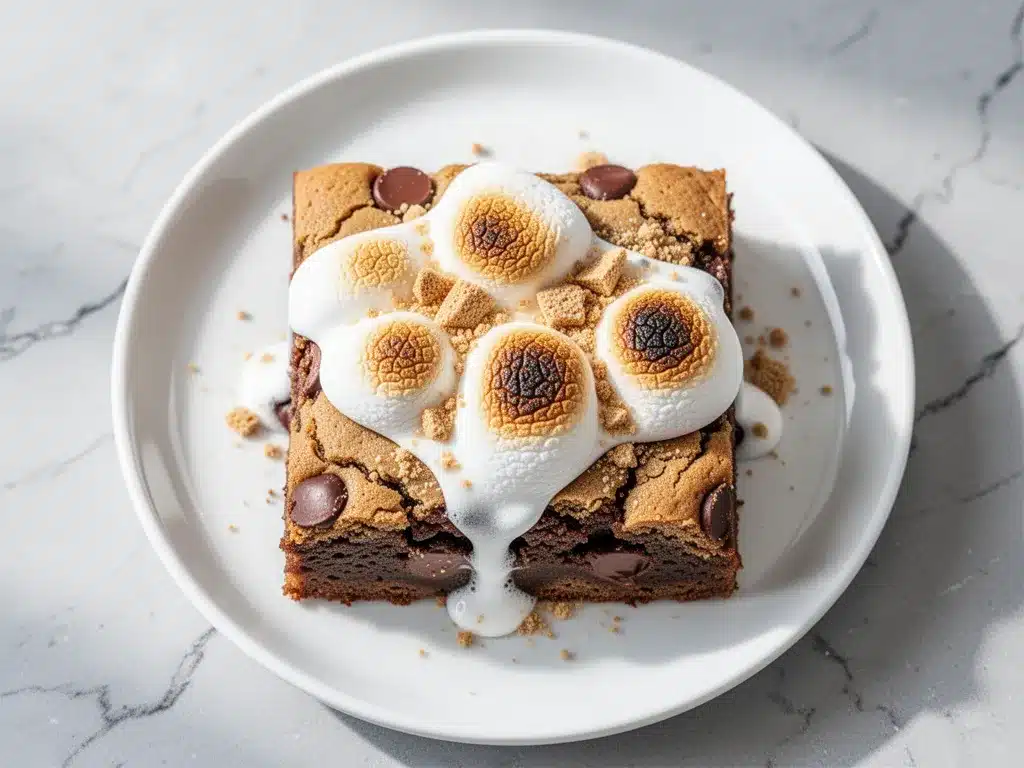
Semi-sweet chocolate chips (1 ½ cups / 270g) — I use standard semi-sweet chips because they hold their shape well but melt nicely. High-quality baking chocolate works too, but you’ll need to chop it. I prefer the convenience of chips. If you’re a dark chocolate lover, swap in dark chocolate chips.
Mini marshmallows (3 cups / 150g) — Do not use large marshmallows. They won’t distribute evenly and will create huge, sticky pockets. Mini marshmallows melt into a consistent, gooey layer. I always buy the big bags because I use them for other things, like creamy garlic tuscan salmon (wait, no, that doesn’t make sense—marshmallows don’t go in salmon! But you get the idea, I use them for baking often). Actually, let’s stick to baking: I use them for hot cocoa bombs and these bars.
Extra graham cracker sheets (for garnish) — Optional, but I love breaking up a few sheets and sprinkling them on top before baking for extra crunch and visual appeal.
Optional Add-Ins
Caramel sauce — A drizzle on top after baking adds a salty-sweet kick. I buy a bottle because making caramel from scratch is a pain.
Salted peanuts — Crushed on top for texture. This turns it into a rocky road vibe.
Equipment Needed
You don’t need fancy gadgets for this. Here’s what I actually use in my kitchen.
9×13 inch baking dish — Glass or ceramic works best because it heats evenly. I prefer glass because I can see the bottom browning. Metal works too, but watch the edges so they don’t burn.
Medium mixing bowl — For combining the graham cracker crumbs, butter, sugar, and cinnamon.
Fork or pastry cutter — To mix the base. I use a fork because it’s easier to press the mixture into the pan with the same tool.
Parchment paper — I line the pan with parchment, leaving an overhang on the sides. This is non-negotiable for easy removal. Trying to lift these out of an unlined pan is a recipe for disaster (and broken nails).
Oven — Obviously. Preheated to 350°F (175°C).
Sharp knife — For cutting the bars after they cool. I use a chef’s knife. Make sure it’s clean and dry for clean cuts.
How to Make It: Step-by-Step
Alright, let’s make these chewy s’mores cookie bars! I’m walking you through exactly how I do it, including the little tricks I’ve picked up over the years. It’s straightforward, but there are a few key moments to watch.
Step 1: Prep the Pan and Oven (2 minutes)
Preheat your oven to 350°F (175°C). Line your 9×13 inch baking dish with parchment paper. I like to lay down two strips crossing each other to form a cross, creating handles to lift the bars out later. Spray it lightly with non-stick spray just in case, though the butter in the base should help.
Step 2: Make the Graham Cracker Base (5 minutes)
In a medium bowl, combine the graham cracker crumbs, melted butter, granulated sugar, and cinnamon. Stir until the mixture looks like wet sand. It should hold together when you pinch it. If it’s too dry, add a tablespoon more melted butter. If it’s too wet, add a sprinkle more crumbs.
Press this mixture firmly and evenly into the bottom of your prepared pan. Use the bottom of a measuring cup or your fingers to pack it down. You want a tight, even layer. This is crucial because if the base is loose, the bars will crumble when you cut them.
Step 3: Bake the Base (10 minutes)
Place the pan in the oven and bake the crust for 10 minutes. You want it to set and get slightly golden. It won’t be fully browned, just firm. Remove it from the oven. This step ensures the bottom is crisp and won’t get soggy from the chocolate and marshmallows.
Step 4: Add the Chocolate Layer (2 minutes)
While the base is baking, measure out your chocolate chips. As soon as you pull the pan out of the oven, sprinkle the chocolate chips evenly over the hot crust. The heat from the crust will start to melt them. Let it sit for 2-3 minutes. Then, use a spatula or the back of a spoon to spread the melting chocolate into an even layer. You don’t need to melt it completely in the microwave; just get it smooth.
Step 5: Add the Marshmallows (1 minute)
Spread the mini marshmallows evenly over the chocolate layer. Don’t be shy with them, but don’t pile them so high that they overflow. I like to press them down slightly so they nestle into the chocolate. This helps them toast evenly.
Step 6: Broil or Bake Until Golden (3-5 minutes)
Return the pan to the oven. Bake for 3-4 minutes, or switch to the broiler for the last 1-2 minutes. Watch it closely! Marshmallows can go from golden to burnt in seconds. You want them puffy and lightly browned on top. If you use the broiler, keep the oven door slightly ajar and stand right there. I prefer baking at 350°F for the whole time because it’s less risky, but the broiler gives a nicer color.
Step 7: Cool and Cut (30+ minutes)
This is the hardest part: waiting. Remove the pan from the oven and let it cool completely on a wire rack. The chocolate will harden, and the marshmallows will deflate slightly, creating that chewy texture. If you cut them warm, they will be a sticky mess. I usually let them cool for at least 30 minutes, but overnight is best for clean cuts.
Once cool, lift the bars out using the parchment handles. Use a sharp knife to cut into squares or rectangles. Wipe the knife between cuts for clean edges. Serve and enjoy!
Expert Tips & Tricks
Here’s everything I’ve learned from making these dozens of times. These tips will save you from my mistakes.
Press the Base Firmly
I cannot stress this enough. If your graham cracker base is loose, your bars will fall apart. Pack it down hard. I use the bottom of a glass to press it into the corners and edges. It should feel like a solid floor.
Don’t Over-Broil
Marshmallows burn fast. If you’re using the broiler, set a timer for 1 minute and check every 30 seconds. They should be golden, not black. Burnt marshmallows taste bitter and ruin the whole bar.
Use Mini Marshmallows
I know they’re more expensive per ounce, but large marshmallows create uneven layers. Mini marshmallows melt into a consistent blanket. It’s worth the extra cost.
Cool Completely
I know you want to eat them now. But if you cut them warm, the chocolate will smear, and the marshmallows will stretch into strings. Patience pays off. Let them cool until they’re room temperature.
Storage is Key
Store these in an airtight container at room temperature for up to 3 days. If it’s hot outside, keep them in the fridge, but let them come to room temperature before eating for the best texture. They don’t freeze well because the marshmallows can get sticky.
Variations & Substitutions
Once you’ve nailed the basic version, here’s how you can mix it up. I’ve tried all of these, and they’re all winners.
Chocolate Chip Cookie Bars
Add ½ cup of chocolate chips to the graham cracker base before baking. It adds extra chocolate pockets and makes it feel more like a bar cookie.
Reese’s Cup Twist
Chop up peanut butter cups and sprinkle them between the chocolate and marshmallow layers. The salty peanut butter contrasts beautifully with the sweet marshmallows. This is a huge hit with kids.
Caramel Drizzle
After the bars are cooled, drizzle warm caramel sauce over the top. Sprinkle with flaky sea salt. This turns it into a gourmet dessert that looks amazing on Instagram.
White Chocolate Version
Swap semi-sweet chips for white chocolate chips. It’s sweeter and milder, which pairs well with the graham crackers. I love this version for summer parties.
Gluten-Free
Use gluten-free graham cracker crumbs. Most brands work fine. The rest of the ingredients are naturally gluten-free, so just check your chocolate chips and marshmallows for cross-contamination warnings if you have celiac disease.
Vegan
Use vegan graham crackers, vegan chocolate chips, and vegan marshmallows (like Dandies). The technique stays the same. The texture might be slightly different, but it’s still delicious.
Serving & Storage
How to serve these chewy s’mores cookie bars for maximum impact.
How to Serve
I usually serve these at room temperature. They’re rich and sweet, so a small square is usually enough. I like to pair them with a cold glass of milk or a cup of coffee. The contrast of hot coffee and sweet bar is perfect.
Side Dishes
Since these are dessert, they don’t need much. Maybe some fresh berries on the side to cut the sweetness. Or just serve them plain. They’re the star of the show.
Storage Instructions
Refrigerator: Store in an airtight container for up to 3 days. Layer squares with parchment paper to prevent sticking. They will firm up in the fridge, so let them sit out for 10 minutes before eating.
Freezing: I don’t recommend freezing these because the marshmallows can become sticky and lose their texture. It’s better to make them fresh.
Reheating: If you want warm bars, microwave a square for 10-15 seconds. The chocolate will melt, and the marshmallows will soften. Be careful not to overheat, or they’ll melt into a puddle.
Nutrition Information
I’m not a nutritionist, but here’s the breakdown if you’re tracking. These are rich bars, so portion control is key.
Per Serving (based on 16 bars):
| Nutrient | Amount |
|---|---|
| Calories | 280 |
| Protein | 3g |
| Carbs | 38g |
| Fiber | 1g |
| Sugar | 24g |
| Fat | 14g |
| Saturated Fat | 8g |
What’s Good: They’re quick to make and use simple ingredients. The graham cracker base provides some fiber.
What to Know: High in sugar and saturated fat. This is a treat, not a health food. Enjoy in moderation. If you want to lighten it up, use less chocolate chips or swap some marshmallows for crushed nuts.
Final Thoughts
So that’s my go-to chewy s’mores cookie bars recipe! I’ve probably talked your ear off at this point, but when you make a recipe this often, you have a lot to say about it. These bars have saved me on countless occasions. They’re my answer to “what’s for dessert” when I’m tired, don’t want takeout, and still want something that tastes really good. My kids are happy, my husband’s happy, and I’m happy because I’m not stressed about cooking.
Make it yours! Try different add-ins, swap in your favorite chocolate, or adjust the amount of marshmallows. The best recipes are the ones you adapt to your family’s tastes. And honestly, there’s no wrong way to make s’mores. As long as there’s chocolate and marshmallows, you’re winning.
If you make these, drop a comment and let me know what you think! I love hearing how recipes turn out in your kitchen. And if something doesn’t work, tell me that too—I’m here to help troubleshoot. Happy baking! And I hope your kitchen smells half as good as mine does right now.
Frequently Asked Questions
Can I use large marshmallows instead of mini?
You can, but the results won’t be as consistent. Large marshmallows create big pockets of goo and don’t melt evenly. If you must use them, cut them in half or thirds. But mini marshmallows are really the way to go for that uniform, chewy texture.
Why did my marshmallows burn?
Marshmallows burn very quickly, especially under a broiler. If you’re using the broiler, watch them like a hawk. Set a timer for 1 minute and check every 30 seconds. They should be golden brown, not black. If you’re baking at 350°F, they might not get as brown, but they won’t burn.
Can I make these ahead of time?
Yes! These bars are actually better the next day. Make them, let them cool completely, and store them in an airtight container at room temperature for up to 3 days. They travel well too, so they’re great for potlucks.
How do I cut clean squares?
Make sure the bars are completely cool. Use a sharp, clean knife. Wipe the blade with a paper towel between cuts to remove any sticky chocolate or marshmallow. For extra clean cuts, dip the knife in hot water and dry it before each cut.
Can I freeze these bars?
I don’t recommend freezing them. The marshmallows can become sticky and lose their texture when thawed. It’s better to make them fresh. If you must, freeze the graham cracker base and chocolate layer separately, then add fresh marshmallows when you’re ready to serve.
What if I don’t have graham cracker crumbs?
You can crush whole graham cracker sheets in a food processor or put them in a ziplock bag and hit them with a rolling pin. Alternatively, you can use crushed digestive biscuits or vanilla wafers, but the flavor will be slightly different.
Can I add nuts?
Absolutely! Chopped walnuts or pecans add a nice crunch and pair well with the chocolate and marshmallows. I like to sprinkle them on top before baking or mix them into the graham cracker base.
Pin This Recipe!
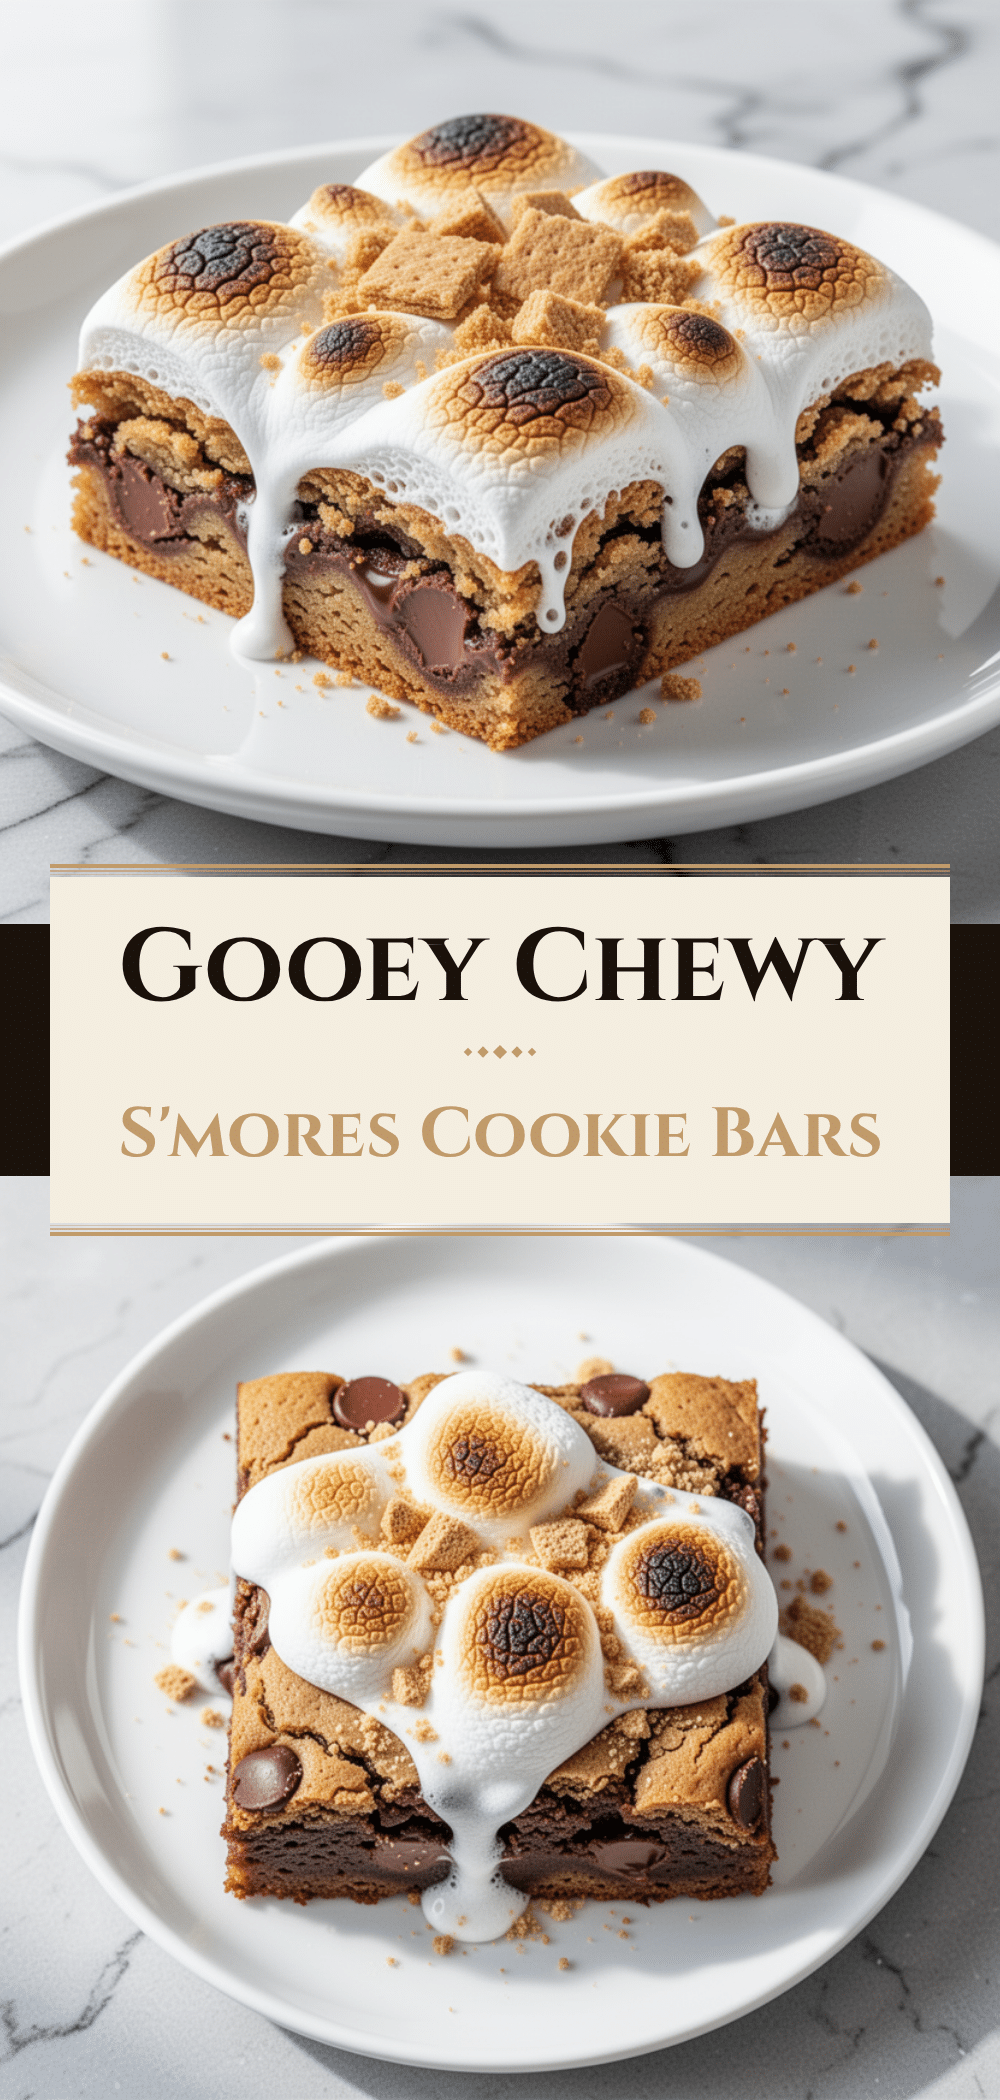
Chewy Smores Cookie Bars: Best Easy Dessert
- Total Time: 45 minutes
- Yield: 16 servings 1x
Description
These chewy s’mores cookie bars capture the classic campfire flavor without the fire. Featuring a buttery graham cracker base, melted semi-sweet chocolate, and toasted mini marshmallows, this easy no-mixer dessert is perfect for parties or a quick sweet treat.
Ingredients
- 1 ½ cups (150g) graham cracker crumbs
- ½ cup (113g) unsalted butter, melted
- ¼ cup (50g) granulated sugar
- ½ teaspoon ground cinnamon
- 1 ½ cups (270g) semi-sweet chocolate chips
- 3 cups (150g) mini marshmallows
- Extra graham cracker sheets (optional, for garnish)
- Non-stick cooking spray
Instructions
- Preheat oven to 350°F (175°C). Line a 9×13 inch baking dish with parchment paper, leaving an overhang on the sides for easy removal.
- In a medium bowl, combine graham cracker crumbs, melted butter, granulated sugar, and cinnamon. Stir until the mixture resembles wet sand.
- Press the mixture firmly and evenly into the bottom of the prepared pan. Pack it down tightly to ensure the bars hold together.
- Bake the crust for 10 minutes until it sets and becomes slightly golden. Remove from the oven.
- Immediately sprinkle chocolate chips evenly over the hot crust. Let sit for 2-3 minutes to soften, then spread into an even layer with a spatula.
- Spread mini marshmallows evenly over the chocolate layer, pressing them down slightly to nestle into the chocolate.
- Return to the oven and bake for 3-4 minutes, or broil for the last 1-2 minutes, watching closely until marshmallows are puffy and golden brown.
- Cool completely on a wire rack (at least 30 minutes, preferably overnight) to allow chocolate to harden and marshmallows to deflate slightly.
- Lift bars out using parchment handles and cut into squares with a sharp knife. Wipe knife between cuts for clean edges.
Notes
Press the base firmly to prevent crumbling. Do not over-broil marshmallows as they burn quickly. Cool completely before cutting to avoid a sticky mess. Store in an airtight container at room temperature for up to 3 days. Freezing is not recommended as marshmallows may become sticky.
- Prep Time: 10 minutes
- Cook Time: 15 minutes
- Category: Dessert
- Cuisine: American
Nutrition
- Serving Size: 1 bar
- Calories: 280
- Sugar: 24
- Fat: 14
- Saturated Fat: 8
- Carbohydrates: 38
- Fiber: 1
- Protein: 3
Keywords: s'mores, cookie bars, dessert, easy baking, marshmallow, chocolate, graham cracker, no-bake base, party dessert


