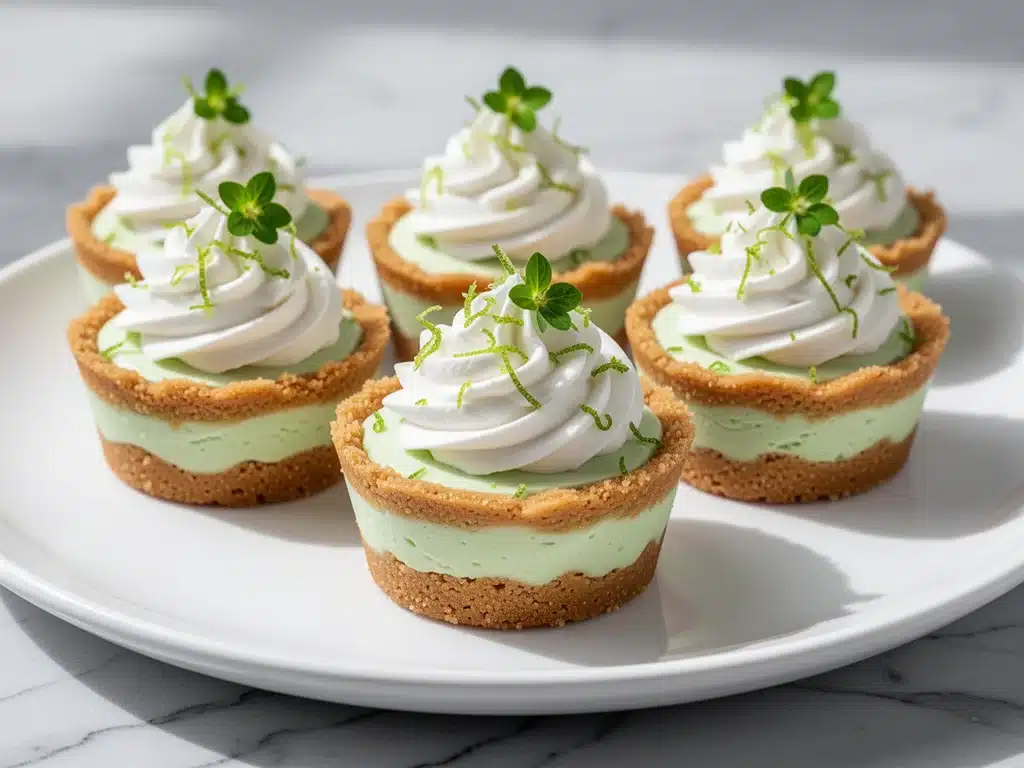
It was the kind of heat that made the air feel heavy, the kind where opening the oven door felt less like cooking and more like stepping into a blast furnace. I had promised my in-laws I’d bring a dessert to our annual family picnic, and I had spent the morning sweating over a roast chicken and a potato salad that needed constant attention. By 4 PM, I was exhausted, the kitchen was a disaster zone, and I still had nothing sweet to offer.
Then I remembered the no-bake key lime pie cups I’d made two summers ago. They were the only thing I’d ever served that actually got the “where did you buy this?” treatment. So, I grabbed some graham crackers, a block of cream cheese, a can of condensed milk, and the tartest limes I could find at the market. Twenty minutes later, I had a batch of bright green, tangy, creamy little pies that chilled in the fridge while I finished the main course. My mother-in-law ate three. Just three. She didn’t even care that they were “cups” and not a traditional pie.
That’s when I knew I had found my holy grail of summer desserts. This no-bake key lime pie cups recipe isn’t just easy—it’s a lifesaver. It requires zero oven time, uses ingredients you likely already have in your pantry, and delivers that perfect balance of sweet and tart that screams “summer.” I’ve made these dozens of times since that fateful picnic, tweaking the ratios until they were absolutely perfect. And the best part? They’re individual portions, so there’s no awkward slicing drama. Everyone gets their own perfect square of happiness.
If you’ve ever stared into your fridge wondering how to make something special with minimal effort, this is your answer. It’s refreshing, it’s reliable, and it’s going to become your new go-to for any last-minute gathering. Let’s get into why these little cups are worth the five minutes of prep.
Why You’ll Love These No-Bake Key Lime Pie Cups
There are about ten reasons I keep making this dessert, but here are the big ones that have me coming back to the recipe box every single time.
Lightning Fast — Seriously, if you can press cracker crumbs into a muffin tin, you can make these. From start to finish, including chilling time, it’s under an hour of active work. I’ve whipped these up on a Tuesday night when I needed a treat and didn’t want to turn on the stove. It’s faster than ordering takeout.
Only Four Ingredients — I’m not exaggerating. The core filling is just cream cheese, sweetened condensed milk, lime juice, and zest. The crust is graham crackers and butter. That’s it. No weird stabilizers, no gelatin packets, no trip to three different specialty stores. It’s pantry-friendly in the truest sense.
Perfectly Tart — So many key lime pie recipes are cloyingly sweet. They taste like dessert syrup, not lime. I spent weeks balancing the acidity of real lime juice against the sweetness of condensed milk to get that bright, zingy kick that makes your jaw tingle. It’s refreshing, not heavy.
Individual Portions — I love a pie as much as the next person, but serving a whole pie is a hassle. Who wants a giant slice? These cups are bite-sized perfection. They look elegant on a platter, they don’t crumble when you pick them up, and they’re perfect for kids (and adults who don’t want to commit to a full slice).
Make-Ahead Magic — This is the real secret weapon. These taste better after they’ve chilled for a few hours. The flavors meld, the texture firms up, and they become incredibly stable. I can make these two days in advance, keep them in the fridge, and just pull them out when guests arrive. Zero stress on the day of.
This is my answer to “what’s for dessert?” when I’m tired, don’t want to bake, and still want something that feels fancy. It’s reliable, delicious, and makes everyone happy without the work.
Ingredients You’ll Need
Here’s the best part: you probably have most of this already. I’m particular about three ingredients here, and I’ll tell you exactly why, because getting those right is the difference between “meh” and “wow.”
Graham Cracker Crumbs (1.5 cups / 150g) — I use standard honey graham crackers for that classic pie flavor. You can buy pre-made crumbs, but I usually just crush a sleeve in a food processor or put them in a bag and smash them with a rolling pin. It takes two minutes. Avoid the cinnamon sugar ones unless you want a different flavor profile; plain is best here.
Unsalted Butter (6 tablespoons / 85g, melted) — This binds the crust. I prefer unsalted so I can control the saltiness. If you only have salted, reduce any added salt in the filling by a pinch. Melt it in the microwave in 15-second intervals—don’t burn it.
Full-Fat Cream Cheese (8 ounces / 225g) — This is non-negotiable. Do not use the light version. It won’t set properly and the texture will be grainy. Let it sit on the counter for 20 minutes before you start so it’s soft enough to whip smooth. Lumpy cream cheese ruins the silky texture of these cups.
Sweetened Condensed Milk (1 can / 14 oz / 397g) — Not evaporated milk! Condensed milk is thick, sweet, and syrupy. It provides the structure and the sweetness. I always buy the small can so I don’t have leftovers, but if you do, freeze it in an ice cube tray for future desserts like soft pink frosted sugar cookie bars.
Fresh Lime Juice (½ cup / 120ml) — Yes, half a cup. You need about 6-8 limes depending on size. Bottle juice tastes metallic and flat. Real lime juice has that bright, volatile oil that makes the dessert taste fresh. Squeeze them yourself. It’s tedious but worth every second.
Lime Zest (2 teaspoons) — The oils in the green skin are where the true “key lime” flavor lives. Grate only the green part, not the white pith (which is bitter). A microplane works best, but a regular grater is fine.
Optional: Graham Cracker Crust for the Cups — You can also press the crumb mixture into the bottom of the cups for a textured base, or skip it entirely for a smoother, cheesecake-like texture. I usually do a thin layer at the bottom for structure.
Equipment Needed
You don’t need fancy equipment for this. Here’s what I actually use.
Muffin Tin (12-cup) — Standard size works best. I use a non-stick tin because it makes removal easier. If you don’t have one, you can use a mini-muffin tin for bite-sized versions, but you’ll need to adjust the number of cups.
Paper Liners — Cupcake liners. I use the standard size. They make cleanup instant and prevent sticking. Grease the liners lightly with butter if you’re worried, but usually, the fat in the cream cheese is enough.
Food Processor or Ziploc Bag + Rolling Pin — For crushing the graham crackers. A food processor is faster and gives you uniform crumbs. If you’re doing it by hand, put the crackers in a thick ziploc bag, seal it tight, and roll over it with a heavy rolling pin or a wine bottle. It’s surprisingly therapeutic.
Mixer — A hand mixer or stand mixer makes whipping the cream cheese smooth much easier. If you don’t have one, a strong whisk and elbow grease will work, but it takes longer. I’m not ashamed to use my mixer for this.
Microplane or Grater — For the lime zest. The finer the zest, the better the flavor distribution.
Spatula — A silicone spatula is essential for scraping the bowl clean and folding in the lime juice without deflating the mixture too much.
How to Make It: Step-by-Step
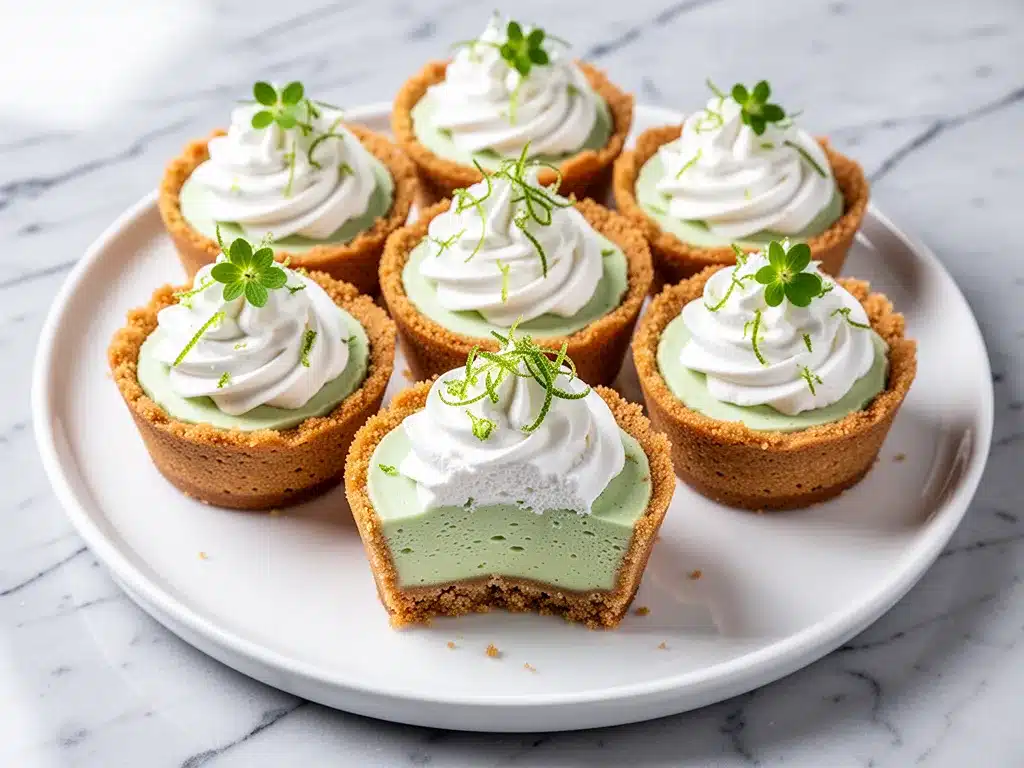
Alright, let’s make this! I’m walking you through exactly how I do it, including the little tricks I’ve picked up so your crust doesn’t fall apart and your filling stays silky.
Step 1: Prep Your Crust (5 minutes)
First, crush your graham crackers. If using a food processor, pulse until you have fine crumbs. If doing it by hand, crush them in a bag until they’re sandy. In a medium bowl, mix the crumbs with the melted butter. It should look like wet sand. If you squeeze a handful, it should hold together. If it’s too dry, add a teaspoon more butter. If it’s too greasy, add a tablespoon more crumbs.
Step 2: Form the Cups (5 minutes)
Line your muffin tin with paper liners. Divide the crumb mixture evenly among the 12 cups. Use the bottom of a measuring cup or a small glass to press the crumbs firmly into the bottom and up the sides of each liner. You want a solid base. Don’t skimp on pressing—this is the foundation. If the crust is loose, the filling will leak. Place the tin in the fridge while you make the filling. This helps the butter set slightly.
Step 3: Whip the Cream Cheese (2 minutes)
In a large bowl, beat the softened cream cheese on medium-high speed until it is completely smooth and creamy. This is crucial. Scrape down the sides and bottom of the bowl. If there are any lumps, they will show up in the final product. It should look like frosting.
Step 4: Add the Sweetness (1 minute)
Pour in the sweetened condensed milk. Beat on low speed just until combined. Don’t overmix at this stage; you just want it integrated. The mixture will be thick and sweet.
Step 5: The Lime Magic (2 minutes)
Add the fresh lime juice and lime zest. Beat on low until just incorporated. You’ll see the mixture lighten slightly in color and become a beautiful pale yellow-green. Taste it! It should be tart and sweet. If it’s too sweet, add a squeeze more lime. If it’s too tart, add a teaspoon more condensed milk. Adjust to your preference.
Step 6: Fill and Chill (30+ minutes)
Spoon or pipe the filling into the prepared crusts. Fill them almost to the top. Smooth the tops with a spatula for a neat look. Place the entire tin in the refrigerator. Let them chill for at least 30 minutes, but ideally 2-4 hours. This allows the cream cheese to set and the flavors to meld. If you’re in a rush, you can put them in the freezer for 15 minutes, but the fridge is best for texture.
Step 7: Serve
Once set, you can eat them right in the liners, or gently peel the liners off if you want a more polished look. Top with a dollop of whipped cream, a sprinkle of extra lime zest, or a tiny lime wheel for garnish. They’re ready to eat!
Expert Tips & Tricks
Here’s everything I’ve learned from making these dozens of times. These tips will save you from my mistakes.
Room Temperature Cream Cheese
I can’t stress this enough. Cold cream cheese = lumpy filling. Take it out of the fridge at least 30 minutes before you start. If you forgot, cut it into cubes and microwave on low power (30%) for 10-second bursts, checking between each, until soft but not melted.
Don’t Skip the Zest
Lime juice provides the flavor, but the zest provides the aroma. Without zest, it tastes like sweet lime milk. With zest, it tastes like key lime pie. Grate the limes before you juice them, so the oils don’t evaporate. And make sure you’re only getting the green part!
The “Wet Sand” Test
For the crust, the butter-to-crumb ratio is key. If your crust crumbles when you bite it, you didn’t use enough butter. If it’s greasy, you used too much. Aim for that wet sand consistency. Press it down firmly!
Use a Piping Bag (Optional but Nice)
If you want professional-looking tops, put the filling in a piping bag with a star tip. It looks fancy and makes cleanup easier. But a spoon works fine if you’re keeping it casual.
Storage is Simple
Keep them in the fridge in an airtight container (or covered with plastic wrap) for up to 5 days. They actually taste better on day 2. Do not freeze them—the texture of the cream cheese filling changes when thawed. It can become grainy.
Variations & Substitutions
Once you’ve nailed the basic version, here’s how you can mix it up. I’ve tried all of these.
Coconut Key Lime
Add ½ cup of toasted coconut flakes to the crust mixture. Or, substitute half the lime juice with coconut cream for a tropical twist. This pairs beautifully with tropical mains like creamy garlic tuscan salmon if you’re serving a seafood dinner.
Chocolate Key Lime
Mix 2 tablespoons of cocoa powder into the graham cracker crumbs for the crust. It creates a “key lime chocolate” flavor that’s surprisingly good. Or drizzle melted chocolate over the top before serving.
Strawberry Key Lime
Swirl 2 tablespoons of strawberry puree into the filling before spooning it into the cups. It creates a pretty pink swirl against the green. Very Instagrammable.
Gluten-Free Option
Use gluten-free graham crackers. Most brands work well, but check the label for crumb quality. Some GF crumbs are coarser, so you might need slightly more butter to bind them.
Lower Sugar
Use a sugar-free sweetened condensed milk alternative (like those made with erythritol). The texture will be slightly different—less thick—but it still works. Add a bit more lime juice to balance the lack of sweetness.
Serving & Storage
How to Serve:
I usually serve these straight from the fridge. They’re best cold. They look great on a white platter with a sprinkle of zest. I often pair them with light, fresh meals. Since these are rich, they balance well with savory dishes like cheddar broccoli rice egg cups if you’re doing a brunch spread, or alongside homemade turkey stackers for a light lunch dessert.
Toppings Bar:
When I have guests, I put out: whipped cream, crushed pistachios, extra lime zest, and chocolate shavings. Everyone customizes their cup.
Storage Instructions:
Refrigerator: Store in an airtight container for up to 5 days. The liners keep them fresh. They will firm up further as they chill.
Freezing: Not recommended. The dairy filling doesn’t freeze well. It can become watery or grainy upon thawing. Make them fresh or store in the fridge.
Meal Prep: Make these on Sunday for the week ahead. They hold up perfectly for 4-5 days. This is my secret to having dessert ready without any weekend baking stress.
Nutrition Information
I’m not a nutritionist, but here’s the breakdown if you’re tracking. Keep in mind that these are rich, sweet treats, so portion control is key.
Per Cup (based on 12 servings):
- Calories: 280
- Protein: 4g
- Carbs: 32g
- Fiber: 0.5g
- Sugar: 28g
- Fat: 16g
- Saturated Fat: 9g
- Cholesterol: 45mg
- Sodium: 180mg
What’s Good:
- Calcium from the cream cheese
- Individual portions help manage intake
- No baked goods additives
What to Know:
- High in sugar from condensed milk
- High in saturated fat
- Contains gluten and dairy
My Take:
Look, this is dessert. It’s sweet, rich, and tangy. It’s not a health food. But it’s way better than store-bought pie, costs less, and you know exactly what’s in it. When I want to make it lighter, I use the sugar-free condensed milk option. But usually? I just eat one cup and enjoy it. Moderation is everything.
Final Thoughts
So that’s my go-to no-bake key lime pie cups! I’ve probably talked your ear off at this point, but when you make a recipe this often, you have a lot to say about it. This has saved my summer evenings more times than I can count. It’s my answer to “what’s for dessert?” when I’m tired, don’t want to bake, and still want something that tastes really good. My kids are happy, my guests are happy, and I’m happy because I’m not stressed about cooking.
Make it yours! Try different toppings, swap in your favorite cracker crumbs, or add a swirl of fruit. The best recipes are the ones you adapt to your family’s tastes. If you make these, drop a comment and let me know what you think! I love hearing how recipes turn out in your kitchen. And if something doesn’t work, tell me that too—I’m here to help troubleshoot.
Happy cooking! And I hope your kitchen smells half as good as mine does right now.
Frequently Asked Questions
Can I use bottled lime juice?
You can, but I strongly advise against it. Bottled lime juice has preservatives that give it a metallic, flat taste. Fresh lime juice has volatile oils that provide the bright, zesty flavor that defines key lime pie. If you absolutely must use bottled, mix it with a little fresh zest to mask the flavor, but fresh is always better.
Why did my filling turn out runny?
This usually happens for two reasons: either the cream cheese wasn’t soft enough to whip smooth (lumps prevent proper setting), or you didn’t chill it long enough. The filling needs at least 2 hours in the fridge to set properly. If it’s still runny after 4 hours, your lime juice might have been too watery or you didn’t use enough condensed milk. Next time, ensure your cream cheese is fully softened.
Can I make these ahead of time?
Yes! These actually taste better the next day. You can make them up to 2 days in advance. Just keep them covered in the fridge. If you make them more than 2 days ahead, the crust might get a bit soggy from the moisture in the filling. For best texture, make them 24 hours before serving.
Can I freeze these?
I don’t recommend freezing the finished cups. The cream cheese filling can become grainy or watery when thawed. However, you can freeze the graham cracker crusts separately for up to a month. Thaw them in the fridge, then fill them fresh. But honestly, the no-bake method is so quick that freezing isn’t necessary.
Can I use a different type of cracker?
Absolutely. Nilla Wafers, vanilla Oreos (remove the cream first, then crush), or even shortbread cookies work great. Just adjust the butter amount as needed. The flavor will change slightly, but the texture will still be delicious. For a nuttier flavor, try crushed ginger snaps.
How do I get the perfect green color?
The natural color of the filling is a pale yellow-green. If you want a brighter green, you can add a drop of food coloring. But I prefer the natural look—it signals “real lime” rather than “artificial.” If you want a deeper green, use more zest, as the green oils can tint the mixture slightly.
Can I make these in a pie dish instead of cups?
Yes! You can press the crust into a 9-inch pie dish and spread the filling on top. Chill for at least 4 hours. Slice into wedges. The baking time isn’t involved, so it’s still no-bake. Just keep in mind that a whole pie might take longer to set than individual cups.
Pin This Recipe!
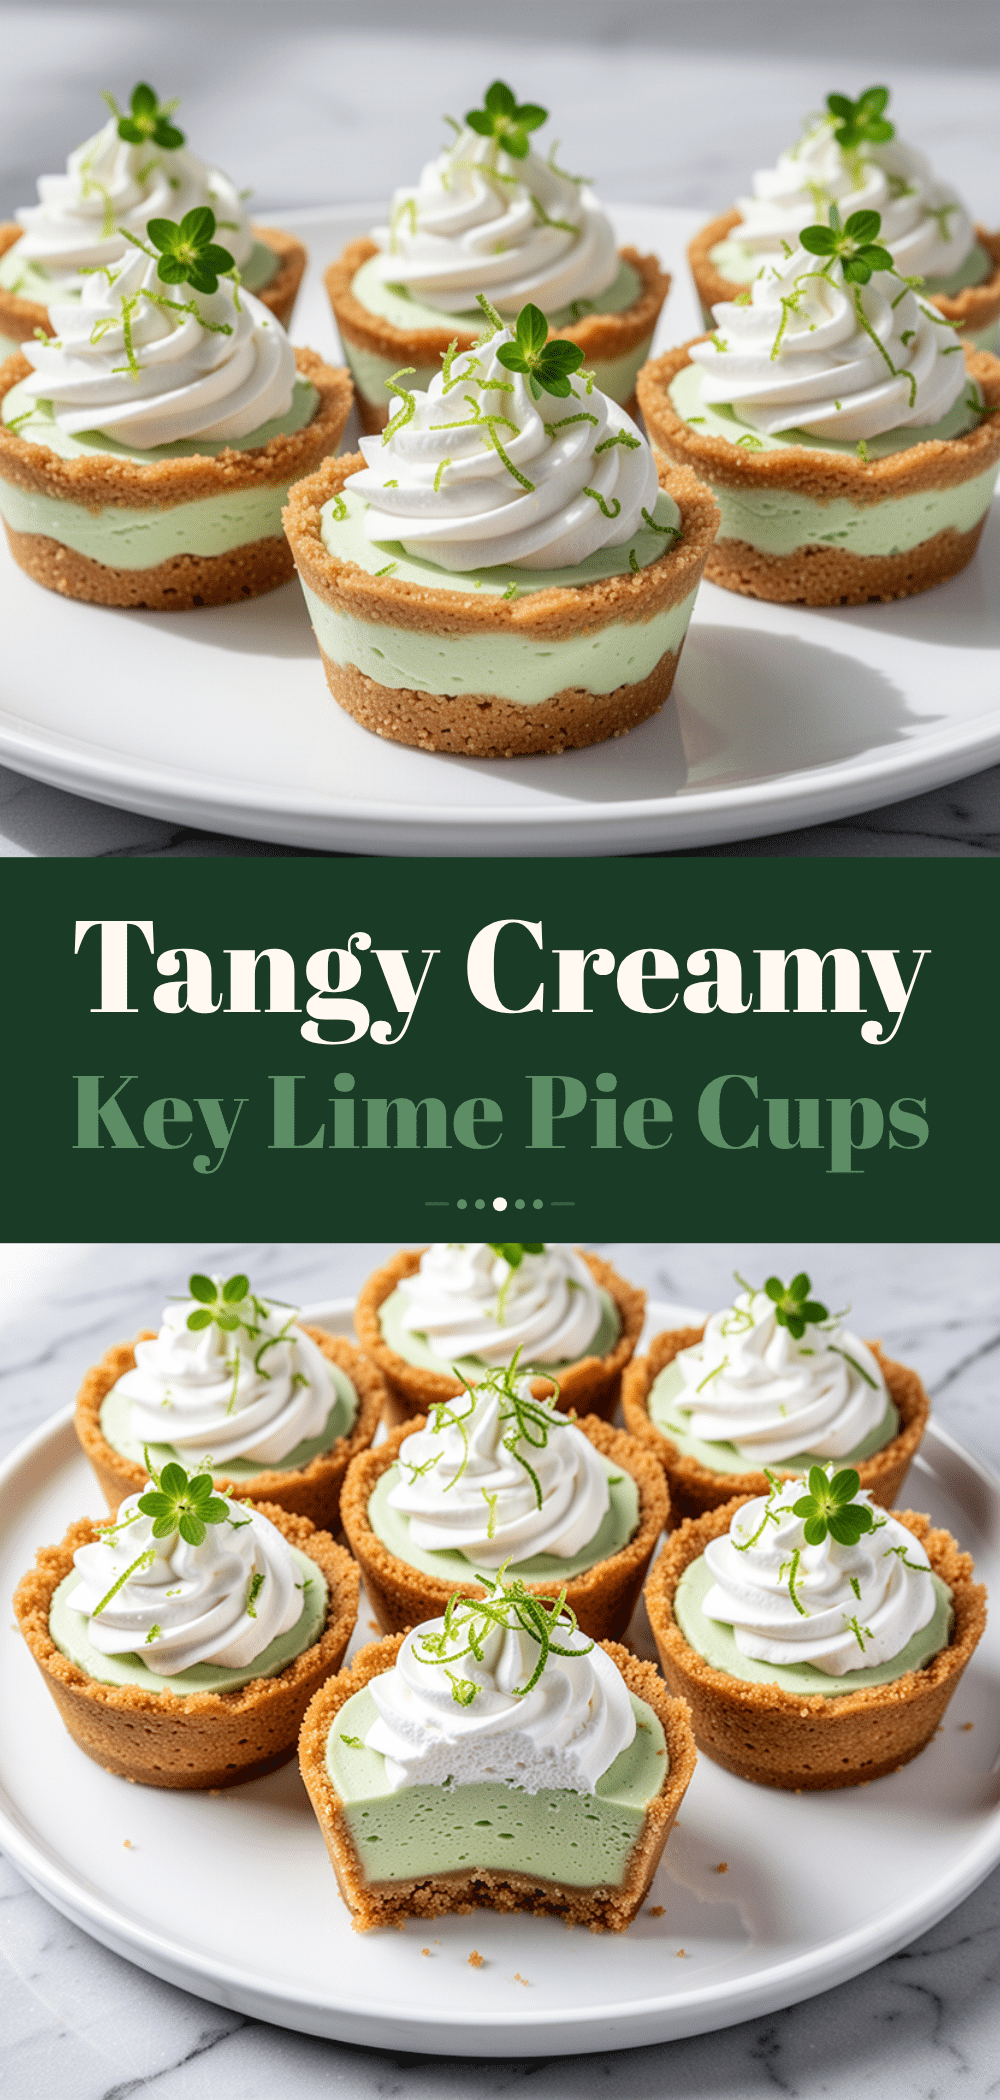
No-Bake Key Lime Pie Cups: 4-Ingredient Easy Dessert
- Total Time: 45 minutes
- Yield: 12 servings 1x
Description
These no-bake key lime pie cups are a lightning-fast, refreshing summer dessert made with just a few pantry staples. They feature a buttery graham cracker crust and a creamy, tangy lime filling that sets in the fridge, offering individual portions perfect for any gathering.
Ingredients
- 1.5 cups (150g) graham cracker crumbs
- 6 tablespoons (85g) unsalted butter, melted
- 8 ounces (225g) full-fat cream cheese, softened
- 1 can (14 oz / 397g) sweetened condensed milk
- ½ cup (120ml) fresh lime juice
- 2 teaspoons lime zest
Instructions
- Crush graham crackers into fine crumbs. In a medium bowl, mix crumbs with melted butter until the consistency resembles wet sand.
- Line a 12-cup muffin tin with paper liners. Divide the crumb mixture evenly among the cups, pressing firmly into the bottom and up the sides to form a crust. Place in the fridge.
- In a large bowl, beat the softened cream cheese on medium-high speed until completely smooth and creamy.
- Pour in the sweetened condensed milk and beat on low speed just until combined.
- Add the fresh lime juice and lime zest. Beat on low until just incorporated. Taste and adjust sweetness or tartness if desired.
- Spoon or pipe the filling into the prepared crusts, filling them almost to the top. Smooth the tops with a spatula.
- Refrigerate for at least 30 minutes, ideally 2-4 hours, until set.
- Serve chilled, optionally topped with whipped cream, extra lime zest, or lime wheels.
Notes
Ensure cream cheese is fully softened to room temperature to avoid lumps. Use fresh lime juice for the best flavor; bottled juice can taste metallic. The crust should feel like wet sand and hold together when squeezed. These taste better after chilling for a few hours. Do not freeze the finished cups as the texture may become grainy.
- Prep Time: 15 minutes
- Cook Time: 0 minutes
- Category: Dessert
- Cuisine: American
Nutrition
- Serving Size: 1 cup
- Calories: 280
- Sugar: 28
- Sodium: 180
- Fat: 16
- Saturated Fat: 9
- Carbohydrates: 32
- Fiber: 0.5
- Protein: 4
Keywords: no-bake, key lime pie, summer dessert, easy dessert, graham cracker crust, lime dessert, make-ahead dessert, individual desserts