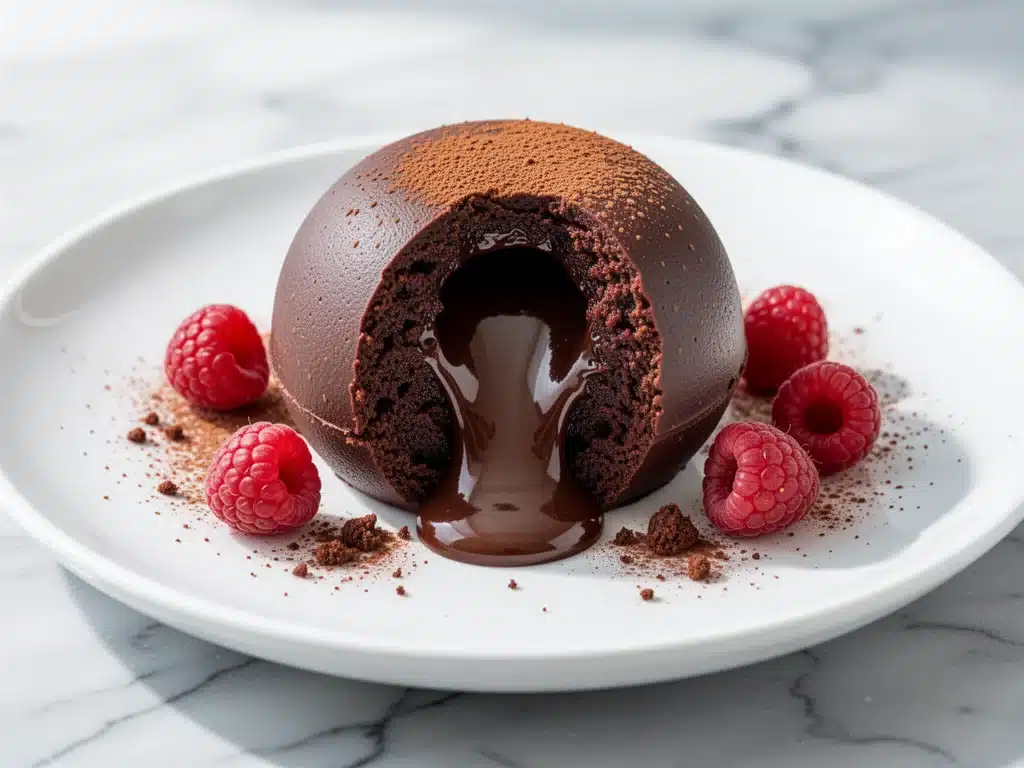
Let’s be honest for a second. I used to think “keto dessert” was just a polite way of saying “sad, dry cracker that tastes like regret.” For years, I stuck to plain cheese plates or the occasional sugar-free gummy bear, convinced that giving up sugar meant giving up joy. Then, about two years ago, I was visiting my sister who’s been keto for half a decade. We were sitting on her porch, watching the sunset, and she pulled out a small ramekin. “Try this,” she said. It was warm. I took one bite, and honestly, I stopped breathing for a second. The center was molten, rich, and impossibly chocolatey. It didn’t taste like a “diet” version. It tasted like cheating. It tasted like a bakery in Seattle.
I begged for the recipe. She sent it over, and I made it the next morning while my husband was still asleep. I waited until he came downstairs, put the plate in front of him, and told him it was just a regular chocolate cake. He took a bite, paused, and asked if I’d bought a fancy pastry. When I told him it was keto, made with almond flour and ready in 10 minutes, he didn’t believe me. Not for a minute.
That was the moment I realized I’d been doing keto desserts wrong. I wasn’t looking for substitutes; I was looking for texture and richness. This keto chocolate lava cake with almond flour is that revelation in a ramekin. It’s better than takeout, better than most coffee shop desserts, and honestly? It’s the only dessert I make anymore when I’m craving something sweet after dinner. If you’re tired of dry muffins and chalky protein bars, you need to stop scrolling and start preheating your oven.
Why You’ll Love This Almond Flour Lava Cake
There’s a specific kind of magic that happens when you combine high-quality dark chocolate with almond flour. It’s not just about being low-carb; it’s about the mouthfeel. Here’s why this recipe has completely taken over my kitchen (and my husband’s heart):
- Stupidly Fast — Seriously, from fridge to fork is about 10 minutes. I’ve made this on nights when I was too exhausted to cook dinner, let alone bake. The batter comes together in a bowl while the kettle boils. No mixing, no whisking, no drama.
- Zero “Keto” Taste — I’m not a fan of the aftertaste many sugar substitutes leave. This recipe uses just enough sweetener to balance the bitterness of the chocolate, but the main flavor is pure, deep cocoa. My kids, who aren’t even keto, fight over these.
- Gluten-Free by Default — Almond flour gives it a tender, cake-like crumb that actually holds together. Unlike coconut flour recipes which can be spongey or dry, almond flour stays moist and dense in the best way possible.
- Restaurant Quality Presentation — When you crack that top open and the gooey center spills out, it looks like something you’d pay $12 for at a high-end bistro. It feels indulgent and special, even though it’s just me in my pajamas eating it with a spoon.
- Macro-Friendly — One cake is roughly 3-4g net carbs. It’s high in healthy fats and protein, which means it actually keeps you full. I used to eat a whole sheet cake (don’t judge me), but now I eat one perfect lava cake and feel satisfied.
This isn’t a compromise dessert. It’s the main event. Once you try this, you’ll realize that almond flour is the secret weapon for so many baked goods, and this cake proves it.
Ingredients You’ll Need
Here’s the best part: you probably have most of this already. Keto baking relies on simple, whole-food ingredients. There are no weird gums or obscure flours unless you want to get fancy. I keep these staples stocked specifically so I can throw together a dessert on a whim.
For the Batter
Dark Chocolate (70% cocoa or higher) (4 oz / 115g) — This is the star. Do not use chocolate chips if you can avoid it; they have stabilizers that prevent melting. Use a high-quality bar, chopped roughly. I love Lindt or Ghirardelli. If you use chips, the lava effect might be less pronounced.
Butter (2 tablespoons / 30g) — Unsalted is best so you control the saltiness. It adds richness and helps create that glossy, molten center. Don’t skip it for oil; the texture will be wrong.
Almond Flour (¼ cup / 25g) — Fine, blanched almond flour works best. It’s mild and sweet. If you use raw almond flour, it’s a bit more textured, which is fine, but blanched gives that bakery finish. Check out my chewy s’mores cookie bars if you want to see almond flour shine in a different context.
Eggs (2 large) — Room temperature is ideal, but not strictly necessary. They provide structure and lift. Don’t use egg whites; you need the yolk for that rich, custard-like center.
Egg Yolks (2 large) — Extra yolks! This is the secret to the “lava” texture. It adds fat and emulsifies the chocolate, making it creamy rather than cakey.
Granulated Erythritol or Monk Fruit Blend (2 tablespoons / 20g) — I use a 1:1 baking blend that has no aftertaste. Erythritol can sometimes crystallize, so make sure it’s finely ground. If you don’t have a sweetener substitute, you can use a tiny bit of honey, but that breaks keto.
Vanilla Extract (½ teaspoon) — Pure vanilla. Not the imitation stuff. It rounds out the chocolate flavor.
Cocoa Powder (1 tablespoon) — Unsweetened, high-quality Dutch-processed cocoa. This deepens the chocolate flavor without adding sweetness. It’s like adding an espresso shot to coffee.
Pinch of Salt — Essential. Salt makes chocolate taste more like chocolate. Never skip it.
For Serving
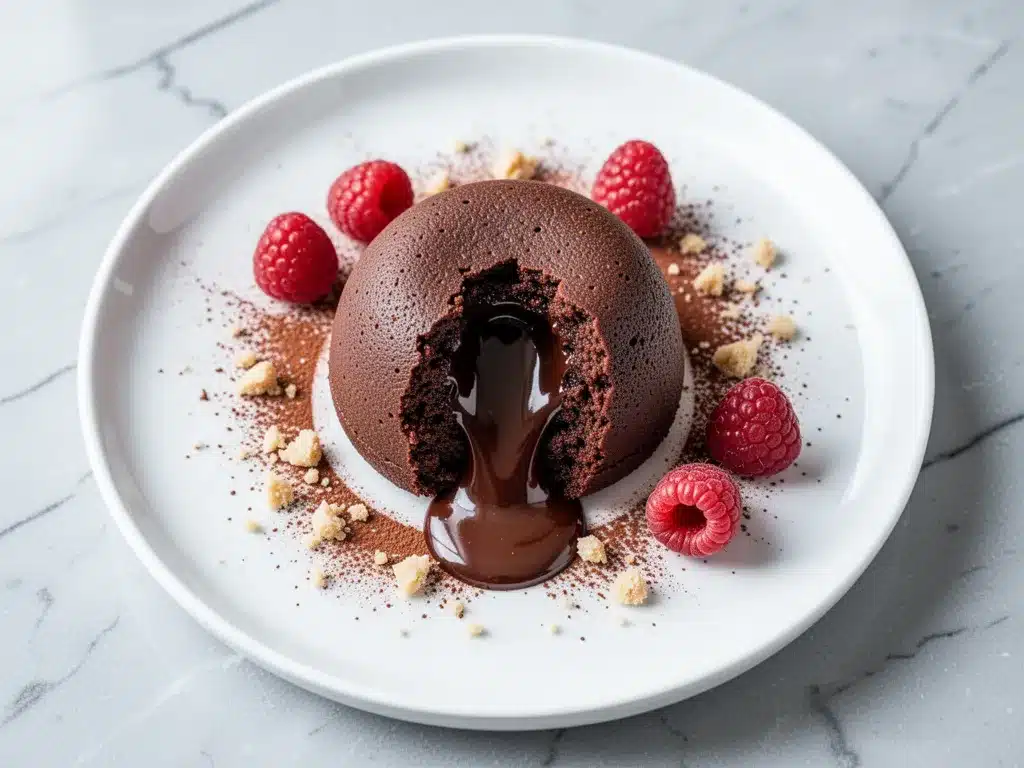
Sugar-Free Whipped Cream — Optional, but highly recommended. If you’re going for the full dessert experience, top it with a dollop of freshly whipped heavy cream sweetened with a drop of stevia.
Raspberries — Fresh raspberries add a tart contrast to the rich chocolate. They also look gorgeous against the dark cake.
Equipment Needed
You don’t need fancy gadgets. Here’s what I actually use, and what you can substitute.
Ramekins (4 small, 6-oz) — These are non-negotiable for the “lava” effect. They concentrate the heat so the center stays gooey while the outside sets. I use ceramic ones because they hold heat well. If you don’t have ramekins, you can use a silicone muffin mold, but the presentation isn’t as pretty.
Microwave-safe bowl — For melting the chocolate and butter. A glass Pyrex bowl works perfectly. If you don’t have a microwave, use a double boiler on the stove.
Mixing bowl — Any medium-sized bowl. Glass or ceramic is fine.
Whisk or Fork — You don’t need an electric mixer. A simple wire whisk or even a sturdy fork is enough to combine the batter smoothly.
Pastry brush or Butter — To grease the ramekins. I use butter and dust with a tiny bit of cocoa powder to prevent sticking and add flavor.
Small Spoon or Spreader — For greasing the inside of the ramekins. It’s harder to get into the corners with your fingers.
How to Make It: Step-by-Step
Alright, let’s make this! I’m walking you through exactly how I do it, including the little tricks I’ve picked up to ensure that perfect runny center every single time.
Step 1: Prep Your Ramekins (2 minutes)
Before you do anything, butter your ramekins generously. I’m talking coat every inch of the inside. Then, dust them with a tiny sprinkle of cocoa powder (or almond flour if you want it less chocolatey on the outside). Tap out the excess. This step is crucial. If the batter sticks, you’ll ruin the presentation. A well-greased ramekin ensures the cake releases cleanly when you flip it.
Step 2: Melt the Chocolate and Butter (1-2 minutes)
Chop your dark chocolate into small pieces. It melts faster that way. Place the chocolate and butter in a microwave-safe bowl. Microwave on high for 30 seconds. Stir. If it’s not fully melted, do another 15 seconds. Stir until smooth and glossy. Be careful not to overheat it, or the chocolate can seize up. Set it aside to cool slightly.
Step 3: Whisk the Eggs and Sweetener (1 minute)
In your mixing bowl, crack the whole eggs and add the extra yolks. Add the sweetener, vanilla, and salt. Whisk vigorously for about 30-60 seconds. You want the mixture to look pale and slightly frothy. This incorporates air, which helps the cake rise a bit. Don’t rush this step; good aeration makes for a better texture.
Step 4: Combine Wet and Dry (1 minute)
Pour the melted chocolate mixture into the egg mixture. Stir gently until combined. Now, add the almond flour and cocoa powder. Mix until just combined. The batter will be thick and paste-like. This is normal. Don’t add extra liquid. The consistency should be like thick cake batter or brownie mix.
Step 5: Fill the Ramekins (2 minutes)
Divide the batter evenly among the 4 ramekins. Use a spoon or a small ice cream scoop for even portions. Smooth the tops with the back of the spoon. At this point, you can cook them immediately or refrigerate them for up to 24 hours. If you refrigerate them, you’ll need to add 1-2 minutes to the cooking time later.
Step 6: Cook Until Just Set (6-8 minutes)
This is the most important step. Preheat your oven to 425°F (220°C). Place the ramekins on a baking sheet (for easier handling) and put them in the center rack. Bake for 6-8 minutes. Watch them closely. The edges should be firm and set, but the center should still look soft and jiggly when you gently shake the ramekin. If the center looks completely set, they’re done. If it looks raw, give them 30 more seconds. Overbaking is the enemy of lava cake.
Step 7: Serve Immediately
Remove from the oven. Let them cool for exactly 1 minute. This allows them to set just enough to hold their shape but keeps the center molten. Run a knife around the edge if needed, then invert onto a plate. Top with whipped cream and raspberries. Eat immediately. Do not wait. The magic happens right now.
Expert Tips & Tricks
Here’s everything I’ve learned from making this dozens of times. These tips will save you from my mistakes.
The Chocolate Matters
I’ve tried cheap chocolate bars, and the result was grainy. Use chocolate with at least 70% cocoa. The higher the percentage, the less sweet it is, so adjust your sweetener accordingly. If you use 85% cocoa, you might want to add an extra tablespoon of sweetener.
Don’t Overbake
I cannot stress this enough. The difference between a perfect lava cake and a dry cake is 60 seconds. Start checking at 6 minutes. The center should jiggle like Jell-O, not slosh like water. It will continue to cook slightly from residual heat after you take it out of the oven.
Room Temperature Eggs
While not strictly necessary, room temperature eggs emulsify better with the melted chocolate. If your eggs are cold, they might cause the chocolate to solidify into clumps. Let them sit on the counter for 15 minutes before you start.
Make-Ahead Strategy
This is my favorite trick for dinner parties. Fill the ramekins and refrigerate them for up to 24 hours. When guests arrive, just pull them out and bake. You might need to add 1-2 minutes to the bake time since they’re cold. This lets you focus on the main course instead of standing by the oven.
Common Mistakes (and how to avoid them)
Mistake: The cake sticks to the ramekin. Fix: You didn’t grease it enough. Use plenty of butter and press it into every corner. Cocoa powder dusting helps too.
Mistake: The center is raw egg. Fix: You underbaked it. The center should be custard-like, not liquid egg. If it’s runny and smells like raw eggs, cook for another minute next time.
Mistake: The cake is dry. Fix: You overbaked it. Or you used too much almond flour. Measure carefully. Almond flour absorbs moisture, so too much makes it dense and dry.
Variations & Substitutions
Once you’ve nailed the basic version, here’s how you can mix it up. I’ve tried all of these, and they’re all delicious.
Peanut Butter Lava
Add 1 tablespoon of peanut butter to the center of each ramekin before pouring the batter on top. When you bite in, you get a gooey peanut butter core. It’s like a Reese’s Cup. My husband’s favorite.
Matcha Green Tea
Swap the cocoa powder for 1 tablespoon of ceremonial grade matcha powder. It adds an earthy, slightly bitter flavor that pairs beautifully with the dark chocolate. It looks stunning too—dark green swirls.
Espresso Boost
Add ½ teaspoon of instant espresso powder to the batter. It doesn’t make it taste like coffee; it just makes the chocolate taste more chocolate. It’s a flavor enhancer, not a flavor change.
Coconut Oil Version
Replace the butter with coconut oil if you’re dairy-free. The texture will be slightly different—less rich, more firm—but it still works. Use refined coconut oil so it doesn’t taste like coconut.
Different Sweeteners
Stevia is much sweeter than erythritol, so use half the amount. Monk fruit blends are the closest to sugar in taste and texture. Avoid xylitol—it’s toxic to dogs, so be careful if you have pets.
Serving & Storage
How to serve and store this bad boy.
How to Serve
I usually serve these straight from the plate at the dinner table. It’s dramatic and fun. But here are other ways I’ve enjoyed it:
- With Coffee — A strong black coffee or espresso cuts through the richness perfectly.
- With Tea — Earl Grey or chai works surprisingly well.
- With Ice Cream — If you’re not strictly keto, a scoop of vanilla ice cream is classic. For keto, use a sugar-free vanilla ice cream or coconut milk ice cream.
Storage Instructions
Refrigerator: Leftover batter can be stored in the ramekins for up to 24 hours. Cooked leftovers? Eat them today. Lava cakes are best fresh. If you must store them, keep them in the fridge for 1-2 days. Reheat gently in the microwave for 15-20 seconds. They won’t be as gooey, but they’re still good.
Freezing: I don’t recommend freezing baked lava cakes. The texture changes, and the center can become grainy. You can freeze the batter in the ramekins for up to 1 month. Thaw in the fridge overnight before baking.
Nutrition Information
I’m not a nutritionist, but here’s the breakdown if you’re tracking. This is per serving (1 cake).
- Calories: 280
- Protein: 8g
- Total Fat: 24g
- Total Carbs: 6g
- Fiber: 3g
- Net Carbs: 3g
- Sugar: 2g (natural from eggs/chocolate)
What’s Good: High in healthy fats from almonds and chocolate. Good source of protein. Low glycemic impact.
What to Know: Calorie-dense due to nuts and chocolate. Portion control is key if you’re watching calories, but for keto, this is a perfect fat source.
Final Thoughts
So that’s my go-to keto chocolate lava cake! I’ve probably talked your ear off at this point, but when you make a recipe this often, you have a lot to say about it. This has saved my sweet tooth during keto more times than I can count. It’s my answer to “what’s for dessert” when I’m tired, don’t want takeout, and still want something that tastes really good. My kids are happy, my husband’s happy, and I’m happy because I’m not stressed about cooking.
Make it yours! Try different add-ins, swap in your favorite chocolate, adjust the sweetness. The best recipes are the ones you adapt to your family’s tastes. If you make this, drop a comment and let me know what you think! I love hearing how recipes turn out in your kitchen. And if something doesn’t work, tell me that too—I’m here to help troubleshoot.
Happy cooking! And I hope your kitchen smells half as good as mine does right now.
Frequently Asked Questions
Can I use coconut flour instead of almond flour?
No, not directly. Coconut flour absorbs way more liquid than almond flour. If you substitute, you’ll need to adjust the recipe significantly—usually, you use 1/4 the amount of coconut flour and add more eggs/liquid. I don’t recommend it for lava cakes because the texture becomes too dry. Stick with almond flour for that gooey center.
Why did my lava cake turn out solid instead of runny?
You likely overbaked it. Start checking at 6 minutes. The center should jiggle when you shake the ramekin. If it looks set, it’s done. Remember, it continues to cook from residual heat after you take it out of the oven. Also, make sure your oven temperature is accurate; an oven that runs hot will dry it out.
Can I make this in the microwave?
Yes! You can cook it in the microwave in about 60-90 seconds. Use a microwave-safe ramekin. Start with 45 seconds, check, and add 15-second intervals. The texture might be slightly less cakey on the edges, but the center will still be gooey. It’s faster, but the oven gives a better crust.
Is this recipe suitable for diabetics?
This recipe is low-glycemic and uses sugar substitutes, so it’s generally considered diabetic-friendly. However, everyone’s body reacts differently to sugar alcohols like erythritol. Always check with your doctor or dietitian. The high fat content can also affect blood sugar differently for some people, so monitor your levels.
Can I double the recipe?
Absolutely! Just fill more ramekins. The cooking time stays the same. I do this when I’m having friends over. Just make sure your oven has room for all the ramekins. If you’re crowding the oven, you might need to rotate the pan halfway through for even baking.
What if I don’t have a ramekin?
You can use a small oven-safe mug, a silicone muffin cup, or even a small cast-iron skillet. The cooking time might vary slightly depending on the material. Ceramic and glass hold heat well, while metal conducts heat faster, so watch it closely.
Pin This Recipe!
Keto Chocolate Lava Cake: Best 10-Min Almond Flour Recipe
- Total Time: 10 minutes
- Yield: 4 servings 1x
Description
A rich, molten-centered chocolate lava cake made with almond flour that is ready in just 10 minutes. This keto-friendly dessert is gluten-free, low-carb, and offers a bakery-quality experience without the sugar.
Ingredients
- 4 oz (115g) Dark Chocolate (70% cocoa or higher), chopped
- 2 tablespoons (30g) Unsalted Butter
- ¼ cup (25g) Fine, Blanched Almond Flour
- 2 large Eggs (room temperature)
- 2 large Egg Yolks
- 2 tablespoons (20g) Granulated Erythritol or Monk Fruit Blend
- ½ teaspoon Pure Vanilla Extract
- 1 tablespoon Unsweetened Dutch-processed Cocoa Powder
- Pinch of Salt
- Sugar-Free Whipped Cream (optional, for serving)
- Fresh Raspberries (optional, for serving)
Instructions
- Preheat oven to 425°F (220°C). Generously butter 4 small (6-oz) ramekins and dust with cocoa powder, tapping out excess.
- Chop dark chocolate into small pieces. Combine with butter in a microwave-safe bowl and microwave on high for 30 seconds. Stir, then microwave in 15-second intervals until smooth and glossy. Set aside to cool slightly.
- In a mixing bowl, whisk together whole eggs, egg yolks, sweetener, vanilla extract, and salt vigorously for 30-60 seconds until pale and frothy.
- Pour the melted chocolate mixture into the egg mixture and stir gently to combine. Add almond flour and cocoa powder, mixing until just combined. The batter should be thick and paste-like.
- Divide the batter evenly among the prepared ramekins, smoothing the tops.
- Place ramekins on a baking sheet and bake in the center rack for 6-8 minutes. The edges should be firm, but the center must remain soft and jiggly.
- Remove from oven and let cool for exactly 1 minute. Invert onto plates and serve immediately with whipped cream and raspberries if desired.
Notes
Do not overbake; the center should jiggle like Jell-O, not slosh like water. The cake continues to cook from residual heat after removal. For make-ahead, fill ramekins and refrigerate for up to 24 hours, adding 1-2 minutes to bake time. Room temperature eggs emulsify better with chocolate. Use high-quality dark chocolate (70%+) for best texture.
- Prep Time: 2 minutes
- Cook Time: 6-8 minutes
- Category: Dessert
- Cuisine: American
Nutrition
- Serving Size: 1 cake
- Calories: 280
- Sugar: 2
- Sodium: 50
- Fat: 24
- Saturated Fat: 12
- Carbohydrates: 6
- Fiber: 3
- Protein: 8
Keywords: keto, chocolate lava cake, almond flour, low carb, gluten-free, quick dessert, sugar-free, paleo friendly, 10 minute recipe


