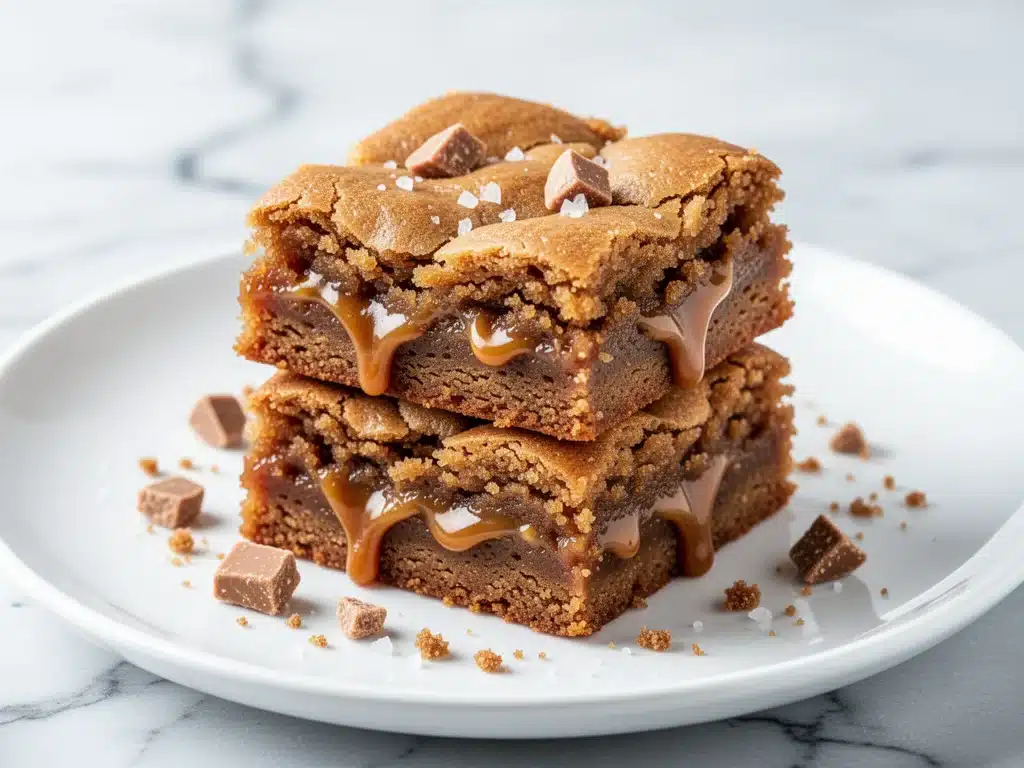
Let’s be honest for a second. The holiday season is a lot. Between wrapping presents, dealing with traffic, and trying to keep your sanity intact, baking often feels like just another item on an exhausting to-do list. I used to think that meant I should skip dessert or just buy a box of cookies from the grocery store. But then, about three years ago, I was hosting my first Christmas Eve dinner party with my in-laws. I was stressed, my kitchen was a disaster zone, and I had exactly forty-five minutes before guests arrived to get the final touches done.
In a panic, I pulled out some brown sugar, some toffee bits, and a stick of butter. I didn’t have a fancy recipe. I just threw things together. What came out of the oven wasn’t just “okay.” It was the first thing my husband’s mom asked for the recipe for. She actually texted me the next morning saying she dreamt about them. That’s when I knew I had found a winner. These Chewy Brown Sugar Toffee Blondies have been a holiday staple ever since. They’re not just a cookie; they’re a chewy, buttery, caramel-infused bar that disappears faster than you can blink.
I’ve tested this recipe at least a dozen times over the last few years, tweaking the ratio of brown sugar to butter, adjusting the baking time to get that perfect chewy center, and deciding exactly how much toffee to add. The secret isn’t complicated. It’s about understanding how brown sugar creates moisture and how toffee adds that addictive crunch. If you’ve ever made soft pink frosted sugar cookie bars and loved the tender crumb, you’re going to fall in love with the dense, chewy texture of these blondies. They’re easier to make than most cakes, they travel well in a Tupperware, and they smell like pure holiday comfort while they bake. Let’s get into why these are going to become your new favorite holiday treat.
Why You’ll Love This Recipe
There are a lot of cookie recipes out there, but these blondies hit a different note. They’re not crisp like a snickerdoodle, and they’re not cakey like a brownie. They live in that perfect, chewy middle ground that makes people close their eyes when they take a bite. Here’s why I keep coming back to this batch, and why your guests will be asking for seconds.
- Zero Fancy Equipment Needed — Seriously. You don’t need a stand mixer. A hand mixer or even a strong whisk and some elbow grease will do the job. I’ve made these in a hotel kitchen with a flimsy whisk, and they still turned out amazing. If you can melt butter, you can make this.
- 30 Minutes of Active Time — From mixing to putting them in the oven is about 15 minutes. The rest is waiting. This is perfect for last-minute holiday gatherings or if you’re baking while watching the kids’ holiday movie marathon. It’s the kind of recipe that lets you actually enjoy the party instead of being stuck in the kitchen.
- Texture Explosion — The combination of chewy brown sugar dough and crunchy toffee bits is addictive. The toffee melts slightly into the dough, creating little pockets of caramelized butteriness. It’s a flavor profile that feels gourmet but tastes like home.
- Make-Ahead Friendly — These actually taste better the next day. The flavors meld together overnight, making the chewiness even more pronounced. I often make these two days before a party so I don’t have to stress on the day of. They keep well in an airtight container for up to a week.
- Universally Loved — I’ve served these to picky teenagers who only eat pizza, to grandparents who swear they “don’t have a sweet tooth anymore,” and to food critics. Everyone loves them. They’re not too sweet, not too rich, and not too complicated. They just work.
This is my go-to when I need a dessert that feels special but doesn’t require a degree in pastry arts. It’s reliable, delicious, and makes your kitchen smell like a bakery. That alone is worth the effort.
Ingredients You’ll Need
Here’s the best part: you probably have most of these ingredients already. This isn’t a recipe that requires a trip to three different specialty stores. It’s built on pantry staples, with just a couple of key additions that make all the difference. I’m particular about the quality of the brown sugar and the toffee, so let’s break down exactly what you need and why it matters.
For the Base
Unsalted Butter (1 cup / 226g) — We use unsalted butter so we can control the saltiness. You need to melt this completely. I like to do it in the microwave in 30-second intervals, stirring in between, so it doesn’t burn. Let it cool for a few minutes before mixing—it shouldn’t be piping hot, or it’ll cook the eggs.
Light Brown Sugar (2 cups / 400g) — This is the star of the show. Brown sugar contains molasses, which adds moisture and that deep, caramel-like flavor. If you use dark brown sugar, it will be more intense. I prefer light brown sugar for a balanced sweetness, but both work. Do not skip this for white sugar; the texture will be completely different.
Granulated Sugar (½ cup / 100g) — This helps with the slight crispness on the edges. It balances out the chewiness of the brown sugar. It’s a small amount, but it makes a big difference in texture.
Eggs (2 large) — Room temperature eggs mix better into the fat. If you’re in a rush, crack them into a small bowl and microwave for 10 seconds. Don’t cook them, just take the chill off.
Vanilla Extract (2 teaspoons) — Use real vanilla, not imitation. It’s one of those times where the cheap stuff really shows. If you have homemade vanilla, even better.
For the Structure
All-Purpose Flour (2 ¼ cups / 280g) — Don’t over-measure! I spoon the flour into my measuring cup and level it off. If you scoop straight from the bag, you’ll pack it down and end up with dry, crumbly blondies. We want chewy, not dry.
Baking Powder (1 teaspoon) — Just a little bit to give them a tiny lift. We don’t want them to rise too much; we want them dense and chewy.
Salt (1 teaspoon) — Even though we’re using unsalted butter, salt is crucial. It enhances the sweetness and balances the flavor. Don’t skip it.
The Star Add-ins
Toffee Bits (1 ½ cups / 170g) — I buy the pre-chopped toffee bits from the baking aisle. They’re consistent in size and easy to fold in. If you want to get fancy, you can chop up a few Heath bars, but the bits work perfectly and save time. Look for the ones that say “crunchy” or “bite-sized.”
Optional: White Chocolate Chips (½ cup) — I sometimes add these for extra creaminess, but the toffee is the main event. If you’re a toffee purist, skip the chips.
Sea Salt Flakes (for topping) — This is the pro move. Sprinkling a little flaky sea salt on top right after they come out of the oven creates a sweet-salty contrast that elevates the whole bar. It’s what makes them taste like they came from a fancy patisserie.
Equipment Needed
You don’t need fancy equipment for this. Here’s what I actually use. If you don’t have these exact items, you can substitute with what you have.
9×13 Inch Baking Pan — This is the standard size for bars. Make sure it’s a metal pan, not glass or ceramic, if you want those slightly crisp edges. If you only have glass, reduce the oven temperature by 25°F to prevent over-browning.
Large Mixing Bowl — Something big enough to hold all the ingredients. Glass or stainless steel works best because it’s easy to clean.
Fork or Whisk — You don’t need a mixer. A good old-fashioned fork is perfect for creaming the butter and sugars together. It takes about 2 minutes of vigorous mixing, and it helps incorporate air.
Rubber Spatula — Essential for folding in the toffee bits without crushing them. You want to keep the chunks intact for that nice texture.
Parchment Paper — I always line my pan with parchment paper, leaving an overhang on the sides. This is non-negotiable for me. It makes lifting the blondies out of the pan incredibly easy and means zero cleanup. Just peel them out and slice them on a cutting board.
Cooling Rack — Let them cool in the pan for at least 10 minutes before slicing. This helps them set so they don’t fall apart.
How to Make It: Step-by-Step
Alright, let’s make these! I’m walking you through exactly how I do it, including the little tricks I’ve picked up over the years. It’s simple, but there are a few key moments to watch.
Step 1: Prep Your Pan and Oven (5 minutes)
Preheat your oven to 350°F (175°C). Line your 9×13 inch baking pan with parchment paper. I like to grease the pan lightly with butter or cooking spray first, then lay the parchment down. This ensures it doesn’t slide around when you’re pouring the batter. It’s a small step that saves you from a stuck dessert disaster.
Step 2: Mix the Wet Ingredients (5 minutes)
In your large bowl, combine the melted butter, light brown sugar, and granulated sugar. Use a fork or a sturdy whisk to mix them together vigorously. You want to mix until the mixture looks smooth and slightly glossy. This takes about 2 minutes. It’s important to mix well here because it helps dissolve the sugar slightly, which contributes to the chewy texture. Once mixed, add the eggs and vanilla extract. Mix again until just combined. Don’t overmix the eggs; you just want them incorporated.
Step 3: Add the Dry Ingredients (2 minutes)
Add the flour, baking powder, and salt to the wet mixture. Switch to a rubber spatula. Fold the ingredients together gently. Stop as soon as you no longer see streaks of flour. Overmixing at this stage develops gluten, which makes the blondies tough instead of tender. We want them soft and chewy, so be gentle. The batter will be thick and sticky—that’s exactly what we want.
Step 4: Fold in the Toffee (2 minutes)
Pour in the toffee bits. Fold them into the batter until they are evenly distributed. You want to see toffee in every spoonful. If you’re adding white chocolate chips, do it now. Scrape the batter into your prepared pan. Use your spatula to spread it out evenly. Press down firmly with the back of the spatula to create a flat, even surface. This ensures they bake uniformly.
Step 5: Bake and Cool (30 minutes total)
Bake for 20-25 minutes. You’ll know they’re done when the edges are golden brown and the center is just set. The center should still look slightly soft, but not raw. If you insert a toothpick, it should come out with a few moist crumbs, not wet batter. If you bake them until the toothpick is completely clean, they’ll be dry. I usually take them out at 22 minutes.
Let them cool in the pan for at least 15 minutes. This is the hardest part, I know. But if you cut them while they’re hot, they’ll be a mess. Once cooled, use the parchment overhang to lift the entire block out of the pan. Place it on a cutting board.
Step 6: Slice and Serve
Use a sharp knife to cut the blondies into squares. I like to cut them into 12 large squares or 24 smaller squares, depending on how much of a sweet tooth your guests have. Right after slicing, sprinkle a tiny pinch of flaky sea salt on top if you’re using it. This adds that gourmet touch. Serve warm or at room temperature.
Expert Tips & Tricks
Here’s everything I’ve learned from making these dozens of times. These tips will save you from my mistakes and ensure your blondies are perfect every time.
Don’t Overbake — This is the #1 mistake people make. Blondies continue to cook in the pan after you take them out of the oven. If they look fully set in the middle when they come out, they will be dry by the time they cool. Pull them when the center looks just barely set. The residual heat will finish the job.
Room Temperature Eggs — I mentioned this earlier, but it’s worth repeating. Cold eggs can cause the melted butter to seize up slightly, creating a grainy batter. Room temperature eggs emulsify better, resulting in a smoother, more consistent texture.
Measure Flour Correctly — Again, this is crucial. Too much flour = dry blondies. Spoon the flour into your measuring cup and level it off with a knife. Never scoop directly from the bag. It’s a bad habit that ruins baked goods.
Use Good Quality Toffee — The toffee is the main flavor profile. If you use stale or low-quality toffee bits, you’ll notice. Look for brands that list butter and sugar as the first ingredients. Avoid the ones that are mostly corn syrup.
Store Properly — These blondies keep best in an airtight container at room temperature. Place a piece of bread in the container with them. The bread will dry out, but the blondies will stay soft and chewy for days. It’s an old baker’s trick that actually works.
Variations & Substitutions
Once you’ve nailed the basic version, here’s how you can mix it up. I’ve tried all of these, and they’re all delicious in their own way.
Chocolate Chip Toffee — Add 1 cup of semi-sweet chocolate chips along with the toffee. The combination of chocolate, caramel, and butter is unbeatable. It’s like a candy bar come to life.
White Chocolate Toffee — Use white chocolate chips instead of toffee bits for a milder, creamier flavor. This is great for people who don’t like the crunch of toffee but still want the caramel flavor.
Peanut Butter Toffee — Swirl ½ cup of peanut butter into the batter before baking. Create a marble effect by drizzling it on top and swirling with a knife. This adds a salty, nutty dimension that pairs beautifully with the toffee.
Gluten-Free Option — You can substitute the all-purpose flour with a 1:1 gluten-free flour blend. Make sure it contains xanthan gum, or add ½ teaspoon if it doesn’t. The texture will be slightly different but still chewy and delicious.
Dairy-Free Version — Use dairy-free butter and dairy-free toffee bits (some toffee contains milk solids, so check the label). The flavor will be slightly less rich, but still good.
Serving & Storage
These blondies are versatile and easy to serve. I usually present them on a simple platter with a dusting of powdered sugar for a festive look. They pair well with a hot cup of coffee or tea, making them perfect for holiday morning gatherings or afternoon snacks.
Storage Instructions:
- Room Temperature: Store in an airtight container for up to 5 days. Keep them away from direct sunlight to prevent the toffee from melting.
- Refrigerator: Not recommended. The cold can make the butter harden and change the texture. Only refrigerate if your kitchen is very hot.
- Freezer: Yes! These freeze beautifully. Wrap individual squares in plastic wrap and place them in a freezer-safe bag. They’ll last for up to 3 months. Thaw at room temperature for 30 minutes before eating.
Reheating: If you want to serve them warm, microwave a single square for 10-15 seconds. The toffee will get gooey and the center will be soft. It’s like eating a warm brownie.
Nutrition Information
I’m not a nutritionist, but here’s the breakdown if you’re tracking. Keep in mind that these are rich, indulgent bars, so portion control is key.
Per Serving (based on 12 squares):
- Calories: 380
- Fat: 18g
- Saturated Fat: 10g
- Carbs: 52g
- Fiber: 1g
- Sugar: 38g
- Protein: 4g
These are high in sugar and fat, which is expected for a dessert bar. However, they’re also relatively low in protein and fiber. To make them a bit more balanced, serve them with a side of fresh fruit or nuts. And remember, one square is usually plenty to satisfy a sweet craving.
Final Thoughts
So there you have it—my Chewy Brown Sugar Toffee Blondies. I’ve probably talked your ear off at this point, but when you make a recipe this often, you have a lot to say about it. These blondies have saved my holiday gatherings more times than I can count. They’re my answer to “what dessert should I bring?” when I want to impress without spending hours in the kitchen.
Make it yours! Try different add-ins, swap in your favorite nuts, or adjust the salt to your liking. The best recipes are the ones you adapt to your family’s tastes. If you make these, drop a comment and let me know what you think! I love hearing how recipes turn out in your kitchen. And if something doesn’t work, tell me that too—I’m here to help troubleshoot.
Happy baking! And I hope your kitchen smells half as good as mine does right now.
Frequently Asked Questions
Can I use dark brown sugar instead of light brown sugar?
Yes, you can. Dark brown sugar has more molasses, so the flavor will be deeper and more caramel-like. It will also make the blondies slightly darker. I prefer light brown sugar for a milder taste, but dark brown sugar works great if you want a more intense flavor.
Why did my blondies turn out dry?
This usually happens from overbaking or using too much flour. Make sure you’re measuring your flour correctly (spoon and level) and pull the blondies out of the oven when the center still looks slightly soft. They will continue to cook in the pan.
Can I freeze the batter?
It’s not recommended. The toffee bits might sink to the bottom, and the texture of the batter changes when frozen and thawed. It’s best to bake the blondies first and then freeze the finished product.
What if I don’t have toffee bits?
You can chop up Heath bars or Skor bars to make your own toffee pieces. Just make sure they’re finely chopped so they distribute evenly. Alternatively, you can use caramel bits, but toffee has a better crunch.
Can I double this recipe?
Yes, you can double it and bake it in a 9×13 pan, but you’ll need to increase the baking time by 5-10 minutes. Keep an eye on them to avoid overbaking. Alternatively, you can bake two 8×8 pans, which might be easier to monitor.
Do these need to be refrigerated?
No, they are best stored at room temperature in an airtight container. Refrigeration can make them hard and less chewy. Only refrigerate if your kitchen is very warm.
Can I add nuts to this recipe?
Absolutely. Chopped pecans or walnuts pair beautifully with toffee and brown sugar. Add ½ cup of chopped nuts along with the toffee bits for extra crunch and flavor.
Pin This Recipe!
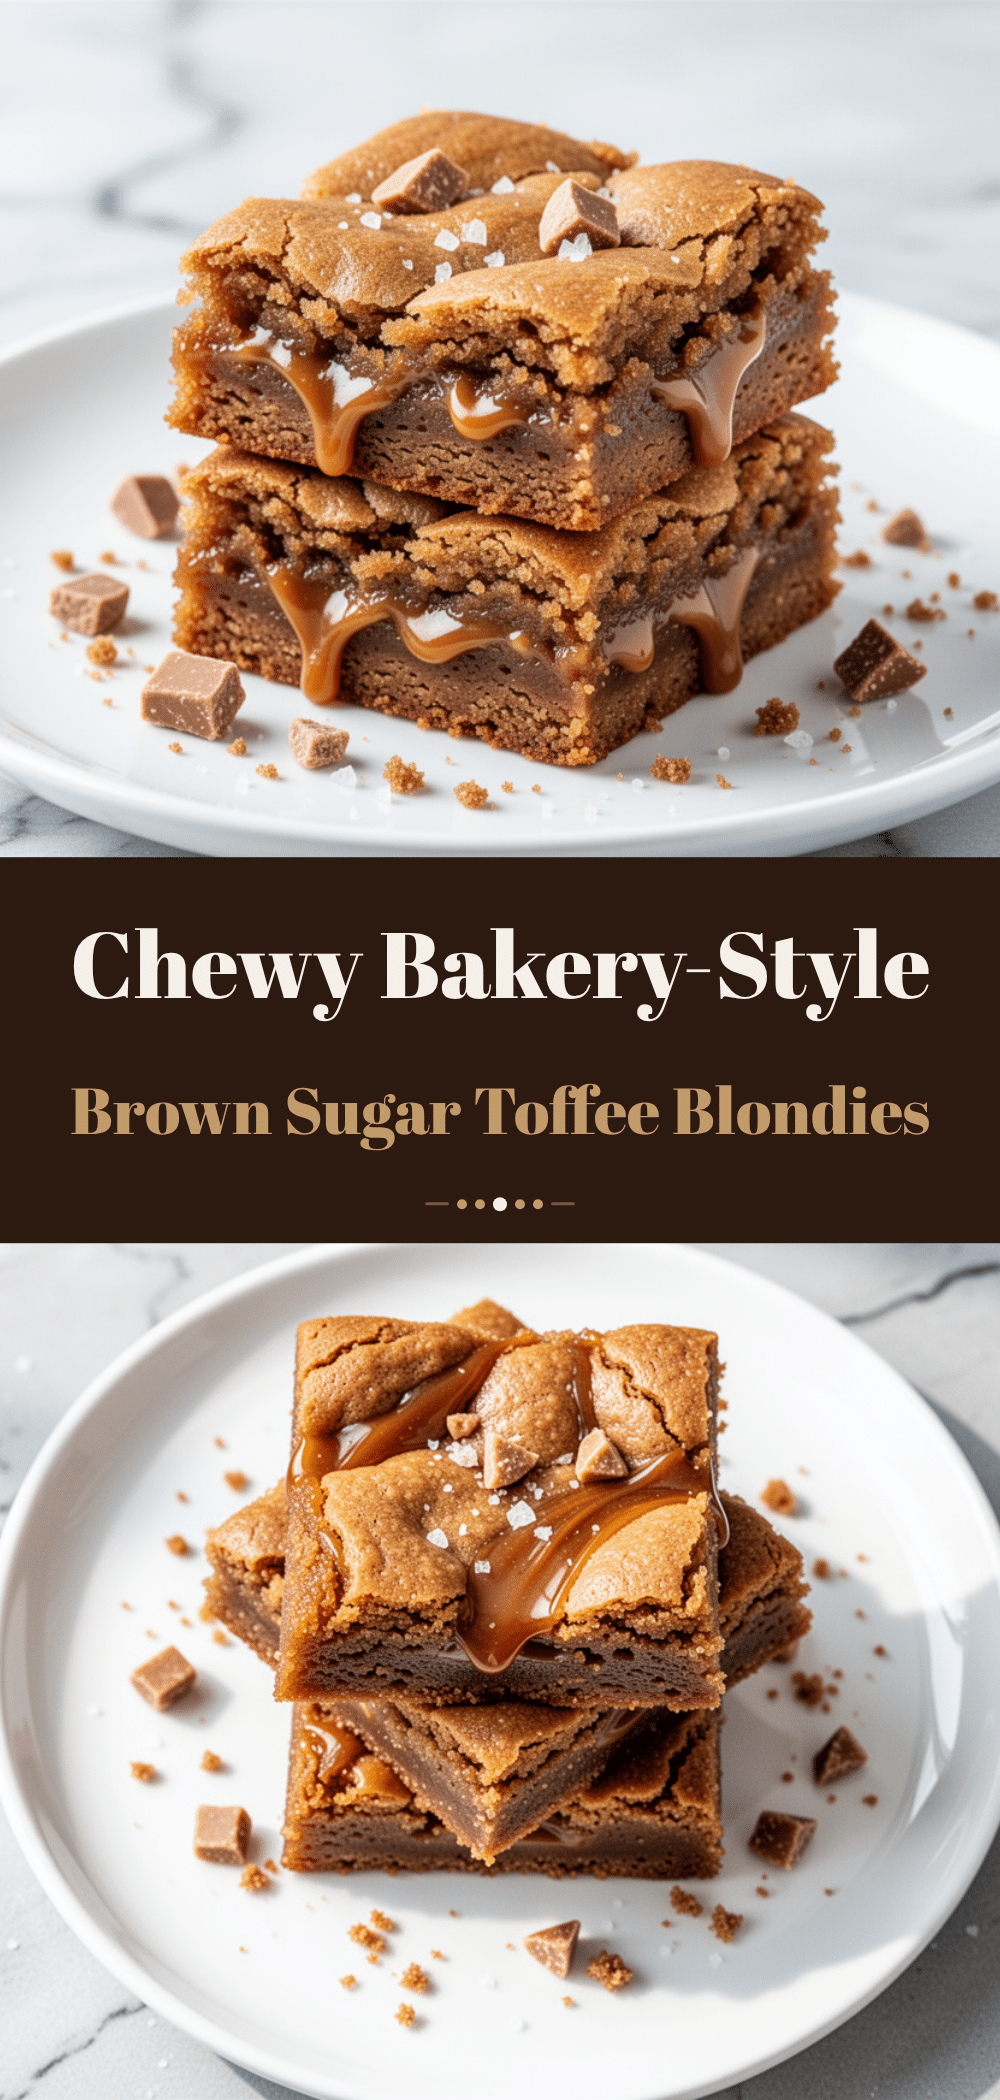
Chewy Brown Sugar Toffee Blondies
- Total Time: 40 minutes
- Yield: 12 servings 1x
Description
These chewy, buttery, caramel-infused blondies are an easy holiday treat that requires no fancy equipment. With a perfect balance of brown sugar sweetness and crunchy toffee bits, they are make-ahead friendly and universally loved.
Ingredients
- 1 cup (226g) unsalted butter, melted and cooled slightly
- 2 cups (400g) light brown sugar
- ½ cup (100g) granulated sugar
- 2 large eggs, room temperature
- 2 teaspoons vanilla extract
- 2 ¼ cups (280g) all-purpose flour
- 1 teaspoon baking powder
- 1 teaspoon salt
- 1 ½ cups (170g) toffee bits
- ½ cup white chocolate chips (optional)
- Sea salt flakes for topping
Instructions
- Preheat oven to 350°F (175°C). Line a 9×13 inch baking pan with parchment paper, leaving an overhang on the sides, and lightly grease the pan.
- In a large mixing bowl, combine the melted butter, light brown sugar, and granulated sugar. Mix vigorously with a fork or whisk for about 2 minutes until smooth and glossy.
- Add the eggs and vanilla extract to the butter mixture. Mix until just combined.
- Add the flour, baking powder, and salt. Switch to a rubber spatula and fold gently until no streaks of flour remain. Do not overmix.
- Fold in the toffee bits (and white chocolate chips if using) until evenly distributed.
- Scrape the batter into the prepared pan and spread it evenly, pressing down firmly with the back of the spatula.
- Bake for 20-25 minutes, or until the edges are golden brown and the center is just set. A toothpick inserted should come out with moist crumbs.
- Let the blondies cool in the pan for at least 15 minutes before lifting them out using the parchment overhang.
- Slice into squares and sprinkle with sea salt flakes if desired. Serve warm or at room temperature.
Notes
Do not overbake as blondies continue to cook in the pan. For best texture, measure flour by spooning it into the cup and leveling it off. Store in an airtight container at room temperature for up to 5 days, or freeze for up to 3 months. Adding a piece of bread to the container helps keep them soft.
- Prep Time: 15 minutes
- Cook Time: 25 minutes
- Category: Dessert
- Cuisine: American
Nutrition
- Serving Size: 1 square
- Calories: 380
- Sugar: 38
- Fat: 18
- Saturated Fat: 10
- Carbohydrates: 52
- Fiber: 1
- Protein: 4
Keywords: blondies, toffee, brown sugar, holiday dessert, easy baking, chewy bars, christmas treats


