It was 7:30 PM on a Tuesday, and I was standing in my kitchen staring at the empty cookie jar. I had just survived a workday that involved three Zoom calls, a spilled coffee incident, and a toddler who decided now was the perfect time to learn how to throw peas. I was tired. I was hungry. And I really, really wanted something sweet.
But I also didn’t want to order takeout. And I definitely didn’t have the energy to make a complicated dessert that required twelve steps and a panic-inducing amount of cleanup. That’s when I decided to try something I’d been meaning to experiment with for months: brown butter cookies.
I’d seen brown butter everywhere. Chefs talked about it like it was some magical elixir. Home cooks claimed it was the secret to “next level” flavor. But I always assumed it was too much work for a random Tuesday. Turns out, I was wrong. So wrong.
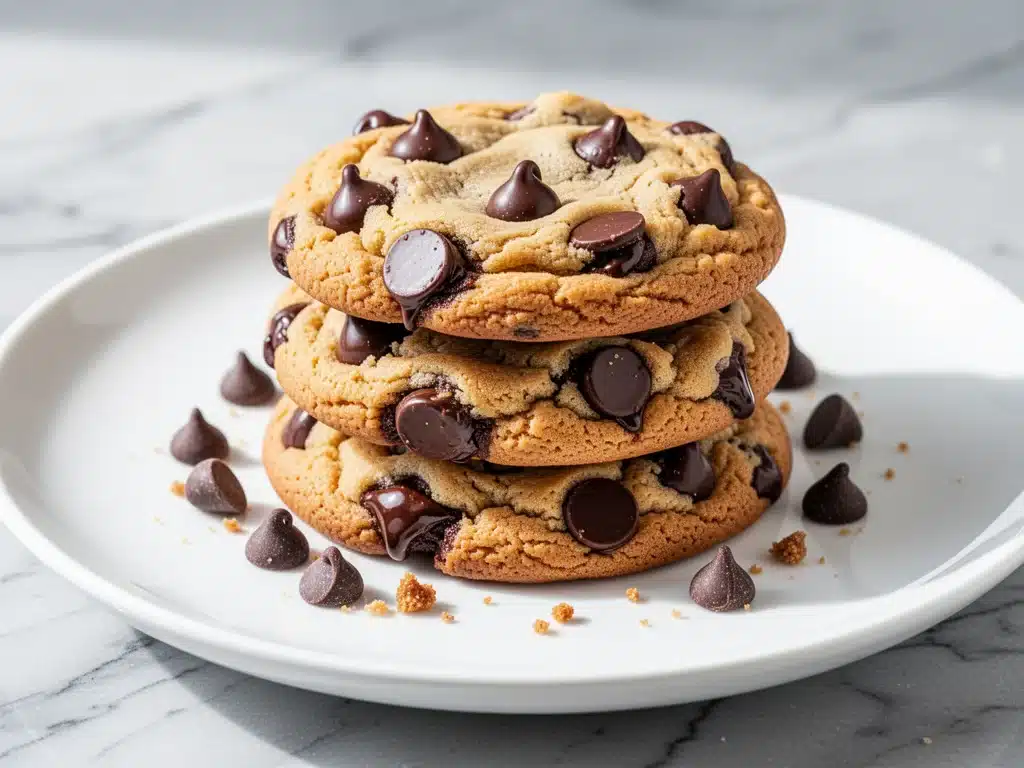
These brown butter chocolate chip cookies are hands-down the best thing I’ve baked in years. They’re nutty, deeply flavorful, chewy in the middle, and crisp at the edges. And the best part? They come together faster than you’d think, even on the most exhausted weeknights. I’ve made this batch at least a dozen times since that random Tuesday, and honestly? My family thinks I’ve finally mastered the art of baking. (Spoiler: I haven’t. I just learned how to brown butter without setting off the smoke alarm.)
If you’re looking for a treat that feels fancy but actually works for busy weeknights, stop scrolling. This is it.
Why You’ll Love This Recipe
Look, I don’t bake often. When I do, it’s usually because I’m trying to impress someone or because my kids are begging for something “from the bakery.” But these brown butter chocolate chip cookies are different. They’ve earned a permanent spot in my weekly rotation, and here’s why.
Deep, Nutty Flavor — This isn’t your standard chocolate chip cookie. Browning the butter adds this incredible toasted, nutty depth that regular melted butter just can’t match. It tastes like you spent hours in the kitchen, even though you didn’t.
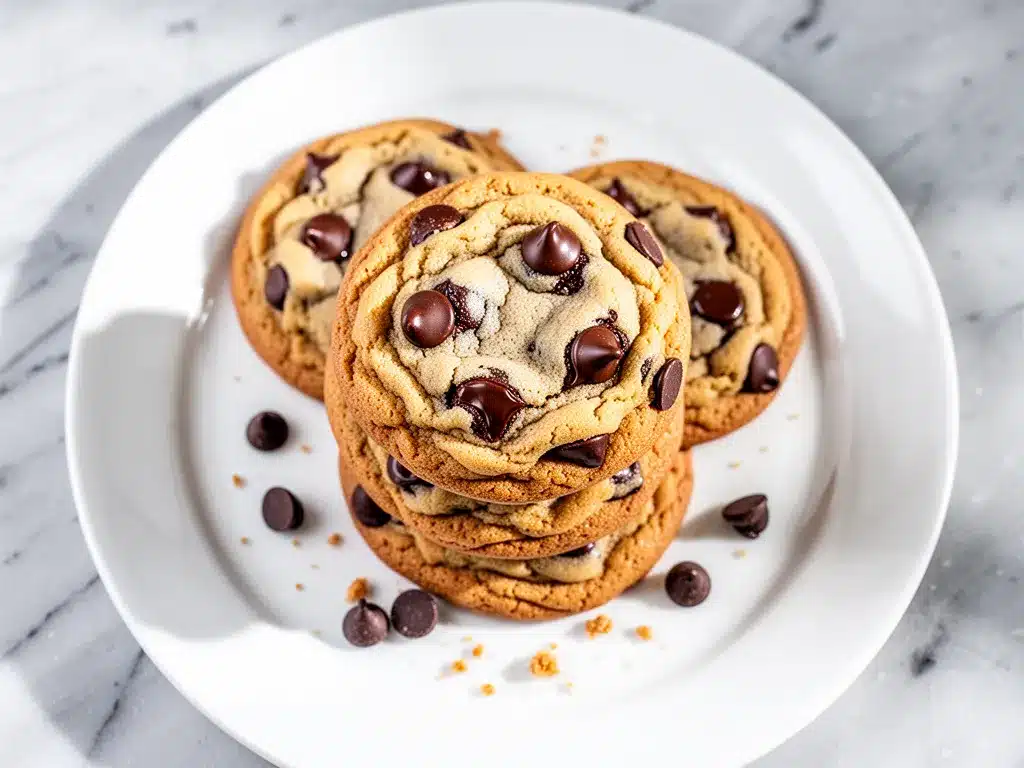
Chewy and Crispy Perfection — I’ve tested the ratio of brown sugar to white sugar, and this version gives you that perfect texture. Crisp edges that shatter a little when you bite, followed by a soft, chewy center that’s loaded with melty chocolate chips. It’s the cookie texture I’ve been chasing for years.
Actually Fast — Yes, you have to brown the butter. But that takes about five minutes. The rest is mixing and chilling. From start to finish, you’re looking at about 45 minutes if you don’t obsess over chilling time (though I do recommend a quick chill). It’s way faster than waiting for delivery.
Uses Basic Ingredients — You probably have everything you need right now. Butter, sugar, eggs, flour, chocolate chips. No weird gadgets or specialty stores. Just good, honest baking.
Great for Leftovers — These cookies keep well in an airtight container for up to five days. Actually, they get better on day two. The flavors meld together, and they stay chewy. I deliberately make extra for Wednesday morning snacks.
So basically, if you want a dessert that feels special but doesn’t require a special occasion, this is your recipe. It’s comforting, it’s delicious, and it’s going to make your kitchen smell like a high-end bakery.
Ingredients You’ll Need
Here’s the thing about brown butter cookies: the ingredient list is short, which means every single ingredient matters. You can’t hide behind vanilla extract or extra chocolate. The butter flavor is the star. So, let’s talk about what you need and why.
For the Brown Butter Base
Unsalted Butter (1 cup / 226g) — This is the main event. Use high-quality butter. If you buy the cheap stuff from the gas station, it won’t taste as good. I use Kerrygold or Plugra. You need to brown this butter, so make sure you have enough time (and patience) to watch it closely.
All-Purpose Flour (2 ¼ cups / 280g) — Standard flour works best. Don’t switch to cake flour or bread flour unless you know what you’re doing. I spoon it into the measuring cup and level it off. Don’t scoop directly from the bag, or you’ll pack in too much flour and get dry cookies.
Baking Soda (1 teaspoon) — This helps the cookies spread and brown. Make sure it’s fresh. If your baking soda is older than six months, toss it and buy a new box. It’s cheap insurance for good cookies.
Salt (1 teaspoon) — Since we’re using unsalted butter, salt is crucial for balancing the sweetness. I use kosher salt. If you use table salt, reduce it to ¾ teaspoon.
For the Sweetness and Structure
Brown Sugar (1 cup / 200g, packed) — This is what gives the cookies their chewiness and moisture. Dark brown sugar is better here because it has more molasses, which adds flavor. If you only have light brown sugar, it’ll work, but the flavor won’t be as deep.
Granulated White Sugar (½ cup / 100g) — This helps create those crispy edges. It’s a balance. Too much brown sugar and they’re cakey. Too much white sugar and they’re too crisp. This ratio is the sweet spot.
Eggs (2 large, room temperature) — Room temperature eggs mix into the dough more evenly. If you’re in a rush, crack them into a small bowl and microwave for 10-15 seconds. Don’t cook them, just warm them up.
Vanilla Extract (2 teaspoons) — Use real vanilla, not imitation. It makes a noticeable difference in flavor. I use Nielsen-Massey, but any good quality vanilla works.
The Mix-Ins
Semi-Sweet Chocolate Chips (2 cups / 340g) — I love using a mix of chips and chunks. Chips melt evenly, while chunks create pockets of intense chocolate. Ghirardelli or Guittard are my go-to brands. Don’t use baking chocolate bars unless you chop them yourself.
Flaky Sea Salt (for topping) — This is non-negotiable. Sprinkling flaky salt (like Maldon) on top of the warm cookies right after they come out of the oven elevates them from “good” to “wow.” The salt crystals crunch and balance the sweetness perfectly.
Equipment Needed
You don’t need fancy gear for this. Here’s what I actually use, and what you can swap if you don’t have it.
Medium Saucepan — I use a stainless steel saucepan with a light bottom. This lets you see the butter browning clearly. If you use a dark non-stick pan, it’s harder to tell when the butter is done, and you risk burning it. A light-colored pan is your friend here.
Large Mixing Bowl — Something big enough to hold all the ingredients without spilling. Glass or ceramic works well because they don’t retain heat like metal might.
Electric Mixer or Wooden Spoon — I prefer a hand mixer for this because it creams the butter and sugars quickly. But a wooden spoon works fine if you have the arm strength. It’s a good workout.
Baking Sheets — I use half-sheet pans. If you have smaller quarter-sheet pans, just divide the dough. Make sure your pans are cool between batches. Hot pans will melt the dough before it bakes.
Parchment Paper — Line your baking sheets with parchment. It prevents sticking and makes cleanup a breeze. Silicone mats work too, but parchment is easier to swap out between batches if they get dark.
Cookie Scoop — A 2-tablespoon scoop ensures uniform cookies. If you don’t have one, use two spoons to drop mounds. Uniform size means even baking.
How to Make It: Step-by-Step
Alright, let’s get into the nitty-gritty. This process is simple, but there are a few key steps that make all the difference. I’m walking you through exactly how I do it.
Step 1: Brown the Butter (5-7 minutes)
This is the most important step. Melt the butter in your saucepan over medium heat. Stir it constantly with a wooden spoon. At first, it will just be melted. Then, it will start to foam and bubble. Keep stirring. You’ll start to smell a nutty aroma—like toasted hazelnuts or popcorn. That’s a good sign. Watch closely. The milk solids at the bottom will turn golden brown. As soon as they do, remove the pan from the heat and pour the butter into a heatproof bowl. This stops the cooking process. Let it cool until it’s just warm to the touch, not hot.
Step 2: Mix the Sugars and Butter
In your large mixing bowl, combine the cooled brown butter, brown sugar, and white sugar. Mix until well combined. It should look like wet sand. If you’re using a mixer, use medium speed for about 2 minutes. If you’re using a spoon, mix vigorously. You want to incorporate air, but don’t overmix.
Step 3: Add Eggs and Vanilla
Add the eggs one at a time, mixing well after each addition. Add the vanilla extract. Mix until the batter is smooth and glossy. Scrape down the sides of the bowl to make sure everything is incorporated.
Step 4: Combine Dry Ingredients
In a separate medium bowl, whisk together the flour, baking soda, and salt. This ensures the baking soda is evenly distributed so you don’t get bitter spots.
Step 5: Make the Dough
Gradually add the dry ingredients to the wet ingredients. Mix on low speed or stir with a spoon until just combined. Do not overmix at this stage. Once the flour streaks disappear, stop. Fold in the chocolate chips. Use a spatula to gently fold them in so you don’t break the chips too much.
Step 6: Chill the Dough (Crucial Step!)
Here’s the secret to thick, chewy cookies: chill the dough. If you skip this, your cookies will spread into flat discs. Cover the bowl with plastic wrap and refrigerate for at least 30 minutes. If you have time, chill for 24 hours. The flavors develop and deepen overnight. I usually prep the dough on Sunday and bake on Tuesday. It’s a game-changer.
Step 7: Bake
Preheat your oven to 350°F (175°C). Line baking sheets with parchment paper. Scoop balls of dough (about 2 tablespoons each) onto the sheets, spacing them 2 inches apart. Bake for 10-12 minutes. The edges should be golden brown, but the centers should still look slightly soft and underdone. They will continue to cook on the hot pan after you take them out.
Step 8: Cool and Salt
Let the cookies cool on the baking sheet for 5 minutes. Then, transfer them to a wire rack to cool completely. While they’re still warm, sprinkle with flaky sea salt. The salt will melt slightly and stick to the surface. Enjoy immediately, or store in an airtight container.
Expert Tips & Tricks
I’ve made these cookies enough times to know where people go wrong. Here’s how to avoid my mistakes.
Don’t Burn the Butter — Brown butter is a fine line between “nutty and delicious” and “burnt and bitter.” If you smell smoke, you’ve gone too far. Start with medium heat and be patient. The butter should smell like toasted nuts, not burnt toast.
Chill the Dough — I cannot stress this enough. Chilling the dough prevents spreading. It also allows the flour to hydrate, which leads to better texture. If you’re in a rush, freeze the dough balls for 15 minutes instead of refrigerating for 30. It works almost as well.
Underbake Slightly — Take the cookies out when the edges are set but the centers look soft. They will firm up as they cool. If you bake them until the centers look done, they’ll be dry and crumbly.
Use Room Temperature Eggs — Cold eggs can seize the butter, making the dough lumpy. Let your eggs sit out for 30 minutes before starting. If you forget, warm them in a bowl of warm water for 5 minutes.
Measure Flour Correctly — Scooping flour packs it down, leading to dry cookies. Spoon flour into your measuring cup and level it off with a knife. This is the difference between a soft cookie and a hard rock.
Flaky Salt on Top — Don’t skip the flaky salt. It adds a crunch and a burst of flavor that contrasts with the sweet chocolate. It’s what makes these cookies taste “bakery-quality.”
Variations & Substitutions
Once you’ve mastered the basic recipe, here are some fun ways to mix it up. I’ve tried all of these, and they work.
Pretzel Chocolate Chip — Crush pretzels and fold them into the dough along with the chocolate chips. The salty crunch is addictive. I add about 1 cup of crushed pretzels.
White Chocolate Macadamia — Swap semi-sweet chips for white chocolate chips and add 1 cup of chopped macadamia nuts. It’s rich and tropical.
Double Chocolate — Add ¼ cup of cocoa powder to the dry ingredients and use dark chocolate chips. It’s intense and fudgy.
Gluten-Free — Use a 1-to-1 gluten-free flour blend. The texture might be slightly more delicate, but it’s still delicious. I’ve used Bob’s Red Mill and it works great.
Dairy-Free — Use a high-quality vegan butter stick (not tub margarine). Brown it the same way. Use dairy-free chocolate chips. The flavor will be slightly different, but still good.
Serving & Storage
How to Serve — These cookies are best enjoyed warm. If you have leftovers, microwave one for 10-15 seconds to soften the center. Serve with a cold glass of milk, of course. Or pair them with a cup of coffee for a dessert that feels like a hug.
Storing — Store cookies in an airtight container at room temperature for up to 5 days. Place a slice of bread in the container to keep them soft. The bread will dry out, but the cookies will stay chewy.
Freezing Dough — You can freeze the dough balls! Scoop them onto a baking sheet and freeze until solid. Then transfer to a freezer bag. Bake from frozen, adding 1-2 minutes to the bake time. This is perfect for meal prep.
Freezing Baked Cookies — Freeze baked cookies in an airtight container for up to 3 months. Thaw at room temperature. They won’t be as crisp, but still tasty.
Nutrition Information
I’m not a nutritionist, but here’s the breakdown if you’re tracking. Keep in mind, this is an estimate based on standard ingredients.
Per Cookie (makes about 24 cookies):
- Calories: 180
- Protein: 3g
- Carbs: 24g
- Fat: 9g
- Sugar: 16g
- Fiber: 1g
These are indulgent cookies, so enjoy them in moderation. But they’re not without merit—they have some protein from the eggs and cheese-like richness from the butter. Compared to store-bought cookies, they’re made with real ingredients, which is a win in my book.
Final Thoughts
So there you have it: my go-to brown butter chocolate chip cookies. They’re my answer to “what’s for dessert?” when I’m tired, busy, or just craving something sweet. They’ve saved my weeknights more times than I can count. My kids love them, my husband asks for them regularly, and I love them because they’re easy to make and impossible to resist.
Make them your own! Try different chocolates, add nuts, or sprinkle extra sea salt. The best recipes are the ones you adapt to your taste. And if you make these, please let me know how they turn out. I love hearing from readers who’ve tried the recipes. Drop a comment below and tell me what you think!
Happy baking! And I hope your kitchen smells amazing.
Frequently Asked Questions
Can I use salted butter instead of unsalted?
You can, but you’ll need to reduce the added salt in the recipe. Use ¾ teaspoon of salt instead of 1 teaspoon. Also, taste the butter before browning—it might already be salty. Unsalted butter gives you more control over the final saltiness.
Why did my cookies spread too much?
This usually happens if the butter was too warm when you mixed it, or if you didn’t chill the dough. Make sure your browned butter is cooled to room temperature before mixing. And definitely chill the dough for at least 30 minutes. If you skip the chill, the cookies will spread.
Can I freeze the cookie dough?
Yes! Scoop the dough into balls, freeze them on a baking sheet until solid, then transfer to a freezer bag. Bake from frozen, adding 1-2 minutes to the bake time. This is great for having fresh cookies on demand.
What kind of chocolate chips should I use?
I prefer semi-sweet chocolate chips for the balance of sweetness and bitterness. But dark chocolate chunks or white chocolate chips work too. Avoid milk chocolate chips unless you like very sweet cookies. I also like mixing chips and chunks for variety.
Can I make these cookies gluten-free?
Yes! Use a 1-to-1 gluten-free flour blend. The texture might be slightly more delicate, but it’s still delicious. I’ve tested this with Bob’s Red Mill and Cup4Cup, and both work well.
Why is my brown butter smelling burnt?
You likely left it on the heat too long. Brown butter moves fast. Once you see the milk solids turn golden and smell the nutty aroma, remove it from the heat immediately. If it smells burnt, you’ll need to start over. There’s no saving burnt butter.
Can I double this recipe?
Absolutely! Double all the ingredients. Just make sure you have a large enough bowl and mixing spoon. You might need to bake in more batches. The cooking time stays the same.
For more easy weeknight dessert ideas, check out our brown butter rice crispy treats or our chewy fall maple pecan cookies. Both feature that same nutty brown butter flavor!
Pin This Recipe!
Brown Butter Chocolate Chip Cookies: Easy Weeknight Treat
- Total Time: 45 minutes
- Yield: 24 cookies 1x
Description
These brown butter chocolate chip cookies are nutty, deeply flavorful, chewy in the middle, and crisp at the edges. They come together quickly, making them the perfect easy weeknight dessert.
Ingredients
- 1 cup (226g) unsalted butter
- 2 ¼ cups (280g) all-purpose flour
- 1 teaspoon baking soda
- 1 teaspoon kosher salt
- 1 cup (200g) packed brown sugar
- ½ cup (100g) granulated white sugar
- 2 large eggs, room temperature
- 2 teaspoons vanilla extract
- 2 cups (340g) semi-sweet chocolate chips
- Flaky sea salt, for topping
Instructions
- Brown the butter: Melt butter in a medium saucepan over medium heat. Stir constantly until milk solids turn golden brown and it smells nutty (5-7 minutes). Remove from heat and pour into a heatproof bowl to cool until just warm.
- Mix sugars and butter: In a large mixing bowl, combine cooled brown butter, brown sugar, and white sugar. Mix until well combined and looks like wet sand.
- Add eggs and vanilla: Add eggs one at a time, mixing well after each addition. Add vanilla extract and mix until the batter is smooth and glossy.
- Combine dry ingredients: In a separate medium bowl, whisk together flour, baking soda, and salt.
- Make the dough: Gradually add dry ingredients to wet ingredients. Mix on low speed or stir with a spoon until just combined. Do not overmix. Fold in chocolate chips.
- Chill the dough: Cover the bowl with plastic wrap and refrigerate for at least 30 minutes (or up to 24 hours).
- Bake: Preheat oven to 350°F (175°C). Line baking sheets with parchment paper. Scoop 2-tablespoon dough balls onto sheets, spacing them 2 inches apart. Bake for 10-12 minutes until edges are golden but centers look soft.
- Cool and salt: Let cookies cool on the baking sheet for 5 minutes, then transfer to a wire rack. Sprinkle with flaky sea salt while still warm.
Notes
Ensure butter is cooled to room temperature before mixing to prevent spreading. Chill dough for at least 30 minutes to maintain texture. Underbake slightly for chewy centers. Store in an airtight container with a slice of bread to keep soft.
- Prep Time: 15 minutes
- Cook Time: 10-12 minutes
- Category: Dessert
- Cuisine: American
Nutrition
- Serving Size: 1 cookie
- Calories: 180
- Sugar: 16
- Sodium: 150
- Fat: 9
- Saturated Fat: 5
- Carbohydrates: 24
- Fiber: 1
- Protein: 3
Keywords: brown butter cookies, chocolate chip cookies, easy dessert, weeknight baking, chewy cookies, homemade cookies


