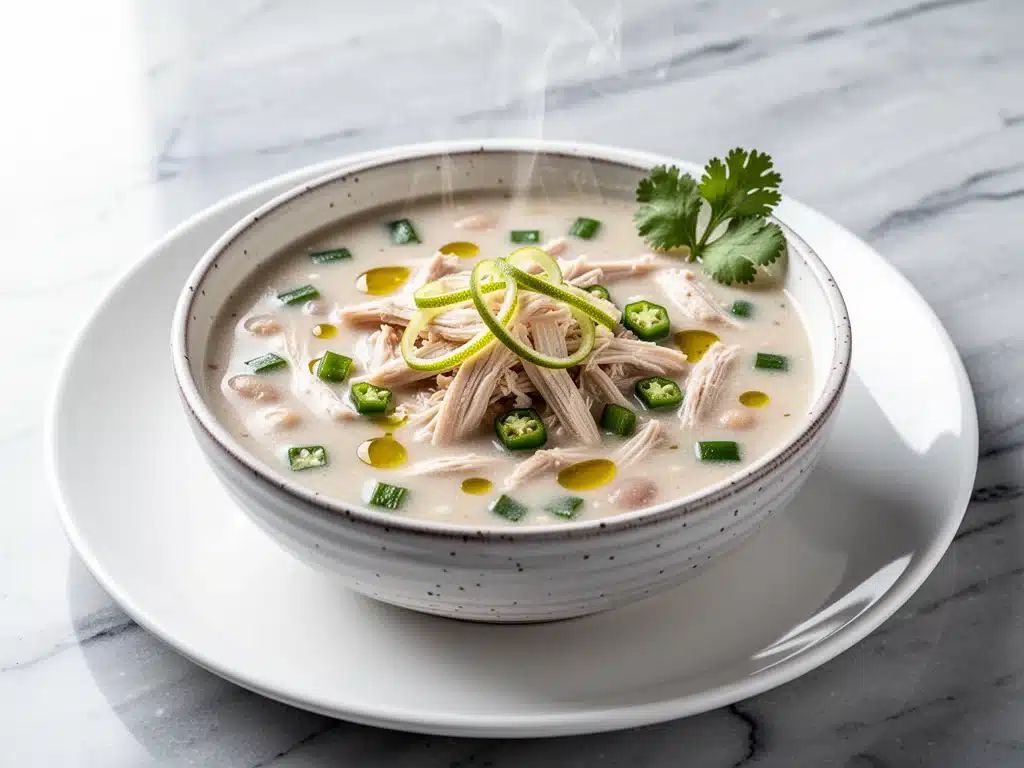
There is a specific kind of magic that happens in late October. The air gets crisp, the leaves turn that perfect burnt orange, and suddenly, the idea of standing over a hot stove for an hour feels less like a chore and more like a warm hug. That’s when I started craving white chicken chili. Not the watery, bland stuff you might get at a sad cafeteria, but a thick, creamy, aggressively flavorful bowl of comfort that tastes like it’s been simmering for hours (even though it’s done in 30 minutes).
I’ve made this Cozy Fall White Chicken Chili with Green Chiles and Lime dozens of times, and it has become my absolute go-to when the weather turns. It’s the kind of dish that makes your house smell incredible while you cook, and leaves everyone at the table asking for the recipe before they’ve even finished their first bowl. I first perfected this version on a particularly rainy Tuesday when I was tired, hungry, and didn’t want to order takeout. I threw together some leftover rotisserie chicken, a can of green chiles, a splash of lime, and some cream cheese. The result was so good that I cleared my calendar the next week just to make it again.
This isn’t just another chili recipe. It’s a weeknight lifesaver that feels fancy enough for guests but simple enough for a Tuesday night after work. It’s creamy without being heavy, spicy without being overwhelming, and packed with flavor that wakes up your palate. If you’re looking for a cozy fall soup alternative, this white chicken chili hits that same sweet spot of warmth and satisfaction, but with a zesty kick that keeps it interesting.
I’ve tested this recipe until I knew exactly which green chile brand worked best and how much lime juice was the “just right” amount. I’ve also figured out how to keep the chicken tender and the beans creamy without turning it into a paste. Whether you’re feeding a family of four or meal-prepping for the week, this 30-minute white chicken chili is going to become a staple in your rotation. So, grab a spoon, and let’s get cooking.
Why You’ll Love This Recipe
There are plenty of chili recipes out there, but this white chicken version stands out for reasons that go beyond just taste. Here’s why I keep coming back to it, and why I think you will too.
- Lightning Fast — Seriously, if you have a rotisserie chicken in the fridge, this dinner is ready in 30 minutes. I’m talking 10 minutes of prep, 20 minutes of simmering. I’ve made this on nights when I walked in the door exhausted, and it saved me from ordering pizza. It’s that reliable.
- Creamy Without the Guilt — Some white chilis rely on heavy cream or sour cream, which can feel heavy. I use a combination of cream cheese and a splash of half-and-half to get that velvety texture. It’s rich, but it doesn’t leave you feeling sluggish. Plus, the chicken and beans add protein to keep you full.
- Flavor Bomb — The secret is in the green chiles and the lime. Green chiles bring a smoky, mild heat that’s perfect for fall, and the lime juice cuts through the richness to brighten every bite. It’s a flavor profile that feels adventurous but is actually super easy to pull off. It’s similar to the zesty kick you get in my creamy hatch chile queso dip, but in soup form.
- Pantry Friendly — You probably have 80% of these ingredients already. Canned beans, canned green chiles, chicken broth, and cream cheese are staples in my cabinet. The only fresh items are the lime, cilantro, and whatever chicken you’re using. It’s the ultimate “I don’t know what to cook” meal.
- Meal Prep King — This chili actually tastes better on day two. The flavors meld together overnight, and the next day, it’s even more cohesive. I make a big batch on Sunday and eat it for lunch all week. It reheats beautifully in the microwave or on the stove.
- Customizable Heat — Don’t like spice? Use mild green chiles and skip the jalapeño. Love heat? Add a diced jalapeño or some red pepper flakes. This recipe bends to your preferences. I usually make a mild batch for the kids and add extra spice to my bowl.
This recipe has completely changed our weeknight dinner routine. It’s warm, it’s comforting, and it’s ready fast. No complicated techniques, no weird ingredients you can’t find, just reliable, delicious food that makes everyone happy.
Ingredients You’ll Need
Here’s the best part: you probably have most of this already. I’m particular about a few items here, and I’ll tell you exactly why they matter. This isn’t just a list; it’s your guide to getting the flavor right.
For the Base
Chicken (3 cups, diced / about 450g) — I always use rotisserie chicken. It’s juicy, flavorful, and saves so much time. You can use cooked chicken breasts, but they can dry out if you overcook them. If using raw chicken, sear it first, then shred. I prefer the convenience of the rotisserie bird.
Onion (1 medium yellow onion, diced / about 200g) — Yellow onions are the workhorse of cooking. They sweeten as they cook and provide a great base flavor. White onions are too sharp, and red onions are best saved for salads. Don’t skip this step.
Garlic (4 cloves, minced / about 2 tablespoons) — Fresh garlic is non-negotiable here. Jarred garlic has a metallic taste that really shows up in a mild white chili. Take the extra 30 seconds to mince it fresh. It makes a huge difference.
Butter (2 tablespoons) — I use unsalted butter to control the saltiness. It adds a rich mouthfeel that oil just can’t match. Olive oil works, but butter gives it that cozy, home-cooked vibe.
Chicken Broth (3 cups / 720ml) — Use low-sodium broth. Canned beans and cream cheese already have salt, so you want to control the seasoning yourself. Good quality broth makes a noticeable difference in the final depth of flavor.
For the Flavor
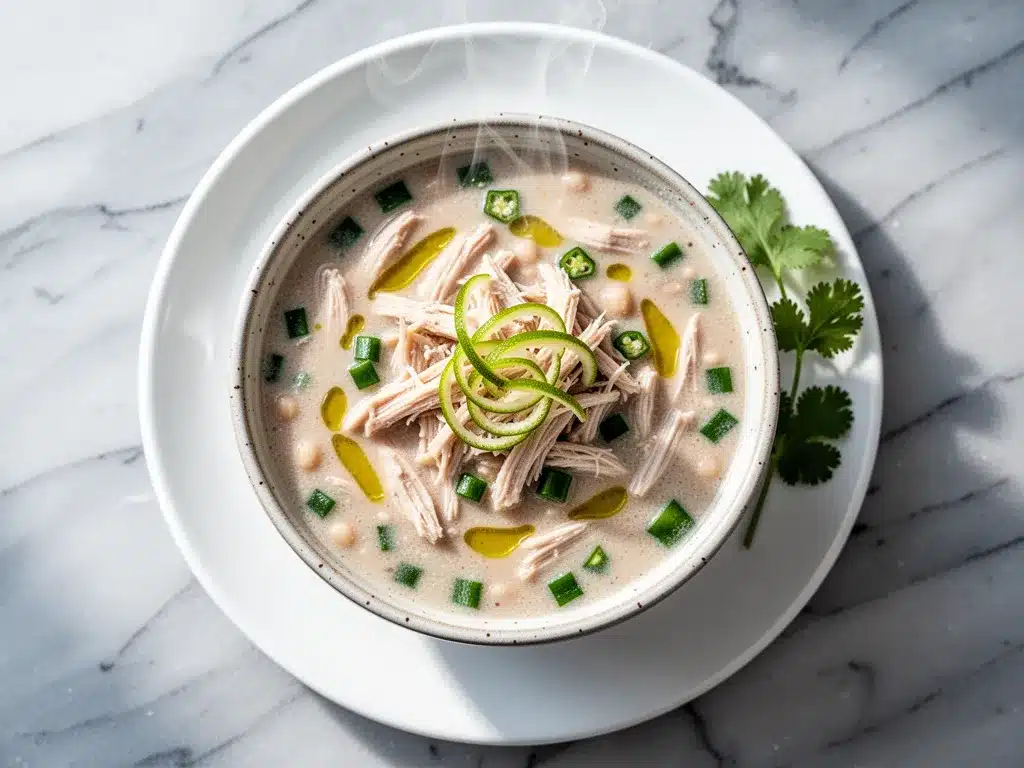
Green Chiles (1 can, 4oz / 113g) — Look for “diced green chiles,” not “roasted green chiles.” The diced ones are softer and integrate better into the chili. Hatch chiles are great if you can find them, but standard green chiles work perfectly. Drain the liquid before adding.
White Beans (2 cans, 15oz each / 425g each) — Cannellini or Great Northern beans are my go-to. They are creamy, mild, and hold their shape well. Rinse and drain them thoroughly to remove that canned bean taste. Navy beans work too, but they’re smaller and might get lost.
Cream Cheese (4 ounces / 113g) — This is the secret weapon for creaminess. Use full-fat, softened cream cheese. It melts into the broth and creates a silky texture without needing heavy cream. Block cream cheese is better than the tub kind, which has stabilizers that don’t melt as smoothly.
Lime (2 limes) — You’ll need the juice from two limes and zest from one. Fresh lime juice is essential. Bottled lime juice tastes artificial and flat. Squeeze it fresh right before adding it to the pot.
Cumin (1 teaspoon ground cumin) — Cumin is the soul of chili. It adds that earthy, warm note. Don’t use pre-ground cumin if you can help it; toast it in the pan for 30 seconds to release the oils. If you’re out, you can skip it, but the flavor will be flatter.
Chili Powder (1 teaspoon) — Not to be confused with a chili seasoning blend. Just pure chili powder. It adds color and a mild heat. If you want more heat, add a diced jalapeño with the onions.
Cilantro (½ cup, chopped / 15g) — Fresh cilantro is added at the end. It adds a bright, herbal note that cuts through the cream. If you hate cilantro, use parsley, but it’s not the same. I know, some people think cilantro tastes like soap. If that’s you, skip it or use a little.
Salt and Black Pepper — To taste. Always season at the end. Start with 1 teaspoon salt and adjust from there.
Optional Add-ins
Jalapeño (1, diced) — For extra heat. Remove seeds for less heat.
Corn (1 cup, frozen or canned) — Adds a nice pop of sweetness and texture. I throw this in if I have it.
Avocado (1, diced) — For serving. Adds creaminess and healthy fats.
Equipment Needed
You don’t need fancy equipment for this. Here’s what I actually use.
Large Dutch Oven or Heavy-Bottomed Pot — I use a 6-quart pot. It needs to fit all the ingredients comfortably. A Dutch oven is great because it retains heat well, but a large soup pot works fine. Just make sure it has a heavy bottom so it doesn’t burn.
Sharp Knife — For chopping onions and garlic. Dull knives make you cry more—learned this the hard way.
Cutting Board — Any size works. I use plastic for easier cleanup.
Wooden Spoon — For stirring. Silicone works too. Don’t use metal on non-stick.
Measuring Cups and Spoons — Pretty standard stuff. Dollar store versions work fine.
Can Opener — For the beans and chiles. If you’re lazy, you can buy pre-chopped onions, but fresh tastes better.
Microplane or Zester — For the lime zest. Or just use a small knife to scrape off the green part of the lime peel.
Ladle — For serving. Or a regular soup spoon works.
How to Make It: Step-by-Step
Alright, let’s make this! I’m walking you through exactly how I do it, including the little tricks I’ve picked up over the years.
Step 1: Prep Your Ingredients (5 minutes)
Before you start cooking, dice your onion, mince your garlic, and chop your cilantro. Measure out your spices. I know it seems fussy, but it makes the actual cooking way less stressful. Once you start cooking, things move fast. Have your chicken shredded and your beans rinsed and drained.
Step 2: Sauté the Aromatics (3-4 minutes)
Melt the butter in your large pot over medium heat. Add the diced onion and cook for 3-4 minutes until it’s soft and translucent. Add the minced garlic and cook for another minute, stirring constantly. The garlic should smell amazing but not brown—browned garlic tastes bitter. If you’re adding jalapeño, add it with the onions.
Step 3: Bloom the Spices (1 minute)
Add the cumin and chili powder to the pot. Stir well and cook for 1 minute. This step “blooms” the spices, releasing their oils and intensifying their flavor. It’s a small step that makes a big difference. Be careful not to burn them.
Step 4: Build the Chili (10 minutes)
Pour in the chicken broth, scraping up any browned bits from the bottom of the pot. Those bits are flavor gold. Add the rinsed beans, drained green chiles, and the shredded chicken. Stir everything together. Bring the mixture to a gentle simmer. Let it cook for 10 minutes, allowing the flavors to meld. The chili will start to thicken slightly.
Step 5: Add the Creaminess (2 minutes)
Reduce the heat to low. Add the softened cream cheese, a few cubes at a time, stirring until it’s fully melted and incorporated. The sauce will become creamy and glossy. If it’s too thick, add a splash more broth. If it’s too thin, let it simmer for a few more minutes. Taste the chili. This is when you adjust the salt and pepper.
Step 6: Brighten It Up (1 minute)
Remove the pot from the heat. Stir in the lime juice and lime zest. This is the moment where the chili transforms. The acid cuts through the richness and wakes up all the flavors. Add half of the chopped cilantro and stir. Taste again. Do you need more lime? More salt? Adjust now.
Step 7: Serve
Ladle the chili into bowls. Top with the remaining cilantro, diced avocado, a dollop of sour cream, and some crushed tortilla chips. Serve immediately with a side of garlic herb skillet flatbread or cornbread for dipping. The combination of creamy chili and crunchy chips is unbeatable.
Total Time: About 30 minutes (10 minutes active, 20 minutes simmering)
Expert Tips & Tricks
Here’s everything I’ve learned from making this dozens of times. These tips will save you from my mistakes.
Don’t Rush the Simmer — Even though this is a “30-minute” recipe, let it simmer for the full 10 minutes. This allows the beans to absorb the broth and the flavors to meld. If you serve it immediately, it will taste like separate ingredients.
Use Full-Fat Cream Cheese — Low-fat cream cheese doesn’t melt as smoothly and can make the chili grainy. Full-fat is worth the calories. It creates that luxurious texture that makes people ask for seconds.
Drain the Green Chiles — Make sure you drain the liquid from the can of green chiles. The liquid can make the chili watery and add unwanted preservative taste. Pat them dry with a paper towel if needed.
Toast Your Spices — I can’t stress this enough. Cooking the cumin and chili powder in the butter for 1 minute before adding the broth unlocks their full potential. It’s a game-changer.
Adjust the Lime at the End — Heat can dull the flavor of lime juice. Always add the lime juice and zest after you remove the pot from the heat. This preserves the bright, fresh flavor.
Make It Ahead — This chili tastes even better the next day. Store it in an airtight container in the fridge for up to 4 days. Reheat gently on the stove, adding a splash of broth if it’s too thick.
Common Mistakes
- Sauce is too thin: Let it simmer longer, or mash some of the beans against the side of the pot to release their starch.
- Sauce is too thick: Add more broth, a quarter cup at a time. Remember, it will thicken more as it cools.
- Chicken is dry: If using raw chicken, don’t overcook it. Shred it after cooking and add it at the end to keep it tender.
Variations & Substitutions
Once you’ve nailed the basic version, here’s how you can mix it up. I’ve tried all of these.
Spicy Version — Add 1 diced jalapeño with the onions. Or stir in ½ teaspoon of cayenne pepper or red pepper flakes when you add the spices. I like to add a few dashes of hot sauce right before serving.
Veggie-Loaded — Toss in 1 cup of frozen corn or diced bell peppers when you add the beans. It adds sweetness and color. I also love adding a handful of spinach in the last minute of cooking.
Lighter Version — Replace the cream cheese with Greek yogurt (add it off heat to prevent curdling) or use light cream cheese. It’s still good, just lighter. I make this when I’m trying to be “healthy.”
Slow Cooker Version — Sauté the onions and garlic in a pan, then add everything to the slow cooker. Cook on low for 6-8 hours. Add the cream cheese and lime juice in the last 30 minutes.
Instant Pot Version — Sauté the onions and garlic, then add everything except the cream cheese and lime. Pressure cook on high for 5 minutes, then quick release. Stir in the cream cheese and lime.
Dietary Modifications
- Gluten-Free: This recipe is naturally gluten-free. Just check your broth and cream cheese labels to be sure.
- Dairy-Free: Use olive oil instead of butter, coconut cream instead of cream cheese, and skip the sour cream. It’s different but still tasty.
- Low-Carb: Skip the beans and add extra chicken or cauliflower. Use cauliflower rice instead of corn.
Serving & Storage
How to Serve: I usually serve this straight from the pot at the dinner table—it looks rustic and stays warm. But here are other ways I’ve enjoyed it:
Side Dishes: Cornbread, kale chips, a simple green salad with vinaigrette, or tortilla chips. Garlic bread is also a classic choice.
Toppings Bar: When I have guests, I put out: extra cilantro, diced avocado, sour cream, crumbled queso fresco, red pepper flakes, and lime wedges. Everyone customizes their bowl.
Storage Instructions:
Refrigerator: Store in an airtight container for up to 4 days. The sauce will thicken in the fridge—totally normal.
Reheating: Best method: Add to a skillet with a splash of milk or broth over low heat. Stir until heated through and creamy again. Microwave method: Heat in 30-second intervals, stirring between. Add a splash of milk if it’s too thick.
Freezing: Honestly, this doesn’t freeze well because of the dairy. The cream cheese can separate when thawed. Make it fresh or store in the fridge for up to 4 days. If you must freeze, freeze the chili without the cream cheese, and add it fresh when reheating.
Nutrition Information
I’m not a nutritionist, but here’s the breakdown if you’re tracking.
Per Serving (based on 6 servings):
- Calories: 380
- Protein: 28g
- Carbs: 32g
- Fiber: 8g
- Sugar: 4g
- Fat: 14g
- Saturated Fat: 7g
- Cholesterol: 85mg
- Sodium: 650mg
What’s Good: High in protein from the chicken and beans. Good source of fiber. Contains vitamins from the vegetables and lime.
What to Know: Higher in sodium from the broth and beans. Contains dairy. Can be made lower-sodium by using low-sodium broth and rinsing beans thoroughly.
My Take: Look, this is comfort food with cream cheese and beans. It’s not a diet recipe. But it’s way better than takeout, costs less, and I know exactly what’s in it. When I want to make it lighter, I use the Greek yogurt version and load up on vegetables. But usually? I just eat a reasonable portion and enjoy it.
Final Thoughts
So that’s my go-to Cozy Fall White Chicken Chili with Green Chiles and Lime! I’ve probably talked your ear off at this point, but when you make a recipe this often, you have a lot to say about it.
This has saved weeknight dinners more times than I can count. It’s my answer to “what’s for dinner” when I’m tired, don’t want takeout, and still want something that tastes really good. My kids are happy, my husband’s happy, and I’m happy because I’m not stressed about cooking.
Make it yours! Try different add-ins, swap in your favorite vegetables, adjust the spice level. The best recipes are the ones you adapt to your family’s tastes. If you make this, drop a comment and let me know what you think! I love hearing how recipes turn out in your kitchen. And if something doesn’t work, tell me that too—I’m here to help troubleshoot.
Happy cooking! And I hope your kitchen smells half as good as mine does right now.
Frequently Asked Questions
Q: Can I use fresh chicken instead of rotisserie?
A: Yes! Use 1.5 lbs of boneless, skinless chicken breasts or thighs. Season with salt and pepper, then cook in the pot with the onions until done (about 10-12 minutes). Shred the chicken with two forks and add it back to the pot. It will be juicy and tender.
Q: Why did my chili turn out watery?
A: This usually happens if you didn’t drain the beans and green chiles well enough, or if you added too much broth. Let it simmer uncovered for 10-15 minutes to reduce. You can also mash a cup of the beans against the side of the pot to release their starch and thicken the chili naturally.
Q: Can I make this ahead for a dinner party?
A: Absolutely. Make the chili up to 2 days ahead, but hold off on adding the cream cheese and lime juice until you’re ready to serve. Reheat the base gently, then stir in the cream cheese and lime. This ensures the best flavor and texture.
Q: Can I freeze this chili?
A: I don’t recommend freezing this chili because the cream cheese can separate and become grainy when thawed. If you must, freeze the chili without the cream cheese. When reheating, add fresh cream cheese and stir well. It won’t be perfect, but it will be edible.
Q: What cheese goes best with white chicken chili?
A: Queso fresco is the traditional choice. It’s mild, salty, and crumbly. Pepper Jack adds heat. Shredded Monterey Jack or cheddar works too if you want a meltier cheese. I usually put out a mix for my family.
Q: How do I make this spicier?
A: Add a diced jalapeño with the onions. Or stir in ½ teaspoon of cayenne pepper or red pepper flakes. You can also top with hot sauce or sliced jalapeños. Start with less and add more to taste.
Q: Can I use black beans instead of white beans?
A: You can, but the flavor and color will change significantly. Black beans are earthier and will turn the chili a darker color. White beans (cannellini or Great Northern) are milder and help keep the chili creamy and light. Stick with white beans for the classic version.
Pin This Recipe!


Cozy Fall White Chicken Chili with Green Chiles and Lime
- Total Time: 30 minutes
- Yield: 6 servings 1x
Description
A thick, creamy, and flavorful white chicken chili that comes together in just 30 minutes. Perfect for weeknight dinners, this dish uses rotisserie chicken, green chiles, and lime for a zesty, comforting meal.
Ingredients
- 3 cups diced rotisserie chicken (about 450g)
- 1 medium yellow onion, diced
- 4 cloves garlic, minced
- 2 tablespoons unsalted butter
- 3 cups low-sodium chicken broth
- 1 can (4oz / 113g) diced green chiles, drained
- 2 cans (15oz each / 425g each) white beans (Cannellini or Great Northern), rinsed and drained
- 4 ounces (113g) full-fat cream cheese, softened
- Juice and zest of 2 limes
- 1 teaspoon ground cumin
- 1 teaspoon chili powder
- ½ cup chopped fresh cilantro
- Salt and black pepper to taste
- Optional: 1 diced jalapeño, 1 cup corn, 1 diced avocado
Instructions
- Prep ingredients: Dice onion, mince garlic, chop cilantro, shred chicken, and rinse/drains beans.
- Melt butter in a large Dutch oven or heavy-bottomed pot over medium heat.
- Add diced onion and cook for 3-4 minutes until soft and translucent. Add minced garlic and cook for 1 minute until fragrant (do not brown).
- Add cumin and chili powder to the pot and stir for 1 minute to bloom the spices.
- Pour in chicken broth, scraping up browned bits from the bottom. Add rinsed beans, drained green chiles, and shredded chicken.
- Bring to a gentle simmer and cook for 10 minutes to allow flavors to meld.
- Reduce heat to low. Add softened cream cheese cubes, stirring until fully melted and incorporated.
- Remove pot from heat. Stir in lime juice, lime zest, and half of the chopped cilantro.
- Season with salt and pepper to taste. Adjust lime or spice as desired.
- Serve immediately topped with remaining cilantro, diced avocado, sour cream, and crushed tortilla chips.
Notes
For best results, use full-fat cream cheese and drain the green chiles thoroughly. The chili tastes better the next day as flavors meld. Do not freeze if it contains cream cheese as it may separate; freeze the base without dairy if necessary.
- Prep Time: 10 minutes
- Cook Time: 20 minutes
- Category: Main Course
- Cuisine: American
Nutrition
- Serving Size: 1 bowl
- Calories: 380
- Sugar: 4
- Sodium: 650
- Fat: 14
- Saturated Fat: 7
- Carbohydrates: 32
- Fiber: 8
- Protein: 28
Keywords: white chicken chili, easy chili recipe, 30 minute dinner, fall recipes, creamy chili, rotisserie chicken recipes, weeknight meals


