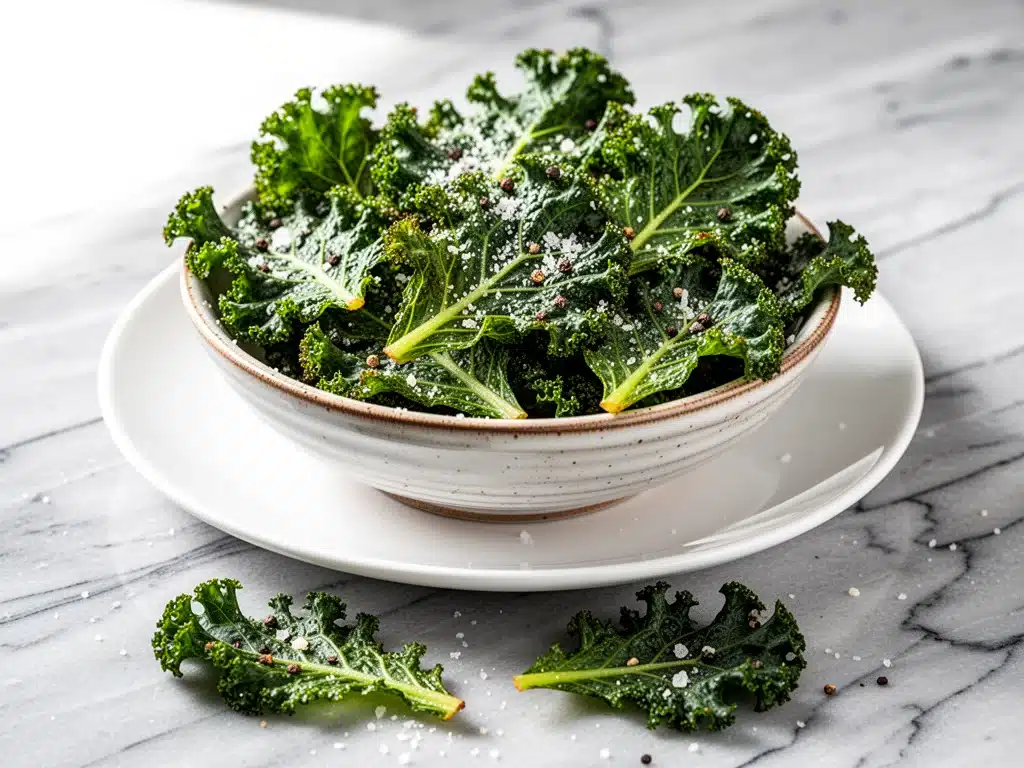
I have a confession to make. For the first thirty years of my life, I thought kale was basically grass that someone had forgotten to harvest. I’d buy it because it looked healthy and green and “good for me,” then watch it wilt in the crisper drawer until it turned into a slimy, regretful mess. I’d throw it out, promise myself I’d do better next week, and then order takeout because, frankly, I didn’t have the energy to deal with a salad that tasted like dirt.
That changed last Tuesday. I was staring into my fridge at 6:30 PM, the witching hour for weeknight desperation. I had a bunch of curly kale that was starting to look past its prime, a block of Parmesan cheese, and zero motivation to cook a “real” dinner. I didn’t want to make creamy garlic tuscan salmon because I didn’t want to clean a pan. I didn’t want to make cheddar broccoli rice egg cups because it was 7 PM, not 7 AM. I just wanted a snack. Something crunchy. Something salty. Something that didn’t involve a drive-thru.
So I did something reckless. I chopped that sad, slimy kale, tossed it with olive oil and a generous amount of grated Parmesan, and threw it in the oven. I expected a charred, bitter disappointment. Instead, I got… chips. Actual, crispy, savory, addictive chips.
I ate them straight off the baking sheet while waiting for my pasta water to boil. They were salty, cheesy, and had this incredible crunch that sounded like celery when I bit into them (but, you know, in a good way). My kids walked in, saw me eating vegetables, and immediately asked for some. I didn’t tell them they were kale. I just called them “cheese crisps.” They devoured them.
That was the moment I realized that kale doesn’t have to be a chore. It can be a treat. And these crispy baked parmesan kale chips have become my go-to weeknight snack. They take five minutes of prep, ten minutes in the oven, and they satisfy that late-afternoon craving without derailing your dinner plans. I’ve made them dozens of times now, tweaking the temperature and timing until I nailed the perfect crunch. This isn’t just a healthy snack; it’s a game-changer for busy parents, busy professionals, and anyone who thinks they hate kale.
Why You’ll Love This Recipe
There are about a million reasons to keep kale in your fridge now, but here’s why these specific chips have earned a permanent spot in my kitchen rotation.
Stupid Simple Prep — Seriously, if you can tear leaves off a stem, you can make this. I don’t even use a knife. I just rip the kale into bite-sized pieces. It’s faster than chopping an onion for a sauce. I’ve made these while on a video call with my mom, just tearing leaves with one hand.
Lightning Fast — From fridge to crunchy snack in under 15 minutes. The active time is maybe 5 minutes. The rest is just waiting. I make these on weeknights when I get home at 7pm and need something to tide me over until dinner at 7:45. It bridges that gap perfectly.
Pantry-Friendly Ingredients — You probably have everything you need right now. Olive oil, Parmesan cheese, salt, and kale. That’s it. No fancy spices, no weird powders. Just good, honest food. I keep a bag of pre-washed kale in my fridge specifically for this.
Kid-Approved (Even by Picky Eaters) — This is the biggest win. My kids hate “green food.” But they love cheese. And they love crunch. By masking the kale flavor with salty Parmesan and removing the moisture, the taste is unrecognizable. My daughter, who usually turns her nose up at anything leafy, asks for “cheese chips” every day now.
Budget-Smart — A bunch of kale costs about $2.50. A bag of chips costs $4. And the kale chips are way more nutritious. It’s a no-brainer for my wallet. I make a big batch, and it lasts for two days in the house.
This is my answer to the “what’s for snack?” question when I’m tired. No complicated techniques, no weird ingredients, just reliable, delicious food that makes everyone happy.
Ingredients You’ll Need
Here’s the best part: this recipe is so simple that the quality of your ingredients matters more than the quantity. Since there are only four items, each one has to pull its weight.
Kale (1 large bunch, about 6-8 ounces) — I use curly kale because the ruffles hold the oil and cheese better. Lacinato (dinosaur) kale works too, but it’s flatter and sometimes gets too soggy. Look for bunches that are deep green and perky, not wilted. If the stems are thick and woody, skip those leaves—they’ll just burn.
Extra Virgin Olive Oil (2 tablespoons) — You need enough to coat the leaves so they crisp up, but not so much that they fry. I use a good quality extra virgin here. It adds a fruity note that balances the salty cheese. If you’re out, regular olive oil works, but extra virgin tastes better.
Parmesan Cheese (½ cup, freshly grated) — This is non-negotiable. Do not use the green can. Do not use the pre-grated bags with the anti-caking powder. Buy a wedge of Parmigiano-Reggiano and grate it yourself. It melts into the kale and creates those crispy little cheese shards that are the best part. I grate it with a box grater while I’m prepping the kale. It takes 3 minutes.
Sea Salt (½ teaspoon, or to taste) — Kosher salt or sea salt works best. I like flaky sea salt on top at the end for a nice crunch, but kosher salt mixed in during prep is essential for flavor. Taste your kale before you bake it—it should taste slightly salty on its own.
Black Pepper (¼ teaspoon, optional) — Freshly cracked black pepper adds a little heat. I usually skip this because the Parmesan is strong enough, but if you like a little kick, add it.
Garlic Powder (½ teaspoon, optional) — I don’t use fresh garlic because it burns at 300°F. But garlic powder adds a nice savory depth without the risk of burning. If you’re sensitive to garlic, skip it. The cheese is plenty flavorful.
Pro Tip: I’ve tried adding nutritional yeast for a vegan version, but it doesn’t get as crispy. The dairy proteins in Parmesan are what help it brown and crisp. If you need dairy-free, you’ll need to experiment with cornstarch and oil, but honestly, the real Parmesan version is just better.
Equipment Needed
You don’t need fancy equipment for this. Here’s what I actually use.
Baking Sheets — I use two standard half-sheet pans. You need space between the leaves. If you crowd them, they steam instead of crisp. I run two batches if I’m making a huge amount, but one batch fits easily on one pan.
Large Mixing Bowl — Just a big bowl to toss the kale in. Glass or ceramic works best so it doesn’t slide around.
Box Grater — For the Parmesan. Microplane works too, but a box grater gives you a coarser shred that sticks to the kale better.
Measuring Spoons — Standard stuff. Dollar store versions work fine.
Paper Towels — Optional but recommended. If your kale is wet, you need to dry it thoroughly. Wet kale = soggy chips.
Large Salad Spinner — This is the secret weapon. Washing kale is messy, but spinning it dry is essential. If you don’t have a spinner, pat it dry with paper towels until your hands are soaked. It’s worth it.
Optional: Tongs — For tossing the kale in the oil. It’s easier than using your hands if you don’t want oily fingers. But honestly, my hands get oily too. It’s part of the fun.
How to Make It: Step-by-Step
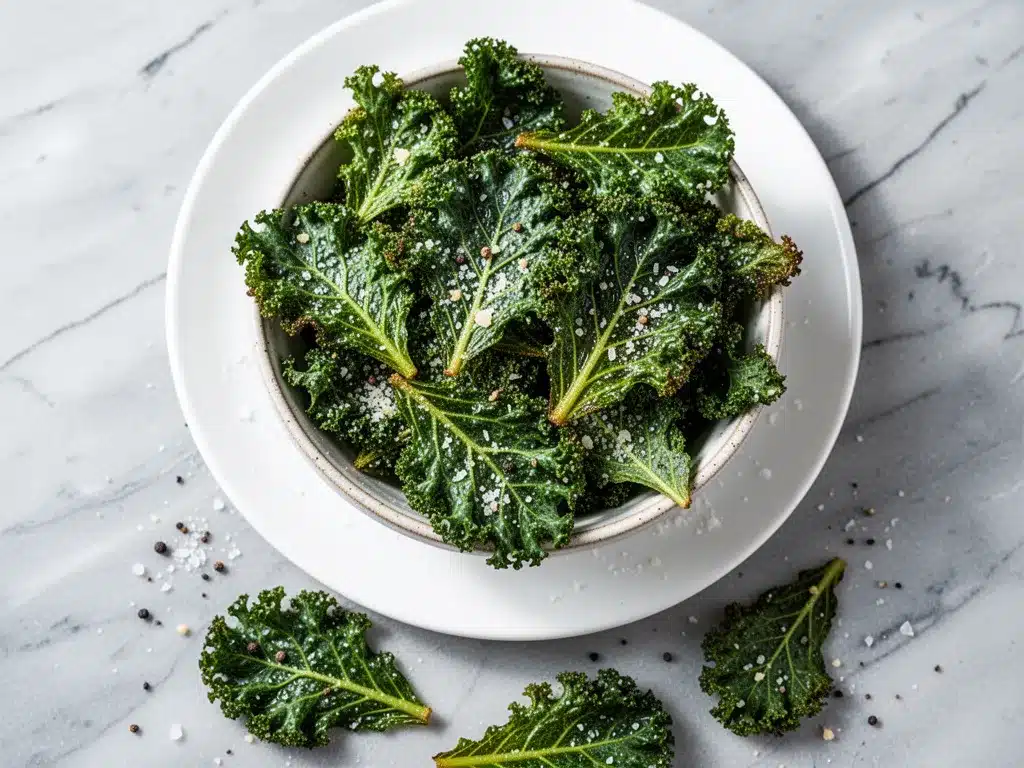
Alright, let’s make these crispy baked parmesan kale chips! I’m walking you through exactly how I do it, including the little tricks I’ve picked up so they turn out perfectly crunchy every time.
Step 1: Prep Your Oven and Pans (2 minutes)
Preheat your oven to 300°F (150°C). This low temperature is key. High heat burns the cheese before the kale crisps. Line your baking sheets with parchment paper. I don’t use foil because the cheese sticks to it like crazy. Parchment is your friend. It makes cleanup a breeze.
Step 2: Wash and Dry the Kale (5 minutes)
Submerge the kale bunch in a bowl of cold water. Swish it around to get out any dirt or sand. Lift it out and repeat until the water is clear. Then, spin it dry. If you don’t have a spinner, lay the leaves on paper towels and pat them dry. They need to be completely dry. Any moisture will steam the chips. This step takes longer than you think, but it’s the most important one.
Step 3: Remove the Stems (3 minutes)
Take a leaf and find the thick, woody stem in the center. Fold the leaf in half along the stem, then pull the stem out. Discard the stems (or save them for stock). Tear the leaf into bite-sized pieces. I don’t worry about perfect shapes—rustic chunks are fine. Aim for pieces that are about 2-3 inches wide. Smaller pieces burn faster.
Step 4: Season the Kale (2 minutes)
Put the kale pieces in your large bowl. Drizzle with olive oil and sprinkle with salt, pepper, and garlic powder (if using). Toss with your hands or tongs until every leaf is lightly coated. You want a sheen of oil, not puddles. If there’s pooling oil, you’ve added too much. The leaves should look glossy, not greasy.
Step 5: Add the Parmesan (2 minutes)
Sprinkle the grated Parmesan over the kale. Toss again gently. You want the cheese to stick to the leaves, not fall to the bottom of the bowl. If you have big clumps of cheese, break them up with your fingers. Distribute the cheese evenly so every bite has some.
Step 6: Arrange on Baking Sheets (2 minutes)
Lay the kale leaves in a single layer on the prepared baking sheets. Do not overlap them. If they touch, they won’t crisp. I usually fit about 12-15 leaves per sheet. If you’re making a large batch, do two rounds. It’s better to make two smaller batches than one giant, soggy one.
Step 7: Bake Until Crispy (10-12 minutes)
Place the pans in the oven. Bake at 300°F for 10-12 minutes. Keep an eye on them after 8 minutes. The edges should turn golden brown, and the cheese should be bubbling and slightly crisp. The kale itself will shrink significantly. It’s done when it looks dry and brittle. It should snap, not bend, when you touch it. If it’s still flexible, bake for 1-2 more minutes.
Step 8: Cool Completely (5 minutes)
Remove the pans from the oven. Let the chips cool on the pans for at least 5 minutes. This is crucial. They might feel soft when they come out of the oven, but they will crisp up as they cool. If you try to eat them hot, they’ll be chewy. Patience pays off. Once cool, they should be shatteringly crisp.
Expert Tips & Tricks
Here’s everything I’ve learned from making these dozens of times. These tips will save you from my mistakes.
Dry Kale is King
I can’t stress this enough. Wet kale is the enemy of crispiness. If your kale is damp after washing, use a salad spinner, then pat it dry with paper towels. I’ve made soggy chips before because I rushed this step. Don’t be me. Dry it until it feels like tissue paper.
Low and Slow
300°F is the sweet spot. At 350°F or higher, the cheese burns before the kale crisps. You’ll end up with black, bitter bits. Low heat allows the moisture to evaporate slowly while the cheese melts and crisps. Trust the process.
Don’t Crowd the Pan
Air circulation is key. If the leaves are touching, they’ll steam each other. Give them space. If you have a small oven, you might need to bake in three batches. It’s worth it for the quality.
Grate Your Own Cheese
Pre-grated cheese has cornstarch to prevent clumping. That cornstarch prevents melting and crisping. You want pure cheese. Grate it yourself, and you’ll see the difference immediately. The chips will have better texture and flavor.
Season While Warm
If you want extra saltiness, sprinkle a little flaky sea salt on the chips right when they come out of the oven. The heat helps it stick. It adds a nice gourmet touch.
Common Mistakes (and how to avoid them):
Mistake: Chips are chewy, not crispy.
Fix: They weren’t dry enough before baking, or you didn’t bake them long enough. Make sure to dry the kale thoroughly, and bake until they look brittle. They will crisp up more as they cool.
Mistake: Cheese is burnt.
Fix: Oven is too hot, or chips were too close to the heating element. Check your oven temperature with a thermometer. Also, rotate the pans halfway through baking.
Mistake: Kale is soggy.
Fix: You overcrowded the pan. Or you stored them in an airtight container while they were still warm. Always let them cool completely before storing.
Variations & Substitutions
Once you’ve nailed the basic version, here’s how you can mix it up. I’ve tried all of these, and they’re all winners.
Garlic Herb Version
Add 1 teaspoon of dried Italian herbs and ½ teaspoon of garlic powder to the oil before tossing. It adds a savory, aromatic depth. Great with pasta nights.
Spicy Chipotle
Add ½ teaspoon of chili powder and ¼ teaspoon of smoked paprika. It gives a nice kick. My husband likes these with cold beer.
Lemon Pepper
Replace the Parmesan with a sprinkle of lemon zest and cracked black pepper. Lighter and brighter. Perfect for spring.
Everything Bagel
Skip the Parmesan and toss the kale with olive oil, then sprinkle with everything bagel seasoning. It’s nutty, savory, and incredibly addictive.
Truffle Parmesan
Drizzle a tiny bit of truffle oil over the chips after they come out of the oven. It’s fancy and delicious. Great for impressing guests.
Dietary Modifications:
Vegan
Use nutritional yeast instead of Parmesan. It won’t get as crispy, but it has a cheesy flavor. Toss with olive oil and nutritional yeast, then bake. It’s still good, just different.
Low-Carb
This recipe is naturally low-carb and keto-friendly. Just watch the portion size of the cheese.
Gluten-Free
This is naturally gluten-free. Just make sure your Parmesan doesn’t have any additives (rare, but check the label).
Serving & Storage
How to serve and store these crispy baked parmesan kale chips so they stay delicious.
How to Serve:
I usually serve these straight from the counter as a snack. But here are other ways I’ve enjoyed them:
- Salad Topping: Crumble them over a Caesar salad instead of croutons. They add crunch and flavor.
- Appetizer: Serve with a dipping sauce like ranch or garlic aioli. They’re great for parties.
- Snack Pairing: Enjoy with a glass of white wine or a cold soda. They’re the perfect salty crunch.
Storage Instructions:
Room Temperature:
Store in an airtight container for up to 2 days. They will lose some crispiness after the first day, but they’re still good. If they get soft, pop them in the oven at 200°F for 5 minutes to re-crisp.
Refrigerator:
Not recommended. The moisture in the fridge will make them soggy. Avoid the fridge unless you’re meal-prepping for a week (in which case, re-crisp before eating).
Freezing:
Do not freeze these. They will become chewy and lose their texture completely. Make them fresh for best results.
Pro Tip:
If you’re making these for a party, make them 1 hour before serving. Let them cool completely, then store in a large bin with a paper towel on the bottom to absorb any moisture. They’ll stay crisp until the party starts.
Nutrition Information
I’m not a nutritionist, but here’s the breakdown if you’re tracking. Remember, kale is nutrient-dense, but the oil and cheese add calories.
Per Serving (based on 1/4 of the batch):
- Calories: 120
- Protein: 5g
- Carbs: 4g
- Fiber: 2g
- Sugar: 1g
- Fat: 9g
- Saturated Fat: 3g
- Sodium: 180mg
What’s Good:
- High in Vitamin K and A from the kale
- Good source of calcium from the Parmesan
- Low carb and keto-friendly
- High in fiber
What to Know:
- Higher in fat from the olive oil and cheese
- Contains dairy
- Sodium content depends on the salt you use
My Take:
Look, this is a snack with cheese and oil. It’s not diet food. But it’s way better than chips, costs less, and I know exactly what’s in it. When I want to make it lighter, I use less oil and less cheese. But usually? I just eat a reasonable portion and enjoy it. It’s a treat that happens to be healthy.
Final Thoughts
So that’s my go-to crispy baked parmesan kale chips! I’ve probably talked your ear off at this point, but when you make a recipe this often, you have a lot to say about it.
This has saved weeknight snacks more times than I can count. It’s my answer to “what’s for snack?” when I’m tired, don’t want chips, and still want something that tastes really good. My kids are happy, my husband’s happy, and I’m happy because I’m not stressed about cooking.
Make it yours! Try different seasonings, swap in your favorite cheese, or add some red pepper flakes. The best recipes are the ones you adapt to your family’s tastes.
If you make this, drop a comment and let me know what you think! I love hearing how recipes turn out in your kitchen. And if something doesn’t work, tell me that too—I’m here to help troubleshoot.
Happy cooking! And I hope your kitchen smells half as good as mine does right now.
Frequently Asked Questions
Can I use baby kale instead of curly kale?
You can, but baby kale is more tender and burns faster. It also doesn’t get as crispy. If you use baby kale, reduce the baking time to 6-8 minutes and keep a close eye on it. Curly kale is best for chips because the ruffles hold the cheese and oil well.
Why did my kale chips turn out soggy?
Usually means the kale wasn’t dry enough before baking, or you overcrowded the pan. Make sure to spin and pat the kale dry, and leave space between the leaves on the baking sheet. Also, let them cool completely—they crisp up as they cool.
Can I make these ahead for a party?
Yes! Make them up to 2 days ahead and store in an airtight container at room temperature. If they lose crispiness, pop them in the oven at 200°F for 5 minutes to re-crisp. They’re great for parties because you can make them the day before.
Can I use pre-grated Parmesan?
You can, but it’s not ideal. Pre-grated cheese has anti-caking agents that prevent it from melting and crisping properly. You’ll get less of that crispy cheese texture. Freshly grated cheese is worth the extra 2 minutes.
How do I reheat leftover kale chips?
If they get soft, put them in the oven at 200°F for 5 minutes. This will drive out any moisture and crisp them back up. Don’t microwave them—they’ll get chewy.
Can I double this recipe?
Absolutely! Double everything and use two baking sheets. Bake them separately if your oven is small, or rotate the pans halfway through. The cooking time stays the same.
Are these keto-friendly?
Yes! They are low-carb and high-fat, making them perfect for keto. Just watch the portion size of the cheese and oil. One serving is about 120 calories and 4g net carbs.
Pin This Recipe!
Crispy Baked Parmesan Kale Chips: Easy 5-Min Snack
- Total Time: 15 minutes
- Yield: 4 servings 1x
Description
A simple, crunchy, and savory snack made from curly kale, olive oil, and freshly grated Parmesan cheese. These chips are ready in under 15 minutes and are perfect for busy weeknights or healthy snacking.
Ingredients
- 1 large bunch curly kale (about 6–8 ounces)
- 2 tablespoons extra virgin olive oil
- ½ cup freshly grated Parmesan cheese
- ½ teaspoon sea salt (or to taste)
- ¼ teaspoon black pepper (optional)
- ½ teaspoon garlic powder (optional)
Instructions
- Preheat oven to 300°F (150°C) and line baking sheets with parchment paper.
- Wash the kale thoroughly in cold water and spin dry or pat completely dry with paper towels to remove all moisture.
- Remove the thick, woody stems from the kale leaves and tear the leaves into bite-sized pieces (2-3 inches wide).
- Place kale pieces in a large mixing bowl and drizzle with olive oil. Toss to coat lightly.
- Sprinkle with salt, pepper, and garlic powder (if using), then toss again until leaves are glossy but not greasy.
- Sprinkle grated Parmesan cheese over the kale and toss gently to distribute evenly.
- Arrange kale leaves in a single layer on the prepared baking sheets, ensuring they do not overlap.
- Bake at 300°F for 10-12 minutes, or until edges are golden brown and cheese is bubbling.
- Remove from oven and let cool completely on the pans for at least 5 minutes to allow chips to crisp up.
- Serve immediately or store in an airtight container at room temperature for up to 2 days.
Notes
Ensure kale is completely dry before baking to prevent sogginess. Use freshly grated Parmesan rather than pre-grated, as anti-caking agents can prevent crisping. Do not overcrowd the baking sheet; bake in batches if necessary. Let chips cool completely to achieve maximum crispiness. If chips become soft, re-crisp in a 200°F oven for 5 minutes.
- Prep Time: 5 minutes
- Cook Time: 10-12 minutes
- Category: Snack
- Cuisine: American
Nutrition
- Serving Size: 1/4 of the batch
- Calories: 120
- Sugar: 1
- Sodium: 180
- Fat: 9
- Saturated Fat: 3
- Carbohydrates: 4
- Fiber: 2
- Protein: 5
Keywords: kale chips, parmesan kale, healthy snack, low carb snack, keto friendly, baked kale, quick snack, vegetarian snack