I’ll be honest with you. Last Tuesday, I was running late. Like, “forgot to set the alarm” late. I needed coffee. I really, really needed coffee. But instead of just brewing a cup, I found myself standing in my kitchen with a whisk, a jar of instant coffee, sugar, and water, looking like I was trying to solve a math problem while half-asleep.
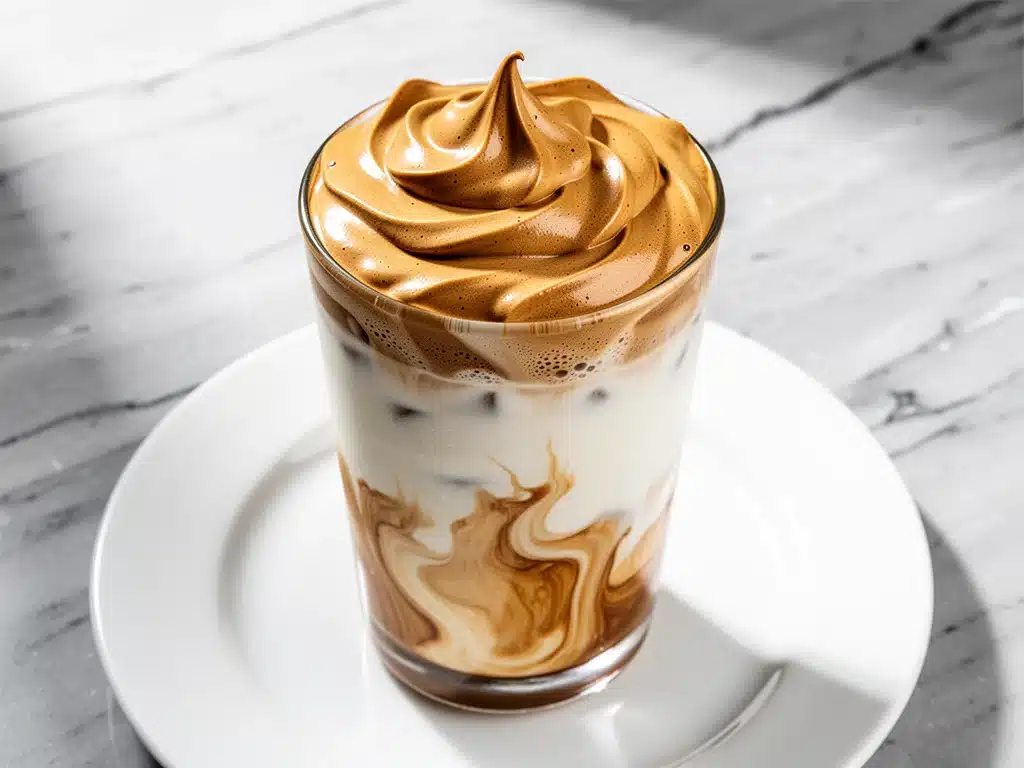
That’s when I made the whipped coffee. Or as everyone calls it now, Dalgona coffee. It started as a TikTok trend that I swore I’d never try, but something about the idea of turning coffee into a cloud just clicked. I whipped it for what felt like an eternity (it was really only three minutes), watched it transform from a dark sludge into this glossy, golden-brown meringue, and poured it over a glass of cold milk.
The first sip? Pure magic. It was like drinking a dessert that also woke you up. It was sweet, airy, and had this incredible texture that melted on your tongue. I made it for my partner, who was still groggy, and he took one sip and said, “Okay, we are doing this every morning now.” And we have. For the last three weeks, this whipped dalgona coffee has been the highlight of our day. It’s not just coffee; it’s a moment of calm before the chaos of the morning. And the best part? It’s stupidly simple. Three ingredients. One bowl. A whisk (or an electric mixer if you’re feeling fancy).
If you’ve been scrolling past videos of this fluffy coffee wonder and thinking it’s too hard or too trendy, let me tell you: it’s neither. It’s just the most fun you can have with your morning caffeine fix. I’ve tested this recipe dozens of times—hot milk, cold milk, oat milk, almond milk—and I’ve found the perfect ratio that guarantees success every single time. No grainy coffee clumps, no flat foam, just pure, whipped heaven.
Why You’ll Love This Whipped Dalgona Coffee Recipe
There are about ten reasons I keep coming back to this drink, but here are the big ones that have converted me from a skeptic to a believer:
- It’s Stupidly Simple — Seriously, if you can whisk, you can make this. I’ve walked my teenage daughter through it over FaceTime while she was at college. No special equipment needed, just a bowl and some arm strength (or an electric mixer).
- It’s Lightning Fast — 5 minutes from start to finish. The actual whipping takes about 3-4 minutes, and the rest is just pouring milk. It’s faster than waiting for a coffee machine to heat up, which is saying something.
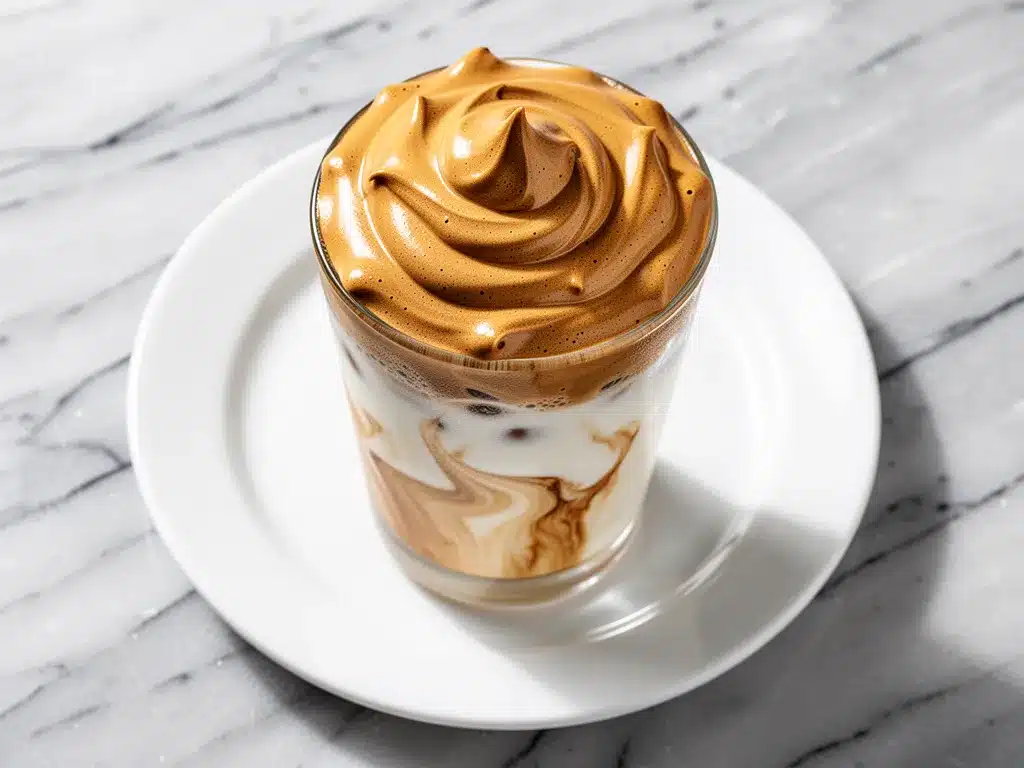
- It’s Visually Stunning — I’m not gonna lie, I make this for the ‘gram. The contrast of the dark, fluffy coffee cloud sitting on top of the creamy white milk is just beautiful. It looks like something you’d get at a high-end café, but it’s made in your kitchen.
- It’s Customizable — Want it sweet? Add more sugar. Want it strong? Use more coffee. Want it dairy-free? Use oat milk. This whipped dalgona coffee recipe adapts to whatever you have in your pantry. It’s the ultimate “use what you have” drink.
- It’s a Mood Booster — There’s something therapeutic about the rhythmic motion of whisking. Plus, the smell of the coffee mixing with the sugar is amazing. It feels like a little treat for yourself in the middle of a busy week.
- Makes Amazing Leftovers (Sort Of) — You can whip up a big batch of the coffee foam and store it in the fridge for a few days. Just give it a quick stir before using. It’s like having instant coffee clouds ready to go.
This is my go-to when I need a pick-me-up that feels special. No complicated techniques, no weird ingredients, just reliable, delicious coffee that makes everyone happy.
Ingredients You’ll Need
Here’s the best part: you probably have most of this already. I’m particular about three ingredients here, and I’ll tell you exactly why.
For the Whipped Coffee Base
Instant Coffee (2 tablespoons / 12g) — This is the most important ingredient. You need real instant coffee, not ground coffee and not espresso powder. I use Nescafé Classic or Gold. It dissolves perfectly and gives that authentic coffee flavor. Do not skip this for “instant cappuccino” mixes—they have too much sugar and creamer already.
Granulated Sugar (2 tablespoons / 25g) — Equal parts to the coffee. This is what helps create the structure and the sweet, caramel-like flavor. I use white sugar because it whips up light and fluffy. Brown sugar works too, but it makes the foam darker and chewier. If you’re watching sugar, you can reduce to 1 tablespoon, but it won’t whip as stiffly.
Hot Water (2 tablespoons / 30ml) — Just enough to dissolve the coffee and sugar. It needs to be hot, not boiling. If it’s too hot, it might melt the sugar too much; too cold, and it won’t dissolve. Room temperature water works in a pinch, but hot water helps the whipping process along.
For the Creamy Vanilla Milk
Milk (1 cup / 240ml) — This is where you can get creative. Whole milk makes the richest, creamiest drink. Oat milk is my personal favorite for the whipped coffee trend because it’s naturally sweet and froths beautifully. Almond milk works too, but it’s thinner. Cold milk is traditional for the iced version, but warm milk makes a cozy latte-style drink. Both are delicious.
Vanilla Extract (1/2 teaspoon) — This is the secret weapon. The vanilla adds a depth of flavor that makes it taste like a café drink rather than just sweetened coffee. Use pure vanilla extract, not imitation. It pairs perfectly with the coffee.
Ice Cubes (Optional) — If you’re making the iced version, fill your glass with ice. It keeps the drink cold and dilutes it slightly as it melts, which balances the sweetness.
Optional Toppings
Whipped Cream — For when you want to go all out. A dollop on top of the coffee foam is indulgent.
Cocoa Powder — A light dusting on top adds a nice chocolate note and looks pretty.
Caramel Drizzle — If you’re feeling fancy, drizzle some caramel sauce over the foam.
Equipment Needed
You don’t need fancy equipment for this. Here’s what I actually use.
Medium Bowl — A glass or ceramic bowl works best. I use a 1-cup bowl because it’s the right size for the foam to expand. Avoid metal bowls if you can—they can conduct heat and affect the whipping.
Hand Whisk or Electric Mixer — A hand whisk is traditional and gives you a good workout. It takes about 4-5 minutes of vigorous whisking. An electric hand mixer or stand mixer will cut this down to 2 minutes and give you even fluffier results. I use a hand mixer when I’m feeling lazy.
Measuring Spoons — Precision matters here. The ratio of coffee to sugar to water needs to be exact for the best texture.
Glass — A clear glass is nice to see the layers, but any mug or glass works. I like using a tall glass to show off the whipped coffee cloud.
Spoon — For stirring the milk and adding the vanilla.
How to Make It: Step-by-Step
Alright, let’s make this! I’m walking you through exactly how I do it, including the little tricks I’ve picked up.
Step 1: Prep Your Ingredients (2 minutes)
Before you start, make sure your instant coffee, sugar, and water are measured out. I know it seems simple, but having everything ready makes the whipping process smoother. If you’re making the milk base, pour your milk into your glass and add the vanilla extract. Stir it well and set it aside. If you’re making it iced, add ice cubes now.
Step 2: Mix Coffee, Sugar, and Water (1 minute)
In your medium bowl, combine the 2 tablespoons of instant coffee, 2 tablespoons of granulated sugar, and 2 tablespoons of hot water. Stir them together with a spoon just until the coffee and sugar are mostly dissolved. You don’t need to worry about perfect dissolution yet—the whisking will take care of the rest.
Step 3: Whip the Coffee Mixture (3-5 minutes)
This is the main event. Using a hand whisk or electric mixer, start whipping the coffee mixture. If you’re using a hand whisk, use a vigorous, rapid motion. You’ll notice the mixture starting to darken and thicken after about 1 minute. Keep going! By 2 minutes, it should look like a thick paste. By 3-4 minutes, it will start to form soft peaks. Keep whipping until you reach stiff peaks—the mixture should be light, airy, and hold its shape when you lift the whisk. It should look like a smooth, glossy meringue. If you’re using an electric mixer, this will happen faster, around 2 minutes.
Visual Cue: The foam should be a rich, golden-brown color and should hold a stiff peak when you lift the whisk. If it’s runny, keep whipping. If it’s too dry, add a tiny splash of water.
Step 4: Assemble the Drink (1 minute)
Once your coffee foam is ready, it’s time to assemble. If you’re making iced whipped dalgona coffee, spoon the whipped coffee mixture on top of the cold milk and ice. The foam will float on top, creating a beautiful two-layer effect. If you’re making it warm, gently spoon the foam over the hot milk. Be careful not to mix it immediately—you want to enjoy the layers first.
Step 5: Serve and Enjoy
Serve immediately! You can drink it by sipping through the foam first, or stir it all together for a creamy, sweet coffee drink. I like to take a few sips of the foam first to enjoy that light, airy texture, then stir it in for the full flavor experience. Add a dusting of cocoa powder or a drizzle of caramel if you’re feeling fancy.
Total Time: About 5-7 minutes (2 minutes prep, 3-5 minutes whipping, 1 minute assembly)
Built-in Troubleshooting:
- Foam is too runny: You didn’t whip it long enough. Keep going! It takes time to incorporate air.
- Foam is too dry/crumbly: You added too little water. Next time, add an extra teaspoon of water.
- Foam is too sweet: Reduce the sugar to 1 tablespoon next time, or use less sweet milk like unsweetened almond milk.
Expert Tips & Tricks
Here’s everything I’ve learned from making this dozens of times. These tips will save you from my mistakes.
Use the Right Instant Coffee
This is crucial. You need pure instant coffee granules, not instant cappuccino mixes or espresso powder. Instant coffee dissolves differently and creates the right structure. I’ve tried espresso powder, and it doesn’t whip up the same way—it stays gritty. Stick with Nescafé or similar brands.
Equal Parts Are Key
The ratio of 1:1:1 (coffee:sugar:water) is non-negotiable for the best texture. If you change the ratio, the foam might not hold its shape. I’ve tried 2:1:1, and it’s too sweet and doesn’t whip as well. Trust the ratio.
Whip Until Stiff Peaks
Don’t stop early! The difference between soft peaks and stiff peaks is night and day. Soft peaks will collapse into the milk. Stiff peaks will float proudly on top. It takes a little arm power, but it’s worth it.
Temperature Matters
If you’re using an electric mixer, make sure your bowl isn’t warm from previous use. Cool bowls help the foam stay stable. For the milk, cold milk helps the foam stay on top longer, while warm milk makes it melt into the drink faster. Both are good, just know what you’re aiming for.
Add Vanilla for Depth
Don’t skip the vanilla! It adds a subtle sweetness and aroma that makes the drink taste more complex. It’s the difference between “sweet coffee” and “café-style drink.”
Make a Big Batch
You can double or triple the coffee mixture and store it in an airtight container in the fridge for up to 3 days. Just give it a quick stir before using. It’s perfect for busy mornings when you don’t have time to whip.
Variations & Substitutions
Once you’ve nailed the basic version, here’s how you can mix it up. I’ve tried all of these.
Milk Variations
Oat Milk Latte Style — Use cold oat milk. It’s naturally sweet and creamy, making the drink taste like a gourmet oat milk latte. This is my personal favorite.
Dairy-Free Option — Use almond milk, soy milk, or coconut milk. Coconut milk adds a nice tropical twist. Just note that non-dairy milks might not froth as well, so the foam might sink a bit faster.
Warm Milk Version — Heat your milk in the microwave or on the stove. Spoon the foam over the warm milk for a cozy, latte-like experience. Add a dash of cinnamon for extra warmth.
Flavor Variations
Chocolate Dalgona — Add 1 tablespoon of cocoa powder to the coffee mixture before whipping. It turns it into a mocha-like treat. Amazing with chocolate milk.
Vanilla Bean — Instead of vanilla extract, use a scraped vanilla bean in the milk. It adds beautiful specks and a deeper vanilla flavor.
Caramel Swirl — Drizzle caramel sauce into the milk before adding the foam. It creates a marbled effect and adds extra sweetness.
Mocha Chip — Add mini chocolate chips to the milk before adding the foam. They sink to the bottom and add a nice crunch.
Dietary Modifications
Low-Sugar — Reduce the sugar to 1 tablespoon or use a sugar substitute like erythritol. It won’t whip as stiffly, but it’s still tasty.
Protein Boost — Add a scoop of vanilla protein powder to the milk. It makes the drink more filling and adds extra protein.
Serving & Storage
How to Serve:
I usually serve this in a tall glass to show off the layers. It’s a visual treat! For guests, I set up a “Dalgona Bar” with different milks, vanilla, cocoa powder, and caramel drizzle. Everyone can customize their own drink.
Side Dishes:
This drink pairs well with light breakfast items. I like it with fall apple cider donut muffins for a sweet morning treat. Or pair it with ultra-moist pumpkin bread for a cozy autumn vibe. It’s also great with bakery-style raspberry white chocolate scones if you’re having a brunch.
Storage Instructions:
Refrigerator: The whipped coffee foam can be stored in an airtight container in the fridge for up to 3 days. It will lose some of its fluffiness, but it’s still good. Give it a quick stir before using. The milk should be made fresh each time for the best texture.
Reheating: Not applicable for the foam. The milk can be reheated gently if you made it warm, but it’s best fresh.
Freezing: I don’t recommend freezing the whipped coffee foam. It will separate and lose its texture when thawed. Make it fresh for the best results.
Pro Tip: If you’re making this for a party, whip up a big batch of foam in the morning and store it in the fridge. When guests arrive, just pour the milk and top with the foam. It’s a great make-ahead option.
Nutrition Information
I’m not a nutritionist, but here’s the breakdown if you’re tracking. This is per serving (1 glass).
Per Serving (based on 1 serving):
- Calories: 120
- Protein: 2g
- Carbs: 24g
- Fiber: 0g
- Sugar: 22g
- Fat: 2g
- Saturated Fat: 1g
- Cholesterol: 5mg
- Sodium: 10mg
- Calcium: 80mg
What’s Good:
- Low in fat (unless you use whole milk)
- Good source of calcium from the milk
- Quick energy boost from the sugar
What to Know:
- Higher in sugar due to the whipped coffee mixture
- Contains caffeine (adjust based on your tolerance)
- Can be made lower-sugar by reducing the sugar in the foam
My Take:
Look, this is a treat. It’s sweet and indulgent. It’s not a health drink, but it’s also not a meal replacement. I enjoy it as a special morning treat or an afternoon pick-me-up. When I want to make it lighter, I use unsweetened almond milk and reduce the sugar to 1 tablespoon. But usually? I just enjoy the sweetness and the fun texture.
Final Thoughts
So that’s my whipped dalgona coffee! I’ve probably talked your ear off at this point, but when you make a recipe this often, you have a lot to say about it. This simple drink has become a ritual for me. It’s my answer to “I need something special but easy” when I’m tired, don’t want to go out, and still want a caffeine fix that feels luxurious.
It’s saved my mornings more times than I can count. It’s fun to make, impressive to serve, and delicious to drink. My family loves it, and I’ve shared it with friends who were skeptical at first but are now obsessed.
Make it yours! Try different milks, add different flavors, adjust the sweetness. The best recipes are the ones you adapt to your tastes. If you make this, drop a comment and let me know what you think! I love hearing how recipes turn out in your kitchen. And if something doesn’t work, tell me that too—I’m here to help troubleshoot.
Happy brewing! And I hope your kitchen smells half as good as mine does right now.
Frequently Asked Questions
Can I use ground coffee instead of instant coffee?
No, you can’t. Ground coffee doesn’t dissolve in water and won’t whip into a foam. You need instant coffee granules. If you don’t have instant coffee, you can try using espresso powder, but it might not whip as well. Instant coffee is the key to this recipe.
Why did my whipped coffee turn out runny?
This usually happens if you didn’t whip it long enough. The mixture needs to be whipped until it forms stiff peaks. If you’re using a hand whisk, it takes about 4-5 minutes. If you’re using an electric mixer, it takes about 2 minutes. Keep whipping until it holds its shape!
Can I make this with hot milk?
Yes! You can absolutely make this with hot milk. It creates a warm, latte-like drink. Just spoon the whipped coffee on top of the hot milk. The foam will melt slightly into the milk, creating a creamy, sweet coffee drink. It’s perfect for cold mornings.
How long does the whipped coffee last?
The whipped coffee foam can be stored in an airtight container in the fridge for up to 3 days. It will lose some of its fluffiness, but it’s still good. Give it a quick stir before using. For the best texture, make it fresh.
Can I use a sugar substitute?
Yes, you can use a sugar substitute like erythritol or stevia. However, it won’t whip as stiffly as regular sugar. You might need to whip it longer, and the texture might be slightly different. It’s still tasty, just not as fluffy.
Can I add flavors to the whipped coffee?
Absolutely! You can add cocoa powder for a mocha version, vanilla extract for a vanilla coffee, or even a dash of cinnamon for a spiced version. Just mix the flavor into the coffee, sugar, and water before whipping.
Is this drink healthy?
This is more of a treat than a health drink. It contains sugar and caffeine. However, you can make it healthier by using unsweetened milk, reducing the sugar, or adding a protein powder to the milk. It’s all about balance and enjoying it in moderation.
Pin This Recipe!

Whipped Dalgona Coffee: 3-Ingredient Easy Homemade Dream
- Total Time: 5-7 minutes
- Yield: 1 serving 1x
Description
A simple, viral whipped coffee drink made with just instant coffee, sugar, and water, served over milk for a sweet, airy, and visually stunning caffeine boost.
Ingredients
- 2 tablespoons instant coffee
- 2 tablespoons granulated sugar
- 2 tablespoons hot water
- 1 cup milk (dairy or non-dairy like oat, almond, or soy)
- 1/2 teaspoon vanilla extract
- Ice cubes (optional, for iced version)
Instructions
- Measure out the instant coffee, sugar, and hot water.
- In a medium bowl, combine the instant coffee, sugar, and hot water. Stir briefly until mostly dissolved.
- Using a hand whisk or electric mixer, whip the mixture vigorously for 3-5 minutes (or 2 minutes with an electric mixer) until it forms stiff, glossy peaks and resembles a meringue.
- Prepare the milk by pouring it into a glass and adding the vanilla extract. Stir well. Add ice cubes if making the iced version.
- Spoon the whipped coffee foam gently on top of the milk.
- Serve immediately, drinking through the foam first or stirring it in for a creamy drink.
Notes
Ensure you use pure instant coffee granules, not espresso powder or instant cappuccino mixes. The ratio of coffee to sugar to water must be equal (1:1:1) for the foam to hold its shape. Whip until stiff peaks form. The foam can be stored in the fridge for up to 3 days, but make the milk fresh for best texture.
- Prep Time: 2 minutes
- Cook Time: 3-5 minutes
- Category: Beverage
- Cuisine: Korean-inspired
Nutrition
- Serving Size: 1 glass
- Calories: 120
- Sugar: 22
- Sodium: 10
- Fat: 2
- Saturated Fat: 1
- Carbohydrates: 24
- Protein: 2
Keywords: dalgona coffee, whipped coffee, iced coffee, viral recipe, easy coffee, morning drink, caffeine boost


