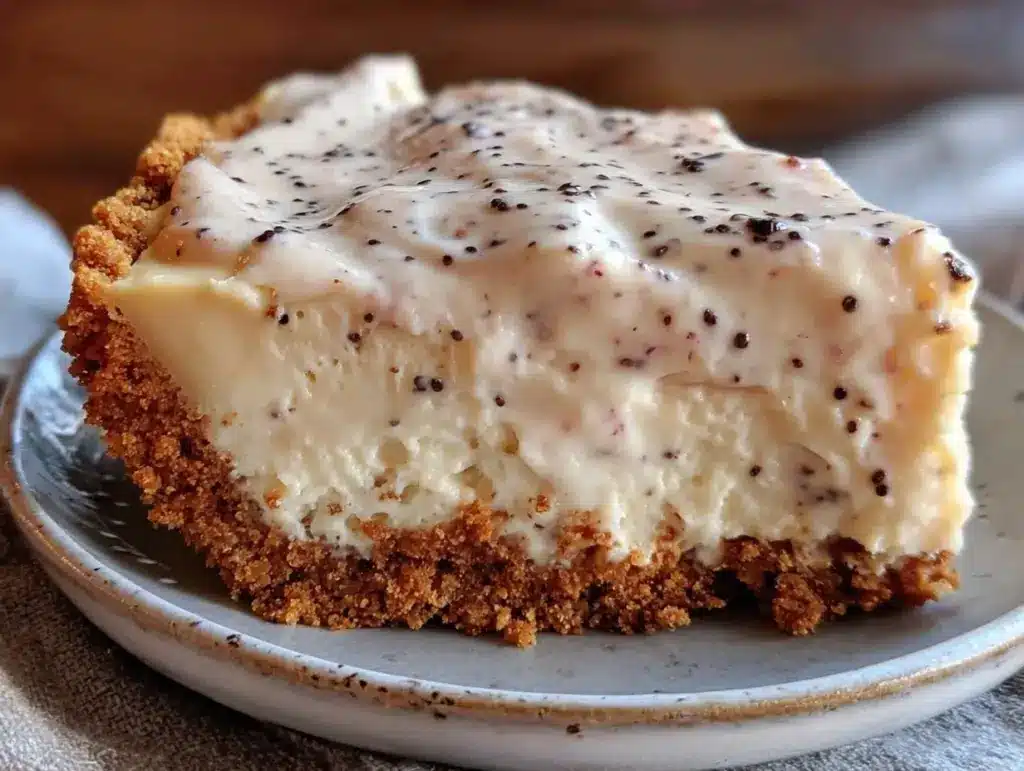
Last year, I promised my best friend Sarah I’d make her a cheesecake for her birthday. Sarah is gluten-free and dairy-sensitive, which usually means “sad, crumbly dessert that tastes like cardboard.” I’ve been there. I’ve bought the sad, pre-packaged gluten-free cheesecakes from the grocery store that fall apart if you look at them wrong. They’re dry. They’re gritty. They’re not worth the money.
So, I spent three weekends in my kitchen testing what I thought would be the perfect gluten-free cheesecake. I tried almond flour crusts that tasted like bitter nuts. I tried cashew-based creams that were too tangy. I tried using just gluten-free flour blends that made the crust sandy instead of buttery. I was ready to just buy a box from the store. Then, I accidentally used a specific ratio of cream cheese to sour cream and added a splash of vanilla bean paste, and suddenly, the kitchen smelled like a Parisian bakery.
That was the day I discovered my Ultra-Creamy Vanilla Bean Cheesecake with Buttery Graham Crust. It’s dense, it’s rich, and the texture is so smooth it’s almost unsettling. But here’s the best part: I’ve made this for my regular-eating family, my gluten-free friends, and my dairy-intolerant sister, and nobody could tell the difference. It’s proof that you don’t need to compromise on flavor or texture when you have dietary restrictions. This isn’t a “diet” version. It’s just a really, really good cheesecake.
Why You’ll Love This Ultra-Creamy Vanilla Bean Cheesecake
There are a lot of cheesecake recipes out there. Some are light and airy like a cloud. Some are dense and fudgy like brownies. This one? It’s the goldilocks of cheesecakes. It’s the one you’ll make on repeat because it works every single time.
It’s Silky Smooth — I’ve whipped this batter until my arm ached, but the secret isn’t overmixing. It’s about straining the mixture (yes, really) to remove any little lumps of cream cheese. The result is a texture so smooth it feels like eating a cloud. I’ve served this to professional pastry chefs, and they’ve asked for my secret. (It’s just patience and a fine-mesh sieve.)
The Crust Actually Tastes Like Graham Crackers — Most gluten-free crusts taste like oatmeal or almonds. This one uses a blend of gluten-free graham cracker crumbs and a touch of brown butter to mimic that classic, buttery, slightly toasted flavor. It’s crisp on the edges and soft in the middle, just like the real deal. If you love my gluten-free almond flour lemon cookies, you’ll appreciate how I balance texture in gluten-free baking here.
It’s Naturally Rich in Vanilla — I’m a vanilla snob. I don’t use extract unless I’m in a pinch. This recipe calls for real vanilla bean paste or scraped seeds, which gives you those beautiful black flecks and a depth of flavor that extract just can’t touch. It makes the whole cake taste like it was made in a high-end bakery.
It Holds Up — One of the biggest issues with gluten-free baked goods is that they dry out fast. This cheesecake stays moist and creamy in the fridge for up to five days. In fact, I’ve found it tastes even better on day two, as the flavors have time to meld together. It’s the perfect make-ahead dessert for holidays or dinner parties.
It’s Dairy-Free Option Included — While this recipe uses dairy for the creamiest texture, I’ve tested it with high-quality dairy-free cream cheese alternatives, and it still works beautifully. I’ll show you exactly how to swap it out later. It’s proof that dietary needs don’t mean missing out.
Ingredients You’ll Need
Here’s the thing about cheesecake: the quality of your ingredients matters more than almost any other dessert. You’re not hiding flavors with spices or chocolate. It’s just cream cheese, sugar, eggs, and vanilla. So, let’s talk about what to buy.
For the Ultra-Creamy Filling
Full-Fat Cream Cheese (32 oz / 900g) — This is non-negotiable for the classic version. Use block cream cheese, not the stuff in the tub. Brick-shaped cream cheese has less water and a higher fat content, which means a denser, richer cheesecake. Let it come to room temperature! Cold cream cheese leads to lumps, and nobody wants lumpy cheesecake. I usually take it out of the fridge the morning I plan to bake.
Sour Cream (1 cup / 240g) — This is my secret weapon. The tang from the sour cream cuts through the richness of the cream cheese, preventing the cake from feeling too heavy. It also adds moisture, ensuring the center stays creamy rather than dry. Use full-fat sour cream. Low-fat versions can make the texture grainy.
Heavy Cream (½ cup / 120ml) — Adds extra fat and smoothness. It helps the batter emulsify properly, creating that silky mouthfeel. If you’re doing a dairy-free version, use full-fat coconut cream (the thick part from the can).
Granulated Sugar (1 cup / 200g) — Standard white sugar. I like it because it dissolves easily and doesn’t add a molasses flavor. If you want a deeper flavor, you can use half white sugar and half light brown sugar, but stick to 1 cup total.
Vanilla Bean Paste (2 tablespoons) — Or 1 large vanilla bean, scraped. Vanilla bean paste is easier to use because it’s pre-mixed with sugar, but real scraped seeds are even better. Look for the little black specks in the batter—that’s where the flavor is. If you only have extract, use 1 tablespoon, but the flavor won’t be as complex.
Eggs (4 large) — Room temperature eggs are crucial. Cold eggs can cause the batter to curdle when mixed with the cold cream cheese. They also help the cheesecake set properly. Don’t skip this step.
Gluten-Free Flour Blend (2 tablespoons) — I use a 1:1 baking blend like Bob’s Red Mill or King Arthur Measure for Measure. This tiny amount helps stabilize the cheesecake without making it taste like flour. It’s a safety net for gluten-free baking.
For the Buttery Graham Crust
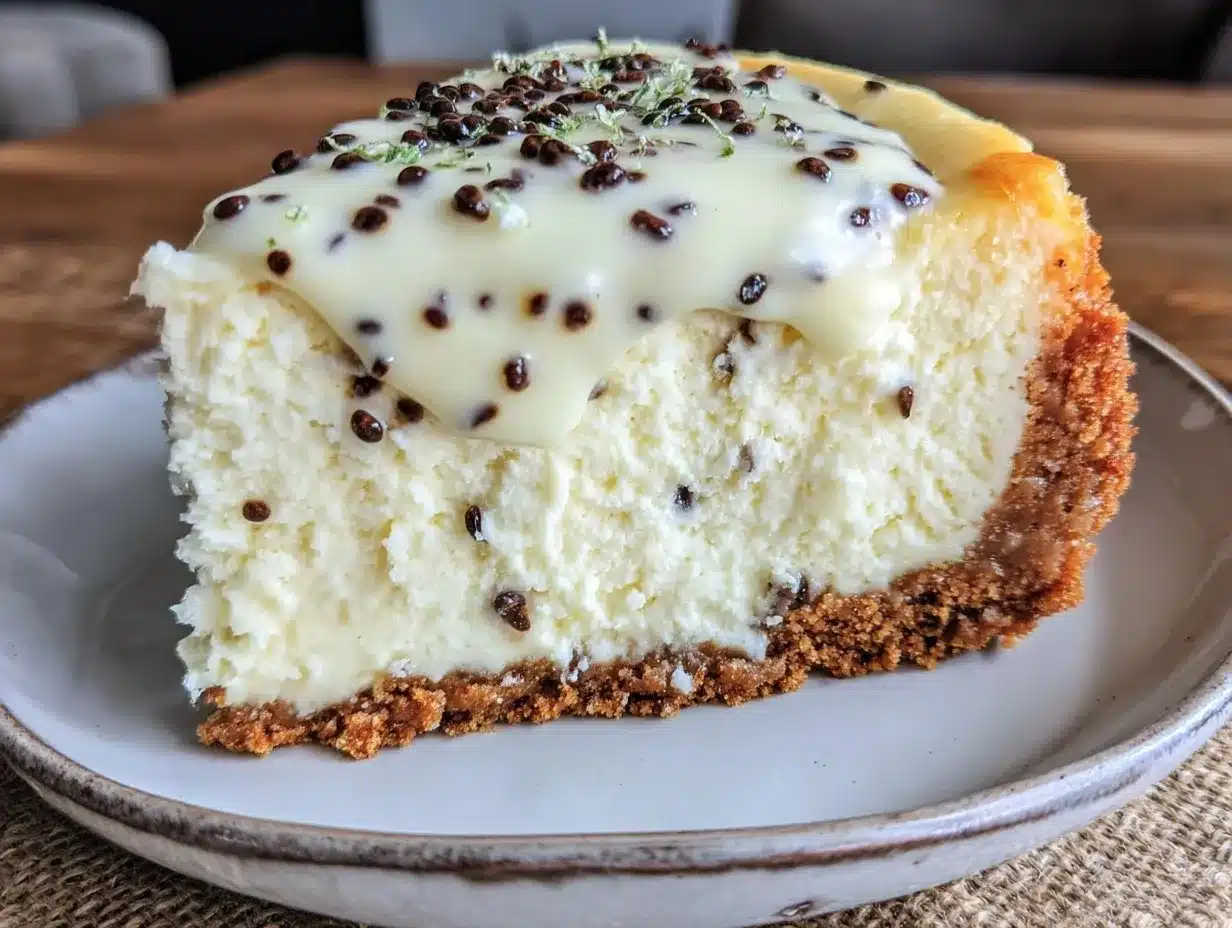
Gluten-Free Graham Cracker Crumbs (1 ½ cups / 150g) — I love the brand Nabisco Gluten-Free Grahams. They have the right sweetness and texture. If you can’t find them, you can make your own by crushing gluten-free graham crackers in a food processor. You want them fine, not chunky.
Unsalted Butter (6 tablespoons / 85g) — Melted. I like to brown the butter first for this crust. It adds a nutty, toasty flavor that elevates the whole dessert. It’s the “buttery” part of the “buttery graham crust.” Trust me on this.
Granulated Sugar (3 tablespoons / 40g) — Just enough to sweeten the crust. It helps the crumbs stick together.
Salt (¼ teaspoon) — A pinch of salt balances the sweetness. Never skip the salt in baking.
Equipment Needed
You don’t need fancy gadgets, but having the right tools makes this much easier.
9-Inch Springform Pan — This is essential. The sides pop off, making it easy to remove the cake. Make sure it’s a good quality one that doesn’t leak. I wrap the bottom in foil just to be safe, even with good pans.
Food Processor — For crushing the graham crackers and mixing the crust. It’s faster and more consistent than doing it by hand.
Stand Mixer or Hand Mixer — Mixing the filling by hand is possible, but it takes a lot of elbow grease. A mixer ensures the cream cheese is completely smooth and aerated.
Fine-Mesh Sieve — This is the “secret” tool. Straining the batter removes any tiny lumps of cream cheese or unmixed eggs. It’s the difference between good and amazing texture.
Roasting Pan or Large Cake Pan — For the water bath. This holds the hot water that surrounds the springform pan. It creates a gentle, even heat that prevents cracking.
Offset Spatula — For smoothing the top of the cheesecake. It gives you that professional, flat finish.
How to Make It: Step-by-Step
Alright, let’s get baking. This process is straightforward, but it requires a bit of patience. Don’t rush it.
Step 1: Prep the Crust (10 minutes)
Preheat your oven to 325°F (160°C). In a food processor, pulse the gluten-free graham cracker crumbs until they are fine. Add the melted brown butter, sugar, and salt. Pulse until the mixture looks like wet sand. Press this mixture firmly into the bottom of your 9-inch springform pan. Use the bottom of a measuring cup to pack it down tightly. You want it even and compact. Set it aside while you make the filling.
Step 2: Whip the Cream Cheese (5 minutes)
In a large mixing bowl, add the room-temperature cream cheese. Beat it on medium-low speed until it is completely smooth and creamy. Scrape down the sides of the bowl with a spatula. This step is crucial. If there are any lumps, they will show up in the final product. I usually beat it for about 2-3 minutes until it looks like frosting.
Step 3: Add the Wet Ingredients (3 minutes)
Reduce the mixer speed to low. Gradually add the sugar, sour cream, heavy cream, and vanilla bean paste. Mix until just combined. Do not overmix at this stage. You want it smooth, but you don’t want to incorporate too much air, which can cause cracking later. Scrape the bowl again.
Step 4: Incorporate the Eggs (2 minutes)
Add the eggs one at a time, mixing on low speed just until the yellow disappears. If you overmix here, you’ll add too much air, and the cheesecake might crack in the oven. It’s okay if the batter looks slightly thin; that’s normal.
Step 5: Strain the Batter (5 minutes)
Pour the batter through a fine-mesh sieve into a large measuring cup or bowl. Use a spatula to press the batter through. This removes any remaining lumps and ensures the smoothest possible texture. This step takes patience, but it’s worth it. You’ll see little bits of unmixed cream cheese or egg in the sieve. Discard them.
Step 6: Bake in a Water Bath (1 hour 15 minutes)
Wrap the bottom of your springform pan in heavy-duty aluminum foil (two layers) to prevent water from seeping in. Pour the batter into the crust. Place the springform pan inside a large roasting pan. Pour hot water into the roasting pan until it comes halfway up the sides of the springform pan. Be careful not to splash water into the batter.
Bake at 325°F (160°C) for 1 hour and 15 minutes. The edges should be set, but the center should still jiggle slightly like Jell-O when you shake the pan. It will firm up as it cools. Do not overbake!
Step 7: Cool Slowly (2 hours)
Turn off the oven and crack the oven door open slightly. Let the cheesecake sit in the oven for 1 hour. This gradual cooling prevents cracking. Then, remove it from the water bath and let it cool completely on a wire rack. Once cool, cover it with plastic wrap and refrigerate for at least 6 hours, preferably overnight.
Expert Tips & Tricks
Here’s everything I’ve learned from making this dozens of times. These tips will save you from my mistakes.
Room Temperature is Key — I cannot stress this enough. Your cream cheese, eggs, and sour cream should all be at room temperature. If you forget, soak the eggs in warm water for 5 minutes, and microwave the cream cheese on 30% power for 10-second bursts until it’s soft. Cold ingredients lead to a lumpy batter.
Don’t Overmix — Once you add the eggs, mix on the lowest speed possible. Overmixing incorporates air bubbles, which expand in the oven and then collapse, causing cracks. If you want a perfectly smooth top, tap the pan on the counter a few times after pouring in the batter to release any air bubbles.
The Water Bath is Non-Negotiable — I know it sounds like extra work, but the water bath creates a humid environment that cooks the cheesecake gently. Without it, the edges cook too fast and crack, or the center stays undercooked. If you’re worried about leaks, wrap the pan in foil twice.
Patience Pays Off — Don’t rush the cooling process. If you take it out of the fridge too soon, it will be too soft to slice. The longer it chills, the firmer and cleaner the slices will be. I usually make it the night before a party.
Storage Matters — Store your cheesecake in an airtight container or cover it tightly with plastic wrap. It will keep in the fridge for up to 5 days. If you need to freeze it, wrap the whole cake (or individual slices) in plastic wrap and then aluminum foil. It will last for up to 2 months. Thaw it in the fridge overnight before serving.
Variations & Substitutions
Once you’ve nailed the basic version, here’s how you can mix it up. I’ve tried all of these.
Dairy-Free Version — Use dairy-free cream cheese blocks (like Kite Hill or Miyoko’s). Use coconut cream instead of sour cream and heavy cream. The texture will be slightly different—less tangy, more coconutty—but still delicious. I’ve served this to my dairy-free friends, and they loved it.
Gluten-Free Crust Alternatives — If you’re avoiding gluten but not grains, you can use crushed gluten-free cookies or even almond flour mixed with butter and sugar. But the graham cracker crust is my favorite for its classic flavor.
Fruit Toppings — This vanilla bean cheesecake is a blank canvas. Top it with fresh berries, a raspberry coulis, or caramel sauce. I love it with a simple strawberry compote. It’s also great with a layer of fresh peach melba in the summer.
Chocolate Version — Add ½ cup of unsweetened cocoa powder to the batter. It turns it into a chocolate cheesecake. You can also swirl in some chocolate chips before baking.
Flavor Variations — Add 1 teaspoon of lemon zest to the batter for a lemon vanilla cheesecake. Or add 1 teaspoon of almond extract for an almond vanilla twist. The possibilities are endless.
Serving & Storage
How to serve this beauty? Slice it with a hot knife. Dip your knife in hot water and wipe it dry between each cut. This gives you clean, perfect slices. Serve it with fresh berries, whipped cream, or a drizzle of caramel.
For storage, keep it in the fridge in an airtight container. It will last for up to 5 days. If you freeze it, wrap it tightly in plastic wrap and aluminum foil. It will last for up to 2 months. Thaw it in the fridge overnight before serving.
I usually serve this straight from the fridge. It’s firm and rich, perfect for a dinner party dessert. But if you prefer a softer texture, let it sit at room temperature for 15 minutes before slicing.
Nutrition Information
I’m not a nutritionist, but here’s the breakdown if you’re tracking. This is a rich dessert, so enjoy it in moderation.
Per Serving (based on 12 slices):
- Calories: 380
- Protein: 6g
- Carbs: 28g
- Fiber: 1g
- Sugar: 20g
- Fat: 28g
- Saturated Fat: 16g
- Cholesterol: 95mg
- Sodium: 220mg
Look, this is comfort food with cream cheese and butter. It’s not a diet recipe. But it’s way better than store-bought, costs less, and I know exactly what’s in it. When I want to make it lighter, I use the dairy-free version and reduce the sugar. But usually? I just eat a reasonable portion and enjoy it.
Final Thoughts
So that’s my go-to ultra-creamy vanilla bean cheesecake! I’ve probably talked your ear off at this point, but when you make a recipe this often, you have a lot to say about it. This has saved dessert nights more times than I can count. It’s my answer to “what’s for dessert” when I want something special but don’t want to stress.
My family is happy, my gluten-free friends are happy, and I’m happy because I’m not stressed about cooking. Make it yours! Try different toppings, swap in your favorite flavors, or adjust the sugar to your taste. The best recipes are the ones you adapt to your family’s tastes.
If you make this, drop a comment and let me know what you think! I love hearing how recipes turn out in your kitchen. And if something doesn’t work, tell me that too—I’m here to help troubleshoot. Happy baking! And I hope your kitchen smells half as good as mine does right now.
Frequently Asked Questions
Can I use extract instead of vanilla bean paste?
Yes, you can. Use 1 tablespoon of pure vanilla extract. However, you won’t get those beautiful black specks, and the flavor won’t be as complex. Vanilla bean paste is worth the extra cost for this recipe because the flavor is so prominent.
Why did my cheesecake crack?
Cracking is usually caused by overmixing (which incorporates too much air) or overbaking. Make sure you mix the eggs on low speed, and don’t bake it until it’s completely firm. The center should still jiggle slightly. Also, the gradual cooling in the turned-off oven helps prevent cracks.
Can I make this dairy-free?
Absolutely. Use dairy-free cream cheese blocks (not tubs), coconut cream instead of sour cream and heavy cream, and dairy-free butter for the crust. The texture will be slightly different, but it’s still incredibly creamy and delicious. I’ve tested this with Kite Hill and Miyoko’s cream cheese, and both work well.
How long does this cheesecake last?
It lasts for up to 5 days in the refrigerator, covered tightly with plastic wrap or in an airtight container. It actually tastes better on day two, as the flavors have time to meld. If you need to freeze it, wrap it tightly in plastic wrap and aluminum foil. It will last for up to 2 months.
Can I use a different pan size?
You can, but the baking time will change. If you use an 8-inch pan, the cheesecake will be taller and may need more baking time. If you use a 10-inch pan, it will be thinner and bake faster. Keep an eye on it and check for doneness a few minutes earlier or later than the recipe states.
Do I really need a water bath?
It’s highly recommended. The water bath creates a humid environment that cooks the cheesecake gently and evenly. Without it, the edges may cook too fast and crack, or the center may stay undercooked. If you’re worried about leaks, wrap the springform pan in two layers of heavy-duty aluminum foil.
Can I add mix-ins like chocolate chips or fruit?
Yes, you can. Fold in ½ cup of chocolate chips or 1 cup of fresh berries after mixing the batter. Be careful not to overmix when adding mix-ins. Also, keep in mind that fruit can add moisture, which might affect the baking time slightly.
Pin This Recipe!
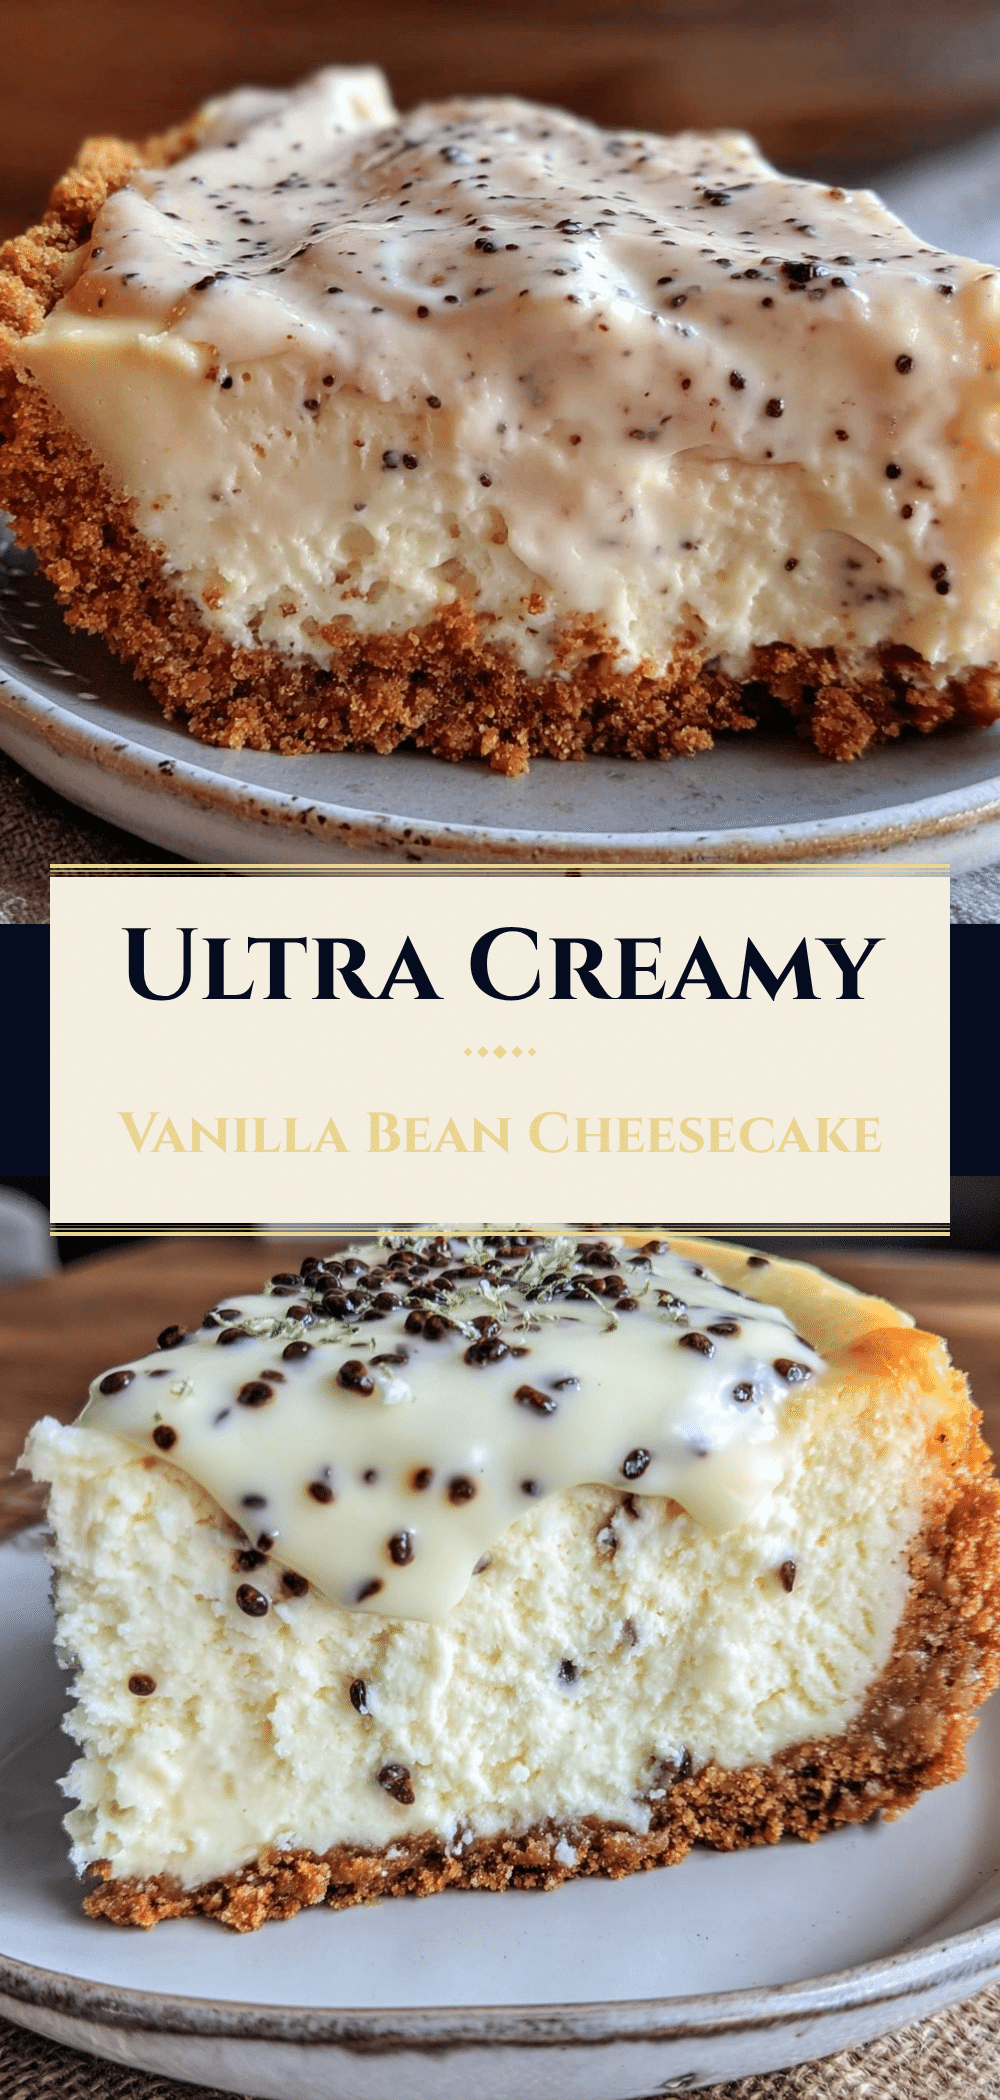
Ultra-Creamy Vanilla Bean Cheesecake: Perfect Gluten-Free Recipe
- Total Time: 8 hours 45 minutes (includes cooling and chilling)
- Yield: 12 servings 1x
Description
A dense, rich, and silky smooth vanilla bean cheesecake with a buttery graham cracker crust. This recipe is naturally gluten-free and includes options for dairy-free diets, ensuring a perfect texture without compromise.
Ingredients
- For the Crust:
- 1 ½ cups (150g) Gluten-Free Graham Cracker Crumbs
- 6 tablespoons (85g) Unsalted Butter, melted and browned
- 3 tablespoons (40g) Granulated Sugar
- ¼ teaspoon Salt
- For the Filling:
- 32 oz (900g) Full-Fat Cream Cheese, room temperature
- 1 cup (240g) Full-Fat Sour Cream, room temperature
- ½ cup (120ml) Heavy Cream, room temperature
- 1 cup (200g) Granulated Sugar
- 2 tablespoons Vanilla Bean Paste (or 1 large vanilla bean, scraped)
- 4 large Eggs, room temperature
- 2 tablespoons Gluten-Free Flour Blend (1:1 baking blend)
Instructions
- Preheat oven to 325°F (160°C). In a food processor, pulse graham cracker crumbs until fine. Add brown butter, sugar, and salt; pulse until mixture resembles wet sand.
- Press the crust mixture firmly into the bottom of a 9-inch springform pan. Use the bottom of a measuring cup to pack it down tightly. Set aside.
- In a large mixing bowl, beat the room-temperature cream cheese on medium-low speed until completely smooth and creamy (about 2-3 minutes). Scrape down the sides of the bowl.
- Reduce mixer speed to low. Gradually add sugar, sour cream, heavy cream, and vanilla bean paste. Mix until just combined. Do not overmix.
- Add eggs one at a time, mixing on low speed just until the yellow disappears. Avoid incorporating too much air.
- Pour the batter through a fine-mesh sieve into a large measuring cup or bowl to remove any lumps. Press through with a spatula.
- Wrap the bottom of the springform pan in two layers of heavy-duty aluminum foil. Pour the strained batter into the crust.
- Place the springform pan inside a large roasting pan. Pour hot water into the roasting pan until it comes halfway up the sides of the springform pan.
- Bake at 325°F (160°C) for 1 hour and 15 minutes. The edges should be set, but the center should still jiggle slightly like Jell-O.
- Turn off the oven and crack the door open slightly. Let the cheesecake sit in the oven for 1 hour to cool gradually.
- Remove from the water bath and let cool completely on a wire rack. Cover with plastic wrap and refrigerate for at least 6 hours, preferably overnight.
- Slice with a hot knife for clean cuts. Serve with fresh berries or whipped cream.
Notes
Ensure all ingredients (cream cheese, eggs, sour cream) are at room temperature to prevent lumps. Do not overmix the batter after adding eggs to avoid cracking. The water bath is essential for even cooking and preventing cracks. The cheesecake tastes better on day two as flavors meld. Can be frozen for up to 2 months.
- Prep Time: 30 minutes
- Cook Time: 1 hour 15 minutes
- Category: Dessert
- Cuisine: American
Nutrition
- Serving Size: 1 slice
- Calories: 380
- Sugar: 20
- Sodium: 220
- Fat: 28
- Saturated Fat: 16
- Carbohydrates: 28
- Fiber: 1
- Protein: 6
Keywords: gluten-free cheesecake, vanilla bean cheesecake, dairy-free dessert, creamy cheesecake, graham cracker crust, make-ahead dessert


