My grandmother’s kitchen didn’t smell like coffee. It smelled like burnt sugar and rosewater, the scent of baklava and cardamom tea. But when I moved out on my own and started hosting dinner parties, I wanted something different. I wanted that deep, bitter-sweet aroma of roasted espresso beans to greet guests at the door. The problem? Every tiramisu I made was either a soggy mess or a dry brick. I spent three years failing at this one dessert before I finally cracked the code.
I’m not kidding when I say I’ve made this ultra-creamy tiramisu at least forty times. Forty. I’ve tested different mascarpone brands, experimented with soaking times, and even tried swapping coffee for espresso powder (spoiler: don’t do that). The version I’m sharing with you today is the one that finally made my picky eater husband ask for “just one more slice” three times in a row. It’s the kind of dessert that looks intimidatingly professional but is actually just about getting the ratios right.
This isn’t your average quick fix. This is a proper, traditional Italian-style tiramisu that relies on high-quality ingredients and a few specific techniques to achieve that cloud-like texture. The ladyfingers stay distinct but tender, the cream is silky enough to melt on your tongue, and the coffee kick is strong enough to keep you awake but sweet enough to satisfy any sweet tooth. If you’ve ever been intimidated by making tiramisu from scratch, this recipe is your ticket. It’s rich, it’s indulgent, and it’s going to become the star of your dessert table. Let’s get into why this specific version works better than the rest.
Why You’ll Love This Ultra-Creamy Tiramisu Recipe
There are about ten reasons I keep making this dessert, but here are the big ones that keep it in my regular rotation. This isn’t just another sweet treat; it’s a confidence booster for your hosting skills.
Zero Baking Required — Seriously, if you can whisk eggs and spread cream, you can make this. I’ve made this while half-asleep on a Sunday afternoon because I knew I wanted dessert ready for Monday guests. It’s entirely no-bake, which means you can prep it days in advance without turning your kitchen into an oven.
Make-Ahead Magic — This is the ultimate party-planning hack. Tiramisu needs time to set, and the flavors actually improve after 24 hours. I usually make it the night before a dinner party, which means I’m not stressing over dessert while everyone is finishing their main course. It’s the stress-free hero of any menu.
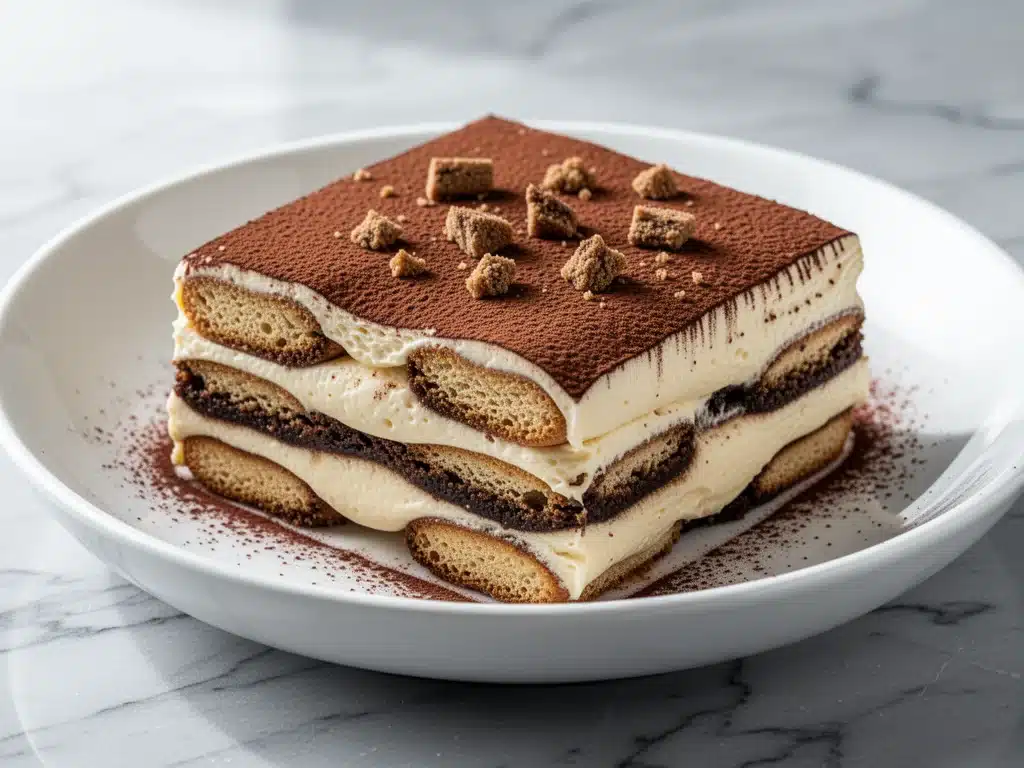
Restaurant-Quality Texture — Most homemade versions are grainy or too dense. This ultra-creamy tiramisu uses a specific whipping technique that incorporates air into the mascarpone, making it light as a feather. The contrast between the airy cream and the soaked ladyfingers is pure magic. It’s the kind of texture you’d pay $12 for at a bistro.
Customizable Strength — Want it boozy? Add a splash of Marsala or rum. Want it strictly coffee-forward? Stick to strong espresso. This recipe is a canvas. I’ve made it with amaretto for Christmas and with just plain coffee for weeknight treats. It adapts to whatever vibe you’re going for.
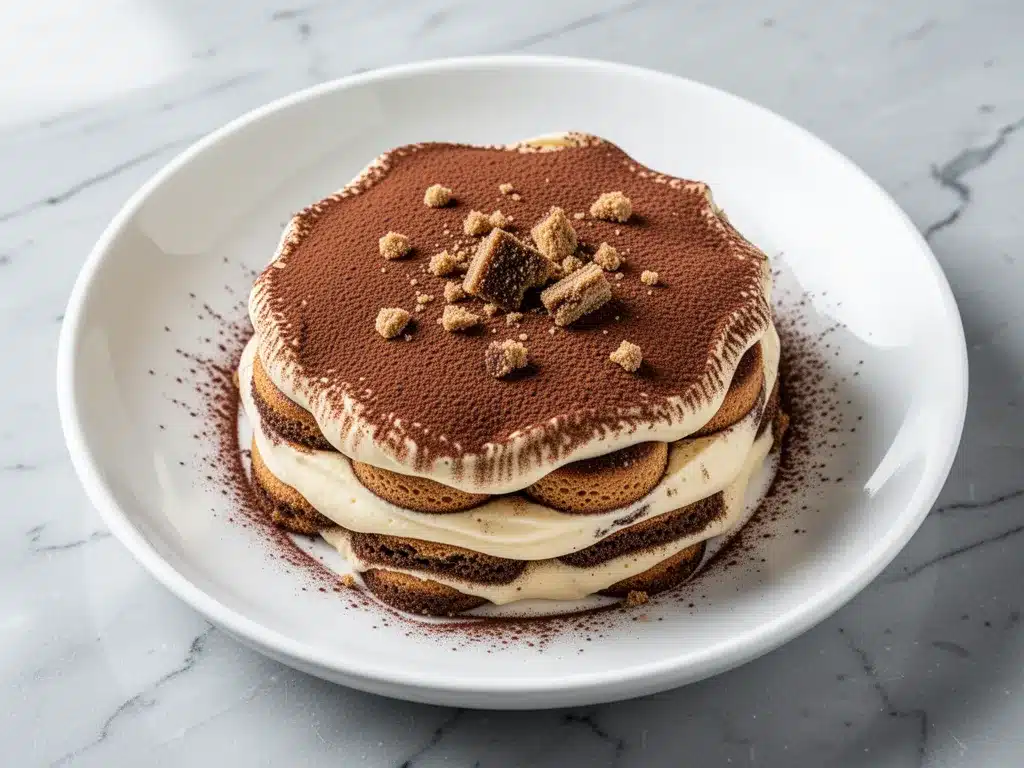
Impressive Presentation — There’s something deeply satisfying about dusting that final layer of cocoa powder and watching it settle into the cream. It looks elegant and rustic at the same time. You don’t need fancy plating skills; the natural layers look beautiful straight from the dish.
This is my go-to when I need to impress without spending hours in the kitchen. It’s reliable, it’s delicious, and it never fails to get compliments. Whether you’re a coffee lover or just have a sweet tooth, this tiramisu hits every note perfectly.
Ingredients You’ll Need
Here’s the thing about tiramisu: the ingredient list is short, which means quality matters more than anything. You can’t hide behind spices or complex sauces. If your mascarpone is old or your coffee is weak, the whole dessert suffers. I’m particular about three ingredients here, and I’ll tell you exactly why.
For the Cream Filling
Mascarpone cheese (16 oz / 450g) — This is the star. Do not substitute with cream cheese. Cream cheese is tangy and dense; mascarpone is mild and buttery. I always buy the tubed version or a high-quality block from a good dairy counter. Make sure it’s cold when you start, but let it sit out for 10 minutes so it’s easy to whisk.
Heavy cream (1 cup / 240ml) — You need full-fat heavy whipping cream for stability. Half-and-half won’t hold peaks. I use the kind that comes in the glass bottle if I can find it—it whips up faster and feels richer. Chill your bowl and whisk attachments beforehand for best results.
Egg yolks (6 large) — These provide richness and emulsification. If you’re worried about raw eggs, you can pasteurize them by whisking them over a double boiler until they reach 160°F, but traditional tiramisu uses raw yolks. I use pasteurized eggs from the carton for peace of mind. The flavor is identical.
Granulated sugar (½ cup / 100g) — Don’t skimp. The sugar balances the bitterness of the coffee and the richness of the cheese. I prefer fine granulated sugar because it dissolves faster into the yolks.
Vanilla extract (1 teaspoon) — Use real vanilla, not imitation. A good quality vanilla adds a floral note that ties the cream together.
For the Coffee Soak
Strong espresso (1 ½ cups / 350ml) — This needs to be strong. If you don’t have an espresso machine, use a Moka pot or very strong brewed coffee from a French press. Instant coffee works in a pinch, but it lacks the depth. Let the coffee cool completely before using—hot coffee will dissolve the ladyfingers instantly.
Espresso powder (1 tablespoon) — Optional, but I recommend it. Adding a tablespoon of instant espresso powder to the cooled coffee intensifies the coffee flavor without adding extra liquid. It’s a game-changer for coffee lovers.
Liqueur (optional) (2-3 tablespoons) — Marsala wine is traditional. Dark rum or Amaretto are great alternatives. Skip this if you’re making it for kids or prefer a non-alcoholic version.
For the Assembly
Ladyfingers (1 package / approx. 24-30 pieces) — Look for Savoiardi cookies. They are dry and crisp, which is what you want. Avoid the soft, sponge-like ladyfingers sold in some stores; they turn to mush too quickly. I buy the Italian brand that comes in the clear plastic bag.
Unsweetened cocoa powder (for dusting) — Use a good quality Dutch-processed cocoa for a darker, smoother dusting. I sift mine to avoid clumps.
Common Questions
Can I use egg whites? Some recipes call for whipped egg whites for extra fluffiness. I’ve tried it, and while it’s lighter, it lacks the richness of the yolks. I stick to yolks for that dense, luxurious mouthfeel.
Where do I find mascarpone? It’s usually in the dairy section near the cream cheese. If your grocery store doesn’t carry it, check an Italian market or order it online. It’s worth the trip.
Equipment Needed
You don’t need fancy gadgets for this, but having the right tools makes the process smoother.
Electric mixer — Stand mixer or hand mixer. You need to whip the cream and yolks to stiff peaks. Doing this by hand is possible but exhausting. I use my stand mixer with the whisk attachment.
Large mixing bowls — You’ll need one for the yolks/sugar, one for the mascarpone, and one for the heavy cream. Make sure they’re clean and dry.
9×13 inch baking dish — This is the standard size for tiramisu. Glass or ceramic works best so you can see the layers. I use a Pyrex dish because it’s sturdy and easy to handle.
Whisk and spatula — A silicone spatula is essential for folding the cream into the mascarpone without deflating it. Don’t use a metal spoon; it won’t get into the corners.
Sieve or fine mesh strainer — For dusting the cocoa powder evenly at the end. This prevents lumps and gives it that professional look.
Measuring cups and spoons — Precision matters here, especially with the sugar and coffee ratio.
Optional but helpful: A small pastry brush for ensuring the ladyfingers are evenly soaked, or a shallow dish for dipping them quickly.
How to Make It: Step-by-Step
Alright, let’s make this! I’m walking you through exactly how I do it, including the little tricks I’ve picked up over the years. This process is methodical but not difficult.
Step 1: Brew and Cool the Coffee
Brew your espresso or strong coffee and stir in the espresso powder and liqueur if using. Pour it into a shallow dish. The most important part here is temperature. The coffee must be completely cool or room temperature. If it’s warm, it will turn your ladyfingers into soup immediately. I usually brew it in the morning and let it sit out while I prep the cream.
Step 2: Whip the Egg Yolks and Sugar
In a large bowl, whisk the egg yolks and sugar together. If you’re pasteurizing, do this over a double boiler until the mixture is thick and pale, about 5 minutes. If using raw pasteurized eggs, just whisk vigorously with an electric mixer on medium-high speed for about 3-4 minutes. You want the mixture to be thick, pale yellow, and ribbon-like when you lift the beaters. This incorporates air and dissolves the sugar.
Step 3: Beat the Mascarpone
In a separate bowl, beat the cold mascarpone cheese with the vanilla extract on medium speed until smooth. Be careful not to overbeat it, or it might separate. You just want it creamy and lump-free. Gently fold the mascarpone into the yolk mixture. Use a spatula and fold from the bottom up. Do this gently to keep the air in the yolks.
Step 4: Whip the Heavy Cream
In a clean, chilled bowl, whip the heavy cream to stiff peaks. This should take about 2-3 minutes on high speed. The cream should hold its shape when you lift the whisk. Be careful not to overwhip it into butter. Once it’s stiff, gently fold it into the mascarpone mixture in two additions. Fold until just combined. The cream should be uniform and airy.
Step 5: Dip the Ladyfingers
This is the critical step. Dip each ladyfinger quickly into the cooled coffee. I mean quickly—about 1-2 seconds per side. You want them soaked but not soggy. If you leave them in too long, they’ll disintegrate. Lay them in a single layer in your 9×13 dish. You’ll need about half the package for the first layer.
Step 6: Layer the Cream
Spread half of the cream mixture over the ladyfingers. Use an offset spatula to get it smooth and even. Then, repeat the process: dip the remaining ladyfingers and layer them on top. Spread the rest of the cream over the second layer. Smooth the top gently.
Step 7: Chill and Dust
Cover the dish tightly with plastic wrap and refrigerate for at least 6 hours, but ideally overnight. This gives the ladyfingers time to absorb the moisture and the flavors to meld. Just before serving, sift a generous layer of cocoa powder over the top. Use a sieve for an even dusting. Slice with a sharp knife and serve cold.
Expert Tips & Tricks
Here’s everything I’ve learned from making this dozens of times. These tips will save you from my mistakes.
The Dip is Everything — The biggest mistake people make is over-soaking the ladyfingers. They should be moist, not dripping. Think of it like dipping a cookie in milk, not soaking a sponge. If your ladyfingers are too soft, your tiramisu will be a mess. Practice the quick dip.
Keep it Cold — Mascarpone and cream are temperature-sensitive. If your kitchen is hot, your cream might not whip properly. Keep your ingredients cold until the last moment. If the cream starts to look grainy, it’s too warm. Put the bowl in the fridge for 10 minutes and try again.
Fold, Don’t Stir — When combining the cream with the mascarpone, use a folding motion. Stirring vigorously deflates the air you worked so hard to incorporate. You want a light, fluffy texture, not a dense paste.
Use Good Cocoa — The cocoa powder is the final impression. Cheap cocoa tastes dusty and bitter. Use a high-quality Dutch-processed cocoa for a smooth, chocolatey finish. It’s the easiest upgrade you can make.
Patience Pays Off — I know you want to eat it now. But if you cut into it after 2 hours, it won’t have set properly. The layers will slide apart. Wait at least 6 hours, but 12-24 hours is ideal. The flavors deepen, and the texture becomes perfect.
Common Mistakes
Mistake: The cream is grainy. Fix: Your mascarpone was too cold or you overmixed it. Let it sit out for 10 minutes before whipping, and mix on low speed.
Mistake: The tiramisu is too watery. Fix: You used warm coffee or over-soaked the ladyfingers. Always use cool coffee and dip quickly.
Mistake: It’s too sweet. Fix: Adjust the sugar next time. Some mascarpone brands are sweeter than others. Taste your cream before assembling.
Variations & Substitutions
Once you’ve nailed the basic version, here’s how you can mix it up. I’ve tried all of these.
Chocolate Tiramisu — Add 2 tablespoons of cocoa powder to the cream mixture. It’s rich and chocolatey, perfect for chocolate lovers.
Strawberry Tiramisu — Swap the coffee for strawberry puree. Dip the ladyfingers in the puree and layer with fresh strawberries. It’s a springtime twist.
Pumpkin Spice Tiramisu — Add pumpkin puree and pumpkin spice to the cream. It’s like a fall version of this dessert. Great for Thanksgiving.
Gluten-Free Option — Use gluten-free ladyfingers. They are often softer, so dip them even faster. The rest of the recipe is naturally gluten-free.
Dairy-Free Option — Use dairy-free mascarpone and coconut cream. It’s not the same, but it’s still delicious. I’ve made it for lactose-intolerant friends, and they loved it.
Alcohol Variations — Try Amaretto for a nutty flavor, or Frangelico for hazelnut. Marsala is traditional, but rum is a classic favorite.
Serving & Storage
How to Serve: I usually serve this straight from the dish, slicing it into squares. It looks rustic and inviting. Pair it with a cup of black coffee or a glass of sweet dessert wine.
Side Dishes: Fresh berries or a simple arugula salad with lemon vinaigrette cuts through the richness. I also like to serve it with ultra-moist pumpkin bread for a fall brunch spread.
Storage: Store in the refrigerator, covered tightly with plastic wrap, for up to 5 days. It actually gets better after day 2.
Freezing: Tiramisu doesn’t freeze well. The cream separates and the ladyfingers get icy. Make it fresh or store in the fridge.
Pro Tip: If you’re serving a crowd, make two smaller dishes instead of one large one. It’s easier to handle and serves better.
Nutrition Information
I’m not a nutritionist, but here’s the breakdown if you’re tracking. This is a rich dessert, so portions matter.
Per Serving (based on 12 servings):
– Calories: 380
– Protein: 6g
– Carbs: 32g
– Fiber: 1g
– Sugar: 22g
– Fat: 24g
– Saturated Fat: 14g
– Cholesterol: 180mg
– Sodium: 120mg
What’s Good: High in protein from the eggs and cheese. Good source of calcium.
What to Know: High in calories and sugar due to the cream, sugar, and ladyfingers. Contains dairy and eggs. Not suitable for vegans or those with egg allergies.
My Take: This is an indulgent treat. Enjoy it in moderation. It’s worth every calorie for the flavor and texture.
Final Thoughts
So that’s my go-to ultra-creamy tiramisu! I’ve probably talked your ear off at this point, but when you make a recipe this often, you have a lot to say about it. This dessert has saved my dinner parties more times than I can count. It’s my answer to “what’s for dessert?” when I want something fancy but don’t have the energy to bake.
My family loves it, my friends ask for the recipe, and I love making it because it’s so forgiving once you know the tricks. Make it yours! Try different liqueurs, add fresh fruit, or experiment with the cocoa dusting. The best recipes are the ones you adapt to your tastes.
If you make this, drop a comment and let me know what you think! I love hearing how recipes turn out in your kitchen. And if something doesn’t work, tell me that too—I’m here to help troubleshoot. Happy cooking!
Frequently Asked Questions
Can I make this ahead of time?
Yes! This is actually better made ahead. Make it 24-48 hours before serving. It needs time to set and for the flavors to meld. It will keep in the fridge for up to 5 days.
Why did my tiramisu turn out watery?
Usually, this happens because the coffee was too warm or you over-soaked the ladyfingers. Always use cool coffee and dip the cookies quickly. Also, make sure your cream is whipped to stiff peaks.
Can I use instant coffee instead of espresso?
You can, but it won’t taste as good. Instant coffee lacks the depth and aroma of real espresso. If you must use it, dissolve a tablespoon in a little hot water and let it cool completely before adding sugar and liqueur.
Is it safe to eat raw eggs?
Traditional tiramisu uses raw egg yolks. To make it safer, use pasteurized eggs. You can also pasteurize your own eggs by whisking them over a double boiler until they reach 160°F. This kills any bacteria while keeping the eggs creamy.
Can I freeze tiramisu?
I don’t recommend it. The cream separates when thawed, and the ladyfingers become icy and mushy. It’s best eaten fresh or chilled for a few days.
What kind of ladyfingers should I use?
Use Savoiardi cookies. They are dry and crisp, which is what you need. Avoid soft sponge cakes or pre-soaked ladyfingers. Look for the Italian brand in the clear bag for the best texture.
Can I make this without alcohol?
Absolutely. Just use strong coffee or espresso without any liqueur. The flavor will still be rich and delicious, just less boozy. It’s great for kids or non-drinkers.
Pin This Recipe!
Ultra-Creamy Tiramisu: Best Easy Dessert Recipe
- Total Time: 6 hours 30 minutes
- Yield: 12 servings 1x
Description
A traditional Italian-style no-bake tiramisu featuring ultra-creamy mascarpone filling and perfectly soaked ladyfingers. This recipe yields a restaurant-quality texture that is rich, indulgent, and easy to make ahead.
Ingredients
- 16 oz (450g) mascarpone cheese, cold
- 1 cup (240ml) heavy whipping cream, chilled
- 6 large egg yolks (pasteurized recommended)
- ½ cup (100g) granulated sugar
- 1 teaspoon vanilla extract
- 1 ½ cups (350ml) strong espresso, cooled completely
- 1 tablespoon espresso powder (optional)
- 2–3 tablespoons liqueur (Marsala, rum, or Amaretto, optional)
- 1 package (approx. 24-30 pieces) Savoiardi ladyfingers
- Unsweetened cocoa powder, for dusting
Instructions
- Brew strong espresso or coffee and stir in espresso powder and liqueur if using. Pour into a shallow dish and let cool completely to room temperature.
- In a large bowl, whisk egg yolks and sugar together vigorously with an electric mixer on medium-high speed for 3-4 minutes until thick, pale yellow, and ribbon-like. (If pasteurizing, whisk over a double boiler until 160°F).
- In a separate bowl, beat the cold mascarpone cheese with vanilla extract on medium speed until smooth and lump-free.
- Gently fold the mascarpone mixture into the egg yolk mixture using a spatula, folding from the bottom up to maintain airiness.
- In a clean, chilled bowl, whip the heavy cream to stiff peaks (about 2-3 minutes).
- Gently fold the whipped cream into the mascarpone mixture in two additions until just combined and uniform.
- Quickly dip each ladyfinger into the cooled coffee for 1-2 seconds per side. Do not over-soak.
- Arrange half of the dipped ladyfingers in a single layer in a 9×13 inch baking dish.
- Spread half of the cream mixture over the first layer of ladyfingers.
- Repeat with the remaining ladyfingers and the rest of the cream mixture, smoothing the top.
- Cover tightly with plastic wrap and refrigerate for at least 6 hours, ideally overnight (12-24 hours).
- Just before serving, sift a generous layer of cocoa powder over the top. Slice with a sharp knife and serve cold.
Notes
Ensure the coffee is completely cool before dipping ladyfingers to prevent them from turning to mush. Use high-quality Dutch-processed cocoa for the best dusting. For a non-alcoholic version, omit the liqueur. The dessert improves in flavor after 24 hours in the refrigerator.
- Prep Time: 30 minutes
- Cook Time: 0 minutes
- Category: Dessert
- Cuisine: Italian
Nutrition
- Serving Size: 1 slice
- Calories: 380
- Sugar: 22
- Sodium: 120
- Fat: 24
- Saturated Fat: 14
- Carbohydrates: 32
- Fiber: 1
- Protein: 6
Keywords: tiramisu, italian dessert, no-bake dessert, mascarpone, coffee dessert, easy tiramisu, make-ahead dessert


