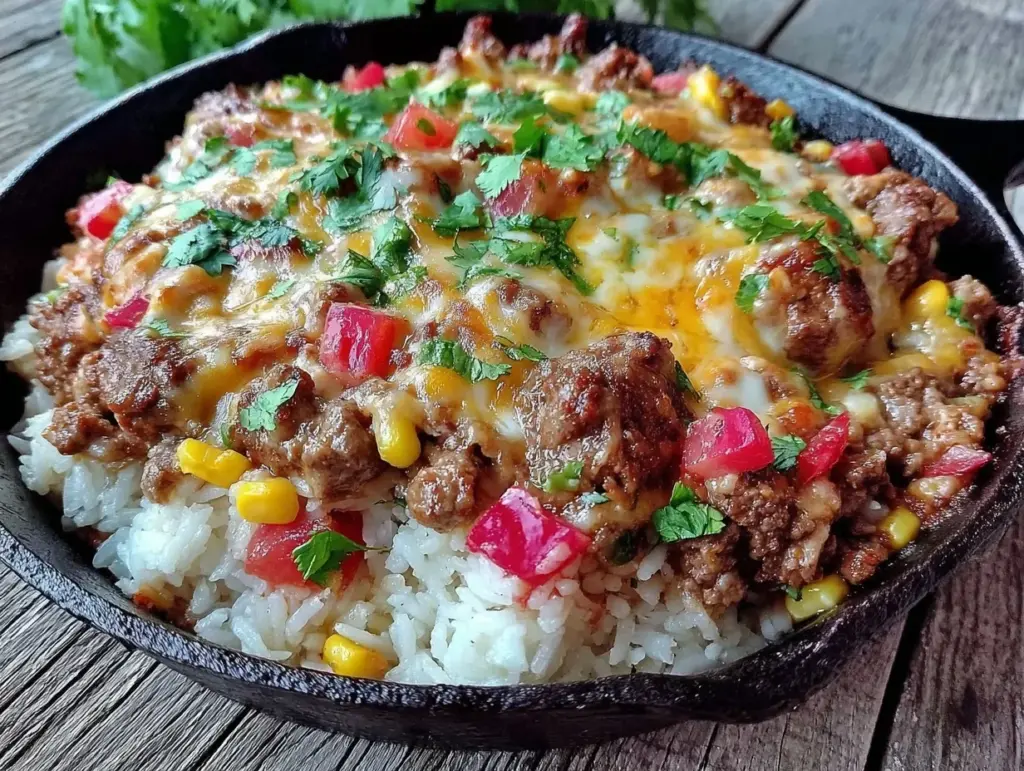
Last Tuesday, I was staring into the abyss of my refrigerator. It was 6:45 PM, I was exhausted, and the only thing standing between me and ordering yet another $25 delivery was this weird half-empty bag of rice, some ground beef I’d forgotten about, and a jar of salsa that was slowly turning into jelly. I didn’t want takeout. I didn’t want to wash a dozen pans. I just wanted something hot, cheesy, and comforting that didn’t involve a thirty-minute prep time.
So I threw everything into my largest skillet. I was skeptical. I’ve made my share of “one-pan” meals that ended up as a soggy, burnt mess requiring a scrub brush and a lot of regret. But this One-Pan Cheesy Ground Beef Taco Skillet with Fluffy Rice was different. It worked. The rice cooked perfectly in the beefy juices, the cheese melted into a golden crust, and my family devoured it in under 20 minutes. No delivery apps, no piles of dirty dishes, just pure, garlicky, cheesy comfort.
I’ve made this taco skillet at least a dozen times since that night. It’s become my go-to answer for “what’s for dinner?” when I’m too tired to think but too hungry to compromise. If you’re looking for a meal that tastes like it came from a busy restaurant kitchen but costs pennies and takes zero effort to clean up, this is it. It’s better than takeout, easier than delivery, and honestly? It’s better than most of the taco bowls I’ve ever paid $14 for.
Why You’ll Love This Taco Skillet
There are about ten reasons I keep making this recipe, but here are the big ones that keep it in my regular rotation:
- Stupid Simple One-Pan Cleanup — Seriously, if you can boil water and open a jar, you can make this. I cook it, serve it, and eat it from the same skillet. That’s it. No pot for rice, no separate pan for beef, no baking dish for cheese. Just one pan. My husband thinks I’m a genius. I think I’m just lazy (in the best way).
- Lightning Fast — 25 minutes from start to finish, and only 10 of those are active stirring. I make this on weeknights when I get home with two hours of energy left. The rice cooks while the beef browns, and the cheese melts while you set the table.
- Pantry-Friendly — You probably have 80% of these ingredients already. Ground beef, rice, salsa, cheese, spices. I keep these stocked specifically so I can make this on a whim when life gets chaotic.
- Crowd-Pleaser — I’ve served this to my picky 8-year-old (who usually only eats chicken nuggets) and my foodie friend who claims she “doesn’t like Mexican food” (she lied, she asked for seconds). Everyone loves it. The cheesy, savory flavor is universal.
- Makes Amazing Leftovers — Actually tastes better the next day. The flavors meld together overnight. I deliberately make extra for lunch throughout the week. It reheats beautifully in the microwave, getting gooey and warm.
- Budget-Smart — Feeds 4-6 people for under $12. That’s less than one meal at a fast-casual taco place. And it’s healthier because you control the sodium and cheese ratio.
This is my go-to when I need dinner to just work. No complicated techniques, no weird ingredients, just reliable, delicious food that makes everyone happy.
Ingredients You’ll Need
Here’s the best part: you probably have most of this already. I’m particular about three ingredients here, and I’ll tell you exactly why. This looks like a short list, but it’s packed with flavor.
For the Base
Ground beef (1 pound / 450g) — I use 80/20 lean beef for the best flavor-to-fat ratio. It keeps the rice juicy. If you’re watching fat, 90/10 works, but drain the excess grease well. I’ve tried turkey, but it’s drier and needs more liquid.
Long-grain white rice (1 cup / 185g uncooked) — Do not use instant rice or brown rice for this specific method. Long-grain (like Jasmine or Basmati) cooks fluffy and absorbs the beef juices perfectly. I use Uncle Ben’s or store brand—both work great.
Water or low-sodium beef broth (1 ¾ cups / 415ml) — Water works fine, but broth adds depth. I keep low-sodium broth on hand so I can control the saltiness of the final dish.
Neutral oil (1 tablespoon) — Vegetable or canola oil. Just enough to coat the pan and help the beef brown.
For the Flavor
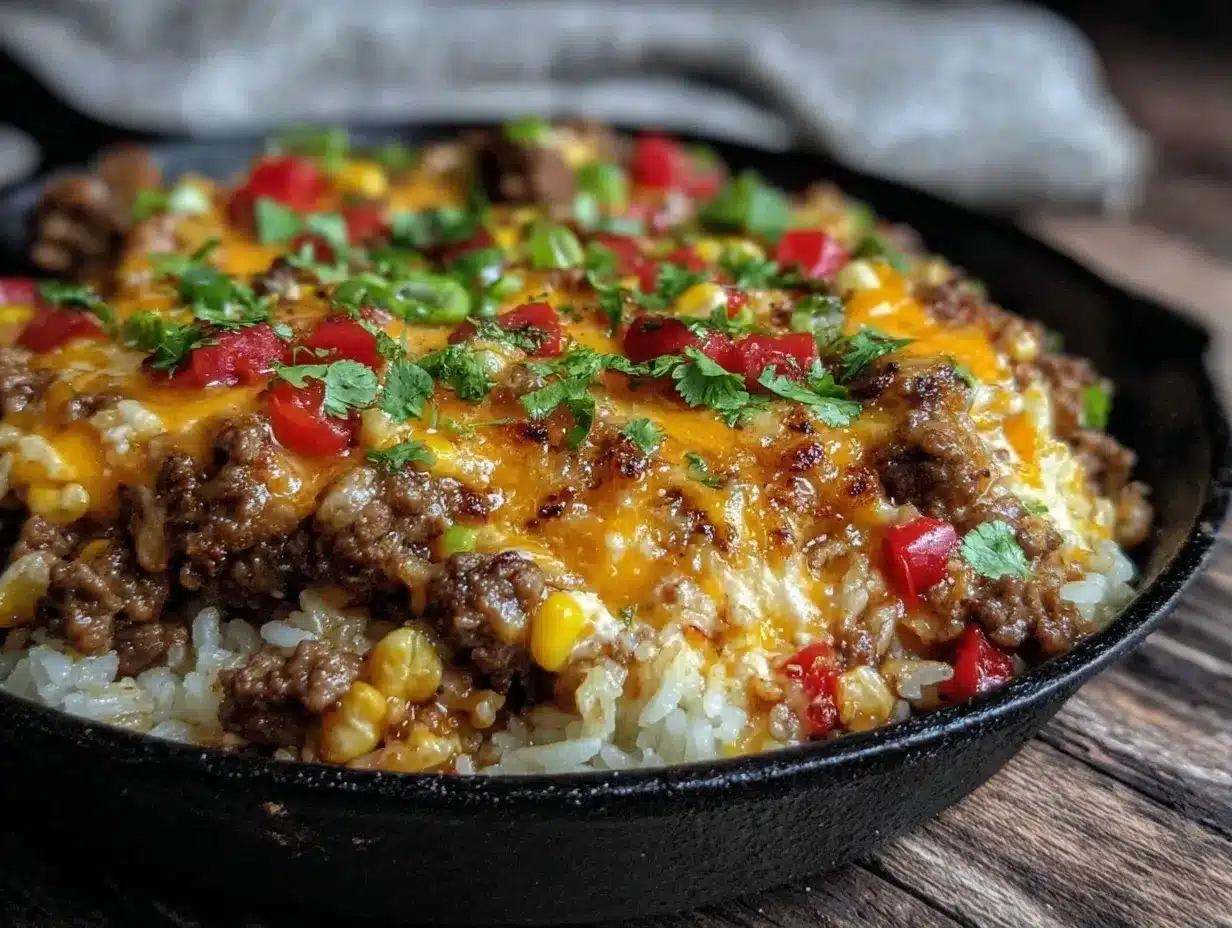
Yellow onion (1 medium, diced / about 200g) — Sweet and aromatic. White onions are too sharp for this. Yellow gives that classic taco base flavor.
Garlic (4 cloves, minced / about 2 tablespoons) — Yes, four cloves. Don’t skimp. Fresh only—no jarred garlic in this recipe. It makes a huge difference in the aroma.
Taco seasoning (1 packet / 1 ounce) — I use a standard store-bought packet (like Old El Paso or McCormick) for convenience. It’s perfectly balanced. If you prefer homemade, use 1 tsp cumin, 1 tsp chili powder, ½ tsp paprika, ½ tsp garlic powder, and ¼ tsp cayenne.
Salsa (1 cup / 240g) — I use a medium chunky salsa (like Pace or Herdez). It adds moisture and acidity. Avoid watery pico de gallo; you need the body of a cooking salsa. This is the secret to fluffy rice!
Black beans (1 can / 15 oz, drained and rinsed) — Adds protein and texture. I love the contrast of the creamy beans against the fluffy rice. If you’re skipping beans, add an extra half-cup of rice or some corn.
For the Cheese Topping
Shredded Mexican blend cheese (2 cups / 200g) — I buy the pre-shredded bag for convenience, but block cheese shreds better and melts smoother. Cheddar and Monterey Jack work great. Avoid pre-shredded if it has potato starch, which can make it clumpy.
Optional Toppings — Sour cream, chopped cilantro, sliced jalapeños, guacamole, hot sauce. These are for garnish, but they turn a good skillet into a great one.
Personal Tip: I always keep a block of cheddar and grate it myself when I have time. It melts into a silkier sauce than the bagged stuff. But honestly? The bagged stuff works fine when you’re tired.
Equipment Needed
You don’t need fancy equipment for this. Here’s what I actually use.
Large 12-inch skillet or Dutch oven — I use a 12-inch stainless steel skillet. It needs to be wide enough to spread the rice in an even layer. A deep skillet or Dutch oven is better so the steam doesn’t escape too quickly.
Wooden spoon or spatula — For stirring the beef and mixing the rice. Silicone works too. Don’t use metal on non-stick.
Measuring cups and spoons — Standard stuff. Dollar store versions work fine.
Knife and cutting board — For the onion and garlic. Sharp knives make you cry less—learned this the hard way.
Colander — For draining the black beans. Or just use a spoon to scoop them out if you’re being lazy.
Lid that fits your skillet — Crucial! You need to trap the steam to cook the rice. If your skillet doesn’t have a lid, use foil or a baking sheet.
Optional but nice: Garlic press — Saves time. Paprika shaker — For dusting the top before melting.
How to Make It: Step-by-Step
Alright, let’s make this! I’m walking you through exactly how I do it, including the little tricks I’ve picked up. This method ensures the rice stays fluffy and doesn’t turn into mush.
Step 1: Prep Your Ingredients (5 minutes)
Before you start cooking, dice your onion, mince your garlic, and drain your beans. I know it seems fussy, but it makes the actual cooking way less stressful. Measure out your rice and seasoning. Once you start cooking, things move fast.
Step 2: Brown the Beef (5-7 minutes)
Heat the oil in your large skillet over medium-high heat. Add the ground beef and diced onion. Break up the beef with your spoon as it cooks. Cook for 5-7 minutes until the beef is no longer pink and the onions are soft. If there’s a lot of excess grease, drain it now. You want the pan to be moist but not swimming in oil. This step builds the flavor base.
Step 3: Add Seasoning and Salsa (2 minutes)
Reduce heat to medium. Add the taco seasoning and stir well to coat the beef. Pour in the salsa and stir. Let it simmer for 1-2 minutes to let the flavors meld. The salsa will start to bubble and thicken slightly. This is where the aroma hits you—it smells like a taco restaurant.
Step 4: Add Rice and Liquid (1 minute)
Stir in the uncooked rice and the water (or broth). Make sure the rice is submerged in the liquid. If it’s not, add a splash more water. The ratio is key: 1 cup rice to 1 ¾ cups liquid. Stir well to combine.
Step 5: Simmer the Rice (15-18 minutes)
Bring the mixture to a boil. Once it’s bubbling, reduce heat to low. Cover the skillet tightly with a lid. Let it simmer for 15-18 minutes. DO NOT PEEK. I know you want to, but lifting the lid releases steam and ruins the cooking process. After 15 minutes, check the rice. It should be tender and the liquid should be absorbed. If it’s still crunchy, cover and cook for 2-3 more minutes.
Step 6: Add Beans and Cheese (2 minutes)
Remove the skillet from heat. Stir in the drained black beans. They just need to warm through. Sprinkle the shredded cheese evenly over the top. Cover the skillet again and let it sit for 2-3 minutes. The residual heat will melt the cheese perfectly. You’ll see the cheese bubbling and turning golden.
Step 7: Serve and Enjoy
Fluff the rice with a fork. Top with sour cream, cilantro, and jalapeños if you like. Serve immediately while it’s hot and cheesy. This is best eaten straight from the pan, passed around the table.
Total Time: About 25 minutes (10 minutes active, 15 minutes hands-off)
Troubleshooting:
- Rice is still hard? Add ¼ cup water, cover, and cook 5 more minutes.
- Rice is mushy? You used too much liquid or peeked too often. Next time, use less water.
- Bottom is burning? Heat was too high. Keep it on low simmer after boiling.
Expert Tips & Tricks
Here’s everything I’ve learned from making this dozens of times. These tips will save you from my mistakes.
Don’t Rinse the Rice — Unlike pasta or pilaf, you don’t need to rinse the rice here. The starch helps thicken the sauce and cling to the beef. Rinsing makes it too loose.
Use Low-Sodium Broth — Taco seasoning and salsa are already salty. Using low-sodium broth prevents the final dish from being inedibly salty. I learned this the hard way with a batch that tasted like a salt mine.
The Lid Trick — If your skillet lid doesn’t seal well, lay a piece of aluminum foil over the pan before putting the lid on. This traps the steam effectively, ensuring the rice cooks evenly.
Room Temperature Cheese — Cold cheese takes longer to melt. If you’re in a rush, let the cheese sit out for 10 minutes. It melts faster and creates a smoother layer.
Common Mistakes:
- Mistake: Rice is crunchy. Fix: Not enough liquid or heat too high. Ensure the liquid covers the rice before covering the pan.
- Mistake: Beef is dry. Fix: Cooked too long before adding salsa. Add salsa as soon as beef is browned to keep it moist.
- Mistake: Sauce is watery. Fix: Used too much salsa or didn’t simmer long enough. Let it reduce after adding salsa.
Variations & Substitutions
Once you’ve nailed the basic version, here’s how you can mix it up. I’ve tried all of these.
Chicken Version — Swap ground beef for diced chicken breast. Cook chicken until done, then proceed. It’s leaner and milder.
Veggie-Loaded — Add 1 cup corn kernels and 1 diced bell pepper with the onions. Adds sweetness and crunch. My kids love the corn.
Spicy Kick — Add 1 diced jalapeño with the onions and use hot salsa. Or add a teaspoon of cayenne pepper to the seasoning.
Lighter Version — Use ground turkey or chicken breast and low-fat cheese. It’s still good, just less rich. I make this when I’m trying to be “healthy.”
Gluten-Free — This recipe is naturally gluten-free! Just ensure your taco seasoning and salsa are certified GF (some brands use wheat as a thickener). I use Old El Paso GF seasoning.
Dairy-Free — Skip the cheese or use dairy-free shreds (like Violife or Daiya). The rice will still be flavorful from the salsa and spices. My lactose-intolerant friend requests this version.
Protein Boost — Add a can of drained pinto beans or chickpeas. Or top with a fried egg. I do this when I’m working out a lot.
Serving & Storage
How to Serve
I usually serve this straight from the skillet at the dinner table—it looks rustic and stays warm. But here are other ways I’ve enjoyed it:
Side Dishes: Garlic bread (obviously), simple green salad with lime vinaigrette, or roasted sweet potato wedges. A side of guacamole is always welcome.
Toppings Bar: When I have guests, I put out: extra cheese, sour cream, hot sauce, chopped cilantro, diced avocado. Everyone customizes their bowl.
Storage Instructions
Refrigerator: Store in an airtight container for up to 4 days. The rice will firm up in the fridge—totally normal. It actually tastes better the next day as the flavors meld.
Reheating: Best method: Add to a skillet with a splash of water or broth over low heat. Stir until heated through and creamy again. Microwave method: Heat in 30-second intervals, stirring between. Add a splash of water if it’s too thick. Never works: Trying to reheat in the pot you cooked it in. It always burns on the bottom. Ask me how I know.
Freezing: Honestly, this doesn’t freeze well because of the dairy. The cheese separates when thawed. Make it fresh or store in the fridge for up to 4 days.
Meal Prep: Make the sauce and rice on Sunday, store in the fridge. Reheat each night and add fresh cheese. Takes 5 minutes and tastes way better than fully reheated pasta.
Pro tip: If leftovers are drying out, stir in a tablespoon of butter and a splash of milk when reheating. Brings back that creamy texture.
Nutrition Information
I’m not a nutritionist, but here’s the breakdown if you’re tracking.
Per Serving (based on 6 servings):
- Calories: 450
- Protein: 22g
- Carbs: 48g
- Fiber: 4g
- Sugar: 4g
- Fat: 18g
- Saturated Fat: 8g
- Cholesterol: 60mg
- Sodium: 680mg
What’s Good: Decent protein from beef and beans. Calcium from cheese. Can add vegetables to boost nutrition. More filling than it looks.
What to Know: Higher in calories from cheese and beef. Contains dairy and gluten (if seasoning has wheat). Moderate sodium (use low-sodium broth to reduce).
My Take: Look, this is comfort food with beef and cheese. It’s not a diet recipe. But it’s way better than takeout, costs less, and I know exactly what’s in it. When I want to make it lighter, I use turkey and less cheese. But usually? I just eat a reasonable portion and enjoy it.
Final Thoughts
So that’s my go-to One-Pan Cheesy Ground Beef Taco Skillet with Fluffy Rice! I’ve probably talked your ear off at this point, but when you make a recipe this often, you have a lot to say about it.
This has saved weeknight dinners more times than I can count. It’s my answer to “what’s for dinner?” when I’m tired, don’t want takeout, and still want something that tastes really good. My kids are happy, my husband’s happy, and I’m happy because I’m not stressed about cooking.
Make it yours! Try different add-ins, swap in your favorite vegetables, adjust the spice level (though more is always better in my opinion). The best recipes are the ones you adapt to your family’s tastes.
If you make this, drop a comment and let me know what you think! I love hearing how recipes turn out in your kitchen. And if something doesn’t work, tell me that too—I’m here to help troubleshoot.
Happy cooking! And I hope your kitchen smells half as good as mine does right now.
Frequently Asked Questions
Can I use brown rice instead of white rice?
You can, but you’ll need to adjust the cooking time and liquid. Brown rice takes longer to cook and needs more water. Use 2 cups of liquid for 1 cup of brown rice, and simmer for 30-35 minutes. It won’t be as fluffy, but it’s still delicious.
Why did my rice turn out mushy?
Usually means you used too much liquid or peeked too often. The ratio is 1 cup rice to 1 ¾ cups liquid. If it’s mushy, spread it out on a baking sheet to let steam escape. Next time, use less water.
Can I make this ahead for a dinner party?
Sort of. Make the sauce and rice up to 2 days ahead and store in the fridge. Reheat gently, add cheese, and melt under the broiler. It won’t be quite as good as fresh, but it’s close and saves you stress during the party. I do this all the time.
Why did my cheese get grainy?
The heat was too high when you added the cheese. Always remove the pan from the burner before adding cheese, then stir it in off heat. If it’s already grainy, try whisking in a splash of warm cream—sometimes you can save it.
Can I use jarred garlic?
You can, but fresh tastes so much better in this recipe. Jarred garlic has a weird metallic taste that really shows up in cream sauces. If you must use it, use half the amount because it’s stronger. But honestly, mincing 4 cloves takes like 2 minutes.
How do I reheat leftovers without it getting dry?
Add a splash of water or broth to a skillet, add your leftover skillet mix, and heat gently over low heat, stirring frequently. The extra liquid brings back the creamy texture. Microwave sort of works but tends to dry it out. If you do microwave, definitely add a splash of water first and heat in short bursts.
Can I double this recipe?
Absolutely! Double everything and use your largest skillet or Dutch oven. The cooking times stay the same. I do this when I’m meal-prepping or feeding a crowd. Just make sure your pan is big enough for the rice—you might need to use two pans or a very large skillet.
Pin This Recipe!


One-Pan Cheesy Ground Beef Taco Skillet with Fluffy Rice
- Total Time: 25 minutes
- Yield: 6 servings 1x
Description
A quick, one-pan weeknight dinner featuring ground beef, fluffy long-grain rice, salsa, and melted cheese. It’s budget-friendly, easy to clean up, and tastes like restaurant-quality comfort food.
Ingredients
- 1 pound ground beef (80/20 lean)
- 1 cup long-grain white rice (uncooked)
- 1 ¾ cups water or low-sodium beef broth
- 1 tablespoon neutral oil (vegetable or canola)
- 1 medium yellow onion, diced
- 4 cloves garlic, minced
- 1 packet taco seasoning (1 ounce)
- 1 cup medium chunky salsa (240g)
- 1 can black beans (15 oz), drained and rinsed
- 2 cups shredded Mexican blend cheese
- Optional toppings: sour cream, chopped cilantro, sliced jalapeños, guacamole, hot sauce
Instructions
- Prep ingredients: Dice onion, mince garlic, and drain beans. Measure rice and seasoning.
- Heat oil in a large 12-inch skillet over medium-high heat. Add ground beef and diced onion. Break up beef and cook for 5-7 minutes until browned. Drain excess grease if necessary.
- Reduce heat to medium. Add taco seasoning and stir to coat beef. Pour in salsa and simmer for 1-2 minutes until fragrant and slightly thickened.
- Stir in uncooked rice and water (or broth). Ensure rice is submerged. Stir well to combine.
- Bring mixture to a boil, then reduce heat to low. Cover tightly with a lid and simmer for 15-18 minutes without peeking. Check for tenderness; cook 2-3 more minutes if needed.
- Remove skillet from heat. Stir in drained black beans. Sprinkle cheese evenly over the top. Cover and let sit for 2-3 minutes until cheese is melted.
- Fluff rice with a fork. Serve immediately with optional toppings.
Notes
Do not rinse the rice; the starch helps thicken the sauce. Use low-sodium broth to control saltiness. Ensure the skillet lid seals well to trap steam; use foil if necessary. Do not peek while rice is simmering. This recipe is naturally gluten-free if the taco seasoning is certified GF. It does not freeze well due to the dairy.
- Prep Time: 10 minutes
- Cook Time: 15 minutes
- Category: Main Course
- Cuisine: Mexican
Nutrition
- Serving Size: 1 serving
- Calories: 450
- Sugar: 4
- Sodium: 680
- Fat: 18
- Saturated Fat: 8
- Carbohydrates: 48
- Fiber: 4
- Protein: 22
Keywords: one-pan meal, ground beef, taco skillet, easy dinner, weeknight dinner, cheesy rice, budget meal, family friendly


