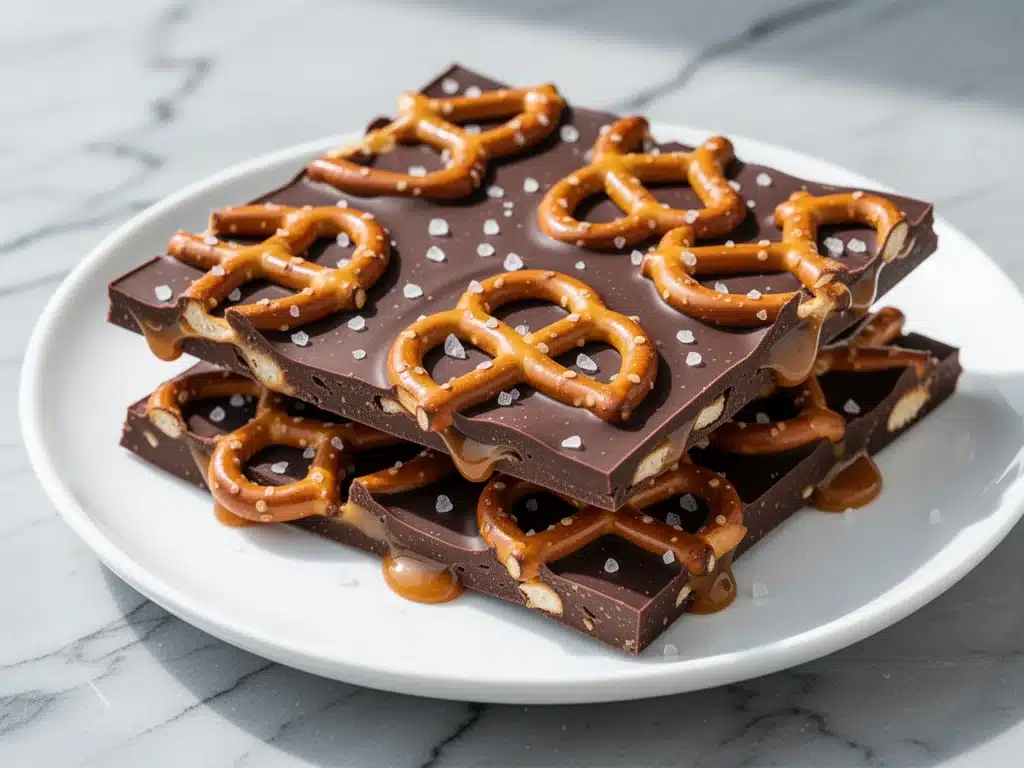
It started with a bag of pretzels I was too lazy to open properly. I remember it was a rainy Tuesday in late October, the kind of day where the sky looks like wet concrete and you just want to sit on the couch in a warm blanket. I had a craving that hit me out of nowhere—something salty, something sweet, something crunchy, and definitely something that didn’t involve turning on the oven. I grabbed the pretzels, a bag of dark chocolate chips, and a jar of caramel sauce that had been sitting in the back of my pantry since last Christmas.
I didn’t have a plan. I just melted things in the microwave and spread them on a baking sheet. I expected it to be a mediocre snack. What I got was a slab of pure magic that disappeared in four minutes. My husband walked in, saw the empty sheet pan, and asked if I’d bought it from a fancy boutique. (I did not. It cost me $8 in ingredients and took 15 minutes.)
That was three months ago. Since then, I’ve made this homemade salted caramel pretzel bark at least a dozen times. It’s become my go-to for last-minute gifts, my secret weapon when I need to impress in-laws without spending hours in the kitchen, and my personal rescue mission when stress levels are high. There’s something deeply satisfying about the crack of the chocolate, the snap of the pretzel, and that little burst of salty caramel in every bite.
I’ve tweaked the ratios, tried different chocolates, and even experimented with adding nuts (spoiler: keep it simple). This version is the winner. It’s foolproof, it looks stunning, and it’s the kind of treat that makes people ask for the recipe immediately. If you’re looking for an easy no-bake dessert that feels gourmet but takes zero skill, this is it. You’ll make this on repeat, I promise.
Why You’ll Love This Recipe
There are a lot of dessert recipes out there, but this homemade salted caramel pretzel bark with dark chocolate stands out for a few specific reasons. It’s not just candy; it’s a texture party. Here’s why I keep coming back to it:
- Zero Baking Required — Seriously. If you can use a microwave or a double boiler, you can make this. I’ve made this while watching TV, while helping my kid with homework, and while on a phone call. No oven, no timer anxiety, no preheating. It’s the ultimate lazy-day luxury.
- Perfect Sweet-Salty Balance — This is the holy grail of flavor profiles. The dark chocolate provides a sophisticated, slightly bitter base that keeps it from being cloyingly sweet. The caramel adds that gooey richness, and the pretzels bring the salt and crunch. It’s balanced so well that you can’t eat just one piece.
- Impressive Yet Simple — I’ve given this as gifts to teachers, neighbors, and coworkers, and the compliments never stop. It looks like something you’d buy at a high-end candy shop for $12 a bag, but it costs a fraction of that to make. It’s a huge win for your social life.
- Make-Ahead Friendly — This bark actually improves after a day in the fridge. The flavors meld together, and the texture sets up perfectly. I often make a batch on Sunday to have ready for the week. It’s my answer to “what’s for dessert?” when I don’t want to cook.
- Customizable Forever — Once you master the basic recipe, you can swap out the chocolate, change the pretzel shape, or add different toppings. I’ve made versions with white chocolate, peanut butter cups, and even crushed peppermint for the holidays. It’s a blank canvas for your cravings.
Real talk: this recipe saves me so much time. It’s my backup plan when I forget to make a real dessert, and it’s my favorite way to use up leftover pretzels or chocolate chips. It’s reliable, delicious, and always a crowd-pleaser.
Ingredients You’ll Need
Here’s the best part: you probably have most of these ingredients already. This isn’t a recipe that requires a trip to three different specialty stores. It’s pantry-friendly, which is why I keep making it.
For the Base
Pretzel rods or twists (about 12-14 oz / 340-400g) — I prefer pretzel rods because they’re long and easy to arrange in a neat pattern. Twists work too, but you’ll need to break them to fit the pan. Look for standard salted pretzels. If you can find “pretzel crisps” (the flat, thin ones), those work amazingly well because they create a smoother surface. Avoid the super thick, soft pretzels; they’re too chewy for this.
Dark chocolate chips (12 oz / 340g) — This is where you can get fancy or cheap. I love using 60% dark chocolate chips because they’re not too sweet. Ghirardelli or Lindt are my go-to brands. You can also use chunks of a dark chocolate bar if you chop them up. Avoid chocolate chips with extra additives if you can help it; you want that smooth melt.
Butter (1 tablespoon) — Just a small pat of butter. This helps the chocolate melt more smoothly and gives it a little extra shine. Don’t skip it; it makes a subtle difference in texture.
For the Caramel Layer
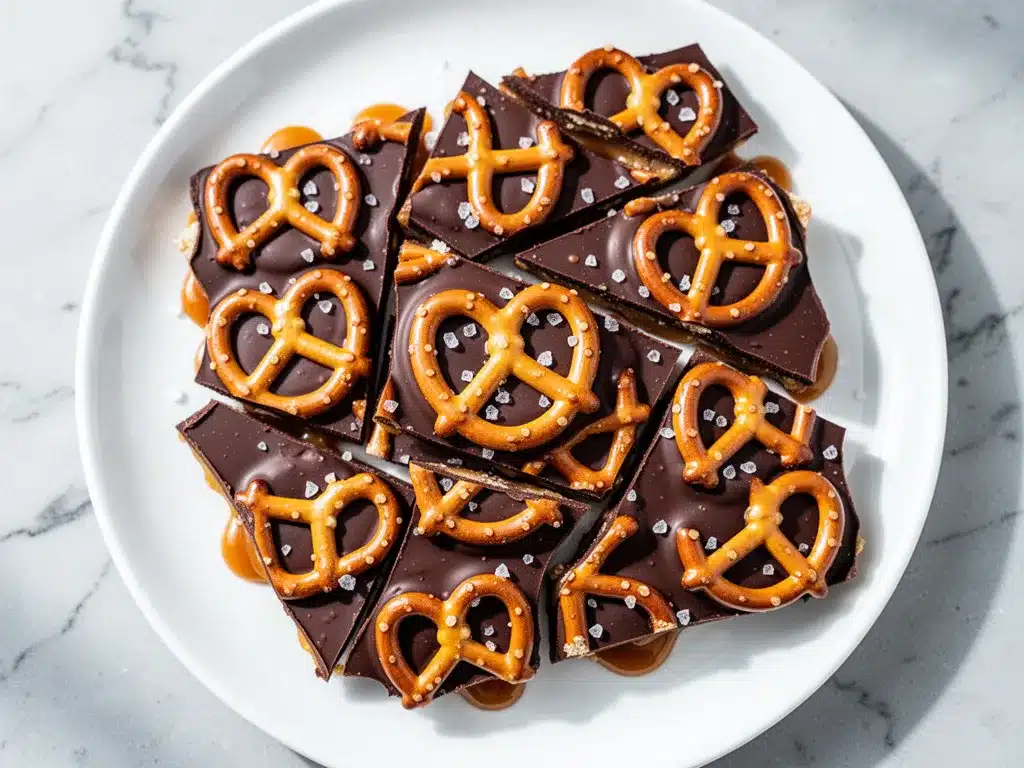
Caramel sauce (about 1 cup / 240ml) — You have two choices here. First, store-bought caramel dipping sauce (like the ones in the baking aisle). I use Smucker’s or a generic brand. It’s thick, sweet, and easy to drizzle. Second, homemade caramel. If you want to go the homemade route, you’ll need sugar, butter, cream, and salt. But let’s be honest: the store-bought stuff is 95% as good and saves you 30 minutes of stirring. For this recipe, I usually grab the bottle.
Flaky sea salt (like Maldon) — This is non-negotiable. I know you might be tempted to use regular table salt, but please don’t. Flaky sea salt dissolves slowly and gives you those beautiful, crunchy, salty bursts. It’s the final touch that elevates this from “candy” to “gourmet treat.” If you can’t find flaky salt, kosher salt works, but flaky is best.
Optional Add-Ins
White chocolate chips (4 oz / 115g) — For a marbled effect, I often drizzle melted white chocolate over the dark chocolate layer. It looks pretty and adds a creamy contrast.
Crushed nuts (½ cup) — Pecans or peanuts are great here. Sprinkle them on before the chocolate sets if you want extra crunch. I like pecans because they pair beautifully with the caramel.
Pretzel pieces — Sometimes I break extra pretzels and press them into the top of the chocolate before it sets. It makes the bark look rustic and ensures every piece has pretzel flavor.
Equipment Needed
You don’t need fancy equipment for this. Here’s what I actually use:
Baking sheet (13×9 inch) — I use a standard half-sheet pan. Line it with parchment paper or a silicone baking mat. Parchment is easier for cleanup, but silicone is great if you want to lift the bark out in one piece later.
Microwave-safe bowl — Or a double boiler setup. I prefer the microwave for speed. A large glass or ceramic bowl works best so you can see the chocolate melting.
Ziplock bags — For drizzling the caramel and white chocolate. Cut a tiny corner off the bag, and you have a perfect piping bag. No extra tools needed.
Knife — For chopping chocolate bars if you’re not using chips. A serrated knife works well for cutting the bark into pieces at the end.
Spatula — A silicone spatula is perfect for stirring the chocolate and spreading it evenly. Don’t use a metal spoon; it can scratch your bowl and doesn’t scrape the sides as well.
How to Make It: Step-by-Step
Alright, let’s make this! I’m walking you through exactly how I do it, including the little tricks I’ve picked up over the last dozen batches.
Step 1: Prep Your Pan and Pretzels (5 minutes)
Line your 13×9 inch baking sheet with parchment paper. I like to leave a little overhang on the sides so I can lift the bark out later if I want to break it into pieces on a cutting board. Now, arrange your pretzels in a single layer on the pan. If you’re using rods, lay them side-by-side. If you’re using twists, break them to fit and arrange them so there are no huge gaps. You want full coverage because that’s where the chocolate and caramel will go. Take your time here; a neat arrangement makes the final product look way more professional.
Step 2: Melt the Chocolate (2-3 minutes)
Place your dark chocolate chips and the tablespoon of butter in a microwave-safe bowl. Microwave on high for 30 seconds. Remove and stir. If it’s not fully melted, go back in for 15-second intervals, stirring in between. This is crucial. Chocolate burns easily, and lumpy chocolate is annoying. You want a smooth, glossy mixture. If you’re using a double boiler, melt over simmering water, stirring constantly until smooth. This takes about 3-4 minutes. Don’t rush it.
Step 3: Spread the Chocolate Layer
Pour the melted chocolate over the pretzels. Use your silicone spatula to spread it evenly, making sure to get into all the nooks and crannies. You want a thin, even layer. If you pile it too thick, the bark will be hard to bite through. Scrape the edges clean. This is your base layer. Set the pan aside for a moment while you prepare the caramel.
Step 4: Drizzle the Caramel
Here’s the fun part. Pour your caramel sauce into a ziplock bag. Cut a tiny corner off the bottom—just a small snip. Then, squeeze the bag to drizzle the caramel over the chocolate. Zigzag it back and forth across the entire pan. Don’t be afraid to get creative; I like to make random squiggles. If you’re using homemade caramel, make sure it’s not too hot, or it might melt the chocolate underneath. Store-bought caramel is usually the perfect consistency right out of the bottle.
Step 5: Add the Flaky Salt
While the caramel is still wet, sprinkle your flaky sea salt over the top. Use your fingers to pinch and scatter the salt. You want it distributed evenly, but not too much. A little goes a long way. I usually use about half a teaspoon for the whole pan. If you add too much, it’ll overpower the sweet flavors. Just aim for those visible, crunchy flecks on top.
Step 6: Chill Until Set
Place the baking sheet in the refrigerator for at least 30 minutes. If you’re in a hurry, you can put it in the freezer for 15 minutes, but the fridge is safer to avoid condensation. The chocolate needs to be completely firm before you break it. If you try to break it too soon, it’ll be a sticky mess. I usually make this at night and let it set overnight. That way, it’s ready whenever I am.
Step 7: Break and Serve
Once the bark is fully set, lift it out of the pan using the parchment paper overhang. Place it on a cutting board or just break it directly from the pan. Use your hands or a knife to break it into irregular pieces. It’s supposed to look rustic, so don’t worry about perfect squares. Just tear it apart. Serve immediately, or store in an airtight container.
Total Time: About 15 minutes active, plus 30 minutes chilling.
Expert Tips & Tricks
Here’s everything I’ve learned from making this dozens of times. These tips will save you from my mistakes.
Don’t Overheat the Chocolate
This is the #1 mistake people make. Chocolate seizes if it gets too hot or if even a drop of water gets in it. Microwave in short bursts and stir often. If you’re using a double boiler, make sure the bottom of the bowl doesn’t touch the water. I learned this the hard way with a bowl of seized chocolate that looked like gravel. Now I’m very gentle with my chocolate.
Use Flaky Salt, Not Table Salt
I can’t stress this enough. Table salt dissolves instantly and makes the whole thing salty. Flaky sea salt stays crunchy and provides bursts of flavor. It’s also beautiful to look at. I buy Maldon salt specifically for this recipe. It’s worth the extra cost.
Keep It Cool
This bark is sensitive to heat. If you’re making it in a hot kitchen, keep it in the fridge until serving. If you’re giving it as a gift, make sure the recipient knows to store it in a cool place. I’ve had batches melt in my car in the summer. Don’t let that happen to you.
Drizzle, Don’t Pour
When adding the caramel, use the ziplock bag trick. Pouring caramel directly from the bottle makes a mess and doesn’t give you control. The bag lets you create thin, elegant lines that look professional. It’s a simple trick that makes a huge difference.
Double the Batch for Gifting
This recipe scales up easily. I often double it when I’m making gifts for teachers or neighbors. Just use two baking sheets or a larger pan if you have one. The process is the same, just longer. It’s a great way to share the love.
Variations & Substitutions
Once you’ve nailed the basic version, here’s how you can mix it up. I’ve tried all of these, and they’re all delicious in their own way.
White Chocolate Version
Swap the dark chocolate for white chocolate chips. This makes it sweeter and more kid-friendly. I love this version for Christmas because it looks snowy and pretty. You can still add the caramel and sea salt.
Milk Chocolate Twist
If dark chocolate is too bitter for you, use milk chocolate. It’s a classic combo with caramel and pretzels. This is my husband’s favorite version. It’s softer and sweeter, perfect for those who like mild chocolate flavors.
Peanut Butter Cup Bark
Add chopped peanut butter cups on top of the caramel drizzle before the chocolate sets. It’s like a Reese’s cup in bark form. I do this for Super Bowl parties, and it’s always a hit.
Mini Marshmallow Version
Sprinkle mini marshmallows over the caramel before adding the chocolate. It’s like a s’mores bark. The marshmallows get slightly toasted if you broil it for 30 seconds (watch it closely!). This is great for fall gatherings.
Crushed Pretzel Crust
Instead of whole pretzels, crush them into small pieces and press them into the bottom of the pan. Then add the chocolate and caramel. This makes it more like a bar than a bark. It’s easier to eat and less crunchy, which some people prefer.
Gluten-Free Option
Use gluten-free pretzels. They’re widely available now and work just as well. Everything else in the recipe is naturally gluten-free, so this is an easy swap for those with allergies.
Serving & Storage
How to Serve:
I usually serve this straight from the pan, broken into pieces. It’s perfect for parties, movie nights, or just eating out of the container (no judgment here). It pairs well with coffee or tea. I also like to serve it with a cold glass of milk.
Side Dishes:
This is a dessert, so it doesn’t really need sides. But if I’m serving it at a party, I might have some sweet and spicy candied pecans or creamy hatch chile queso nearby for a savory-sweet contrast. It’s a fun mix for a snack board.
Storage Instructions:
Store in an airtight container at room temperature for up to 2 weeks. If it’s hot outside, keep it in the fridge. Separate layers with parchment paper to prevent sticking. It stays fresh and crunchy for a long time.
Freezing:
Yes, you can freeze this! Wrap the bark tightly in plastic wrap and then in foil. It will keep for up to 3 months. Thaw at room temperature before serving. I do this to keep a stash for busy weeks.
Nutrition Information
I’m not a nutritionist, but here’s the breakdown if you’re tracking. Keep in mind that this is a treat, so portion control is key.
Per Serving (based on 16 pieces):
- Calories: 280
- Protein: 4g
- Carbs: 32g
- Fiber: 2g
- Sugar: 22g
- Fat: 16g
- Sodium: 250mg
What’s Good:
It’s a small treat, so it’s manageable. The pretzels add some fiber, and the dark chocolate has antioxidants. It’s better than a candy bar from the gas station.
What to Know:
It’s high in sugar and fat because it’s chocolate and caramel. Enjoy it in moderation. If you’re watching your sugar, stick to the dark chocolate version and use less caramel.
My Take:
Look, this is candy. It’s supposed to taste good. It’s not a health food. But it’s homemade, so you know what’s in it. When I make it, I use quality chocolate and real butter. That matters. I enjoy it as a special treat, not a daily snack.
Final Thoughts
So that’s my go-to homemade salted caramel pretzel bark with dark chocolate! I’ve probably talked your ear off at this point, but when you make a recipe this often, you have a lot to say about it.
This has saved me so many times. It’s my answer to “what’s for dessert?” when I’m tired, don’t want takeout, and still want something that tastes really good. My kids are happy, my husband’s happy, and I’m happy because I’m not stressed about cooking.
Make it yours! Try different chocolates, swap in your favorite nuts, or adjust the caramel. The best recipes are the ones you adapt to your family’s tastes. If you make this, drop a comment and let me know what you think! I love hearing how recipes turn out in your kitchen. And if something doesn’t work, tell me that too—I’m here to help troubleshoot.
Happy cooking! And I hope your kitchen smells half as good as mine does right now.
Frequently Asked Questions
Q: Can I use milk chocolate instead of dark chocolate?
A: Absolutely! Milk chocolate is sweeter and creamier, which pairs well with the salty pretzels. I use it for my husband’s version. Just be aware that the overall sweetness will be higher, so you might want to use slightly less caramel.
Q: Why did my chocolate seize or get lumpy?
A: This usually happens if water gets into the chocolate or if it’s overheated. Even a drop of water can cause chocolate to seize. Make sure your bowl and utensils are completely dry. Also, microwave in short bursts and stir often. If it does seize, you can sometimes save it by adding a teaspoon of warm water or cream and stirring vigorously, but it’s better to prevent it.
Q: Can I make this ahead for a party?
A: Yes, this is perfect for making ahead. I usually make it 1-2 days before the party. Store it in the fridge in an airtight container. It actually tastes better after a day because the flavors have time to meld. Just take it out 15 minutes before serving so it’s not too cold.
Q: How do I store the bark so it doesn’t stick together?
A: Use parchment paper between layers. If you’re storing it in a container, place a sheet of parchment paper on the bottom, then the bark, then another sheet, and so on. This keeps the pieces from fusing together. It also makes it easier to pull out individual pieces.
Q: Can I use homemade caramel sauce?
A: Yes, but make sure it’s cooled to room temperature before drizzling. If it’s too hot, it will melt the chocolate layer underneath and make a mess. Homemade caramel is thicker than store-bought, so you might need to thin it with a little cream or warm water to get it to drizzle easily.
Q: Why did my bark break into uneven pieces?
A: That’s actually the goal! This is “bark,” not a bar. It’s supposed to be irregular. If you want perfect squares, press the bark into a pan and cut it with a knife after it sets. But I prefer the rustic look. Just break it along the natural cracks.
Q: Can I add nuts to this?
A: Definitely. Chopped pecans, peanuts, or almonds are great. Sprinkle them on top of the caramel drizzle before the chocolate sets, so they stick. I love the combination of pretzels, caramel, and pecans. It’s like a turtle candy in bark form.
Pin This Recipe!

Homemade Salted Caramel Pretzel Bark: Easy Dark Chocolate Recipe
- Total Time: 15 minutes
- Yield: 16 servings 1x
Description
A foolproof, no-bake dessert featuring a crunchy pretzel base topped with dark chocolate, drizzled caramel, and flaky sea salt. This easy treat is perfect for gifting or satisfying a sweet craving in just 15 minutes.
Ingredients
- 12–14 oz (340-400g) salted pretzel rods or twists
- 12 oz (340g) dark chocolate chips (60% recommended)
- 1 tablespoon butter
- 1 cup (240ml) caramel sauce (store-bought or homemade)
- Flaky sea salt (like Maldon)
- Optional: 4 oz (115g) white chocolate chips for drizzling
- Optional: ½ cup crushed nuts (pecans or peanuts)
Instructions
- Line a 13×9 inch baking sheet with parchment paper. Arrange pretzels in a single layer to cover the pan.
- Place dark chocolate chips and butter in a microwave-safe bowl. Microwave on high for 30 seconds, stir, then continue in 15-second intervals until smooth and glossy.
- Pour the melted chocolate over the pretzels and spread evenly with a silicone spatula, ensuring coverage in all gaps.
- Pour caramel sauce into a ziplock bag and snip a tiny corner to create a piping bag. Drizzle the caramel in a zigzag pattern over the chocolate layer.
- Immediately sprinkle flaky sea salt over the wet caramel.
- Refrigerate for at least 30 minutes (or freeze for 15 minutes) until the chocolate is completely firm.
- Lift the bark out using the parchment paper overhang and break into irregular pieces. Serve or store.
Notes
Do not overheat the chocolate to prevent seizing. Use flaky sea salt for texture and flavor bursts rather than table salt. Store in an airtight container at room temperature for up to 2 weeks, or freeze for up to 3 months. Separate layers with parchment paper to prevent sticking.
- Prep Time: 5 minutes
- Cook Time: 5 minutes
- Category: Dessert
- Cuisine: American
Nutrition
- Serving Size: 1 piece (approx. 1/1
- Calories: 280
- Sugar: 22
- Sodium: 250
- Fat: 16
- Saturated Fat: 8
- Carbohydrates: 32
- Fiber: 2
- Protein: 4
Keywords: salted caramel pretzel bark, dark chocolate bark, no-bake dessert, easy candy recipe, holiday treats, gluten-free option


