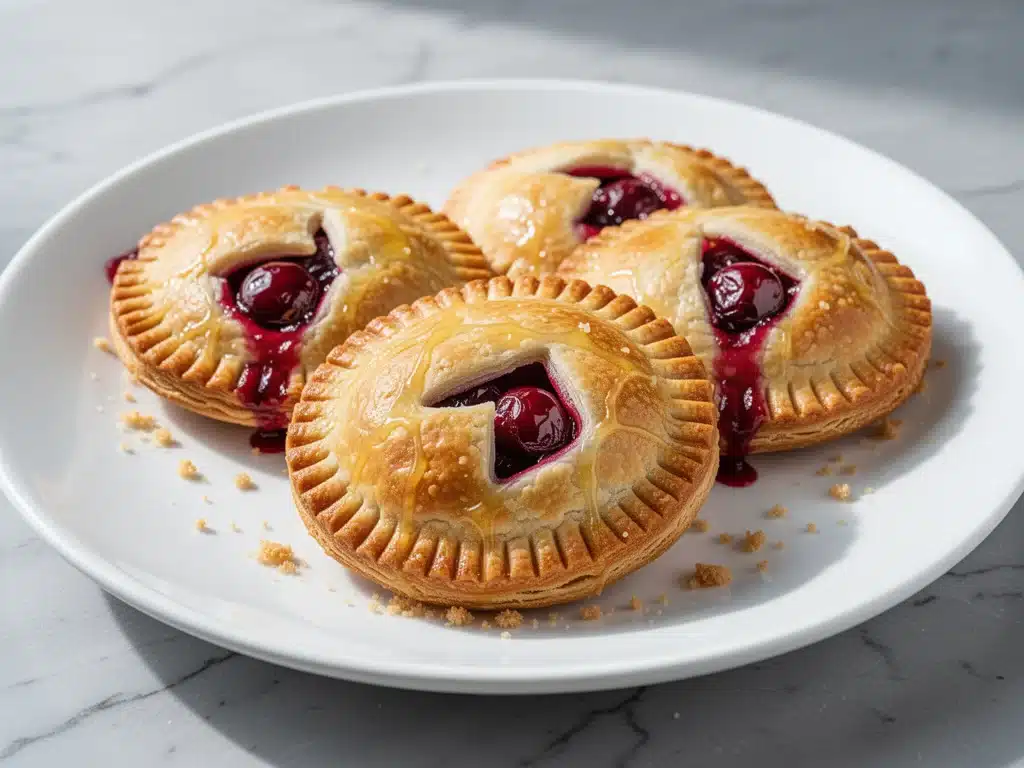
I have a confession to make. For years, I was the person who bought those frozen cherry turnovers from the grocery store freezer aisle. You know the ones—the ones that cost $4.99, come in a box that looks like it survived a war, and arrive at your plate looking like sad, gray bricks. I’d heat them up in the microwave, watch the crust puff up slightly, and then take one bite of the soggy, overly sweet filling and think, “Is this really what I’m settling for?”
Then, last spring, I was visiting my aunt in the countryside. She pulled a baking sheet out of the oven, and the smell hit me before I even saw the pies. It was buttery, sweet, and smelled like actual summer. She handed me one still warm from the oven. The crust shattered when I bit into it—actually shattered, like a real pie crust should—and the cherry filling burst out, hot and tart and real. No cardboard taste. No soggy bottom. Just perfect, flaky, homemade goodness.
I ate three of them in one sitting. My aunt laughed and said, “I’ve been making these for twenty years, but I never really wrote down the secret.” That night, I called her three times to ask questions. I took notes. I came home and tried to replicate them. The first batch? A disaster. The crust was tough, the filling leaked everywhere, and they looked like puckered lips. The second batch? Better, but still not right. It took me five attempts over two weeks to finally nail it.
But here’s the thing: when I finally got it right, these homemade cherry hand pies changed everything. They’re not just a dessert; they’re a confidence booster. They’re the kind of thing you can bake on a Sunday afternoon, pack in a lunchbox, or bring to a potluck where people will inevitably ask, “Where did you buy these?” (Answer: You made them. You’re amazing.)
I’ve tested this recipe more times than I care to admit, tweaking the butter temperature, the flour type, and the cherry ratio until it was perfect. This isn’t just another cherry pie recipe. It’s a 5-step process that yields flaky, golden, buttery crusts filled with juicy, tart cherries that actually stay inside the pie. If you’ve ever been intimidated by homemade pastry, this is your moment. Let’s make some magic.
Why You’ll Love This Cherry Hand Pie Recipe
There are about ten reasons I keep coming back to these pies, but let’s be real—you’re here because you want something delicious without spending six hours in the kitchen. Here’s why this recipe has earned a permanent spot in my rotation:
- Stupidly Flaky Crust — I’m talking layers upon layers. I’ve had people cry over this crust. It’s not an exaggeration. The secret? Keeping the butter cold and handling the dough as little as possible. I’ve walked my teenage son through this process, and he got perfect results on his first try.
- 5-Step Simplicity — Seriously, if you can mix dough and spoon filling, you can do this. Step 1: Mix flour and butter. Step 2: Roll it out. Step 3: Cut circles. Step 4: Fill and fold. Step 5: Bake. That’s it. No complicated techniques, no special equipment, just reliable, delicious food.
- Pantry-Friendly Ingredients — You probably have 90% of this already. Flour, butter, sugar, salt, eggs, and cherries. If you don’t have fresh cherries, frozen work beautifully (and are often better because they’re picked at peak ripeness). I keep a bag of frozen pitted cherries in the freezer specifically for these.
- Crowd-Pleaser — I’ve served these to my vegan friend (using vegan butter), my gluten-sensitive neighbor (using gluten-free flour blend), and my dad who says he “doesn’t like sweet things.” He asked for the recipe. That’s a win.
- Makes Amazing Leftovers — Actually, they’re better the next day. The flavors meld together, and the crust softens just a tiny bit, making it even more tender. I deliberately make extra for breakfast with a cup of coffee. It’s basically pie for breakfast, and I’m not sorry.
- Portable Perfection — These are the ultimate hand-held dessert. No fork needed. Perfect for picnics, lunchboxes, or eating while walking around the house. I’ve taken these to work, and they vanished in ten minutes.
This is my go-to when I need to impress guests without looking like I tried too hard. It’s my answer to “What dessert can I make that feels fancy but is actually easy?” And the best part? You’ll feel like a pastry pro by the time you’re done.
Ingredients You’ll Need for Flaky Cherry Hand Pies
Here’s the best part: you probably have most of this already. I’m particular about three things here, and I’ll tell you exactly why. Don’t skip the details—it matters.
For the Flaky Butter Crust
All-purpose flour (2 ½ cups / 315g) — The foundation. I use Gold Medal or King Arthur. Cake flour makes it too tender (read: crumbly), bread flour makes it too chewy. All-purpose is the sweet spot. If you’re gluten-free, a 1:1 blend like Bob’s Red Mill works great.
Unsalted butter (1 cup / 2 sticks / 226g) — Cold. I mean ice-cold. This is non-negotiable for flakiness. Cube it into ½-inch pieces and keep it in the freezer for 15 minutes before using. If the butter melts while you’re mixing, the crust will be tough, not flaky. I learned this the hard way with a batch that tasted like cardboard.
Granulated sugar (1 tablespoon) — Just a touch. It helps with browning and adds a hint of sweetness to the crust itself. Don’t skip it, but don’t add more. Too much sugar makes the crust spread too much.
Salt (1 teaspoon) — Essential for flavor. Butter needs salt to taste like butter. Use kosher salt if you have it; if using table salt, reduce to ¾ teaspoon.
Ice water (6-8 tablespoons / 90-120ml) — This binds the dough. Make sure it’s actually icy. I keep a glass of water with ice cubes in it and use the water straight from the fridge. Warm water will melt the butter, ruining the flaky layers.
Vinegar or vodka (1 tablespoon) — Optional but recommended. A splash of white vinegar or vodka helps inhibit gluten formation, making the crust more tender. Vodka evaporates during baking, so you don’t taste it. I use vodka because it’s foolproof.
For the Cherry Filling
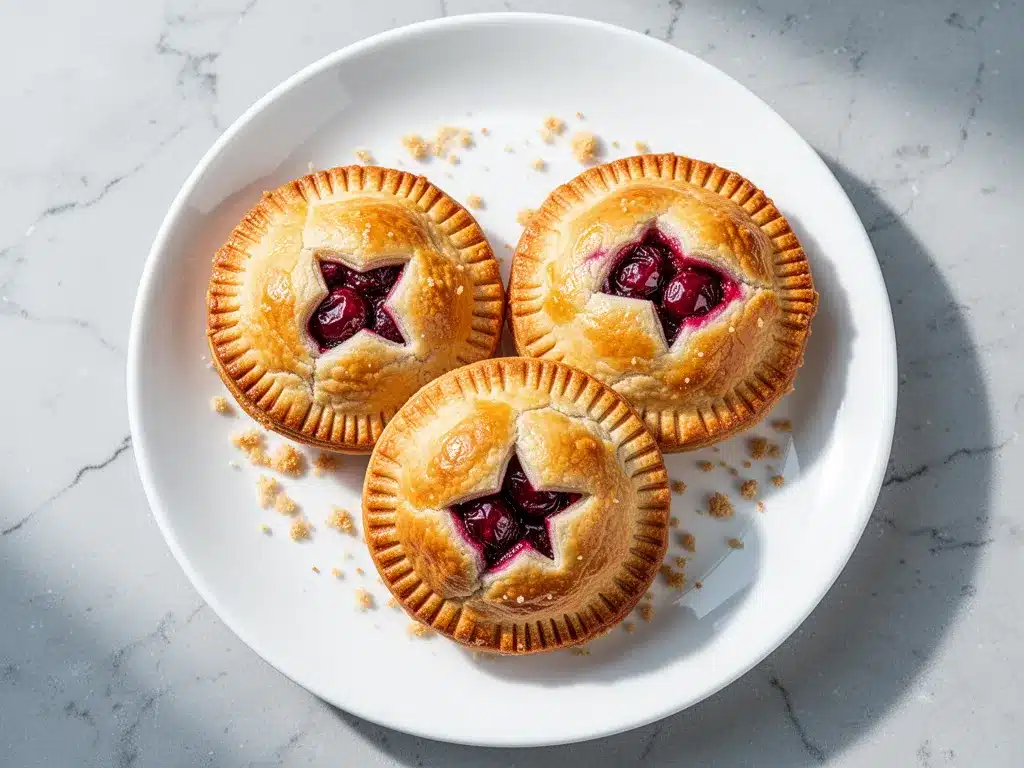
Fresh or frozen pitted cherries (3 cups / 450g) — Fresh are nice, but frozen are often sweeter and cheaper. If using frozen, do not thaw them first—you’ll get a watery mess. Use them straight from the bag. If using fresh, pit them yourself or buy pre-pitted. Cherries are expensive to pit, so I buy pre-pitted when I’m being lazy.
Granulated sugar (⅓ cup / 65g) — Adjust based on tartness. If your cherries are very tart, go up to ½ cup. If they’re super sweet, stick with ⅓ cup. Taste a cherry first. If it makes your face pucker, add more sugar.
Lemon juice (1 tablespoon) — Brightens the flavor and balances the sweetness. It also helps prevent the cherries from browning if you’re prepping ahead. Fresh lemon is best. Bottled juice tastes metallic in desserts.
Cornstarch (2 tablespoons) — This thickens the juices so you don’t get a soup-filled pie. Cornstarch is better than flour for fruit fillings because it stays clear and glossy. If you don’t have cornstarch, arrowroot powder works too.
Cinnamon (½ teaspoon) — Adds warmth. Optional, but I think it’s essential. It makes the cherries taste like pie, not just fruit. If you’re not a cinnamon person, skip it, but you’re missing out.
Vanilla extract (1 teaspoon) — Enhances the cherry flavor. Pure vanilla only. I use Nielsen-Massey. The cheap stuff tastes like alcohol and chemicals.
For the Egg Wash & Topping
Egg (1 large, beaten with 1 tablespoon water) — This gives the crust that golden, bakery-style shine. Don’t skip it. If you’re vegan, use a flax egg or just brush with milk for a softer finish.
Coarse sugar or turbinado (for sprinkling) — Adds crunch and sparkle. Regular granulated sugar works too, but coarse sugar looks fancy and tastes amazing. I buy a bag of turbinado specifically for this.
Equipment Needed
You don’t need fancy equipment for this. Here’s what I actually use.
Large mixing bowl — I use a big glass bowl. It needs to be wide enough to mix the dough comfortably. A food processor works too, but I prefer doing it by hand so I can feel when the dough is ready.
Pastry cutter or fork — To cut the butter into the flour. I use a pastry cutter because it’s faster, but a fork works fine. You’re looking for pea-sized chunks of butter.
Rolling pin — Any standard rolling pin works. I use a wooden one. Make sure it’s smooth so it doesn’t stick to the dough.
Circular cutter or glass — I use a 4-inch biscuit cutter for perfect circles. If you don’t have one, a drinking glass works. Just make sure it’s clean and sharp-edged.
Baking sheets — Two standard 13×18 inch sheets. Line them with parchment paper. This is crucial. Parchment prevents sticking and makes cleanup a breeze. I’ve burned pies on bare pans before. Never again.
Parchment paper — Non-negotiable. It makes rolling easier and cleanup instant.
Pastry brush — For the egg wash. A silicone brush works great. Or just use your finger if you’re being lazy (but don’t judge me).
Sharp knife — To cut steam vents. A paring knife is perfect. Don’t use a dull knife—you’ll squish the crust.
How to Make It: Step-by-Step
Alright, let’s make this! I’m walking you through exactly how I do it, including the little tricks I’ve picked up so you don’t make my mistakes.
Step 1: Make the Dough (10 minutes)
In a large bowl, whisk together the flour, sugar, and salt. Add the cold, cubed butter. Use a pastry cutter or your fingers to work the butter into the flour. You’re looking for a mixture that looks like coarse meal with some pea-sized chunks of butter remaining. Those chunks are what create the flaky layers. Don’t overmix. If the butter is all blended in, you’ll get a tough crust.
Drizzle in 6 tablespoons of ice water and the vinegar or vodka. Mix gently with a spatula or your hands until the dough just starts to come together. It should look shaggy. If it’s too dry, add more water, one tablespoon at a time. If it’s too wet, add a sprinkle of flour. The dough should hold together when squeezed but not be sticky. Form it into a disk, wrap in plastic, and refrigerate for at least 30 minutes. This relaxes the gluten and re-chills the butter. Do not skip this step.
Step 2: Prepare the Filling (5 minutes)
While the dough chills, mix the cherries, sugar, lemon juice, cornstarch, cinnamon, and vanilla in a medium bowl. Toss gently until the cherries are coated. The cornstarch will absorb the juices as the pies bake. If using frozen cherries, just toss them in—they’ll thaw in the oven. Taste the mixture. If it’s too tart, add a little more sugar. Set aside.
Step 3: Roll and Cut the Dough (10 minutes)
Preheat your oven to 375°F (190°C). Line two baking sheets with parchment paper. On a lightly floured surface, roll out the chilled dough to about ⅛-inch thickness. Use a 4-inch circular cutter to cut out circles. If the dough cracks, just press it back together—it’s fine. You should get about 12-14 circles from one disk. Place them on the prepared baking sheets, leaving space between them.
Pro Tip: Keep the dough cold. If it starts to get soft and sticky, put it back in the fridge for 10 minutes. Warm dough sticks and tears. Cold dough is your friend.
Step 4: Fill and Fold (10 minutes)
Place a heaping tablespoon of the cherry filling in the center of half of the circles. Don’t overfill! Too much filling will cause leakage. Leave a ½-inch border around the edge. Brush the edges with a little water or egg wash. Take a plain circle and place it on top of a filled circle. Press the edges together firmly with your fingers, then crimp with a fork for a pretty finish. Use a sharp knife to cut 2-3 small slits in the top of each pie. This lets steam escape so the pies don’t burst open.
Step 5: Bake to Golden Perfection (15-18 minutes)
Brush the tops with the egg wash and sprinkle generously with coarse sugar. Bake for 15-18 minutes, or until the crust is deep golden brown and the filling is bubbling through the vents. If the edges are browning too fast, cover them with foil. Rotate the pans halfway through for even baking. Let them cool on the pan for 5 minutes, then transfer to a wire rack. They’ll firm up as they cool.
Visual Cue: You’ll know they’re done when the crust is a rich, golden brown (not pale yellow) and the filling is visibly bubbling. The smell will be incredible—like a bakery.
Expert Tips & Tricks
Here’s everything I’ve learned from making these dozens of times. These tips will save you from my mistakes.
Keep Everything Cold
This is the #1 rule. Cold butter = flaky crust. If your kitchen is warm, work quickly. I even chill my bowl and rolling pin beforehand. If the dough feels warm to the touch, it’s too warm. Put it back in the fridge. I’ve ruined batches by being impatient. Don’t be me.
Don’t Overwork the Dough
Handle the dough as little as possible. Every time you touch it, you develop gluten, which makes the crust tough. Mix until it just comes together. Roll it out gently. If it’s stubborn, let it rest. Resting is your best friend.
Use Cornstarch, Not Flour
Flour makes the filling cloudy and can leave a raw flour taste. Cornstarch keeps the filling glossy and clear. It’s a small detail, but it makes a big difference in texture and appearance.
Don’t Skip the Vents
Those little slits aren’t just for looks. They let steam escape. If you don’t vent them, the pressure builds up, and the pies can burst open or the top can bubble unevenly. Cut 2-3 slits per pie.
Egg Wash for the Win
The egg wash isn’t optional if you want that bakery shine. It gives the crust a deep golden color and a slight crispness. Mix the egg with a tablespoon of water or milk for easier brushing.
Cool Completely Before Eating
I know, I know, you want to dig in. But the filling is molten hot when they come out of the oven. Let them cool for at least 10 minutes. The filling will set slightly, making it easier to bite into without it running everywhere. Patience pays off.
Variations & Substitutions
Once you’ve nailed the basic version, here’s how you can mix it up. I’ve tried all of these.
Blueberry Hand Pies
Swap cherries for blueberries. Add a teaspoon of lemon zest and a pinch of nutmeg. Blueberries are sweeter, so you might need a touch more cornstarch. My kids love these.
Apple Cinnamon Hand Pies
Use diced apples instead of cherries. Toss with cinnamon, sugar, and a bit of lemon juice. Cook the apples briefly on the stove to soften them before filling. These taste like fall in your hand.
Raspberry Lemon Hand Pies
Use raspberries and add extra lemon juice and zest. Raspberries are delicate, so be gentle with the filling. These are tart and bright, perfect for spring.
Vegan Version
Use vegan butter (like Earth Balance) in the dough. Use a flax egg (1 tablespoon ground flaxseed mixed with 3 tablespoons water) instead of the egg wash. The crust will be slightly less golden, but still delicious. I’ve made this for my vegan friend, and she loved it.
Gluten-Free
Use a 1:1 gluten-free flour blend with xanthan gum. The dough might be a bit more fragile, so handle gently. Add an extra tablespoon of ice water if needed. It works surprisingly well.
Different Fillings
You can use any berry: strawberries, blackberries, or mixed berries. Just adjust the sugar and cornstarch based on the fruit’s sweetness. For a non-berry option, try apple or pear. I’ve even made these with apricot jam, though fresh fruit is always best.
Serving & Storage
How to Serve:
I usually serve these warm, right off the baking sheet. They’re amazing with a scoop of vanilla ice cream or a dollop of whipped cream. But they’re also perfect on their own. I pack them in lunchboxes for school or work. They hold up well for a few hours at room temperature.
Side Dishes:
These are a dessert on their own, but if you’re serving a meal, pair them with a light fruit salad or a simple green salad. They’re rich, so you don’t need much else.
Storage Instructions:
Refrigerator: Store in an airtight container for up to 3 days. The crust might soften slightly, but they’re still good. Reheat in the oven at 350°F for 5 minutes to crisp up.
Freezer: Yes, you can freeze them! Bake them completely, let them cool, then freeze on a baking sheet. Once solid, transfer to a freezer bag. They’ll last for 2-3 months. Reheat in the oven at 350°F for 10-15 minutes. Do not microwave frozen pies—they’ll get soggy.
Reheating: Oven is best. Microwave makes the crust chewy. If you must microwave, do it for 15-20 seconds max, and expect a softer crust.
Pro Tip: If you’re meal-prepping, make the dough and filling ahead. Store them separately in the fridge. Assemble and bake when you’re ready. It’s the best of both worlds.
Nutrition Information
I’m not a nutritionist, but here’s the breakdown if you’re tracking. These are indulgent treats, so enjoy in moderation.
Per Pie (based on 12 pies):
- Calories: 180
- Protein: 2g
- Carbs: 24g
- Fiber: 1g
- Sugar: 12g
- Fat: 9g
- Saturated Fat: 5g
- Cholesterol: 25mg
- Sodium: 120mg
What’s Good:
Decent fiber from the cherries. Real fruit in every bite. No artificial ingredients.
What to Know:
Higher in calories and sugar from the crust and filling. Contains dairy and gluten. Use the vegan or gluten-free variations if you have dietary restrictions.
My Take:
Look, these are homemade hand pies with butter and sugar. They’re not diet food. But they’re way better than store-bought, and you control the ingredients. When I make them, I use less sugar and add more fruit, which helps. But usually? I just eat one and enjoy it. Life’s too short for guilt.
Final Thoughts
So that’s my homemade cherry hand pies! I’ve probably talked your ear off at this point, but when you make a recipe this often, you have a lot to say about it. These pies have saved my social life. They’re my go-to when I need to bring something to a party, impress a date, or just treat myself on a rainy afternoon.
They’ve replaced my store-bought habit completely. I love the process of making the dough, the smell of baking cherries, and the pride of handing someone a pie I made from scratch. It’s simple, but it’s special.
Make it yours! Try different fruits, adjust the sweetness, or add a twist like cardamom or almond extract. The best recipes are the ones you adapt to your tastes. If you make these, I want to hear about it. Drop a comment and let me know how they turned out. And if something doesn’t work, tell me that too—I’m here to help troubleshoot.
Happy baking! And I hope your kitchen smells half as good as mine does right now.
Frequently Asked Questions
Can I use fresh cherries instead of frozen?
Absolutely! Fresh cherries are great, especially in season. Just make sure they’re pitted. If you’re buying fresh, taste one first—if they’re tart, you might need a bit more sugar. Frozen cherries are often picked at peak ripeness, so they’re consistently sweet and flavorful. Either works perfectly.
Why did my crust turn out tough?
Usually, that means the butter got too warm or you overmixed the dough. Keep the butter ice-cold, handle the dough as little as possible, and don’t skip the chilling step. If the dough feels sticky or warm, put it back in the fridge. Tough crust is almost always a temperature or handling issue.
Can I make these ahead of time?
Yes! You can assemble them and refrigerate them for up to 24 hours before baking. Just bake them when you’re ready. You can also freeze the unbaked pies on a baking sheet, then transfer to a bag. Bake from frozen, adding 2-3 minutes to the baking time.
Why did my filling leak out?
Leakage usually happens if you overfilled the pies or didn’t seal the edges well. Use about a tablespoon of filling per pie, not more. Press the edges firmly and crimp with a fork. Also, make sure you cut steam vents—without them, pressure builds up and pushes the filling out.
Can I use a food processor for the dough?
Yes! Pulse the flour, sugar, salt, and cold butter until it looks like coarse meal. Then add the ice water and vinegar, pulsing just until the dough comes together. Be careful not to over-process. It takes about 5-6 pulses. This method is faster and keeps the butter cold.
What’s the best way to reheat leftovers?
Oven or toaster oven is best. Preheat to 350°F and heat for 5-8 minutes. This restores the flakiness. Microwave makes the crust chewy and soggy. If you must microwave, do it for 15 seconds max, and accept that the texture will change.
Can I freeze the baked pies?
Yes! Let them cool completely, then freeze on a baking sheet. Once solid, transfer to a freezer bag or airtight container. They’ll last for 2-3 months. Reheat in the oven at 350°F for 10-15 minutes. Do not refreeze after thawing.
Pin This Recipe!


Homemade Cherry Hand Pies: 5-Step Flaky Crust
- Total Time: 53 minutes
- Yield: 12 servings 1x
Description
These homemade cherry hand pies feature a stupidly flaky, buttery crust and a juicy, tart cherry filling. This 5-step process makes it easy to create bakery-quality pastries at home.
Ingredients
- 2 ½ cups all-purpose flour
- 1 cup unsalted butter, ice-cold and cubed
- 1 tablespoon granulated sugar
- 1 teaspoon salt
- 6–8 tablespoons ice water
- 1 tablespoon vinegar or vodka (optional)
- 3 cups fresh or frozen pitted cherries
- ⅓ cup granulated sugar
- 1 tablespoon lemon juice
- 2 tablespoons cornstarch
- ½ teaspoon cinnamon
- 1 teaspoon vanilla extract
- 1 large egg, beaten with 1 tablespoon water
- Coarse sugar or turbinado for sprinkling
Instructions
- In a large bowl, whisk together flour, sugar, and salt. Add cold cubed butter and work it into the flour using a pastry cutter or fingers until the mixture resembles coarse meal with pea-sized butter chunks.
- Drizzle in 6 tablespoons of ice water and vinegar/vodka. Mix gently until the dough just starts to come together. Form into a disk, wrap in plastic, and refrigerate for at least 30 minutes.
- While the dough chills, mix cherries, sugar, lemon juice, cornstarch, cinnamon, and vanilla in a medium bowl until coated. Set aside.
- Preheat oven to 375°F (190°C) and line two baking sheets with parchment paper. Roll out chilled dough to ⅛-inch thickness and cut into 4-inch circles.
- Place a heaping tablespoon of filling in the center of half the circles. Brush edges with water or egg wash, top with remaining circles, press edges to seal, and crimp with a fork. Cut 2-3 steam vents in the top of each pie.
- Brush tops with egg wash and sprinkle with coarse sugar. Bake for 15-18 minutes until deep golden brown and filling is bubbling. Cool on the pan for 5 minutes before transferring to a wire rack.
Notes
Keep all ingredients, especially butter, as cold as possible to ensure a flaky crust. Do not overwork the dough. If using frozen cherries, do not thaw them before mixing. Let pies cool completely before eating to allow the filling to set.
- Prep Time: 35 minutes
- Cook Time: 18 minutes
- Category: Dessert
- Cuisine: American
Nutrition
- Serving Size: 1 hand pie
- Calories: 180
- Sugar: 12
- Sodium: 120
- Fat: 9
- Saturated Fat: 5
- Carbohydrates: 24
- Fiber: 1
- Protein: 2
Keywords: cherry hand pies, flaky crust, homemade pastries, cherry dessert, easy baking, hand-held dessert


