Last Super Bowl Sunday, I stood in my kitchen watching my husband aggressively dip a soggy, sad onion ring into a bowl of ranch. It was the third one that had collapsed into a mushy mess in under a minute. The look on his face wasn’t just disappointment; it was genuine betrayal. We had ordered from that fancy place downtown—the one with the white tablecloths and the menu that costs more than my grocery bill—and yet, the appetizer was the biggest letdown of the night.
I made a silent vow right then: I would never let store-bought or restaurant onion rings ruin game day again. I wanted something better. Crunchier. More flavorful. Something that stood tall on a platter and actually stayed crispy for more than thirty seconds.
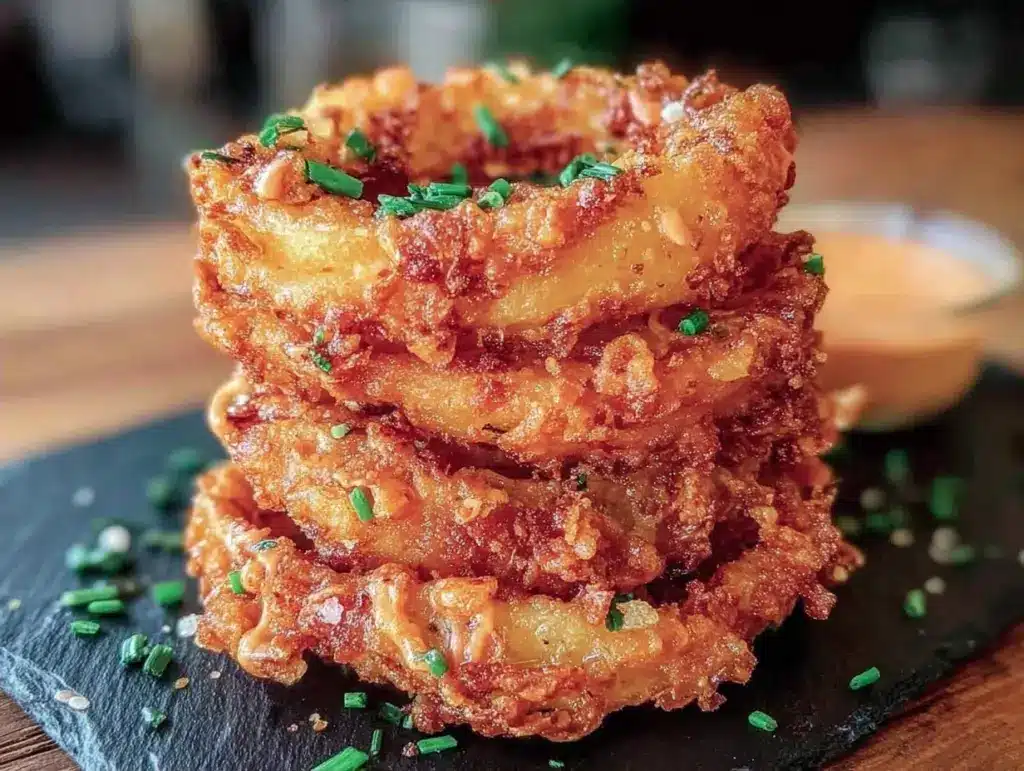
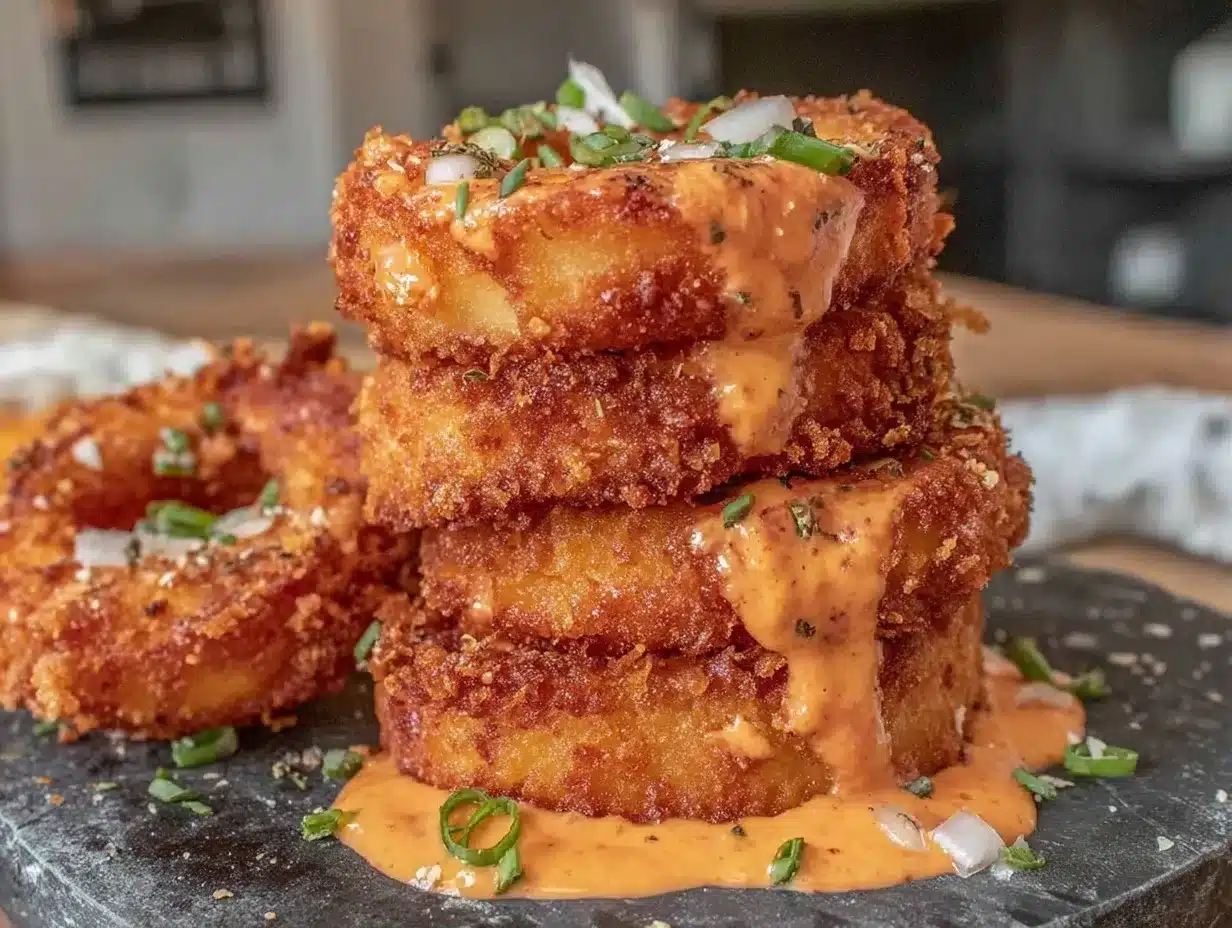
So, I went to work. I tested about a dozen different batters, tried panko, seasoned flour, and beer-battered versions. Some were too heavy, some fell apart in the oil, and a few tasted like cardboard. But then I found the sweet spot. A simple, three-step dredge that creates a shatteringly crisp, golden-brown crust that holds up against any dip. And the best part? The presentation. Instead of a messy pile, I learned to stack them into a towering “tower” that looks like it came from a high-end bar but takes zero special skills to make.
This Game Day Crispy Onion Ring Tower is my answer to “what’s for the big game?” It’s not just an appetizer; it’s the main event of the snack table. I’ve made this for football parties, backyard barbecues, and even just Tuesday night movie marathons. Everyone asks for the recipe. Everyone. And once you taste the difference between these and the frozen kind, you’ll never go back.
Why You’ll Love This Recipe
There are a few reasons this onion ring tower has become the undisputed king of my game day spread. But let’s be real, it’s mostly about that crunch.
- Actually Stays Crispy — Most onion rings get soggy the moment they hit the plate. Not these. The double-dredge method creates a barrier that keeps the moisture out. I’ve tested this by letting a batch sit for 20 minutes, and they were still crunchy. That’s huge for party food.
- Stunning Presentation — Let’s face it, we eat with our eyes first. A tower of golden rings looks impressive. It’s a centerpiece that says, “I put effort into this,” without you actually having to do much heavy lifting.
- Forgiving for Beginners — I’m not a professional chef. I burn toast. I over-salt soup. But this recipe? You really can’t mess it up. If you can dip something in flour and then in egg, you can make these. It’s foolproof.
- Better Than Takeout — I compared these side-by-side with the rings from that local sports bar. The flavor was deeper, the onion-to-breading ratio was perfect, and the texture was superior. Plus, they cost a fraction of the price.
- Perfect for Dipping — The shape and size make them ideal for dipping. Whether you’re team ranch, team spicy mayo, or team ketchup, these rings hold their own against thick sauces without falling apart.
This is the kind of recipe that turns a casual hangout into a celebration. It’s simple, it’s reliable, and it always gets a cheer from the crowd.
Ingredients You’ll Need
Here’s the good news: you don’t need a trip to a specialty store for this. Most of this is basic pantry stuff. I’m particular about three things here—the onion type, the flour blend, and the oil—and I’ll tell you exactly why.
For the Onions
Large Yellow Onions (2 large) — I know, raw onions are intense. But yellow onions have the perfect balance of sulfur and sugar. When they cook, they get sweet and mellow. Avoid red onions (they get too soft) or sweet onions like Vidalia (they can get watery and fall apart in the batter). Look for onions that are firm, not squishy.
Salt (1 teaspoon, plus more for seasoning) — Essential for bringing out the natural sweetness of the onion. Don’t skip this step of salting the rings before cooking.
For the Dredge (The Crust)
All-Purpose Flour (1 cup / 120g) — This is your base. It creates the initial layer that helps the egg stick. I use regular all-purpose. Cake flour is too delicate, and bread flour is too chewy for this application.
Cornstarch (2 tablespoons / 15g) — This is the secret weapon. Cornstarch creates that shatteringly crisp texture. It absorbs moisture better than flour and prevents the breading from getting heavy. Trust me, this little ingredient makes the difference between “okay” and “addictive.”
Paprika (1 teaspoon) — Adds a subtle warmth and that beautiful golden-red color. Smoked paprika is amazing if you want a deeper flavor, but regular works fine.
Garlic Powder (1 teaspoon) — Because onions are already garlicky, this enhances that flavor without adding chunks of raw garlic that might burn.
Onion Powder (1 teaspoon) — Double onion flavor sounds weird, but it intensifies the savory profile. It’s subtle but necessary.
Black Pepper (½ teaspoon, freshly cracked) — Adds a little kick. Don’t use pre-ground dust; fresh crack matters here.
For the Wet Batter
Eggs (2 large) — These bind the breading to the onion. Room temperature eggs work slightly better, but cold is fine. Just whisk them well.
Milk or Buttermilk (¼ cup / 60ml) — Buttermilk adds a nice tang that cuts through the richness of the fried dough. If you don’t have buttermilk, regular milk works, or even water. I prefer buttermilk for that classic diner taste.
For Frying
Vegetable Oil or Canola Oil (about 4 cups / 1 liter) — You need enough oil to submerge the rings halfway or fully. Vegetable oil has a high smoke point and neutral flavor. Canola is a great budget-friendly alternative. Do not use olive oil (low smoke point, strong flavor) or butter (burns instantly).
Equipment Needed
You don’t need fancy gadgets. Here’s what I actually use in my home kitchen.
Large Bowl — For mixing the dry ingredients. A wide bowl is better so you can toss the flour and spices evenly.
Shallow Dish — A pie plate or shallow baking dish works best for the egg wash. It makes dipping easier.
Two Plates or Baking Sheets — One for the floured onions, one for the finished coated rings. Having a staging area keeps the workflow smooth.
Deep Skillet or Dutch Oven — A 12-inch skillet is perfect. It holds the oil well and has high sides to prevent splatter. A Dutch oven is even better if you have one, as it maintains temperature more steadily.
Candy Thermometer — Highly recommended. Knowing your oil temperature is the #1 way to ensure crispiness. If you don’t have one, you can test by dropping a tiny bit of batter in; if it sizzles immediately and turns golden in 60 seconds, you’re good.
Wire Rack and Sheet Pan — This is crucial. Do not put fried onion rings on paper towels. They will steam and get soggy. A wire rack allows air to circulate, keeping them crisp while they drain excess oil.
Slotted Spoon or Tongs — For lifting the rings out of the oil. Tongs give you better control.
How to Make It: Step-by-Step
Alright, let’s build this tower. I’m walking you through exactly how I do it, including the little tricks that keep everything intact.
Step 1: Prep the Onions (10 minutes)
Peel your onions and slice them into ½-inch thick rings. You’ll get rings from the outside and smaller ones from the inside. Separate the rings and discard any mushy pieces. You want firm rings. Place them in a bowl, sprinkle with salt, and toss gently. Let them sit for 10 minutes. This draws out some of the harsh sulfur flavor and makes them sweeter.
Step 2: Set Up Your Station (5 minutes)
Get your three stations ready. Station 1: The dry mix. In your large bowl, whisk together the flour, cornstarch, paprika, garlic powder, onion powder, and pepper. Station 2: The wet mix. Whisk the eggs and milk (or buttermilk) in your shallow dish. Station 3: The coating area. Place a wire rack over a sheet pan. This is where your coated rings will rest before frying.
Step 3: Dredge the Rings (10 minutes)
This is the most important step. Take a ring from the salted onions, shake off excess water, and toss it in the dry flour mixture. Make sure it’s fully coated. Shake off any excess flour. Then, dip it into the egg wash, ensuring it’s completely covered. Finally, toss it back into the flour mixture for a second coat. This double-dredge is what creates that thick, crispy crust. Place the coated ring on the wire rack. Repeat with all rings.
Pro Tip: If your breading looks clumpy, just tap the ring gently to remove excess. You want a even layer, not a mountain of flour.
Step 4: Heat the Oil (10 minutes)
Pour about 2-3 inches of oil into your skillet or Dutch oven. Heat it over medium-high heat until it reaches 350°F (175°C). If you don’t have a thermometer, wait until the oil shimmers slightly and a wooden chopstick inserted into the oil bubbles vigorously around it.
Step 5: Fry in Batches (15 minutes)
Do not overcrowd the pan! This drops the oil temperature and leads to greasy, soggy rings. Fry 3-4 rings at a time, depending on the size of your pan. Cook for 2-3 minutes, flipping halfway through, until they are deep golden brown and crispy. The inside should be tender but not mushy.
Step 6: Drain and Rest (5 minutes)
Remove the rings with tongs or a slotted spoon and place them on the wire rack. Let them rest for 2-3 minutes. This allows the crust to set and become extra crunchy. Sprinkle with a tiny pinch of salt if you like a salty finish.
Step 7: Build the Tower
Once all batches are done, start stacking. Place the largest rings at the base, creating a circle. Then stack smaller rings in the center, leaning them slightly against each other to form a tower shape. It’s surprisingly stable if you arrange them right. Serve immediately while they’re hot and crispy.
Expert Tips & Tricks
Here’s everything I’ve learned from making this dozens of times. These tips will save you from my early mistakes.
- Keep the Oil Hot — The biggest mistake people make is letting the oil cool down between batches. If the oil is below 325°F, the rings will absorb grease. Let the oil come back up to 350°F before adding the next batch.
- Don’t Skip the Cornstarch — I tried a version with just flour once. It was okay, but not great. The cornstarch is non-negotiable for that “crunch” factor. It’s cheap and makes a huge difference.
- Pat Dry Before Coating — After salting the onions, pat them dry with a paper towel before dredging. Excess water prevents the flour from sticking properly, leading to patchy breading.
- Double Dip for Extra Crisp — If you love a really thick crust, dip the ring in the egg wash, then flour, then egg wash again, then flour. It’s a bit more work but worth it for serious crunch lovers.
- Season the Flour, Not Just the Rings — Many recipes say to salt the rings after frying. But salting the flour mixture ensures every bite is seasoned, not just the surface.
Variations & Substitutions
Once you’ve nailed the basic version, here’s how you can mix it up. I’ve tried all of these.
Spicy Kick — Add 1 teaspoon of cayenne pepper and 1 teaspoon of chili powder to the flour mix. Serve with a spicy aioli instead of ranch.
Cheesy Crust — Mix ¼ cup of grated Parmesan cheese into the flour mixture. It adds a savory, umami depth that pairs perfectly with the sweet onion.
Gluten-Free — Swap the all-purpose flour for a 1:1 gluten-free baking flour blend. Use cornstarch as is. Make sure your buttermilk is GF if you’re strict about cross-contamination.
Baked Version — For a lighter option, brush the coated rings generously with oil spray and bake at 400°F (200°C) for 15-20 minutes, flipping halfway. They won’t be *as* crispy as fried, but they’re still delicious. I use this method when I’m trying to eat a bit cleaner, but honestly, fried is superior.
Dipping Sauces — Don’t just stick to ranch. Try a spicy mayo (mayo + sriracha), a honey mustard, or even a smoky chipotle dip. I also love these with the smoked queso dip from my other recipes—it’s a match made in heaven.
Serving & Storage
How to Serve:
I usually serve the tower right on the counter as a centerpiece. It’s a conversation starter. Pair it with cold beers, a big bowl of ranch, and maybe some crispy smashed cheeseburger tacos for a full game day feast.
Storage:
Leftover onion rings are rare, but if you have some, store them in an airtight container in the fridge for up to 2 days. They will lose their crunch.
Reheating:
Never microwave them. They will turn into rubber. To reheat, place them on a wire rack in a 400°F oven for 5-7 minutes. This restores the crispiness. An air fryer also works great at 375°F for 3-4 minutes.
Freezing:
You can freeze the coated, uncooked rings. Lay them on a baking sheet and freeze until solid, then transfer to a freezer bag. Fry directly from frozen, adding 1-2 minutes to the cook time. They don’t freeze *after* cooking well, so it’s best to prep ahead.
Nutrition Information
I’m not a nutritionist, but here’s the breakdown if you’re tracking. Keep in mind that frying adds calories, so this is a treat food.
Per Serving (based on 6 servings, approx. 8-10 rings per serving):
- Calories: 320
- Protein: 6g
- Carbs: 35g
- Fiber: 2g
- Fat: 16g
- Sodium: 280mg
Look, this is comfort food. It’s not a diet recipe. But it’s way better than fast food, and you control the ingredients. If you want to lighten it up, try the baked version or use less oil for frying. But usually? I just enjoy a reasonable portion and call it a win.
Final Thoughts
So that’s my Game Day Crispy Onion Ring Tower! I know I’ve talked a lot about the crunch, but when you make a recipe this often, you notice the details. This has saved my game day reputation more times than I can count. It’s my answer to “what’s the best snack?” when I want to impress without stressing.
Make it yours! Try the spicy version, add some cheese, or experiment with different dips. The best recipes are the ones you adapt to your family’s tastes. And if you’re looking for more easy game day ideas, check out my air fryer crispy coconut shrimp—they’re just as addictive and just as easy.
If you make this, drop a comment and let me know how the tower turned out! I love hearing how recipes work in your kitchen. And if something doesn’t work, tell me that too—I’m here to help troubleshoot. Happy cooking!
Frequently Asked Questions
Can I use sweet onions instead of yellow onions?
You can, but I don’t recommend it. Sweet onions like Vidalia or Walla Walla have higher water content. They tend to fall apart in the batter and don’t hold their shape as well in a tower. Yellow onions are the sturdy, reliable choice for this recipe.
Why are my onion rings greasy?
This almost always means the oil wasn’t hot enough. If the oil is too cool, the breading absorbs the oil instead of sealing quickly. Make sure your oil is at 350°F before adding the rings. Also, don’t overcrowd the pan, which drops the temperature.
Can I make these in an air fryer?
Yes! Lightly spray the coated rings with oil and air fry at 375°F for 10-12 minutes, flipping halfway. They won’t be *quite* as crispy as deep-fried, but they’re much healthier and still delicious. I use this method when I’m feeling lazy or trying to avoid the mess of frying.
How do I keep the tower from falling over?
Start with a wide base. Use the largest, flattest rings for the bottom layer. Stack the smaller, more curved rings in the center, leaning them against the outer rings. It’s like building a tent. If it’s still wobbly, you can use a small bowl of dip in the center to anchor the structure.
Can I prep these ahead of time?
Absolutely. Coat the rings and lay them on a baking sheet. Cover them loosely with plastic wrap and refrigerate for up to 24 hours. Fry them right before serving. Just make sure to let the oil heat back up to temperature, as the cold rings will cool it down initially.
What’s the best dip for onion rings?
Classic ranch is a favorite, but I also love a spicy mayo (mix mayo with sriracha and a squeeze of lime) or a smoky chipotle dip. For something different, try a honey mustard. The key is a dip that’s thick enough to cling to the ring without dripping off.
Pin This Recipe!
Game Day Crispy Onion Ring Tower: Easy & Foolproof
- Total Time: 45 minutes
- Yield: 6 servings 1x
Description
A foolproof recipe for crispy, golden-brown onion rings that stay crunchy for hours. These are double-dredged and stacked into an impressive tower, perfect for game day parties and dipping.
Ingredients
- 2 large yellow onions
- 1 teaspoon salt (plus more for seasoning)
- 1 cup all-purpose flour
- 2 tablespoons cornstarch
- 1 teaspoon paprika
- 1 teaspoon garlic powder
- 1 teaspoon onion powder
- ½ teaspoon freshly cracked black pepper
- 2 large eggs
- ¼ cup milk or buttermilk
- 4 cups vegetable oil or canola oil (for frying)
Instructions
- Peel onions and slice into ½-inch thick rings. Separate rings, discard mushy pieces, and place in a bowl. Sprinkle with salt and toss gently. Let sit for 10 minutes to draw out moisture.
- Pat the salted onion rings dry with a paper towel.
- Set up three stations: Station 1 with a large bowl containing whisked flour, cornstarch, paprika, garlic powder, onion powder, and pepper. Station 2 with a shallow dish containing whisked eggs and milk/buttermilk. Station 3 with a wire rack over a sheet pan.
- Dredge each onion ring in the dry flour mixture, shaking off excess. Dip into the egg wash, then toss back into the dry mixture for a second coat (double-dredge). Place coated rings on the wire rack.
- Heat oil in a deep skillet or Dutch oven to 350°F (175°C).
- Fry rings in batches of 3-4, avoiding overcrowding. Cook for 2-3 minutes, flipping halfway, until deep golden brown and crispy.
- Remove rings with a slotted spoon or tongs and place on the wire rack to drain and rest for 2-3 minutes. Sprinkle with a tiny pinch of salt if desired.
- Stack the rings into a tower, starting with the largest rings at the base and smaller rings in the center. Serve immediately.
Notes
For extra crispiness, ensure oil stays at 350°F between batches. Do not use paper towels to drain as they make rings soggy; use a wire rack instead. For a baked version, spray with oil and bake at 400°F for 15-20 minutes. To freeze, coat uncooked rings and freeze on a baking sheet before transferring to a bag.
- Prep Time: 25 minutes
- Cook Time: 20 minutes
- Category: Appetizer
- Cuisine: American
Nutrition
- Serving Size: Approximately 8-10 r
- Calories: 320
- Sugar: 4
- Sodium: 280
- Fat: 16
- Saturated Fat: 3
- Carbohydrates: 35
- Fiber: 2
- Protein: 6
Keywords: onion rings, game day snacks, crispy onion rings, party food, fried appetizers, tower recipe, football snacks


