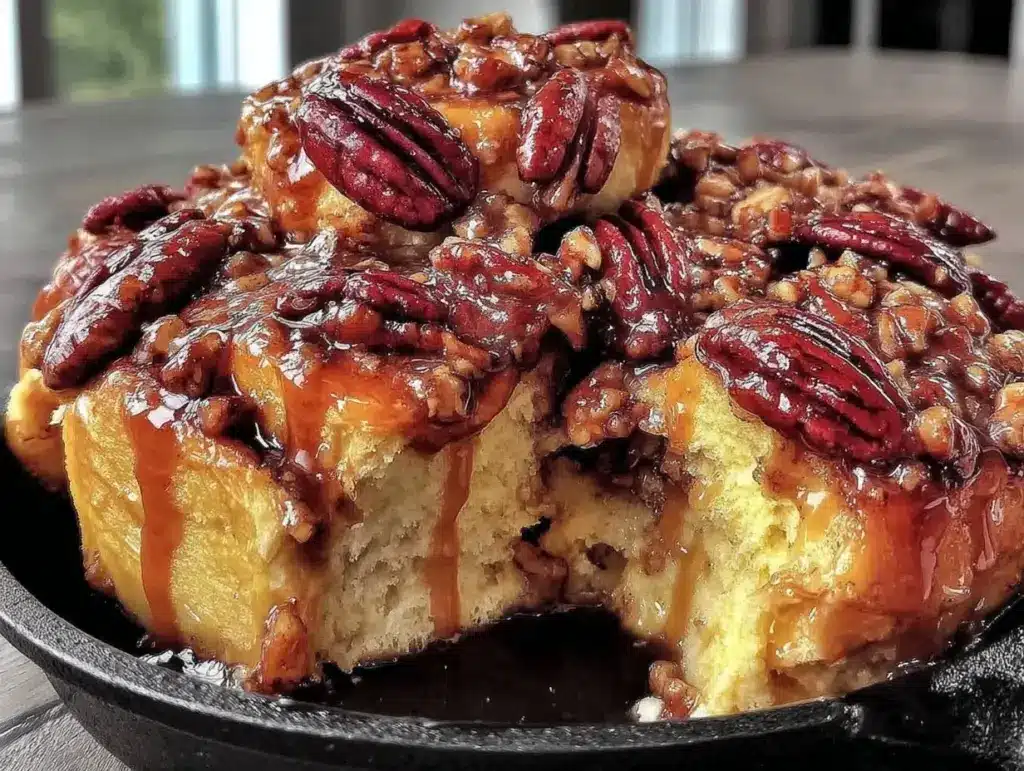
Last October, I stood in my kitchen holding a loaf of store-bought cinnamon rolls, feeling that familiar pang of disappointment. They were too sweet, the frosting was waxy, and worst of all, I was staring at a box meant for twelve people while eating alone. I ate two. I threw the rest out three days later because they’d turned into hard, sugary bricks. It was a waste of money, a waste of food, and frankly, a waste of my craving for something warm and comforting.
I’ve been there. You want a little treat, not a week’s worth of breakfasts you don’t need. That’s why I finally developed this fall maple pecan sticky buns recipe specifically for one or two people. It’s not a compromise. It’s not “small batch” in the sense of cutting corners; it’s crafted to yield exactly four perfect, gooey, maple-drizzled buns. That’s it. Four buns. Enough for you, or you and a partner, with zero guilt and zero freezer burn waiting in your future.
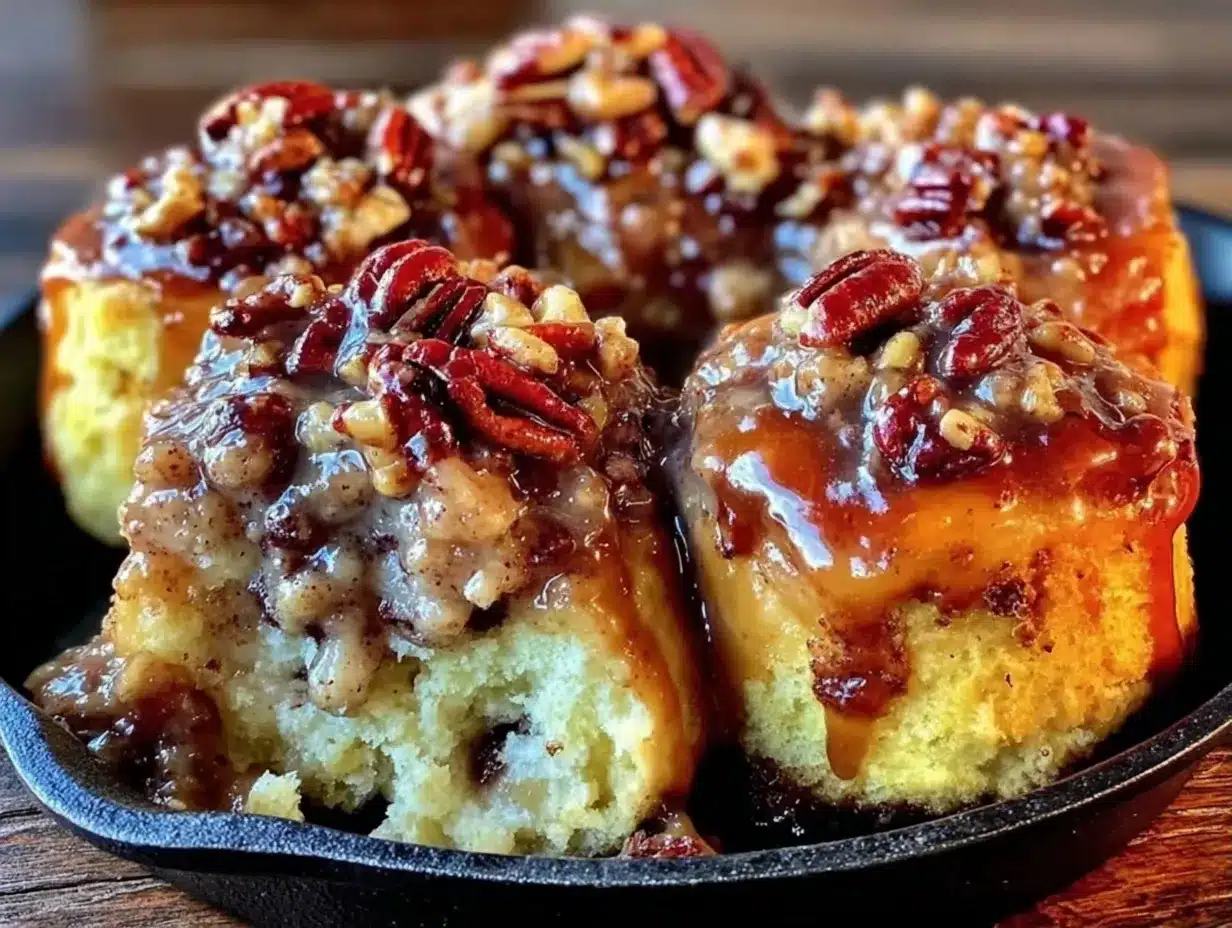
There’s something deeply satisfying about making a bakery-style treat that fits your actual life. These sticky buns capture that crisp autumn vibe—the smell of toasted pecans and rich maple syrup filling the house—without the hassle of a full pan. I’ve tested this recipe at least a dozen times, adjusting the yeast ratios and dough hydration to work perfectly in a small 6-inch round pan (or even a ramekin if you’re really solo). The result? Soft, pillowy dough, a caramelized bottom that’s actually easy to flip, and a glaze that coats every nook and cranny. It’s the kind of weekend morning ritual that feels special but takes less than an hour of active time.
If you’ve ever felt intimidated by baking for one, or if you just hate the idea of buying a whole stick of butter for a recipe that calls for twelve, this is your sign. This fall maple pecan sticky buns recipe is your new best friend. It’s practical, it’s delicious, and it respects your appetite.
Why You’ll Love This Small-Batch Sticky Bun Recipe
Let’s be real: most “small batch” recipes I’ve tried just feel like half-measures. The dough doesn’t rise right, or the baking time is all wrong, or you end up with a weirdly shaped mess. This one works because I built it from the ground up for small quantities. Here’s why this recipe has earned a permanent spot in my weekend rotation:
- Right-Sized Portions — Seriously, four buns. That’s the yield. No more staring at a half-empty pan wondering what to do with the rest. I love that I can make these for a lazy Saturday brunch for two, or have them all to myself while reading the paper. It fits my actual life.
- Quick Rise Time — I’m not a patient person when it comes to baking. I want results. Thanks to the small volume of dough, these buns don’t need a two-hour proof. They rise in about 30-45 minutes, which means I can have them in the oven while my coffee brews. It’s much more manageable than a large batch.
- Pantry-Friendly Ingredients — You probably already have most of this on hand. Flour, sugar, butter, milk, yeast, and pecans. If you don’t have maple syrup, you’re in trouble, but that’s the point. These are treats, not daily staples. I keep a small bottle of real maple syrup just for moments like this.
- Zero Waste — This is the big one. I’ve tried scaling down big recipes before, and I usually end up with leftover dough or half a jar of filling. This recipe uses exactly what you need. No scraps, no weirdly shaped leftover dough balls, no half-used sticks of butter sitting in the fridge. It’s clean, efficient cooking.
- Restaurant-Quality Texture — Don’t let the small size fool you. These buns are soft, fluffy, and have that perfect sticky caramel crust. I’ve compared them side-by-side with the expensive bakery buns down the street, and honestly? Mine are better because they’re fresh and warm. Plus, they cost pennies more per bun.
This recipe has saved my weekends. It’s my answer to “I want something fancy but I don’t want to make a mess” or “I want comfort food but I’m eating alone.” It’s reliable, it’s forgiving, and it tastes incredible. I’ve served these to friends who didn’t believe they were homemade, and I’ve eaten them straight out of the pan at 7 AM on a Tuesday because life is short.
Ingredients You’ll Need
Here’s the best part: the ingredient list is short, simple, and mostly things you already have. I’m being specific about measurements because small-batch baking is all about precision. When you’re only making four buns, a quarter-teaspoon of yeast makes a huge difference.
For the Dough
All-purpose flour (1 ¼ cups / 150g) — I use Gold Medal or King Arthur. Don’t use bread flour unless you want a chewier texture; you want soft and pillowy here. If you’re baking gluten-free, this recipe can be adapted, but the texture will be different. I usually stick to my classic cinnamon roll baked oatmeal for a gluten-free option, but for these, wheat flour is key for that rise.
Active dry yeast (1 packet / 2 ¼ teaspoons) — One standard packet is perfect for this amount. If you have instant yeast, you can use the same amount, but I prefer active dry for the flavor it gives.
Granulated sugar (2 tablespoons / 25g) — This feeds the yeast and adds a little sweetness to the dough itself. Don’t skip it.
Warm milk (½ cup / 120ml) — Whole milk is best for richness. Warm it until it’s lukewarm, not hot. If it’s too hot, you’ll kill the yeast. If it’s cold, it won’t rise. Test it on your wrist—it should feel like a baby’s bath.
Unsalted butter (2 tablespoons / 30g, melted) — Melted, not hot. This adds tenderness to the crumb.
Egg (1 large, room temperature) — This binds everything and adds structure. Room temp eggs incorporate better into the dough.
Salt (½ teaspoon) — Essential for balancing the sweetness and enhancing the flavor.
For the Caramel Filling
Unsalted butter (3 tablespoons / 45g) — This goes into the bottom of the pan. Use good butter; it’s the base of the caramel.
Packed brown sugar (½ cup / 100g) — Dark brown sugar has a deeper molasses flavor that pairs beautifully with maple. Light brown works too, but dark is better for fall vibes.
Maple syrup (2 tablespoons / 30ml) — Real maple syrup, grade A or B. Avoid “pancake syrup” which is just corn syrup with flavoring. This is non-negotiable for the authentic taste.
Pecans (¼ cup / 30g, chopped) — Toast them first! It releases the oils and makes them nuttier. I usually chop them roughly; you want pieces, not powder.
For the Maple Glaze
Powdered sugar (½ cup / 60g) — Sifted if it’s clumpy. You want a smooth glaze.
Maple syrup (1 tablespoon / 15ml) — Again, real maple syrup. This is for the drizzle on top.
Milk (1-2 teaspoons) — Add just enough to get your desired consistency. Thicker for a coating, thinner for a drizzle.
Salt (a pinch) — Cuts the sweetness and makes the maple flavor pop.
Pro Tip: I always measure my flour by spooning it into the cup and leveling it off. Scooping directly from the bag packs it down, and with small-batch baking, that extra flour can make the dough dense. I learned this the hard way with my first attempt, which tasted more like a biscuit than a sticky bun.
Equipment You’ll Need
You don’t need fancy gear for this. Here’s what I actually use:
6-inch round cake pan or deep-dish ramekin — This is the star of the show. A 6-inch pan fits four buns perfectly. If you don’t have one, a standard 8-inch pan will work, but you’ll have more space between buns, which affects the rise. I prefer the 6-inch because the buns touch, which helps them rise up instead of out.
Mixing bowl — A medium bowl is fine. I use a glass one so I can see the dough rising.
Measuring cups and spoons — Standard stuff. Precision matters here.
Whisk — For mixing the wet ingredients and the glaze.
Rolling pin — Or a heavy glass jar if you’re being lazy. You need to roll the dough into a rectangle.
Parchment paper — Optional, but I line the pan with it for easier cleanup. The caramel gets sticky.
Offset spatula — For spreading the butter and sugar mixture. A regular butter knife works too.
Small saucepan — For melting the butter and brown sugar together for the caramel layer. Or you can do it in the microwave, but the saucepan gives you more control.
Brush — A pastry brush for brushing the tops with butter before baking. Or just use a fork.
Tip: I’m obsessed with my small silicone spatulas for scraping the bowls clean. With small batches, you don’t want to lose any of that delicious butter and sugar mixture. Every bit counts.
How to Make It: Step-by-Step
Alright, let’s make these! I’m walking you through exactly how I do it, including the little tricks that ensure they’re soft and sticky, not dry and crumbly.
Step 1: Activate the Yeast (5 minutes)
In a small bowl or measuring cup, combine the warm milk and 1 teaspoon of the granulated sugar (from the dough ingredients). Sprinkle the yeast on top and stir gently. Let it sit for 5-10 minutes. You’ll see a foamy layer form on top. If it doesn’t foam, your yeast is dead or the milk was too hot. Start over—don’t risk ruining the dough. This step tells you your yeast is alive and ready to work.
Step 2: Mix the Dough (5 minutes)
In a large mixing bowl, combine the flour, remaining sugar, and salt. Make a well in the center and pour in the yeast mixture, melted butter, and egg. Mix with a wooden spoon or dough hook until a shaggy dough forms. If it’s too dry, add a teaspoon of milk. If it’s too sticky, add a teaspoon of flour. You want a dough that’s soft and slightly tacky, not sticky to the touch.
Step 3: Knead the Dough (8-10 minutes)
Turn the dough out onto a lightly floured surface. Knead for 8-10 minutes until smooth and elastic. The windowpane test is your friend: take a small piece of dough and stretch it. If it stretches thin without tearing, it’s ready. If it tears, keep kneading. I usually knead by hand for this amount—it’s quick and satisfying. Place the dough in a clean, lightly oiled bowl, cover with a damp towel or plastic wrap, and let it rise in a warm spot for 30-45 minutes, or until doubled in size.
Step 4: Prepare the Caramel Layer (5 minutes)
While the dough rises, melt the 3 tablespoons of butter in a small saucepan over medium heat. Add the brown sugar and maple syrup. Stir constantly until the mixture is smooth and bubbly. Pour this into the bottom of your 6-inch pan. Sprinkle the chopped pecans evenly over the caramel. Set aside.
Step 5: Shape the Buns (10 minutes)
Punch down the risen dough gently to release air. Roll it out into a rectangle about 8×10 inches. Spread the remaining 2 tablespoons of melted butter evenly over the dough. Sprinkle the cinnamon (if using—this recipe is maple-focused, but a pinch of cinnamon adds warmth) and any remaining brown sugar if you want extra sweetness. Starting from the long side, roll the dough up tightly into a log. Pinch the seam to seal. Cut the log into four equal pieces. Place them cut-side up in the prepared pan, spacing them evenly. They’ll expand, so don’t crowd them too much, but let them touch slightly for that soft, pull-apart texture.
Step 6: Second Rise (20-30 minutes)
Cover the pan again and let the buns rise for 20-30 minutes. They should look puffy and fill the pan. This step is crucial for fluffy buns. Don’t skip it!
Step 7: Bake (20-25 minutes)
Preheat your oven to 350°F (175°C). Brush the tops of the buns with a little melted butter (optional, but helps browning). Bake for 20-25 minutes, or until golden brown and cooked through. If they’re browning too fast, cover loosely with foil. Insert a toothpick into the center of a bun—it should come out clean.
Step 8: Glaze and Invert (5 minutes)
While the buns bake, whisk together the powdered sugar, 1 tablespoon maple syrup, milk, and salt for the glaze. Adjust consistency with more milk or sugar as needed. Once the buns are out of the oven, let them cool in the pan for 5 minutes. Then, run a knife around the edges and carefully invert them onto a serving plate. The caramel will drip down the sides—let it set for a minute. Drizzle with the maple glaze while they’re still warm.
Total Time: About 1 hour 15 minutes (mostly hands-off rising time).
Expert Tips & Tricks
Here’s everything I’ve learned from making these dozens of times. These tips will save you from my mistakes.
Don’t Overbake
Sticky buns continue to cook in the pan after you take them out. If they look done but the center is still a bit soft, take them out. Overbaking dries them out, and dry sticky buns are sad sticky buns.
Toast Your Pecans
I cannot stress this enough. Raw pecans in sticky buns taste bland. Toast them in a dry skillet for 2-3 minutes until fragrant. It adds a depth of flavor that makes the buns taste gourmet.
Use Real Maple Syrup
I know it’s expensive, but pancake syrup is sugar water with flavoring. Real maple syrup has complexity. If you’re on a budget, mix half maple syrup and half honey, but don’t skip the maple entirely. The flavor is the star.
Room Temperature Ingredients
Cold eggs and milk can shock the yeast. Take them out of the fridge 30 minutes before you start. It makes a smoother dough and a better rise.
Make-Ahead Option
You can assemble the buns the night before, cover the pan tightly with plastic wrap, and refrigerate overnight. In the morning, let them sit at room temperature for 30 minutes while you preheat the oven, then bake as directed. They’ll rise slowly in the fridge, which actually develops more flavor.
Variations & Substitutions
Once you’ve nailed the basic version, here’s how you can mix it up. I’ve tried all of these.
Chocolate Pecan
Add a tablespoon of cocoa powder to the caramel layer. It creates a chocolate-pecan swirl that’s decadent. I love this version with a chocolate glaze instead of maple.
Spiced Apple
Add diced apples to the caramel layer before adding the pecans. Use a tart apple like Granny Smith. It adds a fresh, fruity contrast to the rich caramel. This is great for autumn.
Maple Bourbon
Add a teaspoon of bourbon to the caramel mixture. It adds a sophisticated depth. Skip the bourbon if you’re making them for kids.
Gluten-Free
Use a 1:1 gluten-free flour blend. The texture will be slightly more tender, but it works. I’ve used Bob’s Red Mill and it’s been good. Just make sure your baking powder is gluten-free.
Dairy-Free
Use coconut oil instead of butter in the dough and caramel. Use almond milk instead of dairy milk. The glaze can be made with coconut cream. It’s still delicious, just different.
Serving & Storage
These are best served warm, straight from the pan. I usually serve them on a small plate, maybe with a cup of coffee or tea. They’re perfect for a lazy weekend breakfast or a special brunch treat.
Leftovers: Store leftovers in an airtight container at room temperature for up to 2 days. They’re best eaten fresh, but they do keep. Reheat in the microwave for 20-30 seconds to soften them up. Don’t refrigerate them—they’ll get stale faster.
Freezing: You can freeze the baked buns for up to 1 month. Let them thaw at room temperature and reheat in the oven at 300°F for 5-10 minutes. The texture won’t be quite as good as fresh, but it’s still tasty.
Nutrition Information
I’m not a nutritionist, but here’s the breakdown if you’re tracking. Each bun is approximately:
| Nutrient | Amount |
|---|---|
| Calories | 380 |
| Carbs | 45g |
| Fat | 18g |
| Protein | 6g |
| Fiber | 2g |
| Sugar | 28g |
Look, these are treats. They’re sweet and rich. But they’re also made with real ingredients, and the portion size is controlled. I don’t feel guilty eating one or two. If you want to lighten it up, reduce the sugar in the dough by a tablespoon, or use less butter in the caramel. But honestly? The joy of these buns is in their richness. Enjoy them as is.
Final Thoughts
So that’s my go-to fall maple pecan sticky buns! I’ve probably talked your ear off at this point, but when you make a recipe this often, you have a lot to say about it. This recipe has saved my weekends. It’s my answer to “I want something fancy but I don’t want to make a mess” or “I want comfort food but I’m eating alone.” It’s reliable, it’s forgiving, and it tastes incredible.
Make it yours! Try different add-ins, swap in your favorite nuts, or adjust the maple syrup to your taste. The best recipes are the ones you adapt to your life. If you make this, drop a comment and let me know what you think! I love hearing how recipes turn out in your kitchen. And if something doesn’t work, tell me that too—I’m here to help troubleshoot.
Happy baking! And I hope your kitchen smells half as good as mine does right now.
Frequently Asked Questions
Can I use instant yeast instead of active dry yeast?
Yes, you can use the same amount. Instant yeast doesn’t need to be activated in milk first; you can mix it directly with the flour. The rise time might be slightly faster, so keep an eye on the dough.
Why did my buns turn out dense?
This usually means the yeast was dead or the dough was over-kneaded. Make sure your milk is warm, not hot, when activating the yeast. Also, don’t knead too much—just until smooth. Over-kneading develops too much gluten, making the buns chewy instead of soft.
Can I make these in a muffin tin?
You can, but the texture will be different. Muffin tins make individual buns with crispy edges, which is nice, but they won’t have that gooey, sticky bottom from the caramel. If you use a muffin tin, add a teaspoon of caramel to each cup before placing the dough.
How do I know when the dough is done rising?
It should double in size and feel puffy when you press it gently. If it springs back slowly, it’s ready. If it springs back quickly, it needs more time. If it doesn’t spring back at all, it’s over-proofed.
Can I freeze the dough before baking?
Yes, but it’s tricky. Shape the buns, place them in the pan, cover tightly with plastic wrap, and freeze. When ready to bake, let them thaw and rise at room temperature, then bake as directed. The texture might be slightly less fluffy, but it works.
What if I don’t have a 6-inch pan?
You can use a smaller ramekin for one bun, or a larger pan and adjust the baking time. If you use a larger pan, the buns will spread more, so you might need to add a little more dough or accept smaller buns. Just keep an eye on them—they’ll bake faster in a larger pan.
Pin This Recipe!
Fall Maple Pecan Sticky Buns: Easy Small Batch Recipe
- Total Time: 1 hour 15 minutes
- Yield: 4 servings 1x
Description
A small-batch recipe yielding four perfect, gooey, maple-drizzled sticky buns, crafted specifically for one or two people with zero waste and a quick rise time.
Ingredients
- 1 ¼ cups all-purpose flour
- 1 packet active dry yeast (2 ¼ teaspoons)
- 2 tablespoons granulated sugar
- ½ cup warm milk
- 2 tablespoons unsalted butter, melted
- 1 large egg, room temperature
- ½ teaspoon salt
- 3 tablespoons unsalted butter (for caramel)
- ½ cup packed brown sugar
- 2 tablespoons real maple syrup (for caramel)
- ¼ cup chopped pecans, toasted
- ½ cup powdered sugar (for glaze)
- 1 tablespoon real maple syrup (for glaze)
- 1–2 teaspoons milk (for glaze)
- Pinch of salt (for glaze)
Instructions
- Activate yeast: Combine warm milk and 1 teaspoon sugar in a small bowl, sprinkle yeast on top, and let sit for 5-10 minutes until foamy.
- Mix dough: In a large bowl, combine flour, remaining sugar, and salt. Add yeast mixture, melted butter, and egg. Mix until a shaggy dough forms.
- Knead dough: Turn dough onto a floured surface and knead for 8-10 minutes until smooth and elastic. Place in an oiled bowl, cover, and let rise for 30-45 minutes until doubled.
- Prepare caramel: While dough rises, melt 3 tablespoons butter in a saucepan. Stir in brown sugar and 2 tablespoons maple syrup until smooth and bubbly. Pour into the bottom of a 6-inch round pan and sprinkle with chopped pecans.
- Shape buns: Punch down risen dough and roll into an 8×10 inch rectangle. Spread remaining 2 tablespoons melted butter over dough. Roll tightly into a log, pinch seam, and cut into four equal pieces. Place cut-side up in the prepared pan.
- Second rise: Cover pan and let buns rise for 20-30 minutes until puffy.
- Bake: Preheat oven to 350°F (175°C). Brush tops with melted butter if desired. Bake for 20-25 minutes until golden brown and cooked through.
- Glaze and invert: Whisk powdered sugar, 1 tablespoon maple syrup, milk, and salt for glaze. Let buns cool in pan for 5 minutes, then invert onto a serving plate. Drizzle with glaze while warm.
Notes
Toast pecans in a dry skillet for 2-3 minutes before adding to enhance flavor. Use real maple syrup, not pancake syrup. For make-ahead, assemble buns the night before, cover, and refrigerate overnight. Let sit at room temperature for 30 minutes before baking.
- Prep Time: 30 minutes
- Cook Time: 25 minutes
- Category: Breakfast
- Cuisine: American
Nutrition
- Serving Size: 1 bun
- Calories: 380
- Sugar: 28
- Sodium: 250
- Fat: 18
- Saturated Fat: 8
- Carbohydrates: 45
- Fiber: 2
- Protein: 6
Keywords: sticky buns, small batch recipe, maple pecan buns, fall baking, easy breakfast, gluten-free option, dairy-free option


