Let’s be real for a second. The idea of a charcuterie board usually conjures up images of Pinterest-perfect spreads, tiny artisanal crackers, and hours of arranging prosciutto into little roses. It sounds like something you’d see at a wedding or a fancy holiday party. And honestly? That’s the problem.
That’s not dinner. That’s not even an appetizer. That’s a performance.
Last week, I came home from work at 6:30 PM. My brain was completely fried. My partner was hungry, the kids were bouncing off the walls, and I did not have the mental energy to cook a “real” meal. But I also didn’t want cereal. I wanted something that felt special, something that said, “Hey, it’s autumn, let’s celebrate,” without requiring me to stand over a stove for forty-five minutes.
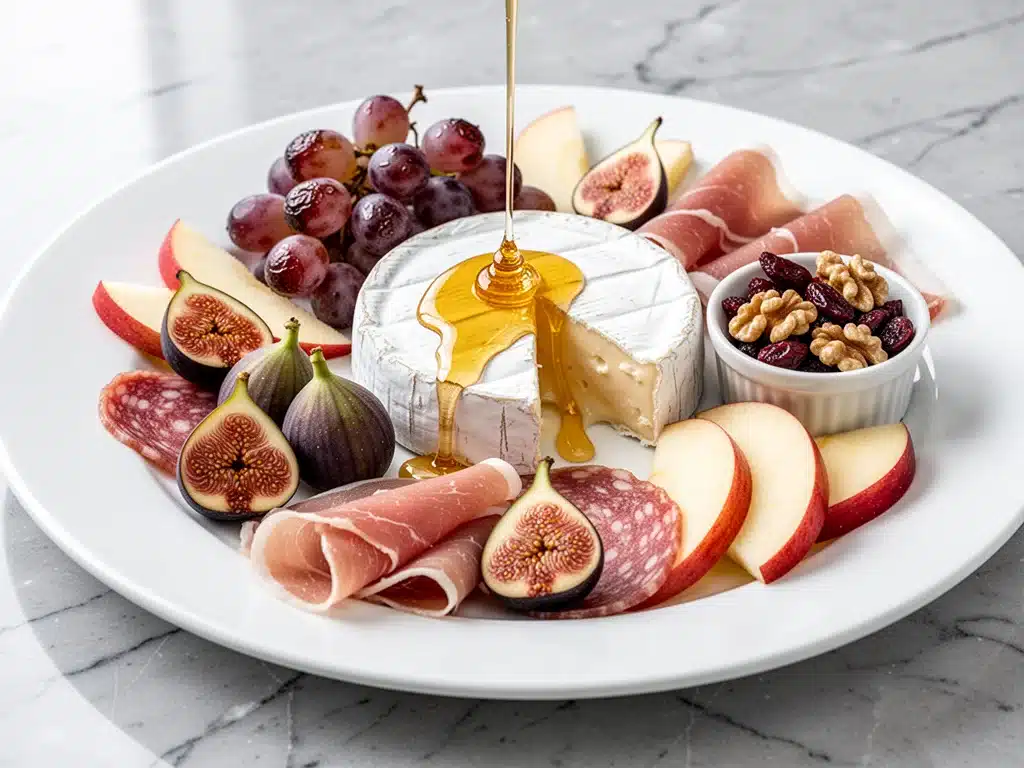
So I did what any exhausted home cook does: I opened the fridge, raided the pantry, and threw together a fall charcuterie board with roasted grapes and honey brie. I didn’t arrange it like a museum exhibit. I just put stuff on a board. And you know what? It was delicious. It was cozy. It took me exactly fifteen minutes. And it tasted like I’d planned it for days.
That’s the secret to this fall charcuterie board with roasted grapes and honey brie. It’s not about the arrangement. It’s about the flavor combo. The sticky, sweet, hot grapes. The gooey, melty brie. The crunch of nuts. It’s comfort food served on a wooden slab. And because it requires zero actual cooking skill (just watching a bowl in the microwave or oven), it’s perfect for those chaotic weeknights when you just need dinner to work.
I’ve made this board at least ten times since September. Sometimes I use the oven. Sometimes I use the microwave. Sometimes I’m too tired to even roast the grapes and just use them raw (which is still good, but the roasted version? Game changer). This recipe has saved me more weeknights than I care to admit. It’s my answer to “what’s for dinner” when I have zero energy but high standards.
Why You’ll Love This Recipe
There are about a million reasons I keep coming back to this board, but let’s cut to the chase. This isn’t just cheese and crackers. It’s a meal-in-a-box that feels fancy but costs less than takeout and takes less time than ordering Uber Eats.
Here’s why this fall charcuterie board with roasted grapes and honey brie has taken over my kitchen:
- Zero Stress Cooking — Seriously. If you can microwave grapes or put a bowl in the oven, you can make this. I’ve made this board while helping my kid with homework. It’s that simple. No chopping, no sautéing, no stirring pots.
- Flavor Explosion — Hot, roasted grapes burst with a jammy sweetness that pairs perfectly with salty cheese. It’s the kind of sweet-and-salty combo that makes people close their eyes and go “oh wow.” It’s addictive.
- Pantry Friendly — You probably have 80% of this already. Grapes? Check. Brie? Check. Crackers? Check. Nuts? Check. If you don’t have prosciutto, skip it. If you don’t have honey, use maple syrup. This recipe is flexible because life is flexible.
- Feels Fancy, Costs Pennies — I’ve served this to friends who think I’m a “foodie” (I’m not, I’m just lazy and strategic). It looks like you spent an hour curating it. But it’s basically just cheese and fruit. It’s budget-smart dinner planning at its finest.
- Make-Ahead Magic — You can roast the grapes and prepare the cheese an hour before guests arrive. The board comes together in five minutes flat. This is the ultimate stress-free hosting hack.
This is my go-to when I need dinner to just work. No complicated techniques, no weird ingredients, just reliable, delicious food that makes everyone happy. And honestly? It tastes better than most restaurant appetizers I’ve paid $20 for.
Ingredients You’ll Need
Here’s the best part: you probably have most of this already. This looks like a long list, but most of it is pantry basics or fridge staples. I’m particular about three ingredients here, and I’ll tell you exactly why.
For the Star Attraction:
Red seedless grapes (2 cups / 300g) — This is the magic ingredient. I use red grapes because they’re sweeter and have thinner skins that burst easier. Green grapes work, but they’re too tart and don’t get that jammy texture. Don’t skip the roasting—it concentrates the sugar and makes them taste like candy.
Brie cheese (1 wheel, about 8oz / 225g) — Get a round wheel, not a wedge. It looks better on the board and melts more evenly. Look for one that’s slightly soft to the touch. If it’s rock hard, it’s too old. If it’s leaking, it’s too ripe. You want that perfect, creamy middle ground.
Honey (2 tablespoons / 30ml) — Drizzle this over the brie before baking. It caramelizes and creates this sticky, golden crust that’s impossible to resist. Use whatever honey you have. Clover is mild, but wildflower adds more flavor. Avoid anything too strong like buckwheat unless you really like that taste.
For the Crunch and Salt:
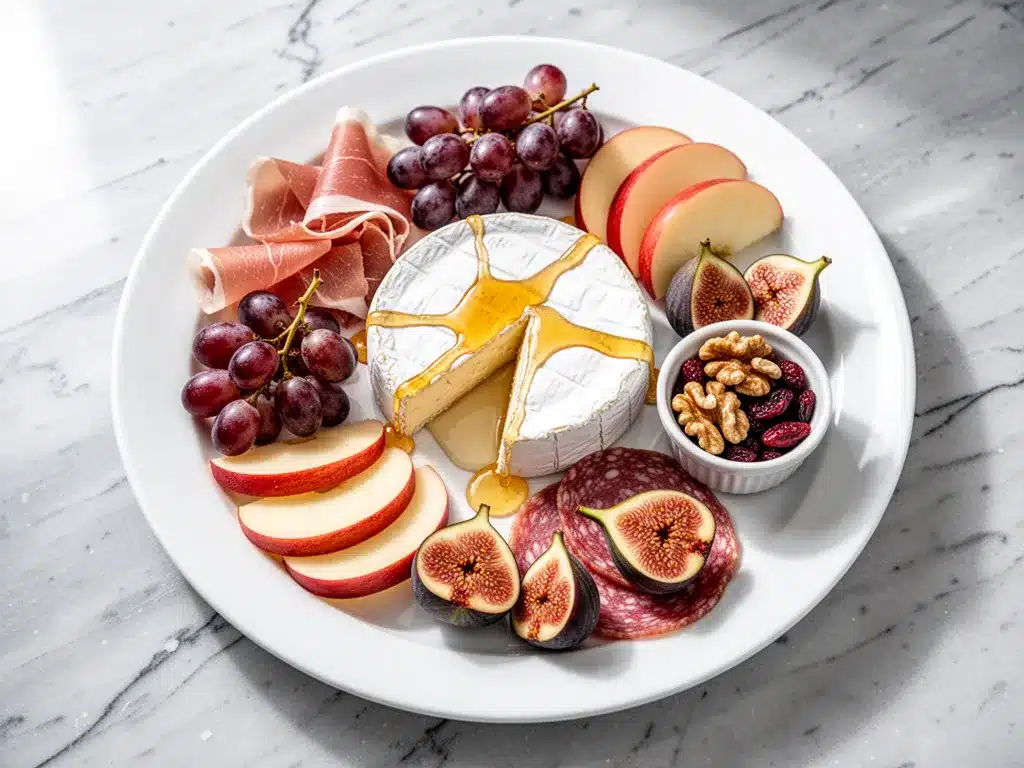
Crackers (1 package / 200g) — I use water crackers or plain sesame seed crackers. They’re neutral and let the cheese shine. Pretzel crisps work too if you want something saltier. Avoid heavily flavored crackers like garlic or herb—they’ll clash with the honey.
Mixed nuts (½ cup / 60g) — Walnuts, pecans, or almonds. I like walnuts because they’re earthy and pair well with the grapes. Toast them lightly in a dry pan for two minutes if you have five minutes. It makes a huge difference. Store-bought roasted nuts work fine if you’re in a rush.
Prosciutto or salami (4oz / 115g) — Optional, but adds that salty, savory element that balances the sweet grapes. I usually buy pre-sliced at the deli counter. If you’re vegetarian, skip it or swap for roasted chickpeas for crunch.
For the Finish:
Fresh rosemary or thyme (2 sprigs) — Garnish. It looks pretty and adds a hint of herbal aroma. Not strictly necessary, but it makes the board look like you tried. I always have dried rosemary in my pantry, but fresh is better if you have it.
Black pepper (freshly cracked) — A little crack of pepper on the brie cuts through the richness. It’s a small detail, but it elevates the whole dish.
Optional Add-ins:
Apple slices (1 apple, sliced) — Adds freshness and crunch. I like crisp Granny Smith apples because they hold up well.
Dried cranberries (¼ cup) — Adds chewiness and extra fall flavor.
Fig jam (2 tablespoons) — If you want to go all out, add a small bowl of jam for dipping.
Shopping Tips:
I always buy my brie from the grocery store deli counter. They can cut it for you, and it’s usually fresher than the pre-packaged stuff. For grapes, look for bunches that are plump and firm. Avoid any with shriveled berries. And for nuts, buy them in the bulk bin if you have one—it’s cheaper and you get exactly the amount you need.
Equipment Needed
You don’t need fancy equipment for this. Here’s what I actually use.
Microwave-safe bowl or small baking dish — I use a microwave bowl for speed. It takes 90 seconds. If you prefer oven-roasting, use a small oven-safe dish. It takes 10-12 minutes at 400°F. I prefer the microwave because I can do it while I’m setting the table.
Wooden board or large platter — Any flat surface works. I use a wooden cutting board because it’s rustic and fits the fall vibe. A marble slab works too, but wood feels cozier. Just make sure it’s clean and dry.
Small knife — For slicing the brie. A cheese knife is nice, but any sharp knife works. I use my regular chef’s knife. Just be careful—brie is slippery.
Small spoon — For drizzling the honey. A teaspoon works perfectly.
Optional but nice:
Small bowls — For holding nuts, jam, or extra crackers. It keeps things organized and looks pretty.
Pastry brush — If you want to brush the honey evenly over the brie. A spoon works fine too.
Tool Tips:
Don’t have a wooden board? A large plate works. I’ve served this on a big ceramic platter, and it looked great. The key is contrast—dark wood or white ceramic makes the colors pop.
How to Make It: Step-by-Step
Alright, let’s make this! I’m walking you through exactly how I do it, including the little tricks I’ve picked up. This whole process takes about 15 minutes, but only 5 minutes of active work.
Step 1: Prep Your Board (5 minutes)
Before you start cooking, lay out your board. Place your crackers in piles or fanned out. Scatter your nuts around. Tear the prosciutto into pieces if you’re using it. Arrange the apple slices if you’re adding them. Think of this as the canvas. You don’t need it to be perfect—just organized. I like to leave space in the center for the hot brie.
Step 2: Roast the Grapes (2 minutes)
Put the grapes in a microwave-safe bowl. Microwave on high for 90 seconds to 2 minutes. You’ll see them start to burst and release juice. That’s exactly what you want. They should be hot and slightly wrinkled. If you’re using the oven, roast at 400°F for 10-12 minutes. Let them cool for a minute so they’re warm, not scalding.
Step 3: Prep the Brie (2 minutes)
Remove the brie from its packaging. Place it in a small oven-safe dish or microwave-safe bowl. Drizzle the honey evenly over the top. Use a spoon to spread it around a bit. Sprinkle with freshly cracked black pepper. If you’re using the oven, bake at 400°F for 10-12 minutes until the cheese is soft and gooey. If using the microwave, heat for 45-60 seconds. Watch it closely—brie melts fast.
Step 4: Assemble the Board (3 minutes)
Place the hot brie in the center of your board. It should be jiggly and soft. Scatter the roasted grapes around the brie. The heat from the cheese will keep them warm. Add any extra garnishes like rosemary sprigs or dried cranberries. Drizzle a little extra honey over the grapes if you like it sweeter.
Step 5: Serve Immediately
Grab a cracker, top it with a piece of brie, a spoonful of grapes, and a nut. Eat it while it’s hot. The contrast of hot, gooey cheese and sweet, burst grapes is incredible. Serve with a glass of wine or cider. Enjoy.
Total Time: About 15 minutes (5 minutes active, 10 minutes mostly hands-off)
Built-in Troubleshooting:
Brie too runny? Don’t panic. That’s actually what you want. It’s supposed to be gooey. Just serve it with sturdy crackers that won’t break.
Grapes not bursting? Microwave them 30 seconds longer. Or roast them longer in the oven. They need to get hot enough to break open.
Sauce too sweet? Add more salt. A pinch of flaky sea salt on top balances the honey perfectly.
Expert Tips & Tricks
Here’s everything I’ve learned from making this dozens of times. These tips will save you from my mistakes.
Don’t Overcook the Brie
I’ve burned brie before. It happens. Brie melts incredibly fast. If you’re using the oven, check it at 8 minutes. If you’re using the microwave, check it at 45 seconds. You want it soft and jiggly, not liquid. If it leaks everywhere, it’s overdone. A little structure helps it hold its shape on the cracker.
Warm the Board (Optional)
If you’re serving this immediately, warm your wooden board slightly before assembling. I’ll sometimes put it in the oven for 2 minutes (off) to take the chill off. Cold wood sucks the warmth out of the cheese. Warm wood keeps everything cozy.
Use Ripe Grapes
The sweeter the grapes, the better the result. If your grapes are tart, they won’t caramelize as nicely. I buy grapes a few days before I plan to make this board so they get a little softer and sweeter. It’s a small detail, but it matters.
Add Texture Contrast
Don’t just serve soft crackers. Add something crunchy like pretzel crisps or toasted nuts. The texture contrast makes the eating experience more interesting. Soft cheese, crunchy cracker, juicy grape. It’s sensory heaven.
Make It Ahead
You can roast the grapes and prepare the cheese up to an hour before serving. Keep the grapes in the fridge and the brie in the fridge. Warm them up right before serving. The board comes together in minutes. This is the ultimate stress-free hosting hack.
Variations & Substitutions
Once you’ve nailed the basic version, here’s how you can mix it up. I’ve tried all of these.
Vegan Version
Use a vegan brie (like Violife or Miyoko’s) and drizzle with agave nectar instead of honey. Roast the grapes the same way. It’s surprisingly close to the original. My vegan friends love this version.
Gluten-Free
Use gluten-free crackers or rice cakes. Everything else is naturally gluten-free. I use Ryvita crackers for a crisp, neutral base.
Spicy Kick
Add a pinch of red pepper flakes to the brie before baking. Or drizzle with spicy honey. It adds a nice heat that cuts through the richness.
Herbaceous Twist
Add fresh thyme or rosemary to the brie before baking. The herbs infuse the cheese with aroma. It’s subtle but fancy.
Fruit Swap
Can’t find grapes? Use halved strawberries or blueberries. They roast similarly and add a different flavor profile. I’ve used both, and they’re both delicious.
Protein Swap
No prosciutto? Use roasted chickpeas for crunch and protein. Or skip it entirely. This board is vegetarian-friendly without the meat.
Serving & Storage
How to Serve:
I usually serve this straight from the board at the dinner table—it looks rustic and stays warm. But here are other ways I’ve enjoyed it:
- As an Appetizer — Serve before dinner with drinks. It’s the perfect way to start a meal.
- As a Light Dinner — Add more crackers and fruit, and you’ve got a full meal. Pair with a side salad if you’re hungry.
- With Dessert — Serve after dinner as a cheese course. It’s lighter than cake and satisfies the sweet tooth.
Side Dishes:
Simple green salad — With balsamic vinaigrette. The acidity cuts through the richness.
Roasted vegetables — Like the fall sheet pan sausage and root veggies for a heartier meal.
Butternut squash soup — A cozy warm soup pairs perfectly with the cool board.
Wine Pairing:
Not a wine expert, but my wine-snob friend says Pinot Grigio or a light Riesling works great with this. For non-alcoholic, try apple cider or sparkling water with lemon.
Storage Instructions:
Refrigerator:
Store leftover grapes and brie separately. The brie will harden in the fridge. Let it come to room temperature before serving again. The grapes will keep for 2-3 days.
Reheating:
Best method: Warm the brie in the microwave for 30 seconds or in the oven at 300°F for 5 minutes. The grapes can be microwaved for 30 seconds. Don’t try to reheat the whole board—just the components.
Freezing:
Honestly, this doesn’t freeze well. The cheese texture changes, and the grapes get mushy. Make it fresh. It’s too quick to bother freezing.
Nutrition Information
I’m not a nutritionist, but here’s the breakdown if you’re tracking.
Per Serving (based on 4 servings):
– Calories: 350
– Protein: 12g
– Carbs: 40g
– Fiber: 3g
– Sugar: 25g
– Fat: 15g
– Saturated Fat: 8g
– Cholesterol: 35mg
– Sodium: 400mg
– Calcium: 200mg
What’s Good:
– Decent protein from cheese and nuts
– Calcium from the brie
– Antioxidants from the grapes
– Can add vegetables to boost nutrition
What to Know:
– Higher in calories from cheese and honey
– Contains dairy and gluten
– Moderate sodium
My Take:
“Look, this is comfort food with cheese and honey. It’s not a diet recipe. But it’s way better than takeout, costs less, and I know exactly what’s in it. When I want to make it lighter, I use fewer crackers and more nuts and fruit. But usually? I just eat a reasonable portion and enjoy it.”
Final Thoughts
So that’s my go-to fall charcuterie board with roasted grapes and honey brie! I’ve probably talked your ear off at this point, but when you make a recipe this often, you have a lot to say about it.
This has saved weeknight dinners more times than I can count. It’s my answer to “what’s for dinner” when I’m tired, don’t want takeout, and still want something that tastes really good. My kids are happy, my partner’s happy, and I’m happy because I’m not stressed about cooking.
Make it yours! Try different add-ins, swap in your favorite vegetables, adjust the honey (though more is always better in my opinion). The best recipes are the ones you adapt to your family’s tastes.
If you make this, drop a comment and let me know what you think! I love hearing how recipes turn out in your kitchen. And if something doesn’t work, tell me that too—I’m here to help troubleshoot.
Happy cooking! And I hope your kitchen smells half as good as mine does right now.
Frequently Asked Questions
Can I use green grapes instead of red?
You can, but red grapes are sweeter and have thinner skins, which makes them burst easier and get that jammy texture. Green grapes work, but they’re tart and don’t caramelize as nicely. If you use green, roast them a little longer.
Can I make this ahead for a party?
Sort of. Roast the grapes and prepare the cheese up to 2 hours ahead. Store them separately in the fridge. Warm them up right before serving. Assemble the board in the last 5 minutes. It won’t be quite as hot as fresh, but it’s close and saves you stress during the party.
Why did my brie leak everywhere?
The heat was too high or you cooked it too long. Brie melts fast. Always check it early. If it’s leaking, it’s still delicious—just serve it with sturdier crackers or spoons. Next time, reduce the cooking time by 30 seconds.
Can I use a different cheese?
Yes! Camembert works the same way. Goat cheese is good but melts differently—it gets soft but doesn’t get as gooey. Brie is best for that classic stretchy texture. Avoid hard cheeses like cheddar; they don’t melt the same way.
Can I use the oven instead of the microwave?
Absolutely. Bake at 400°F for 10-12 minutes. The oven gives a more even melt and slightly caramelizes the honey better. The microwave is faster (90 seconds), but the oven tastes slightly richer. Choose based on your patience level.
How do I store leftovers?
Store the brie and grapes separately in airtight containers. The brie will harden in the fridge. Let it come to room temperature before serving again. The grapes will keep for 2-3 days. Don’t freeze this board—the texture changes.
Can I double this recipe?
Yes! Just use a larger board or two boards. Roast the grapes in batches if needed. The cooking times stay the same. I do this when I’m feeding a crowd. Just make sure you have enough crackers to go around!
Pin This Recipe!
Fall Charcuterie Board: 5-Step Roasted Grapes & Honey Brie
- Total Time: 15 minutes
- Yield: 4 servings 1x
Description
A stress-free, cozy autumn dinner or appetizer featuring hot, jammy roasted grapes and melty honey-drizzled brie, assembled in just 15 minutes with minimal cooking skill.
Ingredients
- 2 cups red seedless grapes (300g)
- 1 wheel Brie cheese (about 8oz / 225g)
- 2 tablespoons honey
- 1 package crackers (200g), such as water crackers or plain sesame seed
- ½ cup mixed nuts (60g), such as walnuts, pecans, or almonds
- 4oz prosciutto or salami (115g), optional
- 2 sprigs fresh rosemary or thyme
- Freshly cracked black pepper
- 1 apple, sliced (optional, Granny Smith recommended)
- ¼ cup dried cranberries (optional)
- 2 tablespoons fig jam (optional)
Instructions
- Prep the board: Arrange crackers, scatter nuts, tear prosciutto if using, and place apple slices. Leave space in the center for the hot cheese.
- Roast the grapes: Place grapes in a microwave-safe bowl and microwave on high for 90 seconds to 2 minutes until they burst and release juice. Alternatively, roast in an oven at 400°F for 10-12 minutes. Let cool slightly.
- Prep the brie: Place the brie wheel in a small oven-safe dish or microwave-safe bowl. Drizzle with honey, spread slightly, and sprinkle with black pepper.
- Heat the brie: Microwave for 45-60 seconds or bake at 400°F for 10-12 minutes until soft and gooey. Watch closely to prevent leaking.
- Assemble: Place the hot brie in the center of the board. Scatter roasted grapes around it. Add garnishes like rosemary or dried cranberries.
- Serve immediately: Enjoy with crackers, nuts, and optional prosciutto while the cheese is warm and gooey.
Notes
Red grapes are preferred for their sweetness and thinner skins. Brie should be soft to the touch but not leaking. If using the oven, check brie at 8 minutes to prevent overcooking. The board can be assembled ahead of time, but heat the cheese and grapes just before serving for best texture.
- Prep Time: 5 minutes
- Cook Time: 10 minutes
- Category: Appetizer
- Cuisine: American
Nutrition
- Serving Size: 1 serving includes a
- Calories: 350
- Sugar: 25
- Sodium: 400
- Fat: 15
- Saturated Fat: 8
- Carbohydrates: 40
- Fiber: 3
- Protein: 12
Keywords: fall charcuterie board, roasted grapes, honey brie, quick dinner, weeknight meal, vegetarian appetizer, easy entertaining, cozy fall recipes


