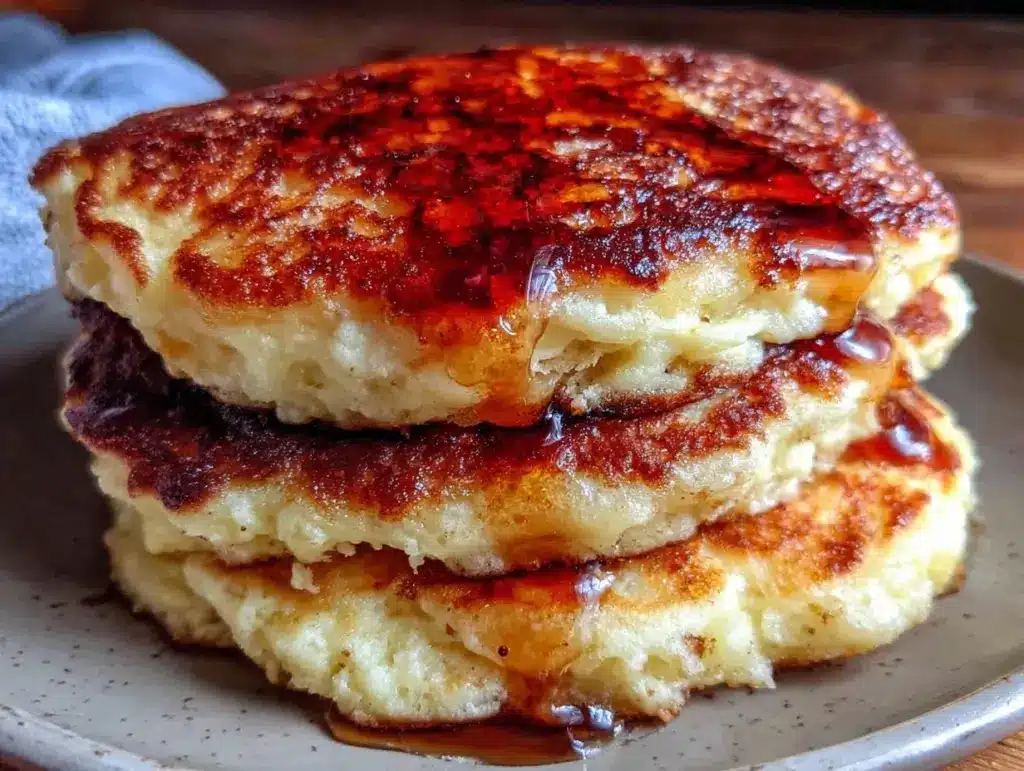
There is a specific kind of magic that happens on a Saturday morning when the house is quiet, the coffee is brewing, and the smell of cooking batter drifts through every room. I remember waking up at my parents’ house years ago, shuffling into the kitchen in my pajamas to find my dad standing over the stove, flipping pancakes with a rhythm that looked like a dance. They weren’t just flat, dense discs of breakfast food. They were tall, golden, and jiggled slightly when you nudged them. He always told me the secret was letting the batter rest, and honestly? I’ve spent the last decade trying to replicate that exact fluffiness.
These extra-fluffy buttermilk pancakes are the result of that obsession. I didn’t want just any pancake recipe; I wanted the kind that makes people stop mid-bite and ask, “What is your secret?” The answer isn’t fancy equipment or expensive ingredients. It’s buttermilk, a little patience, and a vanilla bean maple syrup that tastes like you spent hours on it (but actually takes five minutes). This is the recipe that turns a simple breakfast into a weekend brunch event. It’s rich, it’s tender, and it’s the perfect excuse to stay in bed for another ten minutes.
Why You’ll Love This Recipe
I’ve made pancakes for brunch for friends, for family gatherings, and for lazy Sundays when no one is watching. Some are good. These are unforgettable. Here’s why these extra-fluffy buttermilk pancakes have taken over my weekend routine:
- Actually Fluffy, Not Flat — Most pancake recipes give you a crepe with a pancake identity crisis. These rise. They have air pockets you can lose a fork in. The buttermilk reacts with the baking soda to create lift, and the resting period lets that gluten relax so they stay tender, not tough.
- Vanilla Bean Maple Syrup That Steals the Show — I know, I know. Usually, we just grab the bottle off the shelf. But real maple syrup heated with a split vanilla bean? It’s a game-changer. It’s aromatic, complex, and tastes like a dessert topping rather than just a breakfast drizzle. It elevates the whole meal.
- Perfect for Sharing — This recipe makes enough for a crowd but cooks fast enough that everyone gets hot pancakes. I love setting up a “pancake bar” with this syrup as the star. It feels indulgent and special, like you’re at a fancy hotel breakfast, but it’s made in your own kitchen.
- Uses Simple Ingredients — You probably have buttermilk in your fridge right now, or it’s an easy swap. The rest is flour, sugar, eggs, butter, and baking powder. No weird flours or hard-to-find items. Just classic, comforting breakfast food done right.
This isn’t just breakfast; it’s a mood. It’s cozy, it’s rich, and it’s the kind of meal that makes you want to linger at the table with a second cup of coffee.
Ingredients You’ll Need
Here’s the best part about these extra-fluffy buttermilk pancakes: you don’t need a specialty store run. But I am particular about a few things, so pay attention to the notes below.
For the Pancakes
All-purpose flour (1 ½ cups / 190g) — Don’t use cake flour or self-rising. We need structure. Spoon it into the cup and level it off. Don’t scoop and dump, or you’ll pack in too much flour and get dense pancakes.
Granulated sugar (2 tablespoons) — Just a touch. It helps with browning and adds a hint of sweetness without making them taste like dessert. If you prefer sweeter pancakes, bump it up to 3 tablespoons.
Baking powder (2 teaspoons) — The lift agent. Make sure it’s fresh! Old baking powder is the reason your pancakes come out flat. If it’s been sitting in your cabinet for two years, toss it and buy a new can.
Baking soda (½ teaspoon) — This reacts with the buttermilk to create bubbles. It’s crucial for that extra fluffiness.
Salt (½ teaspoon) — Enhances all the flavors. Don’t skip it.
Buttermilk (1 ¼ cups / 300ml) — The star of the show. The acidity tenderizes the gluten. If you don’t have buttermilk, make your own: add 1 tablespoon of white vinegar or lemon juice to a measuring cup, then fill the rest with regular milk. Let it sit for 5 minutes until it curdles slightly.
Egg (1 large) — Room temperature is best. It emulsifies the batter better than a cold egg.
Unsalted butter (3 tablespoons, melted) — Adds richness and helps with browning. Let it cool slightly before adding so it doesn’t cook the egg.
Vanilla extract (1 teaspoon) — For classic flavor.
For the Vanilla Bean Maple Syrup
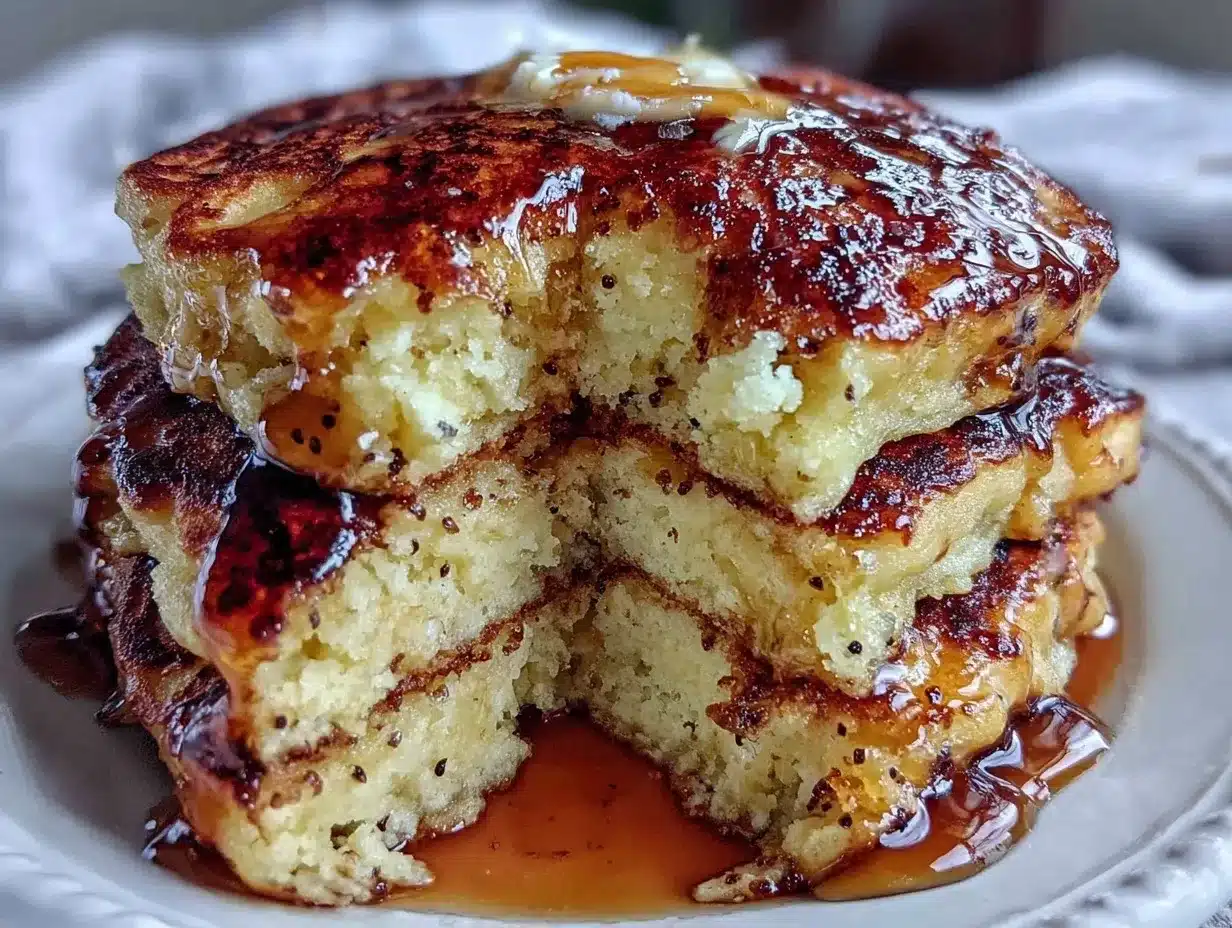
Real maple syrup (½ cup / 120ml) — Must be Grade A Amber or Dark. Avoid “pancake syrup” made with corn syrup. The flavor difference is night and day.
Vanilla bean (1 pod) — Split it lengthwise and scrape out the seeds. The seeds give you those beautiful speckles and intense aroma. If you don’t have a bean, use 1 teaspoon of high-quality vanilla paste or extract, but the bean is worth the effort.
Unsalted butter (1 tablespoon) — Adds a silky mouthfeel and richness to the syrup.
Equipment Needed
You don’t need anything fancy, but having the right tools helps consistency.
Large mixing bowl — For whisking dry ingredients.
Medium mixing bowl — For wet ingredients.
Non-stick skillet or griddle — A 10-12 inch skillet is perfect. Cast iron works great too if you season it well. Avoid non-stick if it’s scratched; pancakes stick and tear.
Spatula — A thin, flexible spatula is best for flipping without deflating the pancakes.
Whisk — For combining wet and dry ingredients smoothly.
Saucepan — Small one for heating the syrup.
How to Make It: Step-by-Step
Alright, let’s make these extra-fluffy buttermilk pancakes. I’m walking you through exactly how I do it, including the little tricks that make the difference between good and great.
Step 1: Mix the Dry Ingredients
In a large bowl, whisk together the flour, sugar, baking powder, baking soda, and salt. Make sure there are no lumps of baking powder, or you’ll get bitter spots. Set this aside.
Step 2: Combine the Wet Ingredients
In a separate medium bowl, whisk the buttermilk, egg, melted butter, and vanilla extract until smooth. The butter should be warm but not hot. If it’s too hot, it’ll scramble the egg.
Step 3: Combine Wet and Dry
Pour the wet ingredients into the dry ingredients. Gently stir with a spoon or spatula just until combined. Stop while it’s still lumpy. Overmixing is the enemy of fluffy pancakes. It develops gluten, which makes them chewy instead of tender. It’s okay if you see little streaks of flour.
Step 4: Let the Batter Rest
This is the secret step. Let the batter sit for 10-15 minutes while you heat your pan. You’ll see bubbles forming on the surface. This gives the flour time to hydrate and the baking powder time to activate. Do not skip this!
Step 5: Heat the Pan
Place your skillet over medium heat. Test it by sprinkling a few drops of water on it—if they sizzle and evaporate, it’s ready. Lightly grease with butter or oil. Too much grease will make the edges fry instead of brown, so wipe out excess with a paper towel.
Step 6: Cook the Pancakes
Pour about ¼ cup of batter per pancake onto the skillet. Don’t crowd the pan. Cook until bubbles form on the surface and pop, leaving little holes that stay open. This means the bottom is set. Flip gently.
Step 7: Finish Cooking
Cook the other side for 1-2 minutes until golden brown. They should be springy to the touch. Transfer to a plate and cover loosely with foil to keep warm while you cook the rest. Repeat with remaining batter, greasing the pan as needed.
Step 8: Make the Vanilla Bean Maple Syrup
While the pancakes cook, split the vanilla bean lengthwise and scrape out the seeds with the back of your knife. In a small saucepan, combine the maple syrup, vanilla seeds, and the scrapings of the pod. Heat over low heat until warm and fragrant, about 2-3 minutes. Remove from heat, stir in the tablespoon of butter until melted. Discard the pod (or save it to dry for vanilla sugar later).
Expert Tips & Tricks
Here’s everything I’ve learned from making these dozens of times. These tips will save you from my mistakes.
Don’t Overmix
I cannot stress this enough. Lumpy batter = fluffy pancakes. Smooth batter = dense pancakes. Stir until you *almost* see no lumps, then stop.
Rest the Batter
That 10-minute rest isn’t just for show. It allows the leavening agents to work and the flour to fully absorb the liquid. You’ll see the batter get slightly thicker and bubbly. That’s a good sign.
Control Your Heat
Medium heat is the sweet spot. Too hot, and the outside burns before the inside cooks. Too low, and they’re pale and soggy. If your first pancake burns, lower the heat. The first pancake is always a test run.
Use Real Butter for Greasing
Oil works, but butter gives a richer flavor and better browning. Just be mindful that butter burns at higher temps, so keep the heat moderate.
Keep Them Warm
A wire rack in the oven set to 200°F (95°C) is better than a plate. Plates trap steam and make the bottoms soggy. If you don’t have a rack, just cover the plate loosely with foil.
Variations & Substitutions
Once you’ve nailed the basic version, here’s how you can mix it up. I’ve tried all of these.
Berry Pancakes
Toss 1 cup of fresh blueberries or raspberries into the batter right before cooking. Don’t stir them in too much, or they’ll bleed color everywhere. They’ll burst nicely in the pan.
Chocolate Chip Pancakes
Add ½ cup of semi-sweet chocolate chips. They melt into gooey pockets. Great for kids or chocolate lovers.
Gluten-Free Version
Use a 1:1 gluten-free flour blend. The texture might be slightly different, but they still turn out fluffy. Add an extra ½ teaspoon of baking powder if the blend doesn’t include it.
Dairy-Free Option
Use dairy-free milk (oat or almond works well) and substitute the butter with coconut oil or a dairy-free butter alternative. The flavor will be slightly different, but still delicious.
Flavor Boosters
Add ½ teaspoon of cinnamon or nutmeg to the dry ingredients for a warm, spiced flavor. Or swap the vanilla extract for lemon zest for a bright, citrusy twist.
Serving & Storage
These extra-fluffy buttermilk pancakes are best served immediately, hot off the griddle. Stack them high on a platter and drizzle generously with the vanilla bean maple syrup. Garnish with a pat of butter and fresh berries if you’re feeling fancy.
Leftovers
Store leftover pancakes in an airtight container in the fridge for up to 3 days. To reheat, toast them in a toaster or oven at 350°F (175°C) for 5 minutes. They won’t be quite as fluffy as fresh, but they’re still good. The syrup keeps well in the fridge for 2 weeks.
Freezing
You can freeze cooked pancakes. Layer them with parchment paper in a freezer bag. Reheat in the toaster for a quick breakfast.
Nutrition Information
I’m not a nutritionist, but here’s the breakdown if you’re tracking. This is per serving (based on 4 servings, 4 pancakes each).
- Calories: 380
- Protein: 10g
- Carbs: 52g
- Fiber: 2g
- Sugar: 18g
- Fat: 14g
- Saturated Fat: 8g
- Cholesterol: 65mg
- Sodium: 520mg
Look, this is comfort food. It’s not a diet recipe. But it’s homemade, so you know exactly what’s in it. When I want to make it lighter, I use less syrup and add fruit on top. But usually? I just enjoy it and move on.
Final Thoughts
So that’s my go-to extra-fluffy buttermilk pancakes! I’ve probably talked your ear off at this point, but when you make a recipe this often, you have a lot to say about it. This has saved weekend brunches more times than I can count. It’s my answer to “what’s for breakfast” when I want to treat myself or my guests to something special.
Make it yours! Try different berries, swap the syrup for honey, or add a dash of cinnamon. The best recipes are the ones you adapt to your family’s tastes. If you make this, drop a comment and let me know what you think! I love hearing how recipes turn out in your kitchen.
Happy cooking! And I hope your kitchen smells half as good as mine does right now.
Frequently Asked Questions
Can I use milk instead of buttermilk?
You can, but the pancakes won’t be as tender or tangy. If you must, make your own buttermilk by adding 1 tablespoon of vinegar or lemon juice to 1 cup of milk and letting it sit for 5 minutes. This curdles the milk and mimics buttermilk’s acidity.
Why are my pancakes dense?
Most likely, you overmixed the batter. Stir until just combined, even if it’s lumpy. Also, check your baking powder. If it’s old, it won’t create enough lift. And don’t skip the resting time!
Can I make the batter ahead of time?
I wouldn’t recommend it. The baking powder starts working as soon as it hits the liquid. If you let the batter sit too long (more than 30 minutes), the bubbles escape and the pancakes lose their fluff. It’s best to mix and cook fresh.
How do I keep pancakes warm while cooking the rest?
Place cooked pancakes on a wire rack set over a baking sheet in a 200°F (95°C) oven. This keeps them warm without trapping steam, which makes them soggy. Avoid stacking them on a plate.
Can I freeze the vanilla bean maple syrup?
Yes! It freezes well for up to 3 months. Thaw it in the fridge and warm it gently before serving. The flavor remains strong and aromatic.
What’s the best way to flip pancakes?
Wait until you see bubbles form on the surface and pop, leaving holes that don’t fill back in. This means the bottom is set. Slide your spatula under the pancake confidently and flip in one smooth motion. Don’t peek too early!
Pin This Recipe!
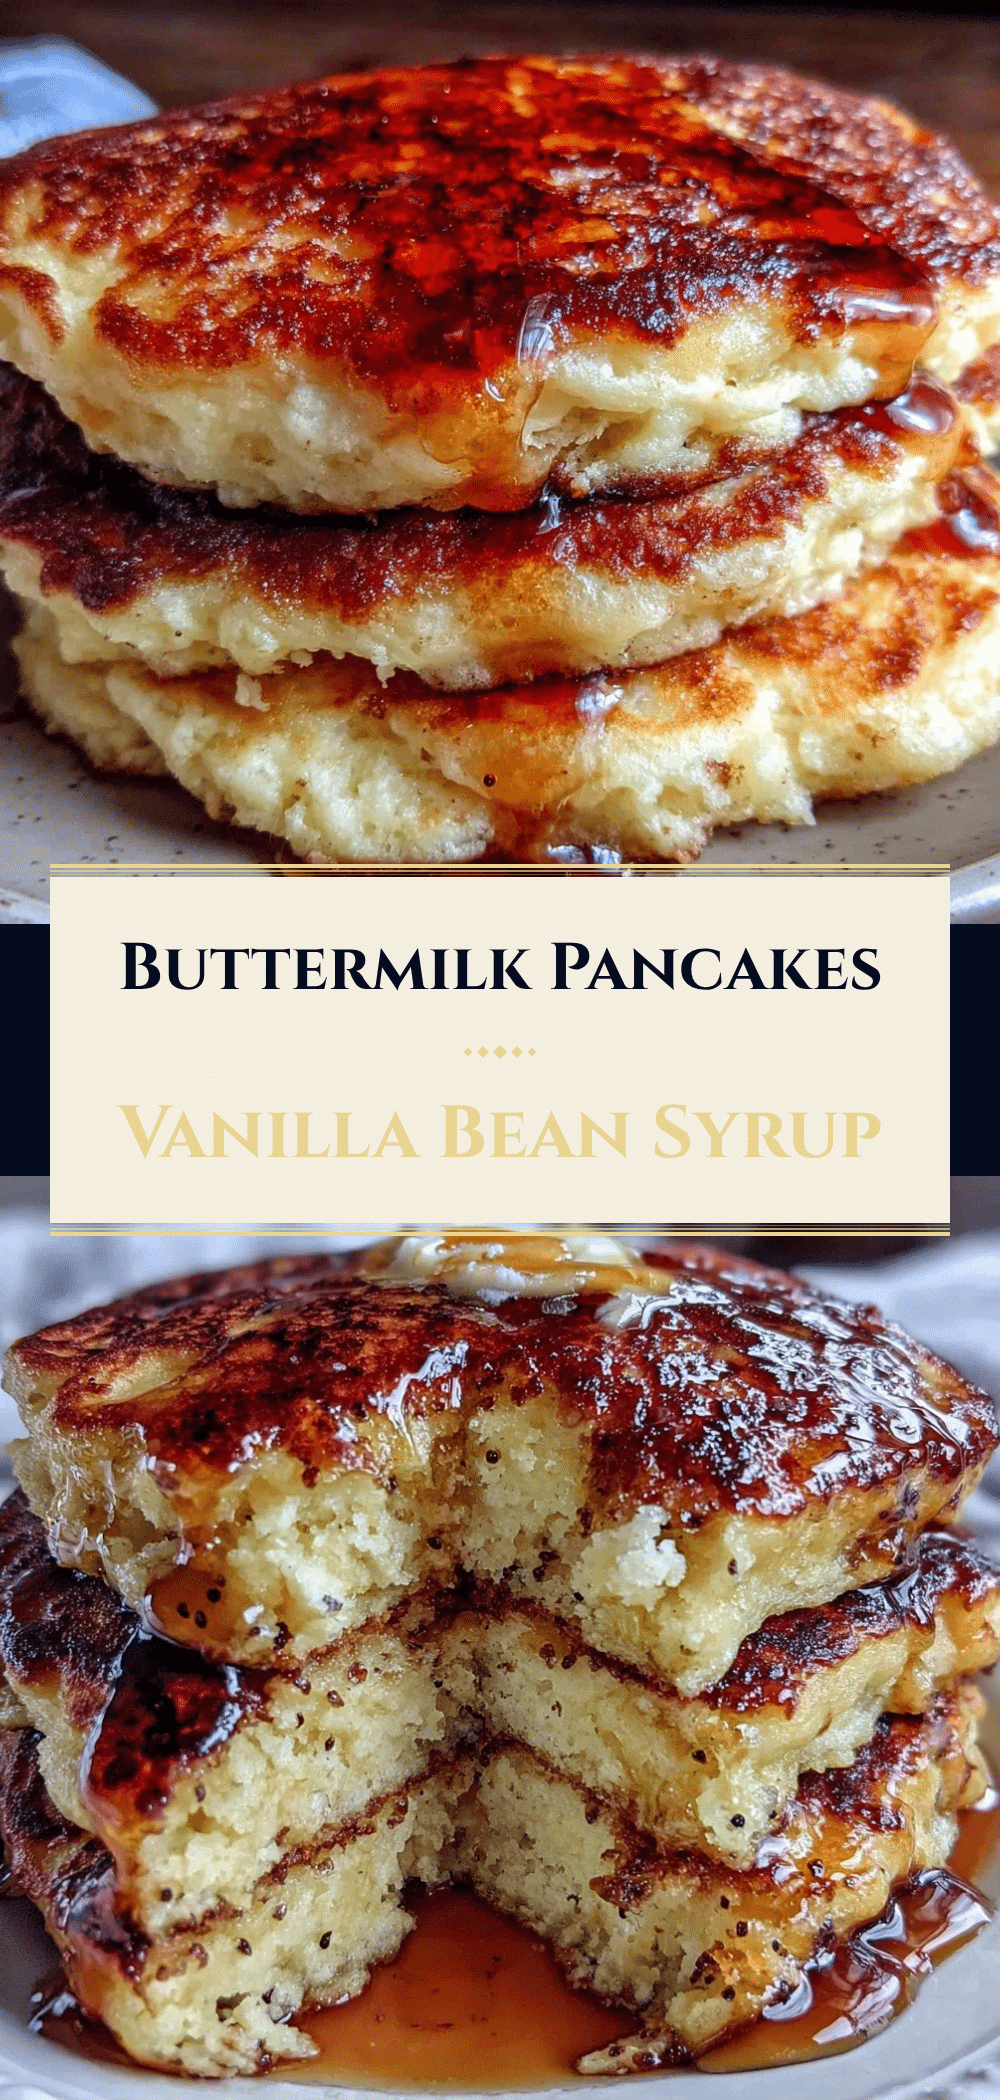
Extra-Fluffy Buttermilk Pancakes: 5-Ingredient Weekend Brunch
- Total Time: 35 minutes
- Yield: 4 servings 1x
Description
These extra-fluffy buttermilk pancakes are tall, golden, and tender, made with simple ingredients and a secret resting period. Served with a homemade vanilla bean maple syrup, they are the perfect indulgent weekend brunch.
Ingredients
- 1 ½ cups all-purpose flour
- 2 tablespoons granulated sugar
- 2 teaspoons baking powder
- ½ teaspoon baking soda
- ½ teaspoon salt
- 1 ¼ cups buttermilk
- 1 large egg
- 3 tablespoons unsalted butter, melted
- 1 teaspoon vanilla extract
- ½ cup real maple syrup
- 1 vanilla bean pod, split and scraped
- 1 tablespoon unsalted butter
Instructions
- In a large bowl, whisk together the flour, sugar, baking powder, baking soda, and salt until no lumps remain.
- In a separate medium bowl, whisk the buttermilk, egg, melted butter, and vanilla extract until smooth.
- Pour the wet ingredients into the dry ingredients and gently stir just until combined. Stop while the batter is still lumpy to avoid tough pancakes.
- Let the batter rest for 10-15 minutes to allow the flour to hydrate and leavening agents to activate.
- Heat a non-stick skillet or griddle over medium heat. Lightly grease with butter or oil, wiping out excess.
- Pour about ¼ cup of batter per pancake onto the skillet. Cook until bubbles form on the surface and pop, leaving open holes.
- Flip gently and cook the other side for 1-2 minutes until golden brown and springy to the touch.
- Transfer cooked pancakes to a plate and cover loosely with foil to keep warm.
- While pancakes cook, combine maple syrup, vanilla bean seeds and scrapings in a small saucepan. Heat over low heat for 2-3 minutes until fragrant.
- Remove syrup from heat and stir in 1 tablespoon of butter until melted. Discard the vanilla pod.
Notes
Do not overmix the batter; lumps are okay. Ensure baking powder is fresh for maximum lift. If you don’t have buttermilk, make a substitute by adding 1 tablespoon of vinegar or lemon juice to milk and letting it sit for 5 minutes. Keep cooked pancakes warm on a wire rack in a 200°F oven to prevent sogginess.
- Prep Time: 15 minutes
- Cook Time: 20 minutes
- Category: Breakfast
- Cuisine: American
Nutrition
- Serving Size: 4 pancakes per servi
- Calories: 380
- Sugar: 18
- Sodium: 520
- Fat: 14
- Saturated Fat: 8
- Carbohydrates: 52
- Fiber: 2
- Protein: 10
Keywords: buttermilk pancakes, fluffy pancakes, weekend brunch, vanilla bean maple syrup, breakfast recipe, homemade syrup


