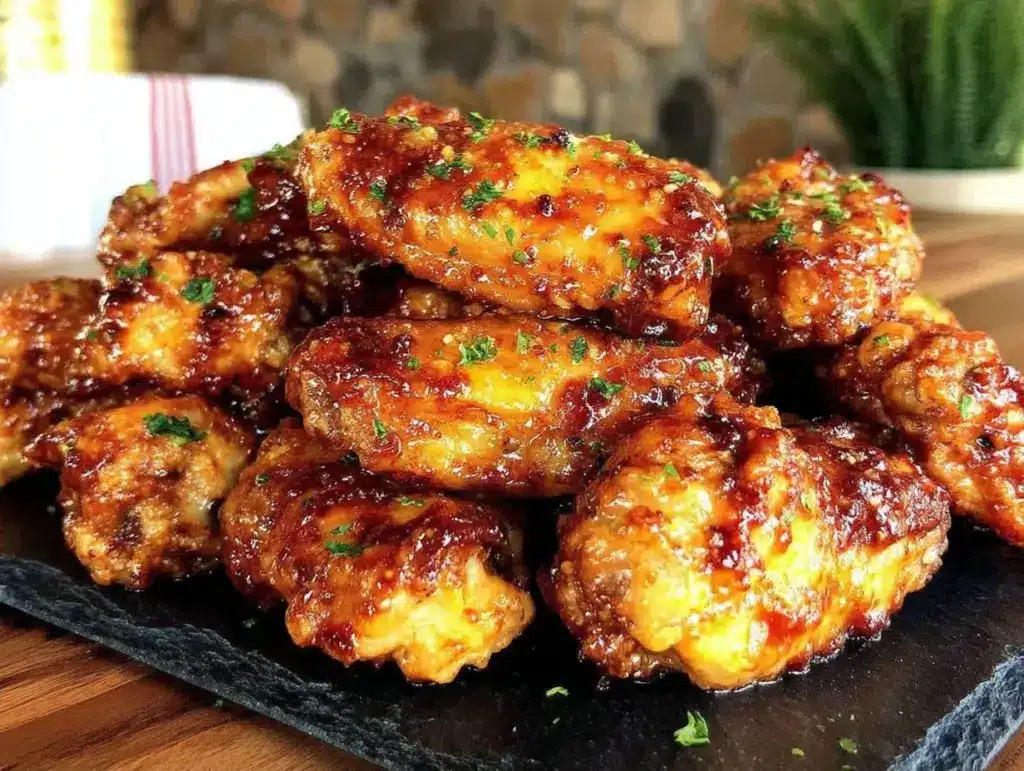
I have a confession to make. I used to think making wings at home was a losing battle. For years, I ordered takeout, waited 45 minutes for my food to arrive, and then watched it get soggy in the delivery bag before I even got to the table. The skin would be soft, the meat would be dry, and the garlic flavor would be nonexistent. It was frustrating, expensive, and honestly, kind of disappointing.
That changed last winter when I was feeling under the weather and couldn’t stomach anything heavy, but I really wanted something savory and comforting. I decided to try making Crispy Garlic Parmesan Chicken Wings in my oven instead of ordering out. I wasn’t expecting much—just something warm to eat while I rested. But when I pulled that baking sheet out of the oven, the smell of roasting garlic and melting parmesan filled the entire house. I took one bite, and it was crisp, juicy, and packed with flavor. It wasn’t just “good for homemade.” It was genuinely better than the place down the street.
Since then, these wings have become my go-to comfort food. I’ve made them for game days, for lazy Sunday dinners, and even as a high-protein snack after work. They are the perfect balance of savory, crunchy, and satisfying. The best part? They actually fuel your day without feeling like diet food. You get lean protein from the chicken, healthy fats from the olive oil, and the satisfaction of a treat that doesn’t leave you feeling sluggish.
I’ve tested this method dozens of times to ensure the skin gets shatteringly crisp while the meat stays tender. I’ve swapped out ingredients to find the perfect garlic-to-cheese ratio. And I’ve learned exactly how to avoid the soggy middle that plagues so many home recipes. If you’re ready to ditch the delivery app and make wings that actually live up to the hype, you’re in the right place.
Why You’ll Love This Recipe
There are a lot of chicken wing recipes out there, but this Crispy Garlic Parmesan Chicken Wings recipe stands out for a few very specific reasons. It’s not just about taste; it’s about the experience of making and eating them.
Actually Crispy Skin — Most home-cooked wings end up steamed in their own juices. Not these. By using a specific baking technique (and a little help from baking powder), the skin gets golden, crunchy, and deeply flavorful. I’ve had friends who are obsessed with restaurant wings try these and ask where I learned to cook.
Garlic That Doesn’t Burn — One of the biggest mistakes people make is tossing raw garlic into the oven with wings. The garlic burns before the wings are done, leaving you with bitter, black bits. This recipe uses a roasted garlic-infused oil and a parmesan coating that protects the flavor, giving you that sweet, mellow garlic taste without the bitterness.
High-Protein Fuel — These wings are a protein powerhouse. Each serving packs a serious punch of lean protein, which helps keep you full and energized. Unlike a bag of chips or a sugary snack that leaves you crashing an hour later, these wings provide steady energy. I love eating them as a post-workout snack or a late-night dinner that doesn’t ruin my sleep.
Minimal Cleanup — I’m a big believer in easy cleanup. These wings bake on a simple sheet pan. If you line it with foil (which I always do), wiping down the pan takes 30 seconds. No scrubbing, no soaking pots. It’s the kind of recipe that fits into a busy weeknight or a spontaneous weekend craving.
Gluten-Free Friendly — Unlike many breaded wing recipes, these rely on parmesan and a light dusting of cornstarch (or just the chicken skin itself) for crunch. They are naturally gluten-free, which makes them perfect for sharing with friends with dietary restrictions without having to make two separate batches.
Ingredients You’ll Need
One of the best things about this recipe is how simple the ingredient list is. You probably already have most of these in your kitchen. The magic happens in the technique, not in hunting for obscure items.
Chicken Wings (3 pounds / 1.36 kg) — I always use the “party cut” wings (the flat and the drumette separated). They cook evenly and are easier to dip. Look for wings that are fresh, not frozen, if possible. If you do use frozen, make sure they are completely thawed and patted dry. Dry skin = crisp skin.
Vegetable Oil or Avocado Oil (2 tablespoons) — I use avocado oil because it has a high smoke point, which prevents burning. But regular vegetable oil works fine too. The goal is to coat the wings lightly so the heat can crisp the skin.
Garlic (4 cloves, minced) — Fresh garlic is non-negotiable here. Jarred garlic has a metallic taste that just doesn’t work in a simple recipe like this. Mince it finely so it distributes evenly. If you’re worried about burning, I’ll show you a trick in the steps.
Parmesan Cheese (½ cup / 50g, finely grated) — Buy a block of Parmigiano-Reggiano and grate it yourself. Pre-grated cheese has anti-caking agents that prevent it from melting smoothly. You want that cheesy, savory crust. Pecorino Romano is also delicious if you like a sharper bite.
Cornstarch (1 tablespoon) — This is the secret weapon. A light dusting of cornstarch helps draw out moisture from the skin and creates that shatteringly crisp texture. It’s gluten-free and totally invisible once cooked.
Baking Powder (1 teaspoon) — Not baking soda! Plain baking powder raises the pH of the chicken skin, helping it brown and crisp up faster. Make sure it’s aluminum-free for the best taste.
Salt and Black Pepper — Kosher salt is my go-to because it’s easy to sprinkle evenly. Freshly cracked black pepper adds a nice heat. Don’t skimp on the salt; it enhances the garlic and cheese flavors.
Fresh Parsley (2 tablespoons, chopped) — For garnish. It adds a pop of color and a fresh, herbal note that cuts through the richness of the cheese. If you don’t have parsley, cilantro or chives work too.
Optional: Red Pepper Flakes — If you like a little kick, sprinkle these on after baking. It balances the savory cheese with a bit of heat.
Equipment Needed
You don’t need any fancy gadgets for this. Here’s what I actually use in my kitchen.
Baking Sheet — A standard half-sheet pan (13×18 inches). I prefer rimmed baking sheets so the oil doesn’t spill over. My old, dented pan works just as well as my new one.
Parchment Paper or Foil — I always line my baking sheet. It prevents sticking and makes cleanup a breeze. Foil is easier to crumple up and throw away, but parchment is better for preventing any tiny bits of cheese from sticking.
Cooling Rack (Optional but Recommended) — Placing a wire rack on top of your baking sheet allows air to circulate around the wings. This helps them crisp on all sides, not just the bottom. If you don’t have one, just flip the wings halfway through cooking.
Mixing Bowls — One large bowl for tossing the wings in oil and seasonings, and one small bowl for mixing the cheese and cornstarch.
Tongs — Essential for flipping and moving the wings. Metal tongs are durable and easy to clean.
Garlic Press or Knife — For mincing the garlic. I usually just use my knife because it gives me more control over the size of the mince.
How to Make It: Step-by-Step
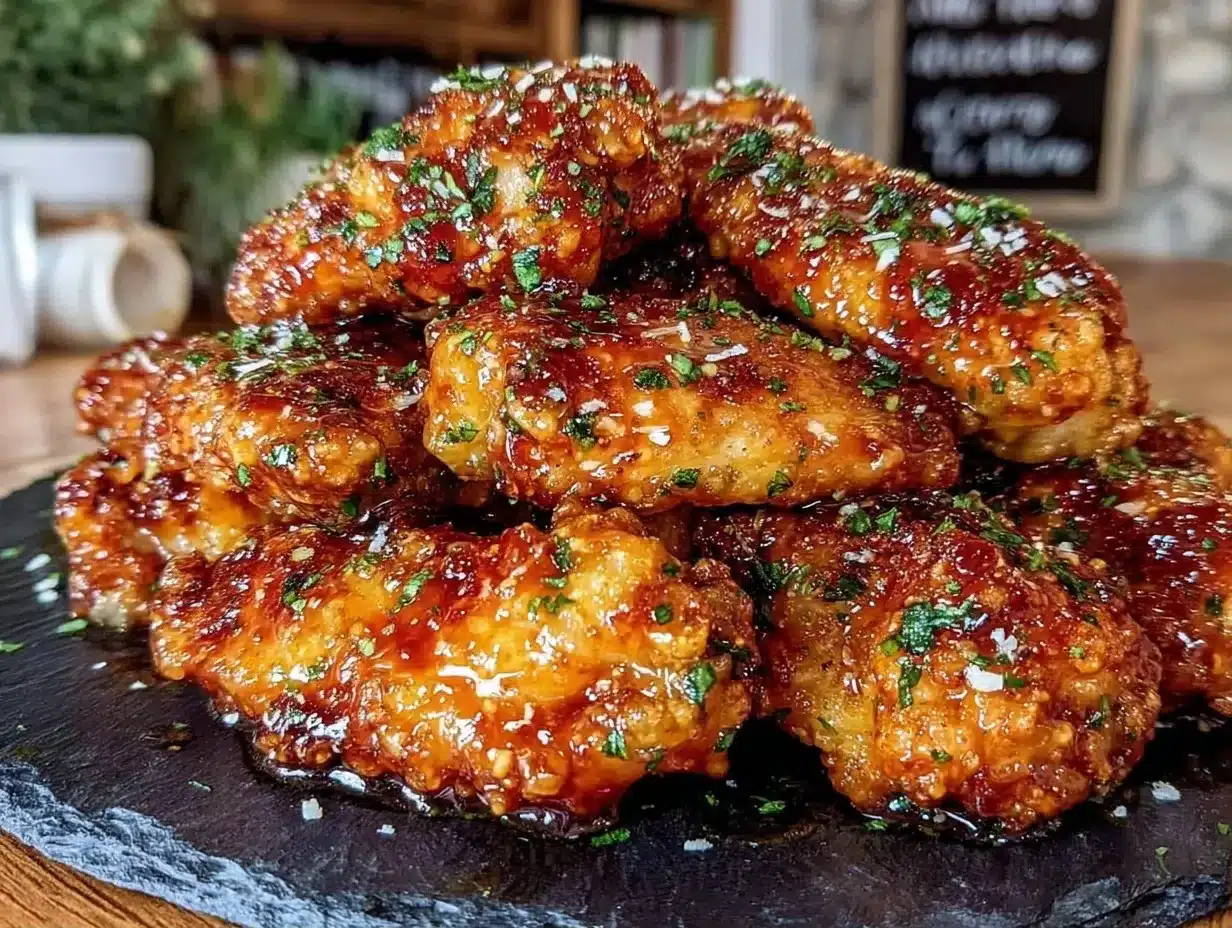
Alright, let’s make these Crispy Garlic Parmesan Chicken Wings! I’m walking you through exactly how I do it, including the little tricks I’ve picked up over the years.
Step 1: Prep the Chicken (10 minutes)
First, pat the wings completely dry with paper towels. This is the most important step. If the skin is wet, it will steam instead of crisp. Discard the paper towels and place the wings in a large bowl. If they are very wet, let them sit out for 15 minutes to air-dry a bit more.
Step 2: Season and Coat (5 minutes)
Add the vegetable oil to the wings and toss to coat them evenly. In a small bowl, mix the cornstarch, baking powder, salt, and pepper. Sprinkle this mixture over the wings and toss again until every wing is lightly dusted. The goal is a thin, even coating, not a thick batter.
Step 3: Arrange on the Pan
Line your baking sheet with foil or parchment. Arrange the wings in a single layer, making sure they aren’t touching. Crowding the pan causes steaming, which leads to soggy wings. If you have a lot of wings, use two pans. Place a wire rack on top of the pan if you have one, and arrange the wings on the rack.
Step 4: Bake Until Crispy (40-45 minutes)
Preheat your oven to 400°F (200°C). Place the wings in the oven and bake for 20 minutes. Then, flip the wings over. Continue baking for another 20-25 minutes, or until the skin is deep golden brown and crispy. You want them to look like they came out of a deep fryer, not a steamer.
Step 5: Make the Garlic Parmesan Topping
While the wings are baking, melt 1 tablespoon of butter in a small skillet over low heat. Add the minced garlic and cook for 1 minute, just until fragrant. Do not let it brown! Remove from heat and stir in the grated Parmesan cheese. It will form a thick paste. If it’s too thick, add a tiny splash of the cooking oil or water.
Step 6: Toss and Serve
Once the wings are done, remove them from the oven. While they are still hot, toss them in a large bowl with the garlic-Parmesan mixture. The heat from the wings will melt the cheese slightly, creating a sticky, flavorful coating. Garnish with fresh parsley and red pepper flakes if using. Serve immediately. They lose their crispness if they sit too long, so eat them while they’re hot!
Expert Tips & Tricks
Here’s everything I’ve learned from making these wings dozens of times. These tips will save you from my mistakes.
Dry Skin is Key
I can’t stress this enough. Use paper towels. Then use more paper towels. If the skin is damp, it won’t crisp. For extra crispiness, you can leave the uncovered wings in the fridge for a few hours before baking. This air-dries the skin even further.
Don’t Burn the Garlic
Garlic burns at around 350°F, and we’re baking at 400°F. That’s why I add the garlic to the melted butter at the end, or mix it with the oil right before tossing. If you put raw garlic on the wings before baking, it will turn black and bitter. Trust me, I’ve learned this the hard way.
Use a Wire Rack
If you have a wire rack, use it. It allows hot air to circulate under the wings, ensuring the bottom gets crisp too. If you don’t have one, just be diligent about flipping the wings halfway through.
Cornstarch vs. Flour
Cornstarch is better than flour for this because it creates a lighter, crispier crust. Flour can make the coating heavy and doughy. Stick with cornstarch for that restaurant-quality crunch.
Double Batch
These wings are so good, you’ll want to make a lot. You can easily double the recipe. Just make sure you have enough oven space. If you’re cooking two pans, rotate them halfway through for even browning.
Variations & Substitutions
Once you’ve nailed the basic version, here’s how you can mix it up. I’ve tried all of these.
Spicy Garlic Parmesan
Add 1 teaspoon of cayenne pepper or 2 teaspoons of red pepper flakes to the dry seasoning mix before tossing the wings. It adds a nice heat that balances the rich cheese.
Honey Garlic
Drizzle 2 tablespoons of honey over the wings after tossing them in the garlic-Parmesan mixture. The sweetness pairs beautifully with the savory cheese. This is a crowd-pleaser for kids.
Herb-Crusted
Add 1 teaspoon of dried thyme or rosemary to the cornstarch mixture. It adds an earthy, aromatic flavor that complements the garlic.
Buffalo Style
Skip the garlic-Parmesan topping. Toss the hot wings in your favorite buffalo sauce. Serve with celery sticks and blue cheese dressing. It’s a classic for a reason.
Dairy-Free Option
Skip the Parmesan cheese and use nutritional yeast instead. It gives a similar savory, cheesy flavor without the dairy. The texture won’t be quite the same, but it’s still delicious.
Serving & Storage
How to Serve:
I usually serve these straight from the oven on a platter with extra parsley and lemon wedges. They pair perfectly with a cold beer or a glass of wine. If you’re making a meal, try serving them with roasted root vegetables or a simple green salad. The wings are rich, so something light and acidic works best.
Refrigerator:
Store leftovers in an airtight container for up to 3 days. The wings will lose some crispiness, but they’re still good.
Reheating:
The best way to reheat wings is in the oven or air fryer. Place them on a baking sheet and bake at 400°F for 5-10 minutes, or until heated through and crisp again. The microwave will make them soggy, so avoid that if you can.
Freezing:
You can freeze the cooked wings for up to 2 months. Thaw in the fridge overnight and reheat in the oven. For best results, freeze them before adding the garlic-Parmesan topping, then add the topping after reheating.
Nutrition Information
I’m not a nutritionist, but here’s the breakdown if you’re tracking. These wings are a great source of protein and healthy fats, making them a satisfying fuel for your day.
Per Serving (based on 6 servings, 2 wings each):
- Calories: 350
- Protein: 28g
- Carbs: 3g
- Fiber: 0g
- Sugar: 0g
- Fat: 24g
- Saturated Fat: 6g
- Cholesterol: 95mg
- Sodium: 450mg
What’s Good:
High in protein, which helps build and repair muscle. Low in carbs, making them keto-friendly. The olive oil provides heart-healthy fats.
What to Know:
Higher in calories due to the cheese and oil, but these are nutrient-dense calories. Use low-sodium chicken broth if you’re watching salt intake.
My Take:
Look, these are wings. They’re a treat. But they’re made with real, whole ingredients. They’re not processed junk. Enjoy them as part of a balanced diet, and don’t feel guilty. They’re fuel that tastes like indulgence.
Final Thoughts
So that’s my Crispy Garlic Parmesan Chicken Wings recipe! I’ve probably talked your ear off at this point, but when you make a recipe this often, you have a lot to say about it. These wings have saved my game day snacks, my lazy dinners, and my need for something savory when I’m tired of takeout.
This is my answer to “what’s for dinner” when I want something flavorful but also want to feel good about what I’m eating. My kids love them, my husband loves them, and I love them because they’re easy to make and easy to clean up.
Make it yours! Try different spices, add some honey, or serve them with hatch chile queso for dipping. The best recipes are the ones you adapt to your family’s tastes.
If you make this, drop a comment and let me know what you think! I love hearing how recipes turn out in your kitchen. And if something doesn’t work, tell me that too—I’m here to help troubleshoot.
Happy cooking! And I hope your kitchen smells half as good as mine does right now.
Frequently Asked Questions
Can I use an air fryer instead of an oven?
Absolutely! Air fryer wings are incredibly crispy. Cook them at 400°F for 20-25 minutes, shaking the basket every 10 minutes. They’ll be done when the skin is golden and crisp. The cooking time might be slightly less, so keep an eye on them.
Why are my wings not crispy?
Usually, this means the skin was too wet or the wings were crowded on the pan. Make sure to pat them dry thoroughly and give them space. Also, check your baking powder—it needs to be fresh to work properly.
Can I make these ahead of time?
You can prep the wings and season them up to 24 hours in advance. Store them uncovered in the fridge to air-dry the skin. Bake them right before you want to eat. The garlic-Parmesan topping should be added right before serving.
Is this recipe gluten-free?
Yes! As long as you use cornstarch instead of flour and check that your baking powder is gluten-free, these wings are naturally gluten-free. They are a great option for those with celiac disease or gluten sensitivity.
Can I freeze the raw wings?
You can freeze raw wings for up to 3 months. Thaw them in the fridge before cooking. Make sure to pat them dry again after thawing, as they will release more moisture.
What sauce goes well with these?
These wings are flavorful on their own, but they pair well with a blue cheese dip, ranch, or a spicy buffalo sauce. I also like them with a simple lemon-herb yogurt dip.
Pin This Recipe!

Crispy Garlic Parmesan Chicken Wings: Fuel Your Day
- Total Time: 1 hour
- Yield: 6 servings 1x
Description
These oven-baked chicken wings are shatteringly crisp and packed with savory garlic and parmesan flavor. They are a high-protein, gluten-free comfort food that is easier to make and cleaner to eat than takeout.
Ingredients
- 3 pounds chicken wings (party cut, flat and drumette separated)
- 2 tablespoons vegetable oil or avocado oil
- 4 cloves garlic, minced
- ½ cup (50g) finely grated Parmesan cheese (Parmigiano-Reggiano)
- 1 tablespoon cornstarch
- 1 teaspoon baking powder (aluminum-free)
- Salt and freshly cracked black pepper to taste
- 2 tablespoons fresh parsley, chopped (for garnish)
- 1 tablespoon butter (for topping)
- Optional: Red pepper flakes
Instructions
- Preheat oven to 400°F (200°C). Line a baking sheet with foil or parchment paper.
- Pat the chicken wings completely dry with paper towels to ensure crispiness.
- Place wings in a large bowl and toss with vegetable oil to coat evenly.
- In a small bowl, mix cornstarch, baking powder, salt, and pepper. Sprinkle over wings and toss until lightly dusted.
- Arrange wings in a single layer on the baking sheet (or on a wire rack placed over the sheet), ensuring they are not touching.
- Bake for 20 minutes, then flip the wings.
- Continue baking for another 20-25 minutes until the skin is deep golden brown and crispy.
- While wings bake, melt butter in a small skillet over low heat. Add minced garlic and cook for 1 minute until fragrant (do not brown).
- Remove skillet from heat and stir in grated Parmesan cheese to form a thick paste.
- Remove wings from oven. While still hot, toss them in a large bowl with the garlic-Parmesan mixture.
- Garnish with fresh parsley and red pepper flakes if desired. Serve immediately.
Notes
Dry skin is key to crispiness; pat wings thoroughly with paper towels. Do not burn the garlic by adding it to the oven raw; add it to the butter at the end. For extra crispiness, leave uncovered wings in the fridge for a few hours before baking. Store leftovers in an airtight container for up to 3 days and reheat in the oven or air fryer to restore crispness.
- Prep Time: 15 minutes
- Cook Time: 45 minutes
- Category: Appetizer
- Cuisine: American
Nutrition
- Serving Size: 2 wings per serving
- Calories: 350
- Sodium: 450
- Fat: 24
- Saturated Fat: 6
- Carbohydrates: 3
- Protein: 28
Keywords: chicken wings, crispy wings, garlic parmesan wings, oven baked wings, gluten-free wings, high protein snack, game day food, keto friendly


