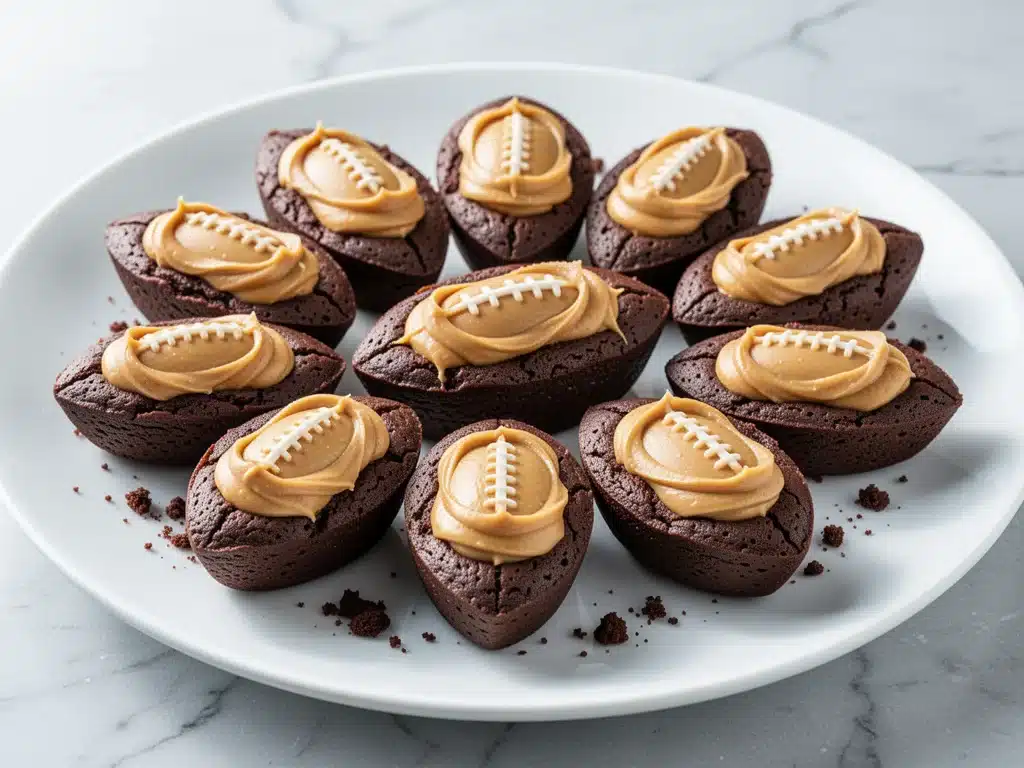
Last Sunday, I was staring at a coffee table covered in empty chip bags, half-eaten bowls of dip, and a TV screen flashing a fourth-quarter touchdown, and I realized something: I had forgotten dessert. Not just forgotten—completely absent. My husband was already reaching for the store-bought brownie box from the pantry, the one we’ve been buying for years because it’s easy. But as he popped the plastic wrap, I stopped him. “No,” I said. “We’re making those bites. The ones that actually taste like a bakery.”
That’s when I pulled the container of Football Party Chocolate Peanut Butter Brownie Bites out of the fridge. They were cold, firm, and perfectly set. We tore into them right there on the couch, no plates needed. The crunch of the crust, the dense chew of the brownie layer, and that salty-sweet peanut butter topping? It was infinitely better than anything you’d grab at a concession stand. Or even a bakery, honestly.
I’ve made these Football Party Chocolate Peanut Butter Brownie Bites for every Super Bowl, tailgate, and casual Sunday game day since then. They’ve become the centerpiece of our game day spread, sitting proudly next to the wings and the creamy hatch chile queso dip. People think they’re complicated because they look so professional, but here’s the secret: they’re no-bake, they’re made in a standard 9×13 pan, and they’re ready to eat in under an hour. If you’re looking for a dessert that’s easier than homemade everything bagel crackers but feels way more indulgent, this is it. Let me show you how to make them.
Why You’ll Love This Recipe
There are about ten reasons I keep making these Football Party Chocolate Peanut Butter Brownie Bites for every gathering, but here are the big ones that will win you over immediately.
- Zero Oven Required — Seriously, if you’re cooking a whole turkey or roasting veggies for game day, you don’t need to fire up the oven for dessert. These stay cool in the fridge, keeping your kitchen temperature down while you watch the game. I love that I can prep them the night before and just pull them out when guests arrive.
- Salty and Sweet Obsession — This is the holy grail of flavor profiles. You get the deep, rich chocolate from the brownie layer, the nutty richness of peanut butter, and that essential hit of sea salt on top. It’s the same vibe as my no-bake peanut butter pretzel bars, but with a fudgier, more decadent brownie texture.
- Make-Ahead Friendly — Game day is stressful enough. You don’t need to be cutting brownies while people are yelling at the referee. These Football Party Chocolate Peanut Butter Brownie Bites actually taste better after they’ve sat in the fridge for 24 hours. The flavors meld together, and the texture firms up perfectly for clean cuts.
- Sturdy Enough for Hands — I’ve served these at messy potlucks where people are holding a beer in one hand and a plate in the other. These bites don’t crumble. They don’t drip. They’re solid, portable, and easy to grab. Unlike my buttery blackberry cobbler, which requires a fork and a napkin, these are pure finger food.
- Crowd-Pleaser for All Ages — My picky nephew who usually only eats chicken nuggets devoured these. My friends who are “too cool” for sweets went back for seconds. They hit that universal note of comfort food that everyone loves.
This is my go-to dessert when I need something impressive but effortless. No baking skills required, no cleanup from mixing bowls, and absolutely zero stress. Just reliable, delicious chocolate heaven.
Ingredients You’ll Need
Here’s the best part: you probably have most of this already in your pantry. This isn’t a recipe that requires a special trip to the store for obscure items. I’m particular about the chocolate and peanut butter quality, but the rest is pretty standard.
For the Brownie Base
Butter (1 cup / 226g) — Unsalted is best so you can control the saltiness, but salted works if you reduce the sea salt on top. I use European-style butter when I have it because it’s richer, but regular sticks work fine.
Dark Chocolate Chips (12 ounces / 340g) — Don’t skimp here. Use semi-sweet or bittersweet chips (60% cocoa is my sweet spot). Chocolate chips melt more evenly than bars. I always buy Ghirardelli or Ghirardelli-style chunks for that bakery flavor.
Sugar (1 ½ cups / 300g) — White granulated sugar gives that classic chewy brownie texture. If you want a fudgier bite, you can swap half for brown sugar, but pure white keeps the structure firm for cutting.
Eggs (3 large) — Room temperature is ideal. I take them out of the fridge while I’m melting the chocolate. They help bind the brownie layer so it’s not too crumbly.
Vanilla Extract (2 teaspoons) — Pure vanilla, please. The artificial stuff can taste harsh against the rich chocolate. It’s a cheap ingredient that makes a big difference.
All-Purpose Flour (¾ cup / 95g) — Just enough to hold it together. You don’t want a cakey texture; you want dense and fudgy. Spoon and level this one to avoid packing too much in.
Cocoa Powder (⅓ cup / 30g) — Unsweetened cocoa powder adds that deep chocolate intensity. I use Hershey’s Special Dark sometimes for a mocha hint, but regular dutched-processed works great too.
For the Peanut Butter Topping
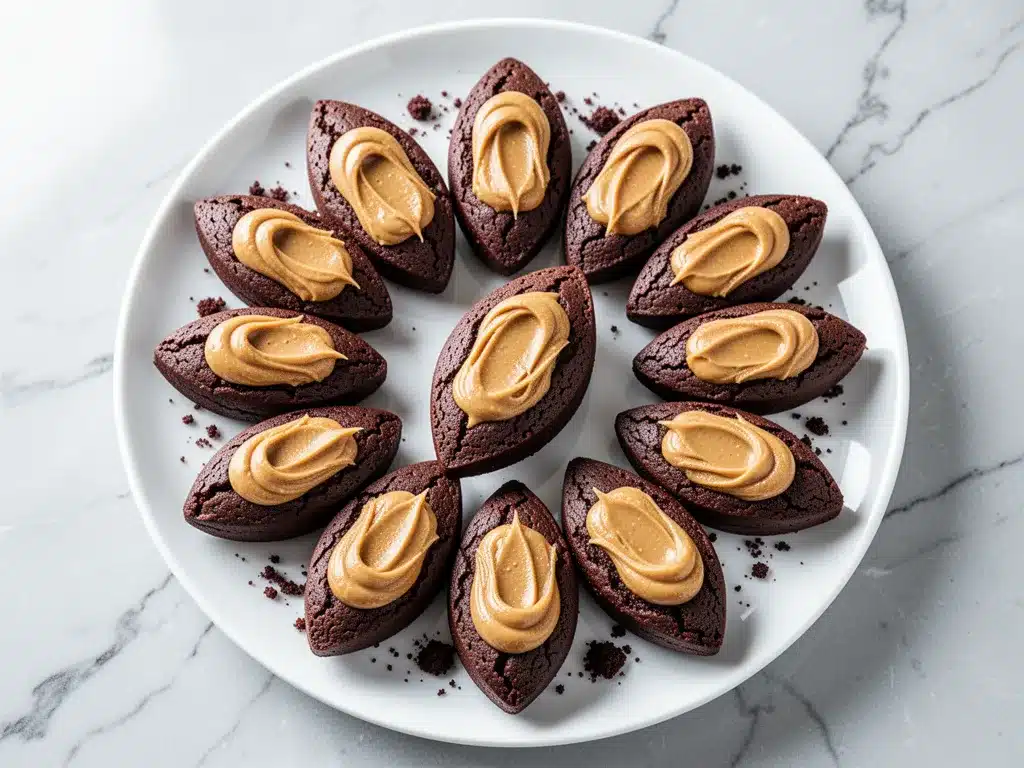
Creamy Peanut Butter (1 cup / 250g) — This is the most important ingredient. Use standard creamy peanut butter (Jif or Skippy are fine). Natural peanut butter with oil separation is too runny and will make the topping greasy. We need structure here.
Powdered Sugar (1 cup / 120g) — Also called confectioners’ sugar. This thickens the peanut butter and sweetens it without adding graininess. Sift it if it’s clumpy.
Heavy Cream (2-3 tablespoons) — Just enough to loosen the peanut butter so it’s spreadable. Don’t add it all at once; you want a thick, frost-like consistency, not a glaze.
For the Finish
Chocolate Chips (½ cup / 85g) — For the drizzle or topping layer. I melt these separately for a glossy finish.
Sea Salt Flakes — Maldon is my favorite, but any flaky sea salt works. This is non-negotiable. The salt cuts through the sweetness and makes the chocolate pop.
Equipment Needed
You don’t need fancy equipment for this. Here’s what I actually use.
9×13 Inch Baking Pan — I line it with parchment paper, leaving an overhang on the sides. This is the secret to getting the whole slab out of the pan easily. Without the parchment, you’re digging for bits with a knife.
Two Microwave-Safe Bowls — One for the chocolate base, one for the peanut butter topping. I use glass bowls because they don’t get too hot to touch. If you don’t have two, you can wash and dry one between steps, but two saves time.
Whisk — For mixing the brownie batter. A simple wire whisk works best to incorporate the eggs and sugar.
Spatula — A silicone spatula is essential for scraping the chocolate bowl clean and spreading the peanut butter layer evenly. I have a few; I use the big one for the base and a small one for the topping.
Small Saucepan (Optional) — I usually melt the topping chocolate in the microwave, but if you’re worried about burning it, a double boiler works. Just don’t let the water touch the chocolate.
Serving Knife — A sharp chef’s knife or a pizza cutter. I prefer a pizza cutter for these because it glides through the cold brownie without squishing it.
How to Make It: Step-by-Step
Alright, let’s make these Football Party Chocolate Peanut Butter Brownie Bites! I’m walking you through exactly how I do it, including the little tricks I’ve picked up so your brownies come out perfect every time.
Step 1: Prep Your Pan (2 minutes)
Line your 9×13 inch baking pan with parchment paper. Leave a few inches of overhang on the long sides—this creates “handles” so you can lift the entire block of brownies out once it’s set. Spray the parchment lightly with cooking spray to keep it in place. This step takes seconds but saves you from a messy cleanup disaster later.
Step 2: Melt the Chocolate Base (5 minutes)
In your large microwave-safe bowl, combine the butter, dark chocolate chips, and sugar. Microwave on high in 30-second intervals, stirring well between each interval. This is crucial. If you just blast it for two minutes, you’ll have burnt chocolate. Stirring ensures even melting. You want a smooth, glossy mixture with no lumps. It should look like thick syrup.
Step 3: Mix the Brownie Batter (3 minutes)
Once the chocolate is melted and smooth, let it cool for about 2 minutes (so you don’t scramble the eggs). Whisk in the eggs one at a time, then stir in the vanilla. In a separate small bowl, whisk together the flour and cocoa powder. Fold the dry ingredients into the chocolate mixture until just combined. Don’t overmix! Overmixing develops gluten, and you’ll end up with cakey brownies instead of fudgy ones. The batter will be thick and glossy.
Step 4: Bake the Layer (15-18 minutes)
Pour the batter into your prepared pan and spread it out evenly with your spatula. Bake in a preheated 350°F (175°C) oven. Here’s the thing: you don’t want to bake these until they’re fully done like a regular brownie. You want them slightly underbaked. Insert a toothpick into the center; it should come out with moist crumbs clinging to it, not clean. If it’s clean, they’re overbaked and will be dry. This ensures the base stays chewy.
Step 5: Cool Completely (30 minutes)
Let the brownies cool in the pan on a wire rack. This is the hardest part if you’re hungry, but you must wait. If you put the peanut butter topping on warm brownies, it will melt into the base and become a greasy mess. I usually put the pan in the fridge for 15 minutes to speed this up. The base needs to be completely room temperature or cold.
Step 6: Make the Peanut Butter Topping (5 minutes)
In a medium bowl, mix the creamy peanut butter, powdered sugar, and heavy cream. Start with 2 tablespoons of cream and add more only if needed. You want a thick, spreadable consistency—like frosting. If it’s too stiff, it won’t spread. If it’s too runny, it won’t hold its shape. Stir until smooth and lump-free.
Step 7: Spread and Chill (20 minutes)
Spread the peanut butter mixture evenly over the cooled brownie base. Use an offset spatula or the back of a spoon to get it to the edges. Once spread, return the pan to the fridge for at least 20 minutes. This firms up the peanut butter layer so it doesn’t smear when you cut it.
Step 8: The Chocolate Drizzle and Salt (5 minutes)
Melt the remaining ½ cup of chocolate chips in the microwave (30-second intervals, stir in between) or in a small saucepan over low heat. Let it cool for a minute so it’s not piping hot. Drizzle it over the peanut butter layer in a zig-zag pattern. Don’t worry about being perfect; the rustic look is part of the charm. Immediately sprinkle with flaky sea salt. The salt will stick to the chocolate and add that crucial crunch.
Step 9: Cut and Serve
Lift the brownies out of the pan using the parchment handles. Place on a cutting board. Use a sharp knife or pizza cutter to slice into 24 bites (6×4 grid). Serve immediately, or store in the fridge until game day.
Expert Tips & Tricks
Here’s everything I’ve learned from making these Football Party Chocolate Peanut Butter Brownie Bites dozens of times. These tips will save you from my mistakes.
The Parchment Paper is Non-Negotiable
I learned this the hard way with a batch that stuck to the pan. If you don’t use parchment, you’ll be scraping brownie bits out of corners for an hour. The overhang is your friend. It makes lifting the whole slab out effortless.
Don’t Overbake the Base
This is the most common mistake. People want a “done” brownie, but these are a layered bar. If the base is fully baked, it becomes dry and crumbly, and the whole bar falls apart when you cut it. Pull them out when the toothpick has moist crumbs. They will continue to cook slightly from residual heat.
Room Temperature Peanut Butter
If your peanut butter is cold from the fridge, it will be stiff and hard to spread. Take it out 15 minutes before you start. If you’re in a rush, microwave it for 10 seconds to loosen it up. Warm peanut butter mixes with powdered sugar much more smoothly.
Salt on Top, Not In
Since we’re using unsalted butter and sweet peanut butter, the salt in the topping is vital. Don’t skip it. It balances the sugar. Flaky salt adds texture, which is nice, but fine sea salt works too. Just don’t use table salt; it’s too sharp and metallic.
Storage is Key
These taste best after sitting in the fridge for a day. The flavors meld, and the texture becomes more cohesive. If you’re making them for a party, make them 24 hours ahead. Cover tightly with plastic wrap or foil.
Variations & Substitutions
Once you’ve nailed the basic version, here’s how you can mix it up. I’ve tried all of these for different cravings.
Reese’s Cups Vibe
Instead of just chocolate chips, chop up Reese’s Peanut Butter Cups and press them into the top of the peanut butter layer before chilling. It adds chunks of peanut butter and chocolate in every bite. This is my personal favorite variation.
Chocolate Peanut Butter Chip Version
Add ½ cup of chocolate peanut butter chips to the brownie base before baking. It adds pockets of melty peanut butter throughout the brownie layer, not just on top.
Gluten-Free Option
Use a 1:1 gluten-free flour blend for the brownie base. The texture is almost identical to regular flour. I’ve used Bob’s Red Mill and King Arthur, and both work well. Just make sure your chocolate chips and peanut butter are certified gluten-free.
Nut-Free Alternative
For schools or friends with nut allergies, swap the peanut butter for sunflower seed butter (SunButter). It has a similar texture and color. The flavor is slightly more earthy, but it still works beautifully with the chocolate. Same with the topping—just use sunflower seed butter instead.
Thicker Peanut Butter Layer
If you’re a peanut butter fanatic like me, double the topping recipe. Spread it thicker, or even add a second layer of chocolate chips on top of the peanut butter before the drizzle. It’s rich, but worth it.
Serving & Storage
These Football Party Chocolate Peanut Butter Brownie Bites are designed for easy serving, but here’s how to handle them like a pro.
How to Serve
I usually cut them into 2-inch squares. They’re small enough to eat in two or three bites, which is perfect for parties where people are holding drinks. Arrange them on a platter with a few extra sea salt flakes sprinkled around for presentation. They look stunning against a white plate.
Side Dishes
These go great with cold beers, milkshakes, or coffee. If you’re serving a full meal, they pair well with the fall sheet pan sausage and root veggies I make for game day dinners. The sweetness balances the savory, salty main course.
Storage Instructions
Refrigerator: Store in an airtight container for up to 1 week. Layer them between sheets of parchment paper if stacking them to prevent sticking. They taste best cold.
Freezing: Yes, you can freeze these! Wrap individual bites in plastic wrap, then put them in a freezer bag. They’ll last for 2 months. Thaw in the fridge overnight. The texture holds up surprisingly well.
Reheating: Do not reheat. These are meant to be eaten cold or room temperature. Heating them will melt the layers and ruin the structure.
Nutrition Information
I’m not a nutritionist, but here’s the breakdown if you’re tracking. Keep in mind, these are rich, sweet bites, so portion control is key.
Per Serving (based on 24 bites):
- Calories: 210
- Protein: 4g
- Carbs: 24g
- Fiber: 1g
- Sugar: 18g
- Fat: 12g
- Saturated Fat: 6g
Look, this is dessert. It’s chocolate, peanut butter, and sugar. It’s not a health food. But it’s homemade, so you know exactly what’s in it, and it’s way better than the processed stuff. When I make these, I enjoy one or two and savor them. It’s about quality, not quantity.
Final Thoughts
So that’s my go-to Football Party Chocolate Peanut Butter Brownie Bites! I’ve probably talked your ear off at this point, but when you make a recipe this often, you have a lot to say about it.
This has saved my game day desserts more times than I can count. It’s my answer to “what’s for dessert” when I’m tired, don’t want to bake a whole cake, and still want something that tastes really good. My kids are happy, my husband’s happy, and I’m happy because I’m not stressed about cooking.
Make it yours! Try different toppings, swap the chocolate chips, or adjust the salt. The best recipes are the ones you adapt to your family’s tastes. If you make this, drop a comment and let me know what you think! I love hearing how recipes turn out in your kitchen. And if something doesn’t work, tell me that too—I’m here to help troubleshoot.
Happy cooking! And I hope your kitchen smells half as good as mine does right now.
Frequently Asked Questions
Can I use natural peanut butter?
I don’t recommend it. Natural peanut butter separates and has a lot of oil. It will make your topping greasy and runny, and it won’t set properly in the fridge. Stick to standard creamy peanut butter like Jif or Skippy for the best texture.
Why did my brownie base turn out cakey?
Two reasons: either you overmixed the batter after adding the flour, or you baked it too long. For fudgy brownies, mix the dry ingredients until *just* combined, and pull them out of the oven when the toothpick has moist crumbs, not clean.
Can I make these ahead of time?
Yes! In fact, they taste better the next day. You can make them up to 3 days in advance. Just keep them covered in the fridge. If you’re making them for a party, I suggest making them the night before.
How do I cut them cleanly?
Make sure the brownies are completely cool and the peanut butter layer is firm. Use a sharp knife and wipe it clean between cuts. Or, use a pizza cutter—it glides through the layers without squishing them. I prefer the pizza cutter for these.
Can I freeze the whole pan?
Absolutely. Wrap the whole pan tightly in plastic wrap and then foil. Freeze for up to 2 months. Thaw in the fridge overnight before cutting. The texture might be slightly softer, but the flavor is still great.
What if I don’t have a 9×13 pan?
You can use an 8×8 pan, but the layers will be thicker. Adjust the baking time for the brownie base accordingly—it might need a few extra minutes. Just keep an eye on the toothpick test.
Can I add nuts?
Definitely. Chopped walnuts or pecans in the brownie base add a nice crunch. I sometimes sprinkle toasted pecans on top of the peanut butter layer before the chocolate drizzle. It elevates the flavor profile significantly.
Pin This Recipe!
Football Party Chocolate Peanut Butter Brownie Bites
- Total Time: 45 minutes
- Yield: 24 servings 1x
Description
These no-bake (mostly) chocolate peanut butter brownie bites are the perfect game day dessert. Featuring a fudgy brownie base, a creamy peanut butter topping, and a chocolate drizzle with sea salt, they are easy to make ahead and perfect for sharing.
Ingredients
- 1 cup (226g) unsalted butter
- 12 ounces (340g) dark chocolate chips (semi-sweet or bittersweet)
- 1 ½ cups (300g) white granulated sugar
- 3 large eggs, room temperature
- 2 teaspoons pure vanilla extract
- ¾ cup (95g) all-purpose flour
- ⅓ cup (30g) unsweetened cocoa powder
- 1 cup (250g) creamy peanut butter (standard brand like Jif or Skippy)
- 1 cup (120g) powdered sugar
- 2–3 tablespoons heavy cream
- ½ cup (85g) chocolate chips (for drizzle)
- Flaky sea salt (such as Maldon)
Instructions
- Line a 9×13 inch baking pan with parchment paper, leaving an overhang on the long sides for easy removal. Lightly spray with cooking spray.
- In a large microwave-safe bowl, combine butter, dark chocolate chips, and sugar. Microwave in 30-second intervals, stirring well between each, until smooth and glossy.
- Let the chocolate mixture cool for about 2 minutes. Whisk in eggs one at a time, then stir in vanilla extract.
- In a separate small bowl, whisk together flour and cocoa powder. Fold dry ingredients into the chocolate mixture until just combined. Do not overmix.
- Pour batter into the prepared pan and spread evenly. Bake in a preheated 350°F (175°C) oven for 15-18 minutes. The center should still have moist crumbs on a toothpick test (slightly underbaked).
- Let brownies cool completely in the pan on a wire rack. For faster cooling, place in the fridge for 15 minutes. The base must be cold before adding toppings.
- In a medium bowl, mix creamy peanut butter, powdered sugar, and heavy cream (start with 2 tablespoons). Stir until smooth and thick like frosting.
- Spread the peanut butter mixture evenly over the cooled brownie base. Return to the fridge for at least 20 minutes to firm up.
- Melt the remaining ½ cup chocolate chips in the microwave or a saucepan. Drizzle over the peanut butter layer in a zig-zag pattern.
- Immediately sprinkle with flaky sea salt.
- Lift the brownies out of the pan using parchment handles. Cut into 24 bites (6×4 grid) using a sharp knife or pizza cutter.
Notes
Do not overbake the brownie base; it should be fudgy, not cakey. Ensure the brownie base is completely cool before adding the peanut butter topping to prevent melting. For best flavor, let the bites sit in the fridge for 24 hours before serving. Natural peanut butter should not be used as it contains oil that will make the topping greasy.
- Prep Time: 15 minutes
- Cook Time: 18 minutes
- Category: Dessert
- Cuisine: American
Nutrition
- Serving Size: 1 brownie bite
- Calories: 210
- Sugar: 18
- Fat: 12
- Saturated Fat: 6
- Carbohydrates: 24
- Fiber: 1
- Protein: 4
Keywords: football party dessert, brownie bites, peanut butter brownies, game day snacks, no bake dessert, chocolate peanut butter, super bowl treats, make ahead dessert


