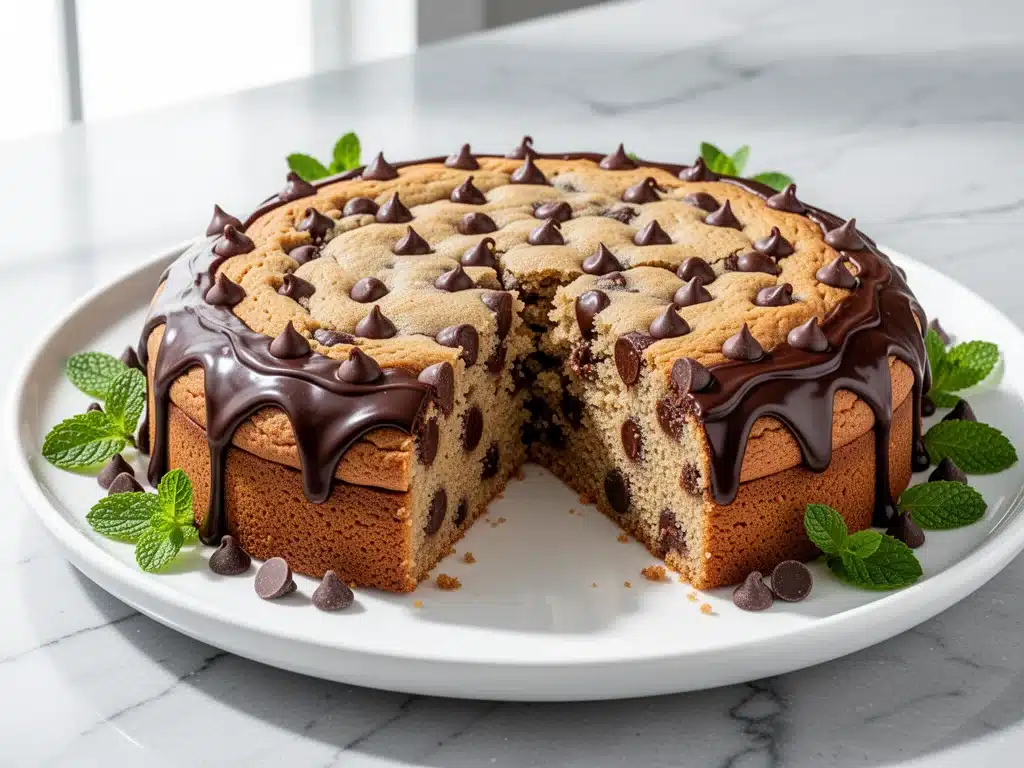
Last Sunday, I was standing in my kitchen at 11 AM on a Saturday, staring at a bowl of cookie dough that looked suspiciously like a hockey puck. My husband walked in, took one look at my face, and asked if I had finally accepted defeat. I had. I was trying to make a giant chocolate chip cookie cake for the big game, and instead of one cohesive, beautiful disc, I had a pile of crumbly mess that refused to stick together. We ended up eating it with spoons straight out of the bowl, which was delicious, but definitely not the “impressive” centerpiece I had promised my friends.
That failure was a turning point. I realized that most cookie cake recipes online are just scaled-up chocolate chip cookies with zero structural integrity. They crack, they crumble, and they look nothing like the bakery versions. So, I went back to the drawing board. I tested this Football Game Day Chocolate Chip Cookie Cake at least seven times. I adjusted the butter ratio, I played with the sugar types, and I even tried different pan sizes. What I ended up with isn’t just a big cookie. It’s a sturdy, chewy, gooey masterpiece that holds its shape, slices cleanly, and tastes like a hug from a professional baker.
This recipe has saved my reputation more times than I can count. It’s the reason my friends now call me the “Game Day Queen” instead of asking if I bought it from a store. And here’s the best part: it takes less than 15 minutes of active prep. You don’t need fancy equipment, and you don’t need to be a pastry chef. You just need a 10-inch springform pan (or a deep dish pizza pan) and a willingness to eat the edges while it cools. If you’ve been looking for a dessert that’s easier than classic Boston cream poke cake but feels just as special, this is it.
Why You’ll Love This Football Game Day Chocolate Chip Cookie Cake
There are about ten reasons I keep making this, but let’s be real—you’re probably looking for something that works, looks good, and doesn’t require a degree in culinary arts. Here’s why this cookie cake has earned a permanent spot in my rotation, especially when the Super Bowl or Sunday night football is on the line.
- Actually Sturdy — This isn’t a fragile cookie that shatters when you try to lift a slice. The secret is in the brown butter and the ratio of brown to white sugar. It creates a dense, chewy center with crisp edges that hold together beautifully. I’ve transported this in my car (with the window down, yes) and it arrived intact. Unlike my fall caramel apple sheet cake, which is lovely but softer, this one is built for travel.
- Stadium-Ready Flavor — Most giant cookies taste like sugar and butter. This one has depth. I use browned butter, which adds a nutty, toffee-like flavor that makes it taste gourmet. It’s rich and indulgent without being cloying. It pairs perfectly with the salty snacks usually on the table, balancing out the chips and dip.
- Zero Dough Chilling Required — I know, I know—most cookie recipes say “chill for 24 hours.” I don’t have 24 hours before kickoff. This recipe is designed to be mixed and baked immediately. The texture works because we’re using room temperature butter and a specific mixing technique that develops the right structure without resting. It’s lazy-baker friendly.
- Impressive Presentation — Because it bakes in a springform pan, you get those clean, straight sides that look like a professional bakery tart. You don’t need intricate piping skills to make it look fancy. A simple dusting of powdered sugar or a drizzle of chocolate sauce is all it takes. It looks way harder to make than it is.
- Feeds a Crowd — This makes one large cake that serves 12-16 people. It’s perfect for game day parties, tailgates, or just a family Sunday dinner. It’s easier to make one large dessert than twelve individual cookies, and it looks like you put in way more effort than you actually did.
This is my go-to when I need a dessert that feels celebratory but requires zero stress. No complicated techniques, no weird ingredients, just reliable, delicious food that makes everyone happy and keeps them in the kitchen long after the game ends.
Ingredients You’ll Need
Here’s the best part: you probably have most of this already in your pantry. This isn’t a recipe that requires a trip to three different specialty stores. It’s built on pantry staples, but the quality of those staples matters. I’m particular about the butter and the chocolate, and I’ll tell you exactly why.
For the Cookie Base
Unsalted butter (1 cup / 226g) — This is the star. I recommend browning it. It adds that nutty depth that separates this from a basic cookie. Use high-quality butter if you can; you’ll taste the difference. I use Land O’Lakes or Kerrygold. Don’t use margarine.
Light brown sugar (1 cup / 200g) — Packed. This gives the cookie its chewiness and moisture. Dark brown sugar works too if you want a deeper molasses flavor, but light is classic.
Granulated white sugar (½ cup / 100g) — This helps create the crisp edges. It balances the moisture from the brown sugar. Don’t skip it, or the cookie will be too cakey.
Large eggs (2) — Room temperature is best. They help emulsify the fat and sugar. If your eggs are cold, just drop them in a bowl of warm water for 5 minutes.
Vanilla extract (2 teaspoons) — Use real vanilla, not imitation. The flavor is concentrated in this recipe, so fake vanilla will taste harsh. I use Nielsen-Massey.
All-purpose flour (2 cups / 250g) — Don’t overmeasure! Spoon it into the cup and level it off. Too much flour makes a dense, dry cookie. I usually just scoop and sweep for speed, but spooning is more accurate.
Baking soda (1 teaspoon) — This is the leavening agent. It helps the cookie spread and brown. Make sure it’s not expired; test it with a little vinegar if you’re unsure.
Salt (1 teaspoon) — Essential for balancing the sweetness. Kosher salt is best because it’s easier to measure. If you use table salt, reduce to ¾ teaspoon.
For the Mix-Ins
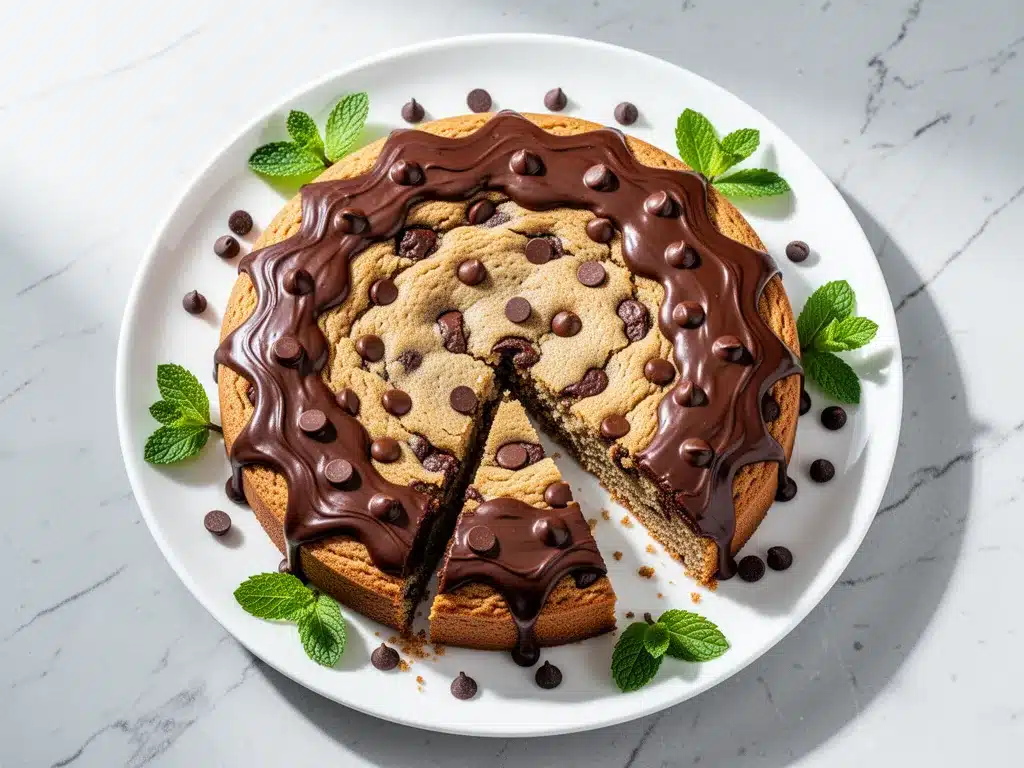
Chocolate chips (2 cups / 340g) — I use a mix of semi-sweet and milk chocolate. Semi-sweet keeps it from being too sweet, while milk chocolate adds creaminess. I like Ghirardelli or Nestlé Toll House. You can also use chunks for a more rustic look.
Flaky sea salt (optional, for topping) — Maldon salt is my favorite. Sprinkling it on top right after baking elevates the flavor profile instantly. It’s the “secret” step that makes people ask what’s different about your cookie.
Chopped walnuts or pecans (optional, 1 cup) — If your crowd likes nuts, add them in. I usually skip them for game day because some people are picky, but they add great texture if you’re serving family.
Equipment Needed
You don’t need fancy equipment for this. Here’s what I actually use.
10-inch Springform Pan — This is crucial. The springform allows you to release the sides for that clean, professional look. If you don’t have one, a deep-dish 9-inch or 10-inch pizza pan works, but you’ll need to line it well with parchment. I use a 10-inch because it gives the perfect ratio of height to width.
Large Saucepan — For browning the butter. Stainless steel is best because you can see the color change clearly. A light-colored pan helps you spot the brown bits.
Large Mixing Bowl — Something big enough to hold all the ingredients. Glass or stainless steel is easiest to clean.
Electric Mixer or Wooden Spoon — I use a hand mixer for the first few minutes to cream the butter and sugars, then switch to a spoon for the flour. A stand mixer works too, but go slow with the flour addition.
Parchment Paper — Essential for lining the pan. I line the bottom and the sides. This prevents sticking and makes cleanup a breeze. Trust me, you’ll thank me later.
Offset Spatula — For spreading the dough evenly in the pan. A regular spatula works, but an offset gives you better control.
How to Make It: Step-by-Step
Alright, let’s make this! I’m walking you through exactly how I do it, including the little tricks I’ve picked up over seven failed attempts.
Step 1: Prep Your Pan and Oven (5 minutes)
Preheat your oven to 350°F (175°C). This is a standard baking temperature that ensures even cooking. Line your 10-inch springform pan with parchment paper. I usually cut a circle for the bottom and a long strip for the sides, overlapping slightly. Spray it lightly with non-stick spray. This guarantees the cookie doesn’t stick, even with all that browned butter.
Step 2: Brown the Butter (5-7 minutes)
This is the game-changer. Melt the butter in your saucepan over medium heat. Stir it constantly. It will foam up, then subside. Watch closely. You’re looking for the butter to turn a golden amber color and smell nutty, like toasted hazelnuts. You’ll see brown bits at the bottom of the pan. This takes about 5 minutes. Immediately pour it into a heat-proof bowl to stop the cooking. Let it cool for 10 minutes until it’s warm but not hot. If it’s too hot, it will scramble the eggs later.
Step 3: Cream the Sugars and Butter (3 minutes)
In your large mixing bowl, combine the slightly cooled browned butter, brown sugar, and white sugar. Beat with an electric mixer on medium-high speed for about 2-3 minutes. The mixture should look pale, fluffy, and combined. This step incorporates air, which helps the cookie rise slightly. If you’re using a wooden spoon, this takes a bit of elbow grease, but it’s worth it.
Step 4: Add Eggs and Vanilla (2 minutes)
Beat in the eggs one at a time, making sure each is fully incorporated before adding the next. Add the vanilla extract. Scrape down the sides of the bowl with a spatula. The mixture should look smooth and glossy. Don’t rush this step; undermixed eggs can lead to a dense cookie.
Step 5: Mix in Dry Ingredients (2 minutes)
In a separate small bowl, whisk together the flour, baking soda, and salt. Add this to the wet ingredients. Mix on low speed or by hand until *just* combined. Stop as soon as you no longer see streaks of flour. Overmixing develops gluten, which makes cookies tough. We want tender and chewy, not bread-like.
Step 6: Fold in Chocolate Chips (2 minutes)
Stir in the chocolate chips by hand. Use a spatula or wooden spoon. Make sure they’re evenly distributed. If you want a more random, rustic look, don’t over-stir. Just get them in there.
Step 7: Press and Bake (25-30 minutes)
Transfer the dough to your prepared springform pan. Press it out evenly with your hands or a spatula. It should be about 1 inch thick. Don’t worry if it’s not perfectly smooth; it will spread. Bake in the preheated oven for 25-30 minutes. You’ll know it’s done when the edges are golden brown and the center looks set but still soft. It might look slightly underdone in the middle—that’s good. It will firm up as it cools. Do not overbake, or it will be dry.
Step 8: Cool and Top (1 hour)
Let the cookie cake cool in the pan for 15 minutes. Then, run a knife around the edge and remove the springform ring. Let it cool completely on a wire rack, at least 45 minutes to an hour. This is the hardest part. Once it’s cool, sprinkle with flaky sea salt if using. Slice with a sharp knife. The clean edges will be satisfying.
Expert Tips & Tricks
Here’s everything I’ve learned from making this dozens of times. These tips will save you from my mistakes.
Don’t Skip the Browning — I know it seems like extra work, but melted butter tastes flat. Browned butter adds a complexity that makes this feel like a dessert from a high-end bakery. It’s the single most important step for flavor.
Room Temperature Eggs — Cold eggs can cause the butter to seize up when you mix them, creating a curdled look. Let them sit on the counter for 30 minutes before you start. If you forget, the warm water trick works wonders.
Don’t Overbake — This is the biggest mistake people make with cookie cakes. The center should look soft and slightly shiny when you take it out. It continues to cook on the hot pan as it cools. If you bake until the center is firm, it will be dry and crumbly.
Use a Sharp Knife — For clean slices, use a sharp chef’s knife. Wipe the blade between cuts with a warm, damp cloth. This removes any sticky chocolate residue and gives you those pristine slices for serving.
Storage is Key — Cookie cake stays fresh at room temperature for up to 3 days in an airtight container. If your kitchen is hot, refrigerate it, but let it come to room temperature before serving for the best texture. It actually tastes better on day 2 as the flavors meld.
Variations & Substitutions
Once you’ve nailed the basic version, here’s how you can mix it up. I’ve tried all of these.
Double Chocolate — Swap half the chocolate chips for cocoa powder in the dough (add 2 tablespoons) and use dark chocolate chips. It’s intense and rich.
Peanut Butter Chip — Swap chocolate chips for peanut butter chips. Add a drizzle of peanut butter on top before baking for a swirl effect. This pairs amazingly with the salty snacks.
White Chocolate Macadamia — Swap chocolate chips for white chocolate chips and add 1 cup of toasted macadamia nuts. It’s tropical and sweet.
Gluten-Free — Use a 1:1 gluten-free flour blend. The texture will be slightly more tender, but it works well. I’ve used Bob’s Red Mill and King Arthur with good results.
Dairy-Free — Use a high-quality dairy-free butter stick (not spread) and dairy-free chocolate chips. The browning step works with vegan butter too, though the flavor is slightly less nutty.
Serving & Storage
How to Serve: I usually serve this straight from the cooling rack. It’s rustic and inviting. For parties, I cut it into squares rather than wedges—it’s easier to handle with one hand while holding a drink. Pair it with a cold glass of milk or a hot coffee.
Side Dishes: This is a dessert, so it stands alone. But if you’re serving a full meal, it pairs well with the savory fall sheet pan sausage and root veggies from earlier in the meal. The sweet cookie balances the savory main course.
Storage Instructions: Store in an airtight container at room temperature for up to 3 days. If you need to keep it longer, freeze individual slices. Wrap them tightly in plastic wrap, then in foil. They’ll last up to 2 months. Thaw at room temperature for an hour before eating.
Reheating: You can warm slices in the microwave for 10-15 seconds to make the chocolate gooey again. Be careful not to overheat, or it will get hard. A quick zap in the oven at 300°F for 5 minutes also works well.
Nutrition Information
I’m not a nutritionist, but here’s the breakdown if you’re tracking. Keep in mind that this is a rich dessert, so portions matter.
Per Serving (based on 12 slices):
- Calories: 380
- Protein: 5g
- Carbs: 48g
- Fiber: 2g
- Sugar: 32g
- Fat: 20g
- Saturated Fat: 12g
- Cholesterol: 45mg
- Sodium: 280mg
This is comfort food. It’s not a diet recipe. But it’s way better than store-bought, costs less, and you know exactly what’s in it. When I want to make it lighter, I reduce the sugar by ¼ cup, but I usually just enjoy a reasonable slice and call it a win.
Final Thoughts
So that’s my Football Game Day Chocolate Chip Cookie Cake! I’ve probably talked your ear off at this point, but when you make a recipe this often, you have a lot to say about it. This has saved my game day parties more times than I can count. It’s my answer to “what’s for dessert” when I’m tired, don’t want takeout, and still want something that tastes really good. My friends are happy, my family is happy, and I’m happy because I’m not stressed about cooking.
Make it yours! Try different chips, add nuts, or drizzle some caramel on top. The best recipes are the ones you adapt to your family’s tastes. If you make this, drop a comment and let me know what you think! I love hearing how recipes turn out in your kitchen. And if something doesn’t work, tell me that too—I’m here to help troubleshoot.
Happy cooking! And I hope your kitchen smells half as good as mine does right now.
Frequently Asked Questions
Can I use a regular cake pan instead of a springform pan?
You can, but it’s trickier. If you use a round cake pan, you must line it with parchment paper on the bottom and sides, leaving an overhang on the sides so you can lift the cookie out. The springform pan is ideal because it releases the sides easily, giving you that professional look. If you don’t have one, a deep-dish pizza pan works too.
Why did my cookie cake crack on top?
Cracking usually happens if the oven is too hot or if you overbaked it. Make sure your oven is properly calibrated. Also, don’t bake it until the center is firm. It should look soft when you take it out. The cracks aren’t the end of the world—they add to the rustic look—but preventing them makes for a smoother top.
Can I make the dough ahead of time?
Yes! You can refrigerate the dough for up to 3 days. Let it come to room temperature for about 30 minutes before pressing it into the pan and baking. You can also freeze the dough balls or the pressed dough for up to 2 months. Just add a few minutes to the baking time if baking from frozen.
Is this recipe too sweet?
It’s sweet, but the brown butter and flaky salt balance it out. If you find it too sweet, reduce the white sugar by 2 tablespoons. The brown sugar should stay the same for texture. The salt topping is key—it cuts through the sweetness and makes the chocolate flavor pop.
Can I use dark chocolate chips instead?
Absolutely. Dark chocolate chips will make the cookie less sweet and more rich. I recommend a 60% cocoa content for a good balance. If you use very dark chocolate (85%+), you might want to add a little extra sugar to balance the bitterness.
How do I store leftovers?
Store in an airtight container at room temperature for up to 3 days. If your kitchen is hot, refrigerate it. Let it come to room temperature before serving for the best texture. It actually tastes better on day 2 as the flavors meld together.
Pin This Recipe!
Football Game Day Chocolate Chip Cookie Cake
- Total Time: 45 minutes
- Yield: 12-16 servings 1x
Description
A sturdy, chewy, and gooey chocolate chip cookie cake that holds its shape and slices cleanly. Made with browned butter for gourmet flavor, this recipe requires no dough chilling and is perfect for game day parties.
Ingredients
- 1 cup (226g) unsalted butter
- 1 cup (200g) light brown sugar, packed
- 1/2 cup (100g) granulated white sugar
- 2 large eggs, room temperature
- 2 teaspoons vanilla extract
- 2 cups (250g) all-purpose flour
- 1 teaspoon baking soda
- 1 teaspoon salt (kosher)
- 2 cups (340g) chocolate chips (semi-sweet and milk)
- Flaky sea salt (optional, for topping)
- 1 cup chopped walnuts or pecans (optional)
Instructions
- Preheat oven to 350°F (175°C). Line a 10-inch springform pan with parchment paper and spray with non-stick spray.
- Melt butter in a saucepan over medium heat, stirring constantly until it turns golden amber and smells nutty (about 5 minutes). Pour into a heat-proof bowl and let cool for 10 minutes.
- In a large mixing bowl, combine cooled browned butter, brown sugar, and white sugar. Beat on medium-high speed for 2-3 minutes until pale and fluffy.
- Beat in eggs one at a time, ensuring each is fully incorporated before adding the next. Add vanilla extract and scrape down the sides of the bowl.
- In a separate bowl, whisk together flour, baking soda, and salt. Add to wet ingredients and mix on low speed or by hand until just combined.
- Fold in chocolate chips (and nuts if using) by hand until evenly distributed.
- Transfer dough to the prepared pan and press evenly to about 1 inch thick. Bake for 25-30 minutes until edges are golden brown and center looks set but soft.
- Cool in the pan for 15 minutes, then remove the springform ring. Cool completely on a wire rack for at least 45 minutes to 1 hour.
- Sprinkle with flaky sea salt if desired, then slice with a sharp knife.
Notes
Do not overbake; the center should look soft when removed from the oven as it will firm up while cooling. Browned butter is essential for the nutty flavor profile. For clean slices, use a sharp knife and wipe the blade between cuts. Store in an airtight container at room temperature for up to 3 days.
- Prep Time: 15 minutes
- Cook Time: 30 minutes
- Category: Dessert
- Cuisine: American
Nutrition
- Serving Size: 1 slice
- Calories: 380
- Sugar: 32
- Sodium: 280
- Fat: 20
- Saturated Fat: 12
- Carbohydrates: 48
- Fiber: 2
- Protein: 5
Keywords: cookie cake, chocolate chip cookie, game day dessert, football party food, brown butter cookie, springform pan dessert, easy dessert


