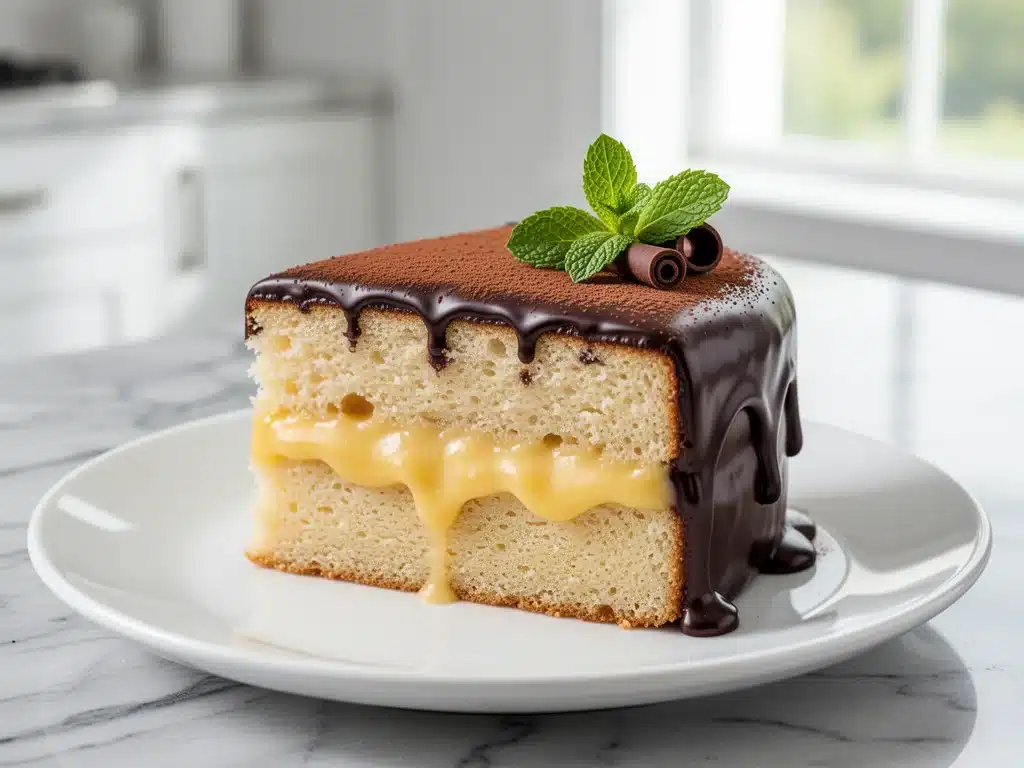
I have a confession to make. For years, I bought the box mix version of Boston Cream Pie at the grocery store. You know the one—the foil pan, the plastic dome lid, the slightly artificial vanilla smell that hits you before you even open it. I told myself it was because I was “too busy” to bake, but the truth? I was intimidated. The idea of making a custard filling from scratch, getting the sponge cake just right, and pouring a shiny chocolate glaze without it running off the edges felt like a recipe for disaster. I’d rather eat a sandwich.
That changed last spring. My daughter’s school had a bake sale, and I was in a panic. I wanted something that looked fancy enough to sell for $5 but was actually manageable to make in a chaotic kitchen. I stumbled across the concept of a poke cake. It sounded too good to be true: a fluffy cake, holes poked in it, and a filling poured right into the sponge so every bite is infused with flavor. No complicated layers, no structural engineering required.
I made this Classic Boston Cream Poke Cake for the bake sale, expecting mediocre results at best. Instead, I watched a line form. People were asking for the recipe. My husband, who is notoriously difficult to impress with desserts, took one bite and said, “This is better than the bakery.” And he’s right. It is.
This isn’t just a cake; it’s a hack for perfection. It combines the nostalgic comfort of a Boston Cream Pie with the ease of a poke cake, resulting in a dessert that is moist, rich, and incredibly easy to make. I’ve tested this recipe about a dozen times now, tweaking the custard thickness and the glaze consistency, and I’m finally ready to share the version that actually works. It’s going to become your new go-to for potlucks, holidays, or just because you want something sweet without the stress.
Why You’ll Love This Recipe
There are about ten reasons I keep making this cake, but here are the big ones that will change your dessert game.
It’s Foolproof Moisture — Seriously, if you’ve ever dealt with dry, crumbly cake, this is your cure. The poke holes allow the vanilla pudding to soak deep into the crumb. I’ve made dry cakes before, but this method guarantees a moist texture every single time. It’s like the cake drinks the flavor.
Zero Skill Required — You don’t need to be a pastry chef. There’s no folding egg whites, no tempering chocolate, and no complex layering. You bake a cake, poke holes, pour pudding, add glaze. That’s it. I’ve walked my teenage nephew through this over FaceTime, and he nailed it on the first try.
Make-Ahead Friendly — This is the ultimate stress-buster. It actually tastes better the next day. The flavors meld together overnight, and the glaze sets perfectly. I make this the night before a party, and it’s ready to go when I am. No last-minute panic.
Restaurant-Quality Taste — It tastes like something you’d get at a high-end bakery, but it costs a fraction of the price. The combination of vanilla custard and chocolate ganache is classic for a reason. It’s rich, satisfying, and feels indulgent without being overly heavy.
Visual Impact — Let’s be honest, we eat with our eyes first. This cake looks impressive with its glossy chocolate top and creamy vanilla interior. It doesn’t look “homemade” in a messy way; it looks intentional and delicious. Perfect for impressing guests or just treating yourself.
This is my go-to when I need a dessert that just works. No complicated techniques, no weird ingredients, just reliable, delicious food that makes everyone happy. It’s the kind of recipe that reminds you why you love baking in the first place.
Ingredients You’ll Need
Here’s the best part: you probably have most of this already in your pantry. I’m particular about three ingredients here, and I’ll tell you exactly why.
For the Cake Base
Yellow Cake Mix (1 box / 15.25 oz / 432g) — I use a standard yellow cake mix. Don’t use white cake mix; you want that buttery yellow color to peek through. I always use Duncan Hines or Betty Crocker. I’ve tried generic brands, and they don’t rise as nicely. Save time and stick to the big names.
Instant Pudding Mix (1 box / 3.4 oz / 96g) — Vanilla instant pudding. This is crucial. Do not use the “cook and serve” kind. Instant pudding is designed to thicken quickly and mix into batters. It adds structure and flavor. I keep a box in my cabinet at all times.
Eggs (3 large) — Room temperature eggs are best. If you forgot to take them out, just run them under warm water for a minute. They help the cake rise evenly.
Vegetable Oil (½ cup / 120ml) — Oil keeps cakes moister than butter. I use a neutral oil like canola or vegetable. Butter adds flavor, but oil adds moisture, and we want moisture here.
Water (1 cup / 240ml) — Some recipes call for milk, but water helps the cake rise higher and keeps the texture light. Milk can make it denser. I stick with water for that classic poke cake lift.
For the Filling
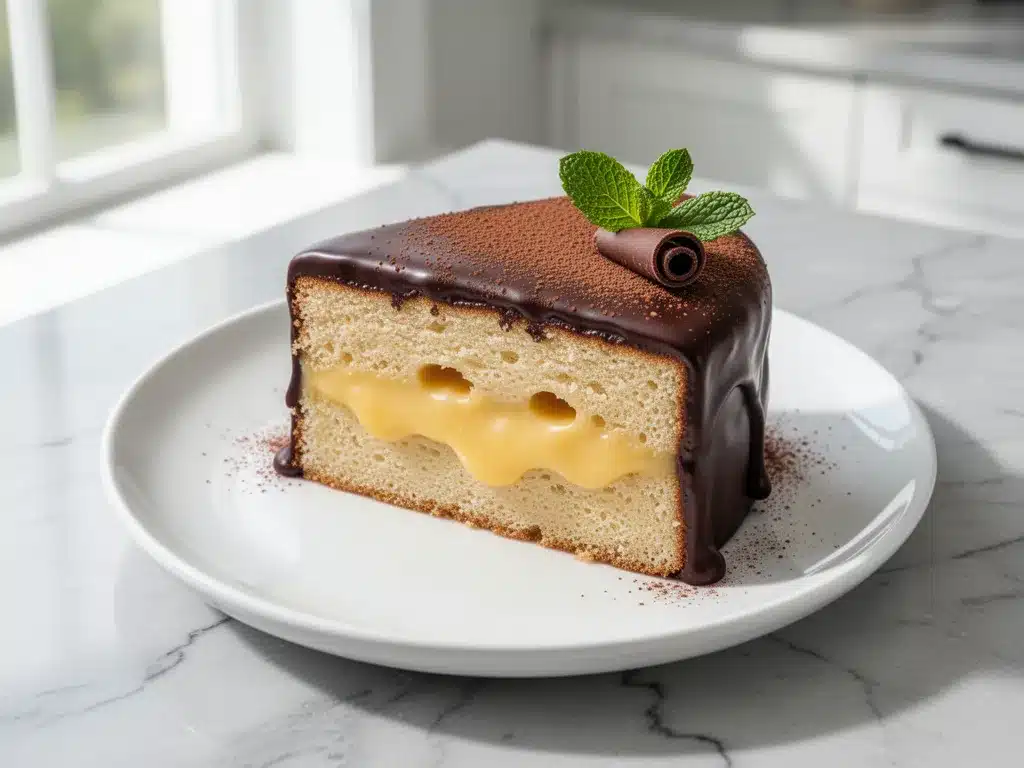
Vanilla Instant Pudding (2 boxes / 6.8 oz / 192g) — We’re doubling the pudding for the filling. This ensures you get plenty of creamy vanilla in every bite. Use the instant kind again. If you can’t find instant, you can use cook-and-serve, but you’ll need to let it cool completely before pouring.
Milk (4 cups / 960ml) — Whole milk is best for richness. If you’re watching calories, 2% works, but whole milk makes the pudding creamier and more luxurious. I don’t skimp on the milk here.
Whipped Topping (1 container / 8 oz / 227g) — Cool Whip or a similar brand. This lightens up the pudding so it’s not too heavy. It adds airiness and makes the filling spreadable. I thaw mine in the fridge for an hour before using.
For the Chocolate Glaze
Chocolate Chips (1 cup / 170g) — Semi-sweet chocolate chips. I use Ghirardelli or Nestlé Toll House. Avoid baking bars; chips hold their shape better when melted and create a smoother glaze. Milk chocolate is too sweet for this balance.
Heavy Cream (½ cup / 120ml) — This creates the ganache. Use heavy cream (35% fat). Half-and-half is too thin, and whole milk will make it grainy. The fat content is what gives the glaze its glossy shine.
Butter (1 tablespoon) — This is the secret ingredient. Adding a tablespoon of butter to the warm ganache makes it extra glossy and adds a subtle richness. It’s optional, but I never skip it.
Optional Garnish
Shaved Chocolate — For that bakery look, shave some chocolate over the top. It’s not necessary, but it makes the cake look professional. I use a vegetable peeler on a chocolate bar.
Equipment Needed
You don’t need fancy equipment for this. Here’s what I actually use.
9×13 Inch Baking Pan — This is the standard size for poke cakes. I use a glass pan because it heats evenly, but metal works too. Grease it lightly with cooking spray before pouring the batter.
Electric Mixer — Hand mixer or stand mixer. Mixing the batter by hand is possible but tiring. I use my hand mixer because it’s quick and easy. You need to beat the eggs and oil thoroughly to get a smooth batter.
Wooden Spoon or Fork — For poking the holes. I use the handle of a wooden spoon because it creates the perfect size hole. A fork works too, but the holes are smaller and might not absorb the pudding as well.
Large Mixing Bowls — You’ll need two large bowls: one for the cake batter and one for the pudding filling. I use a 4-quart bowl for the cake and a 3-quart bowl for the pudding.
Spatula — A silicone spatula is essential for scraping the bowl clean and spreading the pudding and glaze evenly. I have a few, but any flexible spatula works.
Saucepan — For melting the chocolate ganache. I use a small saucepan over low heat. If you don’t have one, you can use a microwave-safe bowl, but the stovetop gives you more control.
Measuring Cups and Spoons — Standard stuff. Dollar store versions work fine. Accuracy matters here, especially with the pudding mix.
Whisk — For mixing the pudding. A whisk ensures there are no lumps. I use a small whisk for the pudding and a larger one for the cake batter.
Vegetable Peeler — Optional, but nice for shaving chocolate. I keep one in my drawer for garnishing desserts.
How to Make It: Step-by-Step
Alright, let’s make this! I’m walking you through exactly how I do it, including the little tricks I’ve picked up.
Step 1: Prep Your Oven and Pan (5 minutes)
Preheat your oven to 350°F (175°C). This is the standard temperature for most cake mixes. Grease your 9×13 inch baking pan with cooking spray or butter. I spray it thoroughly, including the corners, to ensure the cake releases easily. If you skip this, you’ll be scraping cake out of the pan, and nobody wants that.
Step 2: Mix the Cake Batter (5 minutes)
In a large bowl, combine the yellow cake mix, instant vanilla pudding mix, eggs, vegetable oil, and water. Beat with an electric mixer on medium speed for about 2 minutes. The batter should be smooth and well-combined. Scrape down the sides of the bowl to make sure everything is incorporated. Don’t overmix; just until smooth is enough. Pour the batter into your prepared pan and spread it evenly.
Step 3: Bake the Cake (25-30 minutes)
Place the pan in the preheated oven and bake for 25-30 minutes. The cake is done when a toothpick inserted into the center comes out clean or with just a few moist crumbs. It shouldn’t be wet batter. The edges should be lightly golden. I usually check at 25 minutes. If it’s still wet, give it 2-3 more minutes. Ovens vary, so keep an eye on it.
Step 4: Poke the Holes (2 minutes)
This is the key step. While the cake is still hot, use the handle of a wooden spoon to poke holes all over the surface. Space them about 1 inch apart. I go row by row, making sure to cover the entire cake. The holes should be deep enough to go through the top layer but not all the way to the bottom. The heat of the cake helps the pudding soak in later. Don’t let the cake cool completely before poking; it’s harder to do and less effective.
Step 5: Make the Pudding Filling (5 minutes)
In a large bowl, whisk together the two boxes of instant vanilla pudding and the 4 cups of milk until thickened, about 2 minutes. Then, fold in the thawed whipped topping until fully combined. The mixture should be light and airy. Pour this over the hot cake. Use a spatula to spread it evenly, making sure to push some of the pudding into the holes. The hot cake will help the pudding set slightly as it cools.
Step 6: Chill the Cake (1 hour)
Place the cake in the refrigerator for at least 1 hour, or until the pudding is set. This step is crucial. If you skip it, the pudding will be runny, and the glaze will melt into it. I usually chill it for 2 hours to be safe. While it chills, you can make the glaze.
Step 7: Make the Chocolate Glaze (5 minutes)
In a small saucepan, combine the chocolate chips and heavy cream. Heat over low heat, stirring constantly, until the chocolate is melted and the mixture is smooth. This takes about 3-5 minutes. Do not boil; just melt. Remove from heat and stir in the tablespoon of butter until melted. The glaze should be glossy and pourable. If it’s too thick, add a teaspoon of warm cream. If it’s too thin, let it cool for a few minutes to thicken.
Step 8: Pour the Glaze and Chill Again (30 minutes)
Pour the warm chocolate glaze over the chilled cake. Start in the center and let it flow to the edges. Use a spatula to help it spread if needed. The glaze will set as it cools. Return the cake to the refrigerator for at least 30 minutes to let the glaze set completely. This makes slicing much easier.
Step 9: Slice and Serve
Remove the cake from the fridge and slice into squares. I like to use a sharp knife and wipe it clean between cuts for neat squares. Garnish with shaved chocolate if desired. Serve chilled. The cake is best eaten the same day, but it keeps well in the fridge for up to 3 days.
Expert Tips & Tricks
Here’s everything I’ve learned from making this dozens of times. These tips will save you from my mistakes.
Poke While Hot
I can’t stress this enough. Poke the holes while the cake is still warm from the oven. The heat helps the pudding penetrate the crumb. If you wait until it’s cold, the holes will be harder to make, and the pudding won’t soak in as well. I learned this the hard way with a dry cake that tasted like cardboard.
Don’t Skimp on the Pudding
Use the full amount of pudding mix. I’ve tried using less to save calories, and the cake just isn’t as flavorful. The pudding is the star of the show. It provides that creamy vanilla contrast to the chocolate. Trust the recipe.
Low Heat for Glaze
When melting the chocolate and cream, use low heat. High heat can burn the chocolate or cause the ganache to seize. Stir constantly. If you’re worried about burning, you can use a double boiler, but I find the saucepan on low works fine if you’re patient.
Chill Thoroughly
Don’t rush the chilling steps. The pudding needs time to set, and the glaze needs time to firm up. If you cut into it too soon, you’ll get a mess. I usually make this the night before, so it’s perfectly set in the morning.
Use Good Chocolate
The glaze is a big part of the experience. Use good quality chocolate chips. I prefer semi-sweet because it balances the sweetness of the pudding. If you use milk chocolate, the cake might be too sweet for your taste.
Common Mistakes (and how to avoid them)
Mistake: Glaze is too runny
Fix: You used too much cream or heated it too much. Let it cool and thicken. Next time, use less cream or add more chocolate chips.
Mistake: Pudding is lumpy
Fix: You didn’t whisk enough. Whisk the instant pudding and milk vigorously for 2 minutes until smooth. If lumps persist, strain the mixture through a sieve.
Mistake: Cake is dry
Fix: You overbaked it. Check the cake a few minutes before the recommended time. The toothpick should come out clean, not wet, but if it’s dry, pull it out sooner.
Variations & Substitutions
Once you’ve nailed the basic version, here’s how you can mix it up. I’ve tried all of these.
Chocolate Poke Cake
Use a chocolate cake mix instead of yellow. Fill with chocolate pudding and top with chocolate ganache. This is for serious chocolate lovers. It’s rich and decadent.
Red Velvet Poke Cake
Use a red velvet cake mix. Fill with cream cheese pudding (mix cream cheese with vanilla pudding). Top with a white chocolate ganache. This is a festive twist for holidays.
Carrot Cake Poke Cake
Use a carrot cake mix. Fill with cream cheese pudding. Top with a caramel glaze. This is a unique combination that’s surprisingly delicious.
Gluten-Free Option
Use a gluten-free yellow cake mix. Most mixes work well, but check the label to ensure it’s safe. The rest of the ingredients are naturally gluten-free.
Dairy-Free Option
Use dairy-free milk and whipped topping. For the glaze, use dairy-free chocolate chips and coconut cream. It’s not exactly the same, but it’s still tasty.
Alcohol-Infused
Add a tablespoon of rum or bourbon to the pudding filling for an adult version. It adds a nice depth of flavor. I tried this at a dinner party, and the adults loved it.
Serving & Storage
How to Serve:
I usually serve this straight from the fridge. It’s best cold. The contrast of the cold pudding and the firm glaze is perfect. I serve it with a fork, and sometimes a dollop of fresh whipped cream on the side for extra indulgence.
Side Dishes:
This cake is rich, so it pairs well with a light beverage. I serve it with coffee or tea. A glass of cold milk is also classic. It’s not a cake that needs savory sides; it’s a dessert to be enjoyed on its own.
Toppings Bar:
For parties, I put out a toppings bar with fresh berries, chocolate shavings, and caramel drizzle. Everyone can customize their slice. It’s fun and interactive.
Storage Instructions:
Refrigerator: Store the cake in an airtight container or cover the pan with plastic wrap for up to 4 days. It actually tastes better on day 2 as the flavors meld. Do not leave it at room temperature for more than 2 hours.
Reheating: You don’t need to reheat this cake. It’s best served cold. If you must warm it, microwave a slice for 10 seconds, but be careful not to melt the glaze too much.
Freezing: This cake does not freeze well. The pudding filling becomes icy and the texture changes. It’s best made fresh or stored in the fridge for a few days.
Pro Tip: If you’re transporting the cake, keep it chilled in a cooler with ice packs. The glaze can melt in warm weather, so handle with care.
Nutrition Information
I’m not a nutritionist, but here’s the breakdown if you’re tracking. This is a rich dessert, so enjoy in moderation.
Per Serving (based on 12 servings):
- Calories: 380
- Protein: 5g
- Carbs: 52g
- Fiber: 1g
- Sugar: 38g
- Fat: 18g
- Saturated Fat: 10g
- Cholesterol: 45mg
- Sodium: 280mg
What’s Good:
- It’s a satisfying dessert that feels indulgent.
- Easy to share and portion control.
What to Know:
- High in sugar and calories due to the cake mix, pudding, and glaze.
- Contains dairy and gluten.
My Take:
Look, this is comfort food. It’s sweet, rich, and delicious. It’s not a diet recipe. But it’s way better than store-bought, costs less, and I know exactly what’s in it. When I want to make it lighter, I use less glaze and add fresh berries. But usually? I just eat a reasonable slice and enjoy it.
Final Thoughts
So that’s my Classic Boston Cream Poke Cake! I’ve probably talked your ear off at this point, but when you make a recipe this often, you have a lot to say about it.
This has saved dessert nights more times than I can count. It’s my answer to “what’s for dessert” when I’m tired, don’t want to bake a complicated layer cake, and still want something that tastes really good. My kids are happy, my husband’s happy, and I’m happy because I’m not stressed about cooking.
Make it yours! Try different cake mixes, swap in your favorite pudding flavors, or adjust the glaze. The best recipes are the ones you adapt to your family’s tastes. If you’re looking for other easy dessert ideas, you might also enjoy these soft pink frosted sugar cookie bars which are just as simple and kid-friendly.
If you make this, drop a comment and let me know what you think! I love hearing how recipes turn out in your kitchen. And if something doesn’t work, tell me that too—I’m here to help troubleshoot.
Happy baking! And I hope your kitchen smells half as good as mine does right now.
Frequently Asked Questions
Can I use homemade vanilla cake instead of box mix?
You can, but the texture might be different. Box mix is designed to be moist and tender, which works well with the poke cake method. If you use homemade cake, make sure it’s not too dense. I recommend sticking with the box mix for this specific recipe to ensure the best results.
Why did my glaze turn out grainy?
This usually happens if the chocolate was overheated or if water got into the mixture. Make sure your cream is hot but not boiling when you add the chocolate. Stir gently until smooth. Also, ensure your bowl and utensils are completely dry.
Can I make this ahead for a party?
Absolutely! This is actually better made ahead. I recommend making it the night before. It needs time for the pudding to set and the glaze to firm up. It will keep in the fridge for up to 4 days.
Can I use whipped cream instead of Cool Whip?
You can, but homemade whipped cream is less stable and might deflate over time. Cool Whip holds its shape better in the fridge. If you prefer fresh whipped cream, stabilize it with a little gelatin or cream of tartar.
What if I don’t have a wooden spoon?
Use the handle of a butter knife or a fork. The goal is to create holes that are about 1 inch apart. Any utensil with a rounded end will work.
Can I freeze this cake?
I don’t recommend it. The pudding filling doesn’t freeze well and becomes icy. The texture changes significantly. It’s best enjoyed fresh or refrigerated for a few days.
Is there a way to make it less sweet?
Yes! Use semi-sweet or dark chocolate chips for the glaze. You can also reduce the amount of whipped topping in the pudding filling by half. Adding fresh berries on top can also balance the sweetness.
Pin This Recipe!
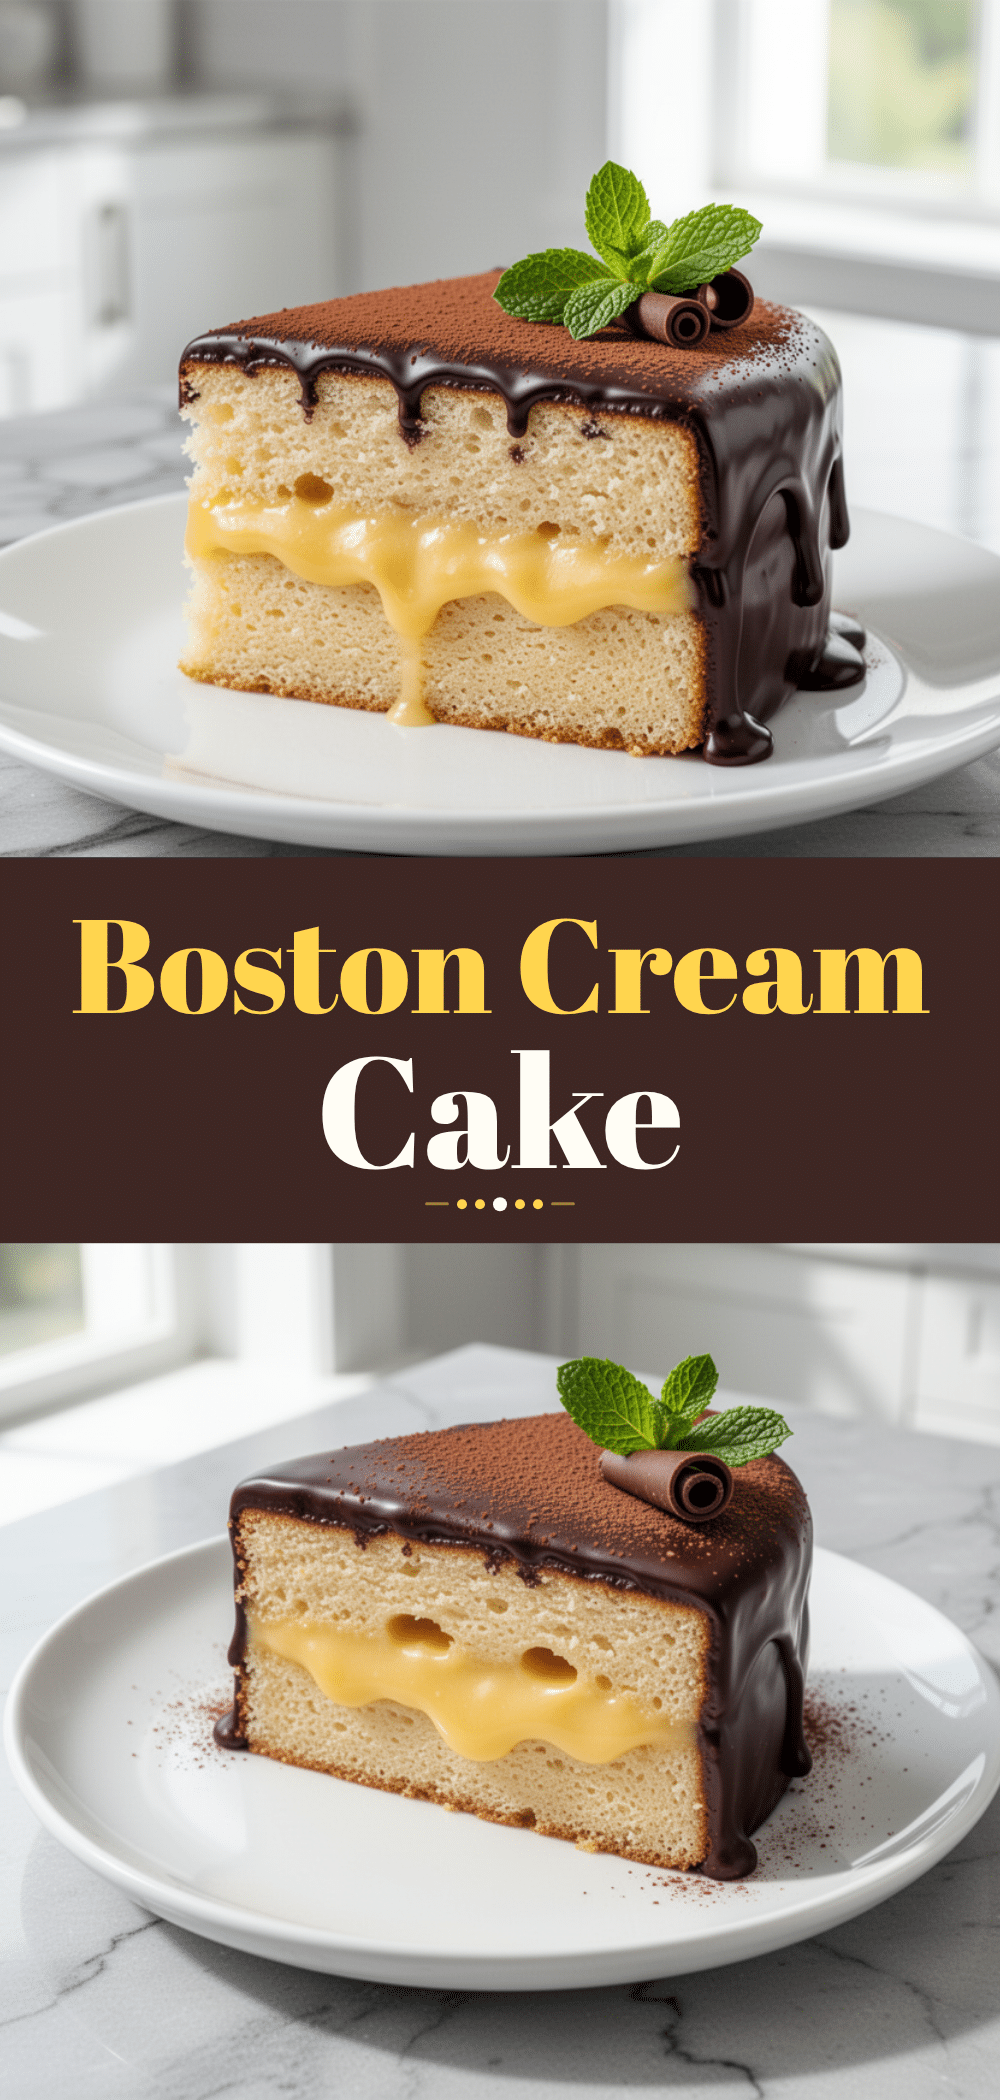
Classic Boston Cream Poke Cake
- Total Time: 45 minutes
- Yield: 12 servings 1x
Description
A foolproof, moist dessert that combines the nostalgic flavors of Boston Cream Pie with the ease of a poke cake. This recipe features a yellow cake base soaked in vanilla pudding and topped with a rich chocolate ganache.
Ingredients
- 1 box (15.25 oz) yellow cake mix
- 1 box (3.4 oz) vanilla instant pudding mix
- 3 large eggs, room temperature
- 1/2 cup vegetable oil
- 1 cup water
- 2 boxes (6.8 oz total) vanilla instant pudding mix
- 4 cups whole milk
- 1 container (8 oz) whipped topping (thawed)
- 1 cup semi-sweet chocolate chips
- 1/2 cup heavy cream
- 1 tablespoon butter
- Shaved chocolate for garnish (optional)
Instructions
- Preheat oven to 350°F (175°C) and grease a 9×13 inch baking pan.
- In a large bowl, combine cake mix, instant pudding mix, eggs, oil, and water. Beat with an electric mixer on medium speed for 2 minutes until smooth.
- Pour batter into the prepared pan and spread evenly.
- Bake for 25-30 minutes or until a toothpick inserted in the center comes out clean.
- While the cake is still hot, poke holes all over the surface about 1 inch apart using the handle of a wooden spoon.
- In a separate large bowl, whisk together 2 boxes of instant pudding and 4 cups of milk until thickened. Fold in the thawed whipped topping.
- Pour the pudding mixture over the hot cake and spread evenly, pushing some into the holes.
- Refrigerate for at least 1 hour until the pudding is set.
- In a small saucepan, heat chocolate chips and heavy cream over low heat, stirring constantly until melted and smooth. Remove from heat and stir in butter.
- Pour the warm chocolate glaze over the chilled cake.
- Refrigerate for another 30 minutes to allow the glaze to set completely.
- Slice into squares and serve chilled.
Notes
Poke the holes while the cake is still hot to ensure the pudding soaks in properly. Do not rush the chilling steps; the pudding and glaze need time to set for clean slicing. This cake is best served cold and keeps in the refrigerator for up to 4 days. It does not freeze well due to the pudding filling.
- Prep Time: 15 minutes
- Cook Time: 30 minutes
- Category: Dessert
- Cuisine: American
Nutrition
- Serving Size: 1 slice
- Calories: 380
- Sugar: 38
- Sodium: 280
- Fat: 18
- Saturated Fat: 10
- Carbohydrates: 52
- Fiber: 1
- Protein: 5
Keywords: Boston Cream Poke Cake, poke cake recipe, easy dessert, vanilla pudding cake, chocolate ganache, bake sale recipe, family friendly dessert


