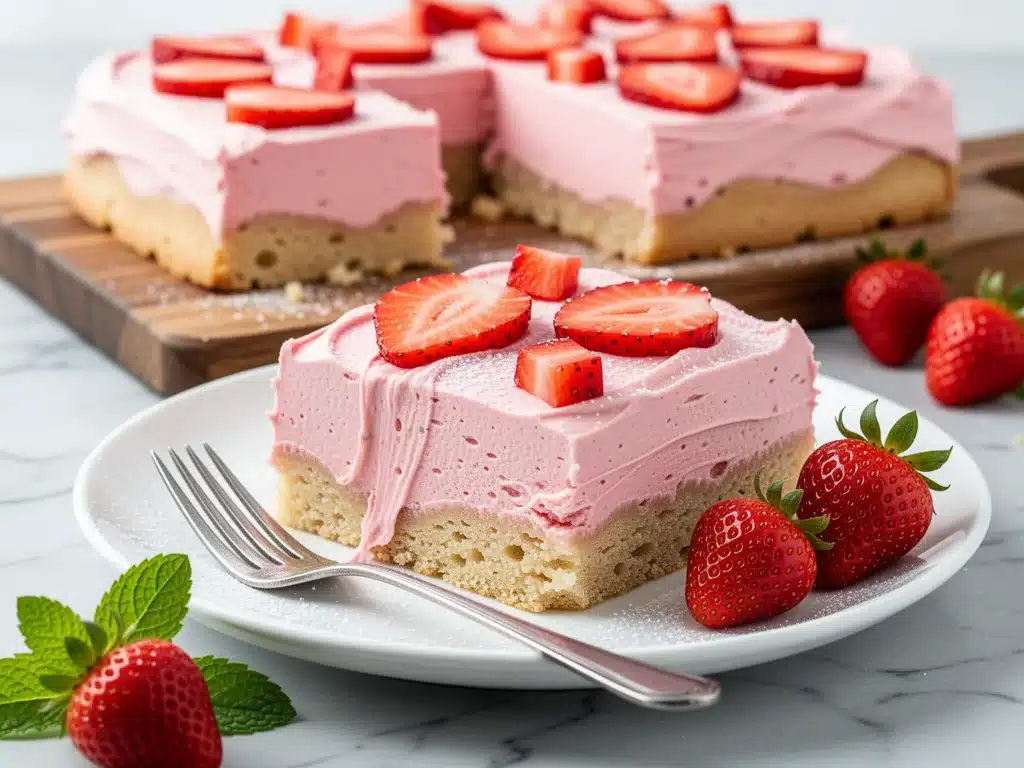
There was a summer about ten years ago when my cousin’s backyard became the unofficial headquarters for neighborhood kids. It was that hot July week when school let out, the days stretched long and golden, and the only thing on our minds was how to stay cool while eating something sweet. We didn’t have fancy ice cream trucks or elaborate parties. Just a folding table, a cooler full of lemonade, and a pile of baking sheets.
That’s where I first fell in love with these frosted strawberry sugar cookie bars. My aunt didn’t make them with gourmet ingredients or complicated techniques. She used a box mix, a packet of strawberry gelatin, and a simple cream cheese frosting that tasted like summer itself. I remember sitting on the grass, sugar on my chin, watching the sun dip below the fence line, and thinking, Why isn’t everything this easy and delicious?
Fast forward to today, and I still make these bars for every gathering. Whether it’s a potluck, a beach day, or just a Tuesday night craving, they are my go-to. I’ve tweaked the recipe over the years to make it taste more homemade—using real butter, fresh strawberries, and a buttery shortbread-like base—but the soul of the recipe remains the same. It’s nostalgic, it’s simple, and it’s absolutely perfect for summer parties.
If you’ve been hunting for a dessert that looks impressive but comes together in under an hour, stop looking. These Frosted Strawberry Sugar Cookie Bars are it. They’re soft, chewy, fruity, and frosted with a tangy cream cheese layer that balances the sweetness perfectly. I’ve made them for everything from bridal showers to casual BBQs, and they always disappear first. Even people who claim they “don’t like sweet stuff” ask for seconds.
Here’s the thing about summer desserts: you want something that doesn’t require you to stand over a hot stove for hours. You want something that can be made ahead, travels well, and doesn’t melt in the heat (thanks to the cream cheese frosting). These bars check every box. Plus, they’re pink, pretty, and just scream “summer vibes.”
I’ve tested this recipe dozens of times, adjusting the flour ratio, the frosting thickness, and the baking time to get that perfect chewy-crisp edge. The result? A bar that holds its shape when cut but melts in your mouth. It’s the kind of recipe you’ll want to print out and tape to your fridge. So grab your mixing bowl, and let’s make something that’ll have your guests asking for the recipe.
Why You’ll Love This Recipe
There are plenty of cookie bars out there, but these frosted strawberry sugar cookie bars are in a league of their own. They’re not just another dessert; they’re a solution to the “what do I bring to the party?” panic. Here’s why they’ve earned a permanent spot in my rotation:
Stupid Simple Ingredients — Seriously, you don’t need a specialty store for this. I’m talking butter, sugar, flour, strawberry gelatin, and cream cheese. If you can read a label, you can make these. I’ve made them while my kids were doing homework at the kitchen table, and they turned out perfect every time.
Make-Ahead Magic — Summer parties often start with last-minute chaos. The best part of these bars is that they taste even better the next day. You can mix the dough, bake the base, frost them, and refrigerate them the night before. When you pull them out of the fridge, they’re set, firm, and ready to cut. No stress, no rushing.
Perfect for Crowds — Whether you’re feeding six people or sixty, these bars scale up easily. I usually make a double batch for parties because they disappear faster than I can blink. They’re also easy to transport. Slide the pan into your car, and they won’t budge. Unlike cupcakes, they don’t need frosting protection or delicate handling.
The Flavor Combo — Strawberry and cream cheese is a classic for a reason. The tartness of the frosting cuts through the sweet, buttery cookie base, while the strawberry gelatin adds that bright, fruity pop. It’s not overly sweet, which is a huge win. My picky-eater nephew, who usually turns his nose up at “pink food,” devours these. Try to find someone who doesn’t like them—I dare you.
Kid-Friendly Fun — These bars are a hit with kids and adults alike. The pink color is festive, and the taste is familiar but elevated. I’ve had kids help me press the dough into the pan, and they love watching the bars turn golden in the oven. It’s a great way to get them involved in the kitchen without a mess.
This recipe is my answer to “what’s for dessert?” when I want something that feels special but doesn’t take all day. It’s reliable, delicious, and always a crowd-pleaser. Once you make these, you’ll understand why I keep coming back to them year after year.
Ingredients You’ll Need
Here’s the best part: you probably have most of this already in your pantry. I’m particular about a few things here, but overall, this is a very accessible recipe. Let’s break down what you need and why it matters.
For the Cookie Base:
Butter (1/2 cup / 113g, unsalted, softened) — This is the foundation. Use real butter, not margarine. It gives the bars that rich, shortbread-like texture. I like to let it sit on the counter for 15 minutes so it’s easy to mix.
Granulated Sugar (1/2 cup / 100g) — Standard white sugar. Don’t substitute with brown sugar unless you want a chewier, molasses-heavy bar. White sugar keeps the texture light and crisp.
Strawberry Gelatin (1 package / 3 oz) — This is the secret ingredient. It’s not just for flavor; the gelatin helps bind the dough and adds that vibrant pink color. I use Jell-O brand, but any strawberry gelatin works. Don’t skip it—it’s what makes these bars unique.
All-Purpose Flour (2 cups / 250g) — The structure of the bar. I sift mine to avoid lumps, but if you’re in a hurry, whisking works too. Don’t pack it down; spoon it into the cup and level it off.
Baking Powder (1/2 teaspoon) — Just a little bit to give the bars a slight lift. Don’t add more, or they’ll be too cakey. We want them chewy, not fluffy.
Salt (1/4 teaspoon) — A pinch to balance the sweetness. It’s subtle, but it makes the strawberry flavor pop.
For the Frosting:
Cream Cheese (4 oz / 113g, softened) — Full-fat brick-style cream cheese is a must. The tub stuff has too much water and will make the frosting runny. Let it come to room temperature so it mixes smoothly.
Butter (1/4 cup / 57g, softened) — Adds richness and helps the frosting hold its shape. Again, real butter only.
Powdered Sugar (1 1/2 cups / 180g) — Sift this! Lumps in powdered sugar are the enemy of smooth frosting. I sift it twice if I’m feeling fancy, but once is usually enough.
Milk (1-2 tablespoons) — To adjust consistency. Start with 1 tablespoon and add more only if needed. You want a spreadable, not pourable, frosting.
Optional Add-ins:
Fresh Strawberries (1/2 cup, diced) — I love adding fresh diced strawberries on top for a burst of color and texture. It’s not necessary, but it’s pretty. Just pat them dry so they don’t make the frosting soggy.
White Chocolate Chips (1/4 cup) — If you’re feeling extra fancy, sprinkle these on top before baking. They melt into little sweet pockets.
Pro Tip: I always buy the block cream cheese and grate it myself if it’s not soft enough. It saves me from fighting lumps later. Also, keep your ingredients at room temperature. Cold butter and cream cheese will make your life harder and your texture uneven.
Equipment Needed
You don’t need fancy equipment for this. Here’s what I actually use:
9×13 Inch Baking Pan — I use a metal pan, but glass or ceramic works too. Just grease it well with butter or cooking spray. I like to line it with parchment paper for easy removal, but it’s not strictly necessary.
Mixing Bowls — Two medium bowls. One for the cookie dough, one for the frosting. I use glass bowls because they’re easy to clean and I can see what’s mixing.
Electric Mixer — A hand mixer or stand mixer makes this super easy. I’ve tried doing it by hand, and it’s not worth the arm workout. Creaming the butter and sugar takes effort.
Measuring Cups and Spoons — Standard stuff. Dollar store versions work fine. Just make sure they’re accurate.
Pastry Brush or Fork — To grease the pan evenly. I use a pastry brush for the butter, but a fork works too.
Offset Spatula — For spreading the frosting. A regular spatula works, but an offset one makes it easier to get into the corners without digging into the cookie base.
Cooling Rack — To cool the bars completely before frosting. This is crucial. If you frost warm bars, the frosting will melt and slide off.
Knife or Pizza Cutter — To cut the bars. A sharp knife works, but a pizza cutter gives you clean, straight edges. I use a pizza cutter for the party batches.
Optional: Parchment Paper — For easy lifting. I always use it for the first batch, then stop because it’s extra cleanup. But if you’re new to this, use it.
How to Make It: Step-by-Step
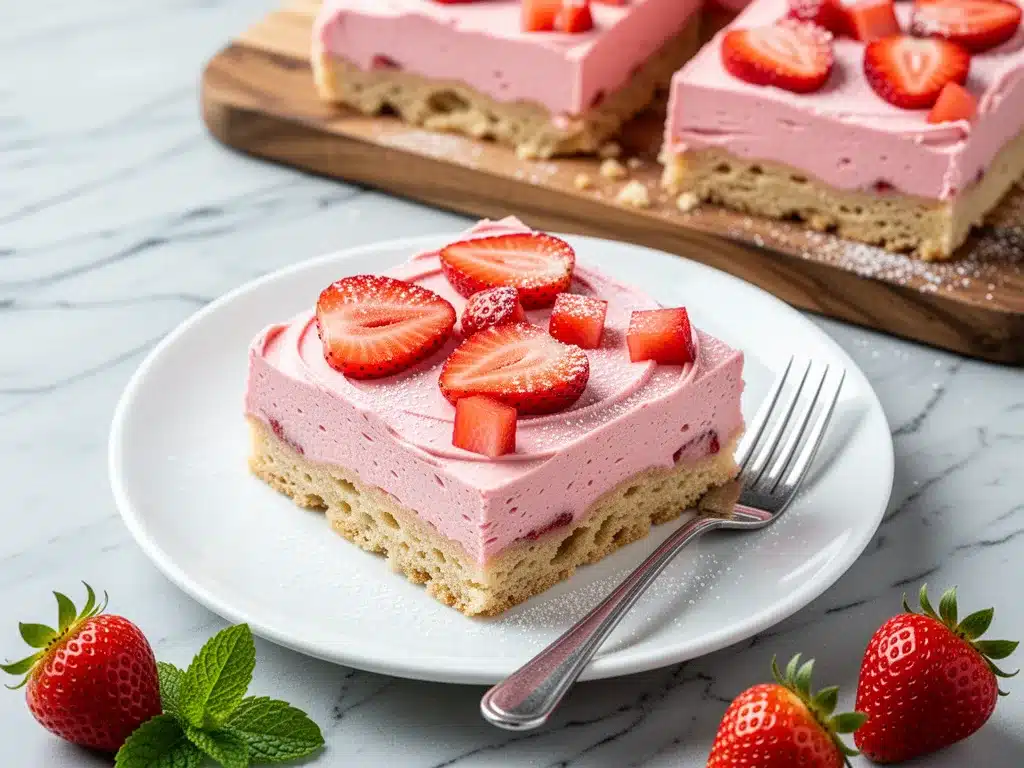
Alright, let’s make this! I’m walking you through exactly how I do it, including the little tricks I’ve picked up. This recipe is straightforward, but attention to detail makes the difference between good and great.
Step 1: Prep Your Pan and Oven (5 minutes)
Preheat your oven to 350°F (175°C). Grease a 9×13 inch baking pan with butter or non-stick spray. I line mine with parchment paper, leaving an overhang on the sides. This makes it super easy to lift the bars out once they’re cooled. If you skip the parchment, just make sure the pan is well-greased.
Step 2: Cream the Butter and Sugar (3 minutes)
In a large bowl, beat the softened butter and granulated sugar together until light and fluffy. This takes about 2-3 minutes with an electric mixer. You want the mixture to be pale and airy. This step incorporates air into the dough, which helps the bars rise slightly and stay tender. Don’t rush this.
Step 3: Add the Gelatin and Flour (2 minutes)
Add the dry strawberry gelatin powder, flour, baking powder, and salt to the butter mixture. Mix on low speed until just combined. The dough will look crumbly at first, then come together into a stiff, cohesive ball. Don’t overmix. Once it’s mostly combined, use your hands to press it into the prepared pan. I use a greased spatula or my fingers to press it down evenly. You want a flat, even layer. Press it firmly so it doesn’t crumble later.
Step 4: Bake the Base (15-18 minutes)
Place the pan in the preheated oven and bake for 15-18 minutes. The edges should be lightly golden, and the center should be set but still soft. Do not overbake. The bars will firm up as they cool. If you bake them until they’re hard, they’ll be dry. I usually pull them out when they just look done.
Step 5: Cool Completely (30 minutes)
Remove the pan from the oven and let it cool on a wire rack for at least 30 minutes. This is the hardest part—waiting—but it’s essential. If you try to frost warm bars, the heat will melt the frosting, and you’ll end up with a pink mess. I usually use this time to clean up and prep the frosting.
Step 6: Make the Frosting (5 minutes)
While the bars cool, make the frosting. In a clean bowl, beat the softened cream cheese and butter together until smooth. Add the sifted powdered sugar and beat on low speed until combined. Then, increase the speed and beat for 2-3 minutes until fluffy. Add milk, one tablespoon at a time, until you reach a spreadable consistency. The frosting should be thick enough to hold its shape but soft enough to spread easily.
Step 7: Frost and Chill (1 hour)
Spread the frosting evenly over the cooled cookie base. Use an offset spatula to get smooth edges. If you want, sprinkle diced fresh strawberries or white chocolate chips on top now. Once frosted, refrigerate the bars for at least 1 hour. This sets the frosting and makes cutting much cleaner. If you’re in a hurry, 30 minutes works, but an hour is better.
Step 8: Cut and Serve
Lift the bars out of the pan using the parchment paper overhang. Cut into squares or rectangles. I usually cut them into 12-16 pieces, depending on how hungry your guests are. Serve chilled. They taste best cold, with the frosting firm and the cookies chewy.
Expert Tips & Tricks
Here’s everything I’ve learned from making these dozens of times. These tips will save you from my mistakes.
Room Temperature Ingredients are Key
I can’t stress this enough. Cold butter and cream cheese will not cream properly. Your frosting will be lumpy, and your dough will be stiff. Let everything sit out for 30 minutes before you start. If you forget, microwave the butter for 10 seconds and the cream cheese for 15 seconds. They should be soft, not melted.
Don’t Overmix the Dough
Once you add the flour, mix just until combined. Overmixing develops gluten, which makes the bars tough. You want them tender and chewy, like a sugar cookie. If the dough looks crumbly, that’s normal. It will come together when you press it into the pan.
Cool Completely Before Frosting
This is the #1 mistake people make. Warm bars = melted frosting. I’ve learned this the hard way. If you’re impatient, freeze the bars for 15 minutes to speed up the cooling process. But don’t skip it.
Sift Your Powdered Sugar
Lumps in powdered sugar are the worst. They ruin the smoothness of the frosting. Sift it through a fine-mesh sieve before adding it to the cream cheese. It takes 30 seconds but makes a huge difference.
Chill Before Cutting
After frosting, refrigerate for at least an hour. This sets the frosting and makes the bars easier to cut. If you cut them warm, they’ll crumble and the frosting will smear. I use a sharp knife or pizza cutter for clean edges.
Storage Matters
Store leftovers in an airtight container in the fridge. They’ll last up to 5 days. Bring them to room temperature for 15 minutes before serving for the best texture. Don’t freeze them with the frosting on—it doesn’t hold up well. Freeze the bars unfrosted, then frost when ready to serve.
Variations & Substitutions
Once you’ve nailed the basic version, here’s how you can mix it up. I’ve tried all of these, and they’re all delicious.
Raspberry Version
Swap the strawberry gelatin for raspberry. The color is even prettier, and the tartness is slightly more intense. I love this version in the spring.
Lemon Cream Cheese Frosting
Add 1 tablespoon of lemon zest and 1 teaspoon of lemon juice to the frosting. It adds a bright, citrusy note that pairs beautifully with the strawberry base.
White Chocolate Chip
Stir 1/2 cup of white chocolate chips into the dough before pressing it into the pan. They melt into little sweet pockets. It’s like a dessert cookie bar.
Gluten-Free
Use a 1:1 gluten-free flour blend. The texture might be slightly crumblier, but it still works. I’ve used Bob’s Red Mill, and it’s great.
Dairy-Free
Use vegan butter and dairy-free cream cheese. The frosting might be slightly softer, so add less milk. It’s not exactly the same, but it’s still tasty.
Mini Bars
Use a mini muffin tin for bite-sized versions. Bake for 10-12 minutes. Frost with a small dollop. Perfect for parties and easy to grab.
Serving & Storage
How to Serve:
I usually serve these chilled, straight from the fridge. They look rustic and stay firm. But here are other ways I’ve enjoyed them:
Side Dishes:
– Fresh berries (strawberries, raspberries, blueberries)
– Whipped cream (for a decadent touch)
– A scoop of vanilla ice cream (if you’re feeling indulgent)
Toppings Bar:
When I have guests, I put out: extra diced strawberries, white chocolate chips, and crushed graham crackers. Everyone customizes their bar.
Storage Instructions:
Refrigerator:
Store in an airtight container for up to 5 days. The frosting will firm up in the fridge. Let them sit at room temperature for 15 minutes before serving for the best texture.
Freezing:
Freeze the bars unfrosted for up to 3 months. Wrap them tightly in plastic wrap and foil. Thaw overnight in the fridge, then frost. Don’t freeze frosted bars—the texture suffers.
Pro Tip: If leftovers are drying out, store them with a slice of bread in the container. The bread releases moisture and keeps the bars soft.
Nutrition Information
I’m not a nutritionist, but here’s the breakdown if you’re tracking. This is a dessert, so enjoy in moderation.
Per Serving (based on 12 servings):
- Calories: 280
- Protein: 3g
- Carbs: 38g
- Fiber: 0g
- Sugar: 26g
- Fat: 14g
- Saturated Fat: 9g
- Cholesterol: 40mg
- Sodium: 150mg
What’s Good:
– It’s a small, manageable portion size.
– The cream cheese adds a bit of protein.
– You control the sugar content.
What to Know:
– Higher in sugar and fat due to frosting and butter.
– Contains gluten and dairy.
– Moderate sodium.
My Take:
Look, this is a sweet treat. It’s not a health food. But it’s homemade, which means you know exactly what’s in it. When I want to make it lighter, I reduce the sugar in the frosting by 1/4 cup. But usually? I just enjoy a small square and savor it.
Final Thoughts
So that’s my go-to frosted strawberry sugar cookie bars! I’ve probably talked your ear off at this point, but when you make a recipe this often, you have a lot to say about it. These bars have saved me more times than I can count. They’re my answer to “what’s for dessert?” when I’m tired, don’t want takeout, and still want something that tastes really good. My kids are happy, my husband’s happy, and I’m happy because I’m not stressed about cooking.
Make it yours! Try different add-ins, swap in your favorite fruits, adjust the frosting thickness. The best recipes are the ones you adapt to your family’s tastes. If you make this, drop a comment and let me know what you think! I love hearing how recipes turn out in your kitchen. And if something doesn’t work, tell me that too—I’m here to help troubleshoot.
Happy baking! And I hope your kitchen smells half as good as mine does right now.
Frequently Asked Questions
Can I use fruit punch gelatin instead of strawberry?
Yes, you can! Fruit punch gelatin works similarly and adds a different flavor profile. I’ve tried it, and it’s good, but strawberry is the classic choice. Just make sure it’s the powdered gelatin, not the drink mix.
Why did my bars crumble when I cut them?
This usually happens if the dough wasn’t pressed firmly enough into the pan, or if you cut them before they were completely cooled. Make sure to press the dough down evenly and chill the bars for at least an hour after frosting.
Can I make these ahead for a party?
Absolutely! In fact, they taste better the next day. Make them the night before, frost them, and refrigerate. They’ll stay fresh for up to 5 days. Just bring them to room temperature before serving for the best texture.
Can I freeze the frosted bars?
I don’t recommend freezing frosted bars. The frosting can separate or become grainy when thawed. Instead, freeze the unfrosted bars. Wrap them tightly in plastic wrap and foil. Thaw overnight in the fridge, then frost when ready to serve.
What if I don’t have a 9×13 pan?
You can use an 8×8 pan, but the bars will be thicker. Adjust the baking time to 20-25 minutes, and check for doneness. The edges should be golden, and the center should be set.
Can I use fresh strawberries in the dough?
While Soft Pink Frosted Sugar Cookie Bars rely on gelatin for structure and flavor, adding fresh strawberries to the dough can make it soggy. If you want fresh fruit, I recommend adding diced strawberries on top of the frosting instead. It adds a nice burst of freshness without compromising the texture of the bar.
How do I store these bars?
Store them in an airtight container in the refrigerator for up to 5 days. If you’re meal-prepping, you might also enjoy checking out some Cheddar Broccoli Rice Egg Cups for a savory contrast during the week, but for sweet treats, the fridge is your best friend. They taste best cold, with the frosting firm and the cookies chewy.
Pin This Recipe!
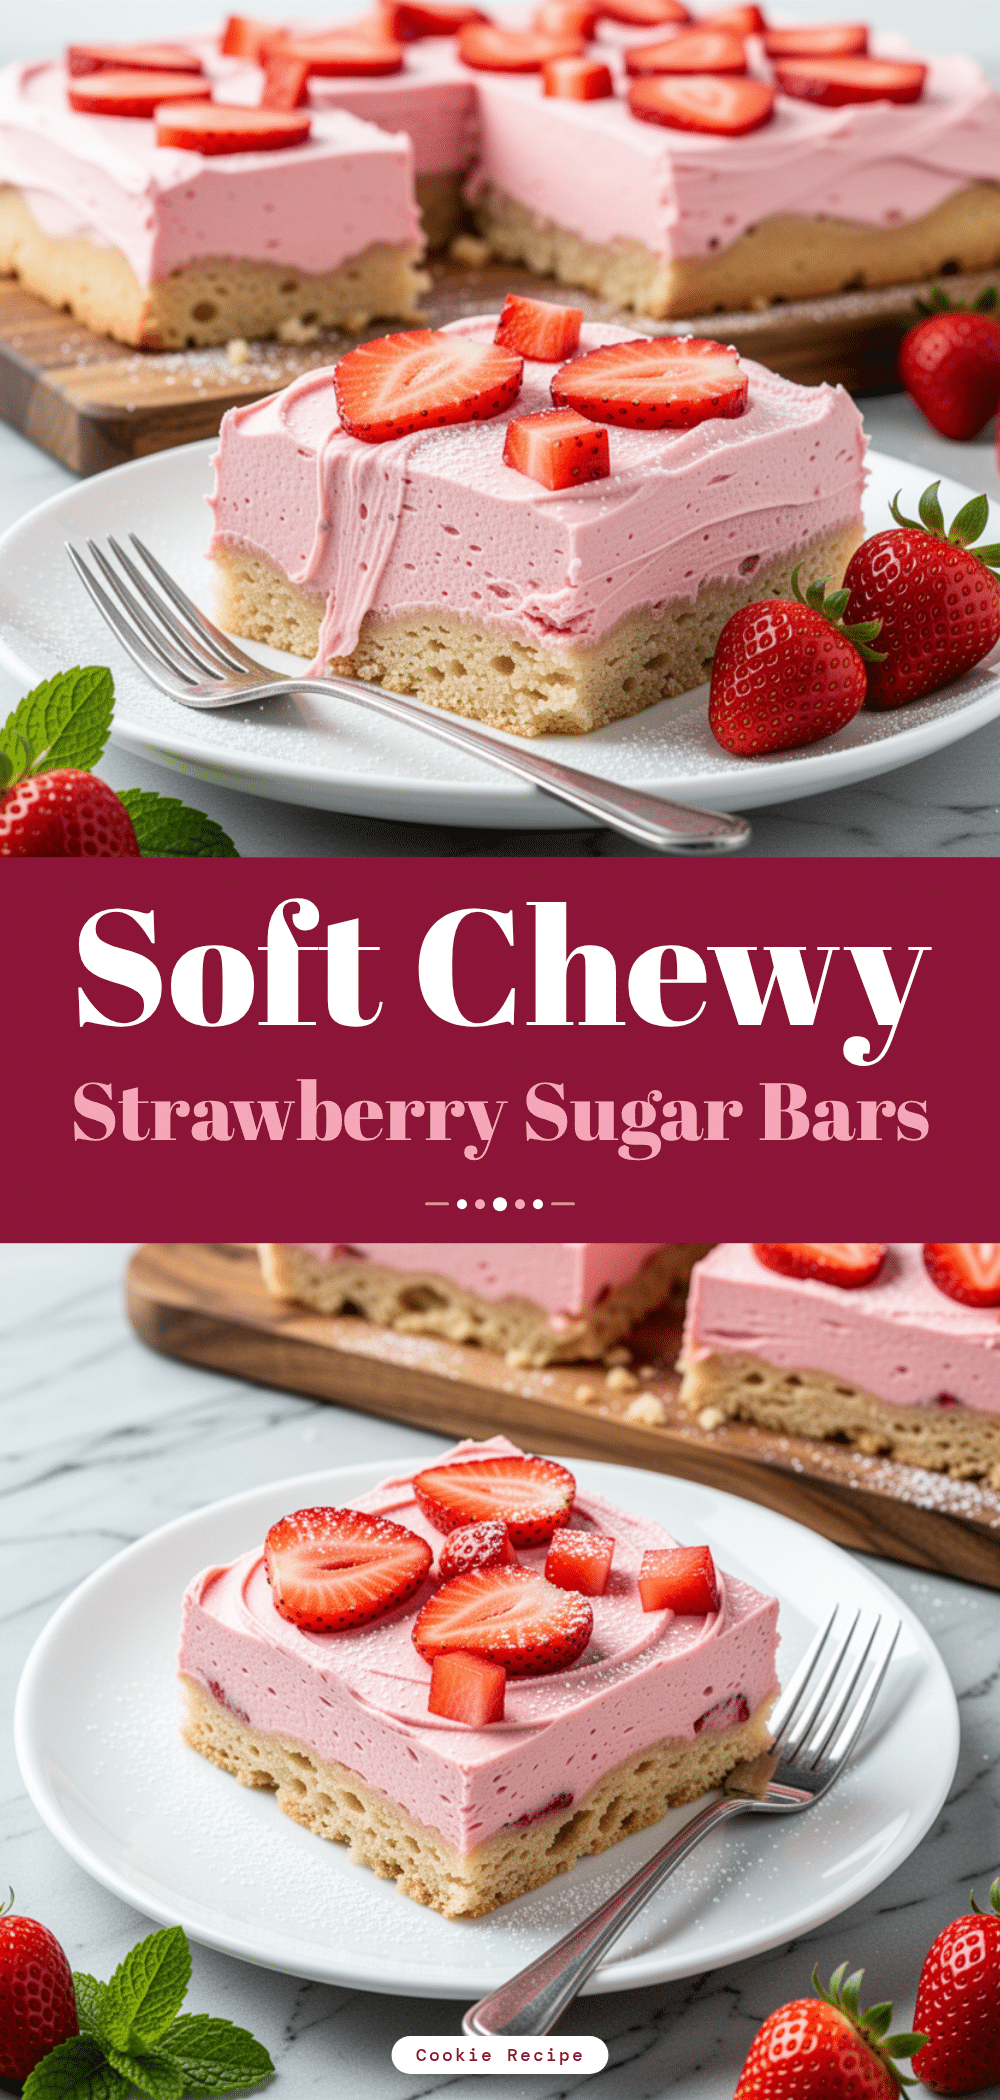
Frosted Strawberry Sugar Cookie Bars
- Total Time: 1 hour 33 minutes
- Yield: 12 servings 1x
Description
Soft, chewy strawberry sugar cookie bars with a tangy cream cheese frosting. This nostalgic summer treat is simple to make, perfect for parties, and tastes even better the next day.
Ingredients
- 1/2 cup (113g) unsalted butter, softened
- 1/2 cup (100g) granulated sugar
- 1 package (3 oz) strawberry gelatin powder
- 2 cups (250g) all-purpose flour
- 1/2 teaspoon baking powder
- 1/4 teaspoon salt
- 4 oz (113g) full-fat brick-style cream cheese, softened
- 1/4 cup (57g) unsalted butter, softened
- 1 1/2 cups (180g) powdered sugar, sifted
- 1–2 tablespoons milk
- Optional: 1/2 cup diced fresh strawberries
- Optional: 1/4 cup white chocolate chips
Instructions
- Preheat oven to 350°F (175°C). Grease a 9×13 inch baking pan and line with parchment paper for easy removal.
- In a large bowl, beat the 1/2 cup softened butter and granulated sugar together until light and fluffy, about 2-3 minutes.
- Add the strawberry gelatin powder, flour, baking powder, and salt to the butter mixture. Mix on low speed until just combined.
- Press the dough firmly and evenly into the prepared pan to form a flat base.
- Bake for 15-18 minutes until edges are lightly golden and the center is set but still soft.
- Remove from oven and let cool completely on a wire rack for at least 30 minutes.
- While bars cool, beat the 4 oz cream cheese and 1/4 cup softened butter until smooth.
- Add sifted powdered sugar and beat on low until combined, then increase speed and beat for 2-3 minutes until fluffy.
- Add milk one tablespoon at a time until the frosting reaches a spreadable consistency.
- Spread frosting evenly over the cooled bars. Sprinkle with optional fresh strawberries or white chocolate chips if desired.
- Refrigerate for at least 1 hour to set the frosting.
- Lift bars out of the pan and cut into squares or rectangles. Serve chilled.
Notes
Ensure all dairy ingredients are at room temperature for best texture. Do not frost the bars while they are warm, or the frosting will melt. For clean cuts, chill the bars for at least one hour after frosting. Store leftovers in an airtight container in the refrigerator for up to 5 days.
- Prep Time: 15 minutes
- Cook Time: 18 minutes
- Category: Dessert
- Cuisine: American
Nutrition
- Serving Size: 1 bar
- Calories: 280
- Sugar: 26
- Sodium: 150
- Fat: 14
- Saturated Fat: 9
- Carbohydrates: 38
- Protein: 3
Keywords: strawberry cookie bars, cream cheese frosting, summer dessert, easy baking, party dessert, strawberry gelatin recipe


