
I have a confession to make. Last Tuesday, I was standing in my kitchen at 6:45 PM, staring at a half-empty fridge and a very tired brain. It was one of those weeknights where the only thing I wanted was to order spicy wings and forget about cooking. But then I remembered I had a whole head of cauliflower sitting on the counter, looking at me like, “Well? What are we doing?”
Normally, I’d just ignore it. But something clicked. I didn’t want heavy, greasy takeout. I wanted flavor. I wanted crunch. I wanted those tangy, spicy buffalo wings my husband loves, but I wanted to make it lighter, faster, and honestly, a bit more interesting than just dipping sauce on fried chicken.
So I threw together what I thought would be a mediocre experiment: roasted cauliflower florets tossed in hot sauce, stuffed into warm tortillas, and topped with a cool, creamy slaw. I expected… okay. I expected “okay.”
Instead, my husband took one bite, closed his eyes, and said, “This is better than the taco place on 4th Street.”
That was the moment Crispy Baked Buffalo Cauliflower Tacos were born. I’ve made them probably thirty times since then—sometimes with blue cheese, sometimes with ranch, sometimes with zero toppings because I was just too hungry to chop anything. But the core recipe? It’s magic. It’s crispy, it’s tangy, it’s vegetarian, and it comes together in the time it takes to scroll through delivery apps. If you’re looking for a weeknight dinner that feels indulgent but doesn’t leave you feeling like a human balloon by 9 PM, this is it.
Why You’ll Love This Recipe
There are about ten reasons I keep making these buffalo cauliflower tacos, but here are the big ones. This isn’t just a “rabbit food” substitute; it’s a flavor explosion that stands on its own.
Stupid Simple — Seriously, if you can toss vegetables in a bowl and press “bake,” you can make this. I’ve walked my teenage son through it over FaceTime while he was at college. He nailed it on the first try.
Lightning Fast — 30 minutes from start to finish, and only 10 of those are active. I make this on weeknights when I get home at 7pm, and I’m still sitting down to eat by 7:30. No standing over a sizzling stove, no complicated sauces.
Pantry-Friendly — You probably have 80% of these ingredients already. I keep cauliflower, hot sauce, and tortillas stocked just so I can make this on a whim. It’s my emergency dinner plan.
Crowd-Pleaser — I’ve served this to my carnivore friends who claim they “can’t eat without meat.” They were convinced it was fried chicken tacos until I told them the truth. Now they ask for the recipe regularly.
Makes Amazing Leftovers — Actually tastes better the next day. The cauliflower absorbs the buffalo sauce overnight and gets even more flavorful. I deliberately make extra for lunch throughout the week.
This is my go-to when I need dinner to just work. No complicated techniques, no weird ingredients, just reliable, delicious food that makes everyone happy. Plus, it’s way healthier than the deep-fried version, which is a nice bonus for my waistline (and my bank account).
Ingredients You’ll Need
Here’s the best part: you probably have most of this already. I’m particular about three ingredients here, and I’ll tell you exactly why. This looks like a short list, but that’s because the quality of the few items you use matters more than having a dozen mediocre ones.
Cauliflower (1 large head / about 1.5 kg) — Look for a tight, firm head. If the leaves are yellowing or it feels spongy, skip it. I usually buy organic because cauliflower absorbs pesticides easily, but conventional works fine if you wash it well. Cut it into bite-sized florets—uniform size helps them cook evenly.
All-Purpose Flour (½ cup / 60g) — This creates the light, crispy coating. Some people use cornstarch, but I find flour gives a better “breaded” texture that holds up to the wet buffalo sauce without getting soggy too fast. It’s the secret to that crunch.
Hot Sauce (½ cup / 120ml) — Frank’s RedHot is the classic choice for buffalo flavor. It’s vinegar-forward and tangy. If you like it spicier, use a Carolina Reaper blend or add cayenne pepper. If you want milder, use a medium heat sauce. Avoid thick, smoky sauces like Chipotle for this specific recipe; you want that classic tangy buffalo profile.
Butter (3 tablespoons / 45g) — Melted. This helps the hot sauce cling to the cauliflower. You can use olive oil, but butter gives that authentic wing-shop richness. If you’re dairy-free, use coconut oil, though the flavor will be slightly different.
Garlic Powder (1 teaspoon) — Essential. Fresh garlic burns in the oven, but powder adds that savory depth without burning. Don’t skip it.
Onion Powder (1 teaspoon) — Again, savory depth. It balances the acidity of the hot sauce. If you don’t have it, skip it, but it really rounds out the flavor.
Vegetable Oil (1 tablespoon) — Just a drizzle on top before baking. This helps the flour coating turn golden brown and crispy. It’s optional, but I highly recommend it.
Tortillas (8-10 small flour tortillas) — I prefer small, soft flour tortillas. They’re sturdy enough to hold the filling but soft enough to bite through. Corn tortillas work if you’re gluten-free, but they can be brittle, so warm them first.
Cooling Slaw (1 cup shredded cabbage / carrots) — This is crucial. You need something cold and crunchy to balance the hot, spicy cauliflower. I use a mix of green cabbage and carrots. You can buy pre-shredded coleslaw mix to save time.
Dressing (½ cup ranch or blue cheese dressing) — Ranch is milder and kid-friendly. Blue cheese is more authentic to the buffalo wing experience. I usually keep both on hand. Mix it with a splash of milk to thin it out for drizzling.
Garnishes — Green onions, cilantro, extra hot sauce. I love fresh green onions for a bit of sharpness on top.
Equipment Needed
You don’t need fancy equipment for this. Here’s what I actually use.
Baking Sheets — I use two standard half-sheet pans. You need space between the florets so they bake instead of steam. If you crowd them, they get mushy. Two pans are better than one crowded one.
Large Bowls — Two medium bowls. One for tossing the cauliflower in the flour mixture, one for the hot sauce butter mixture.
Parchment Paper — I line my baking sheets with parchment. Cleanup is a nightmare if the buffalo sauce burns onto the pan. Parchment saves you scrubbing time. I don’t bother with silicone mats; they’re too slippery for this.
Whisk — For mixing the hot sauce and butter. A fork works, but a whisk blends it faster.
Sharp Knife — For cutting the cauliflower and chopping green onions. Dull knives make cutting tough stems harder—learned this the hard way.
Colander — For rinsing the cauliflower. Water is your friend here; dry florets help the flour stick.
Small Skillet or Microwave-Safe Bowl — For melting the butter. Microwave is faster, but a skillet gives you a little control. I usually just zap it for 30 seconds.
Tongs — For tossing the cauliflower in the sauce. Makes it much easier than using a spoon.
That’s it. No special gadgets. Just basic kitchen tools you probably already have.
How to Make It: Step-by-Step

Alright, let’s make this! I’m walking you through exactly how I do it, including the little tricks I’ve picked up. This process is forgiving, but following these steps ensures that crispy texture we’re after.
Step 1: Prep the Cauliflower (5 minutes)
Start by washing the cauliflower head. Pat it completely dry with paper towels. Moisture is the enemy of crispiness. If the florets are wet, the flour will slide right off. Cut the head into florets about the size of a large walnut. Try to keep them uniform. Remove any tough green stems. Place them in a large colander and give them a final rinse, then pat dry again. Yes, twice. I know it’s tedious, but it matters.
Step 2: Make the Dry Coating (2 minutes)
In a shallow bowl or pie dish, mix the flour, garlic powder, onion powder, salt, and pepper. I use about ½ teaspoon of salt here. Whisk it together so the spices are evenly distributed. You want every floret to get a little bit of that seasoning.
Step 3: Coat the Florets (5 minutes)
Toss the dry cauliflower florets into the flour mixture. Use your hands to coat them thoroughly. You want a light, even dusting. Don’t pack it on thick; you’re not making breaded chicken cutlets. Just a light coat. Shake off any excess flour and place the coated florets on your parchment-lined baking sheets. Leave space between them! This is non-negotiable. If they touch, they steam. If they steam, they’re soggy. Bake them for 20 minutes at 425°F (220°C). Halfway through, flip them for even browning.
Step 4: Make the Buffalo Sauce (1 minute)
While the cauliflower bakes, melt the butter in a small bowl. Whisk in the hot sauce. Add a pinch of salt and pepper if you like. The ratio should be about 2:1 hot sauce to butter. If you want it spicier, add more hot sauce. If you want it tangier, add a splash of vinegar. Taste it—it should be bold.
Step 5: Toss and Bake Again (10 minutes)
Take the partially baked cauliflower out of the oven. It should be tender but not falling apart. Pour the buffalo sauce over the hot florets. Toss them gently with tongs until every piece is coated. Return them to the oven for another 10 minutes. The sauce will bubble and caramelize slightly, creating that sticky, crispy texture.
Step 6: Make the Slaw (5 minutes)
While the cauliflower finishes, toss your shredded cabbage and carrots with the dressing. I like to mix ranch and blue cheese for the perfect balance. Add a squeeze of lime juice if you have it—it brightens everything up. Taste and adjust. It should be creamy and tangy.
Step 7: Warm the Tortillas (2 minutes)
Warm your tortillas in a dry skillet or microwave. They need to be pliable so they don’t crack when you fold them. Don’t skip this step. Cold tortillas break. Warm tortillas bend.
Step 8: Assemble and Serve
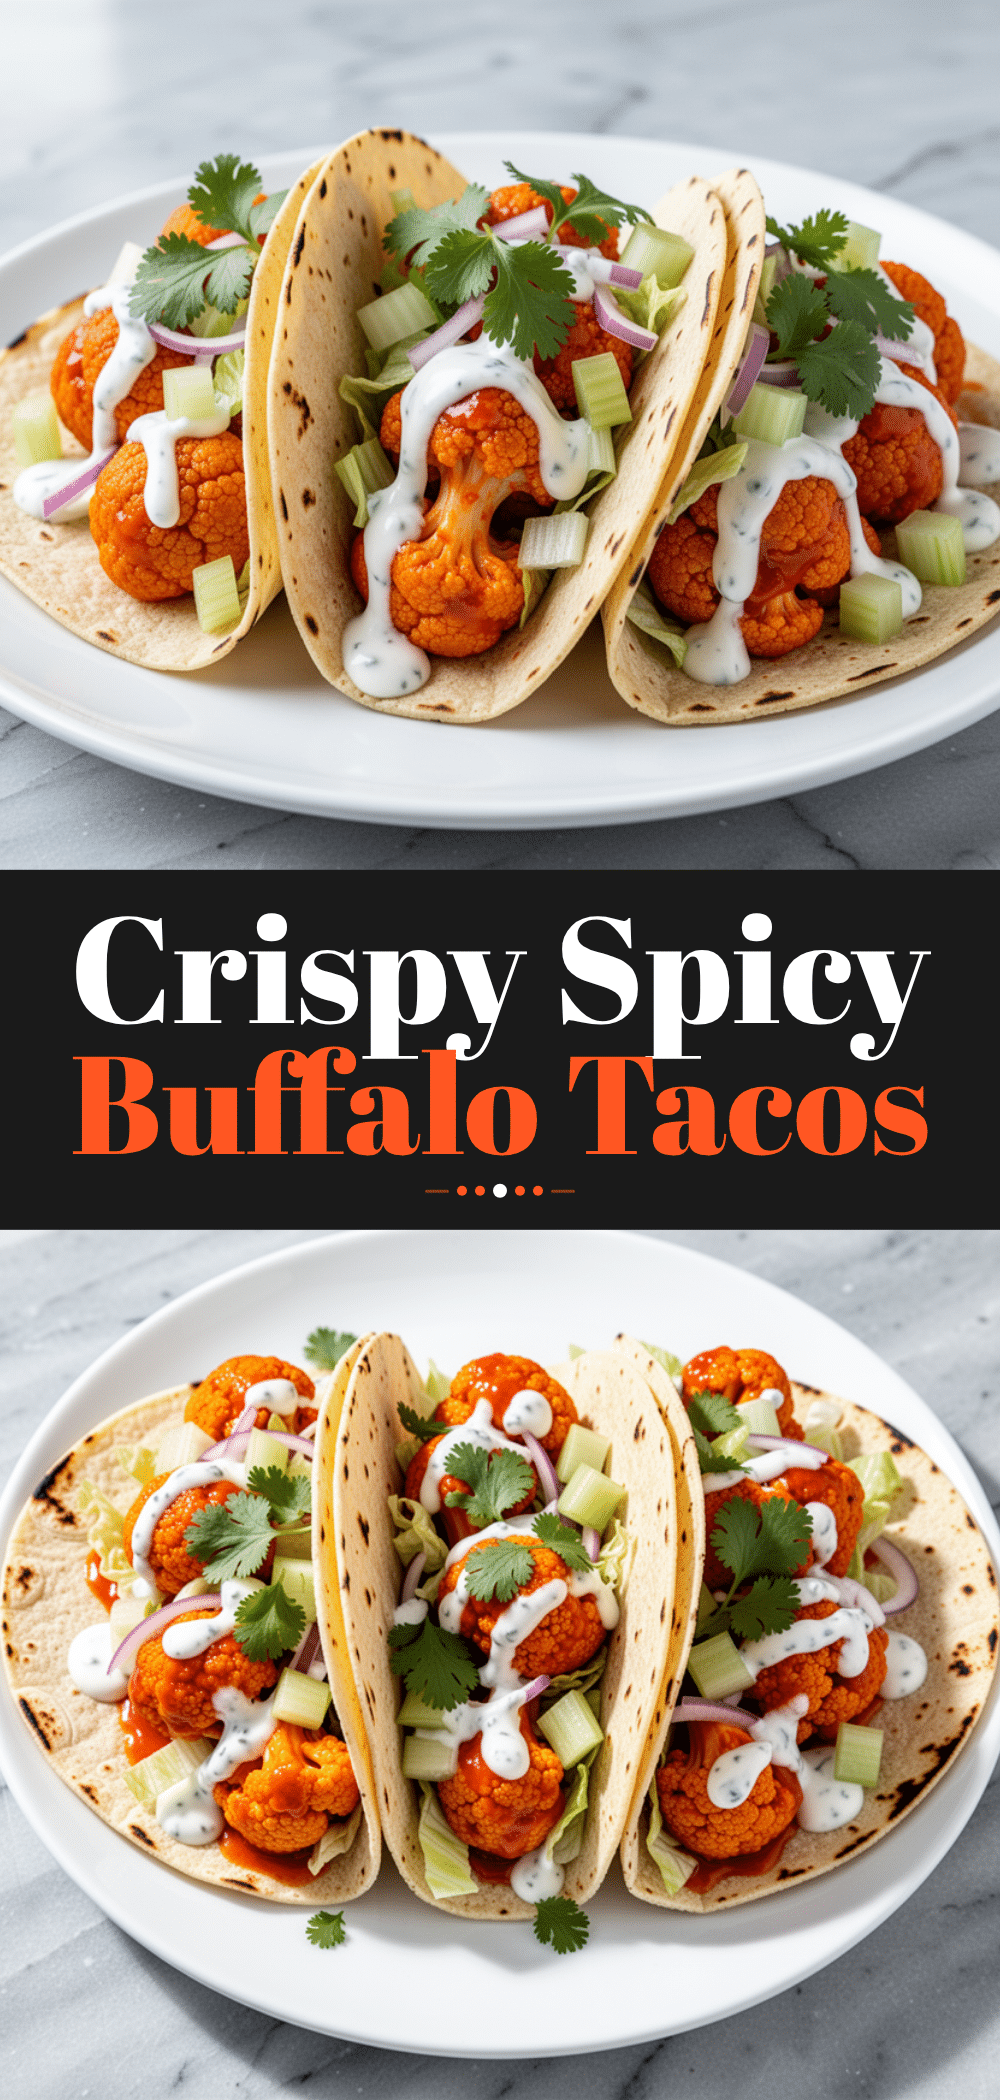
Place a generous spoonful of the buffalo cauliflower in the center of each tortilla. Top with a big dollop of the cool slaw. Drizzle with extra dressing if you like. Sprinkle with chopped green onions. Serve immediately. The contrast of hot, spicy cauliflower and cold, creamy slaw is what makes this recipe sing.
Total Time: About 30 minutes (10 minutes active, 20 minutes baking)
Troubleshooting:
- Soggy cauliflower? You crowded the pan. Next time, use two pans or bake in batches.
- Burnt edges? Your oven might run hot. Check them at 15 minutes if your oven is old.
- Flour sliding off? The cauliflower was too wet. Pat it drier next time.
Expert Tips & Tricks
Here’s everything I’ve learned from making this dozens of times. These tips will save you from my mistakes.
The Dry Cauliflower Rule
I cannot stress this enough. Wet cauliflower = soggy flour = sad tacos. After my first few attempts, I started patting the florets with paper towels before every step. It adds a minute, but it ensures that crispy bite. If you’re in a rush, let them air-dry on a rack for 10 minutes after washing.
Don’t Skimp on the Space
I used to try to fit everything on one pan to save time. The result? Steamed, mushy vegetables. Use two pans. If you only have one, bake in two batches. It’s worth the extra 10 minutes of oven time for the texture difference. Trust me.
Room Temperature Butter
When mixing the hot sauce and butter, if the butter is cold, it clumps. Melt it completely and let it cool for a minute before whisking. This creates an emulsion that coats the cauliflower evenly. Clumpy butter means uneven flavor.
The Slaw Balance
The slaw isn’t just a topping; it’s the counterpoint to the heat. If your buffalo sauce is super spicy, make the slaw milder. If your sauce is mild, make the slaw tangy and sharp. I usually add a splash of apple cider vinegar to the slaw for brightness.
Common Mistakes (and how to avoid them):
- Mistake: Tortillas cracking. Fix: Warm them up! Microwave for 10 seconds under a damp paper towel.
- Mistake: Sauce too thin. Fix: Simmer the buffalo sauce for 2 minutes before tossing to reduce it slightly.
- Mistake: Cauliflower undercooked. Fix: Poke a floret with a fork. It should go through easily. If not, bake 5 more minutes.
Pro Trick:
For extra crunch, sprinkle a little panko breadcrumbs on the cauliflower before the final bake. It’s optional, but it adds a nice texture boost if you’re craving that fried feel.
Variations & Substitutions
Once you’ve nailed the basic version, here’s how you can mix it up. I’ve tried all of these.
Spicy Jalapeño Version
Add diced jalapeños to the slaw. It adds a fresh heat that complements the vinegar tang. Great for summer.
Smoky Chipotle Version
Swap the hot sauce for chipotle peppers in adobo sauce (blended). It adds a deep, smoky flavor. Less tangy, more earthy. My husband loves this version.
Lighter Version
Skip the butter and use olive oil. Use Greek yogurt instead of ranch/blue cheese dressing. It’s thinner but still good. I make this when I’m trying to be “healthy.” It’s not as rich, but it’s lighter.
Cajun Style
Swap the buffalo sauce for Cajun seasoning and butter. Add smoked paprika. Totally different vibe—spicy and smoky.
Gluten-Free
Use gluten-free flour or cornstarch for the coating. Use corn tortillas. Everything else is naturally gluten-free. I’ve used Bob’s Red Mill gluten-free flour and it works great.
Dairy-Free
Replace butter with coconut oil. Replace ranch/blue cheese with a dairy-free vegan ranch or cashew cream. It’s different but still tasty. My lactose-intolerant friend requests this version.
Vegan
Use coconut oil and vegan cheese dressing. Add nutritional yeast to the flour for a “cheesy” flavor.
Other Proteins:
- Chicken wings (bake instead of fry, then toss in sauce)
- Tofu cubes (press well, coat in cornstarch, bake)
- Broccoli florets (works similarly, but cooks faster)
Serving & Storage
How to Serve:
I usually serve this straight from the skillet at the dinner table—it looks rustic and stays warm. But here are other ways I’ve enjoyed it:
Side Dishes:
- Garlic bread (obviously)
- Simple green salad with balsamic vinaigrette
- Roasted sweet potato fries (for dipping)
- Caesar salad (when I’m feeling fancy)
Toppings Bar:
When I have guests, I put out: extra buffalo sauce, ranch, blue cheese, green onions, cilantro, lime wedges. Everyone customizes their bowl.
Wine Pairing:
Not a wine expert, but my wine-snob friend says a crisp Sauvignon Blanc or a cold IPA beer works great with this. The acidity cuts through the richness.
Storage Instructions:
Refrigerator: Store the cauliflower and slaw separately in airtight containers for up to 3 days. The cauliflower will lose some crispiness, but it’s still good.
Reheating: Best method: Air fryer at 375°F for 3-4 minutes. This restores the crunch. Oven at 400°F for 5-7 minutes works too. Never microwave—it makes them soggy. Ask me how I know. I learned this the hard way.
Freezing: Honestly, this doesn’t freeze well. The texture of the cauliflower gets mushy when thawed. Make it fresh or store in the fridge for up to 3 days.
Pro tip: If leftovers are drying out, reheat with a spray of water in the air fryer. It helps steam them slightly while crisping the outside.
Nutrition Information
I’m not a nutritionist, but here’s the breakdown if you’re tracking.
Per Serving (based on 4 tacos with slaw):
- Calories: 320
- Protein: 8g
- Carbs: 42g
- Fiber: 5g
- Sugar: 6g
- Fat: 14g
- Saturated Fat: 4g
- Cholesterol: 15mg
- Sodium: 680mg
- Calcium: 80mg
What’s Good:
- High in fiber from the cauliflower and slaw
- Vegetarian-friendly
- Lower in calories than fried chicken tacos
What to Know:
- Higher in sodium from the hot sauce and tortillas
- Contains gluten and dairy (unless modified)
My Take:
Look, this is comfort food. It’s not a diet recipe. But it’s way better than takeout, costs less, and I know exactly what’s in it. When I want to make it lighter, I use the yogurt version and load up on vegetables. But usually? I just eat a reasonable portion and enjoy it.
Final Thoughts
So that’s my go-to Crispy Baked Buffalo Cauliflower Tacos! I’ve probably talked your ear off at this point, but when you make a recipe this often, you have a lot to say about it.
This has saved weeknight dinners more times than I can count. It’s my answer to “what’s for dinner” when I’m tired, don’t want takeout, and still want something that tastes really good. My kids are happy, my husband’s happy, and I’m happy because I’m not stressed about cooking.
Make it yours! Try different add-ins, swap in your favorite vegetables, adjust the garlic (though more is always better in my opinion). The best recipes are the ones you adapt to your family’s tastes.
If you make this, drop a comment and let me know what you think! I love hearing how recipes turn out in your kitchen. And if something doesn’t work, tell me that too—I’m here to help troubleshoot.
Happy cooking! And I hope your kitchen smells half as good as mine does right now.
Frequently Asked Questions
Can I use a different hot sauce?
Yes! Frank’s is classic, but you can use Texas Pete, Crystal, or even a sriracha-honey mix for a sweeter heat. Just remember that different sauces have different vinegar levels, so taste as you go. If it’s too thick, add a splash of water.
Why did my cauliflower get soggy?
Usually means you crowded the pan or didn’t pat it dry enough. Space is key. If the florets are touching, they steam. Also, make sure you’re not adding too much sauce at once. Toss gently so it coats, doesn’t drown.
Can I make this ahead for a dinner party?
Sort of. Prep the cauliflower and coat it, but don’t bake it yet. Store in the fridge. Bake right before serving. The slaw can be made a day ahead. Assemble tacos just before eating so the tortillas don’t get soggy. I do this all the time.
Can I use air fryer instead of oven?
Absolutely! Air fryer is actually better for crispiness. Cook at 400°F for 12-15 minutes, shaking the basket halfway. Then toss in sauce and air fry for 3 more minutes. It’s faster and crunchier. I love this method.
Why did my tortillas crack?
They were too cold. Warm them in the microwave for 10-15 seconds under a damp paper towel, or in a dry skillet for 30 seconds per side. Pliable tortillas are essential for a good taco.
Can I freeze the buffalo sauce?
Yes, but it might separate when thawed. Whisk it well before using. It’s better to make fresh sauce, but if you’re short on time, freezing works.
Is this recipe gluten-free?
Not by default. Use gluten-free flour and corn tortillas to make it gluten-free. The rest of the ingredients are naturally gluten-free.
Pin This Recipe!

Crispy Baked Buffalo Cauliflower Tacos
- Total Time: 30 minutes
- Yield: 4 servings 1x
Description
A quick, vegetarian weeknight dinner featuring roasted cauliflower florets tossed in tangy buffalo sauce, served in warm tortillas with a cool, creamy slaw.
Ingredients
- 1 large head cauliflower (about 1.5 kg), cut into bite-sized florets
- ½ cup all-purpose flour
- 1 teaspoon garlic powder
- 1 teaspoon onion powder
- ½ teaspoon salt (for coating)
- Black pepper to taste
- 3 tablespoons butter, melted
- ½ cup hot sauce (e.g., Frank’s RedHot)
- 1 tablespoon vegetable oil
- 8–10 small flour tortillas
- 1 cup shredded cabbage and carrots
- ½ cup ranch or blue cheese dressing
- Optional garnishes: green onions, cilantro, lime juice
Instructions
- Preheat oven to 425°F (220°C). Line two baking sheets with parchment paper.
- Wash and thoroughly pat dry the cauliflower florets. Moisture is the enemy of crispiness.
- In a shallow bowl, whisk together flour, garlic powder, onion powder, salt, and pepper.
- Toss cauliflower florets in the flour mixture until lightly coated. Shake off excess and arrange on baking sheets, ensuring space between florets.
- Drizzle with vegetable oil and bake for 20 minutes, flipping halfway through.
- While cauliflower bakes, whisk melted butter with hot sauce in a small bowl.
- Remove cauliflower from oven, toss with the buffalo sauce mixture, and return to oven for another 10 minutes until sticky and crispy.
- In a separate bowl, mix shredded cabbage and carrots with ranch or blue cheese dressing (and a splash of lime juice if desired).
- Warm tortillas in a dry skillet or microwave until pliable.
- Assemble tacos by placing buffalo cauliflower in tortillas, topping with slaw, and garnishing with green onions.
Notes
Ensure cauliflower is completely dry before coating to prevent soggy results. Do not crowd the baking sheet; use two pans or bake in batches for maximum crispiness. Tortillas must be warmed to prevent cracking.
- Prep Time: 10 minutes
- Cook Time: 20 minutes
- Category: Main Course
- Cuisine: American
Nutrition
- Serving Size: 1 taco with slaw
- Calories: 320
- Sugar: 6
- Sodium: 680
- Fat: 14
- Saturated Fat: 4
- Carbohydrates: 42
- Fiber: 5
- Protein: 8
Keywords: vegetarian tacos, buffalo cauliflower, weeknight dinner, healthy tacos, crispy baked cauliflower, gluten-free option


