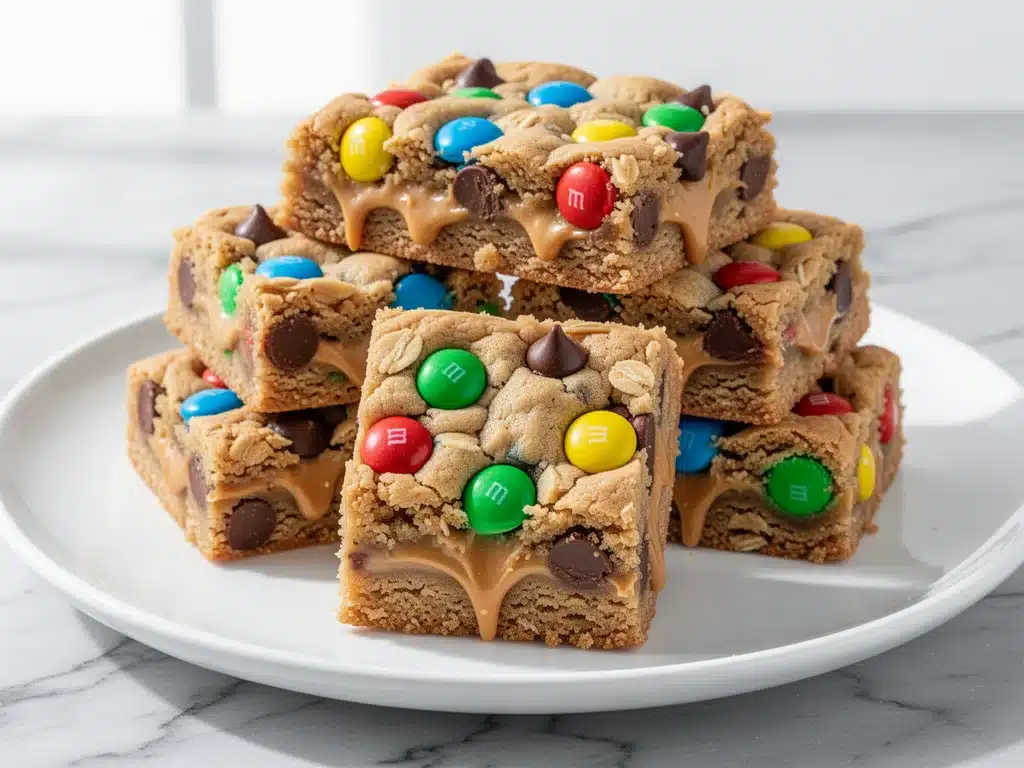
It was 6:45 PM on a Tuesday in late August. The sun was going down, my kids were arguing over whose turn it was to unpack the dishwasher, and I was staring at a half-empty pantry with the kind of dread that only a parent can feel. The school year started in three days. My lunchbox prep for the week was… well, let’s just say it was non-existent. I had tried packing those cute little bento boxes last year, but by Thursday, the apple slices were brown, the cheese cubes had dried out, and my son was trading his lunch for a bag of chips in the cafeteria. I was done with the stress. I was done with the food waste. I needed something that would survive in a backpack for five hours, look appealing to a ten-year-old, and actually taste like dessert without turning my kitchen into a flour bomb.
That night, I raided the pantry and threw together what I thought would be a mediocre oatmeal cookie dough. I didn’t want to bake a full tray of cookies because cleanup is a nightmare, and I wanted something that could be cut into neat squares. I added peanut butter, mini chocolate chips, M&Ms, and coconut. I pressed it into a pan, baked it, and waited. When I pulled that pan out, the house smelled like a cookie factory, and the bars had this incredible chewy, gooey center that I hadn’t even planned for. I cut one and handed it to my husband. He took a bite, paused, and said, “These are dangerous. I can’t stop eating them.”
That was the birth of my Chewy Monster Cookie Lunchbox Bars. I’ve made them at least twenty times since that August night. I’ve tweaked the ratios, tested different brands of oats, and even tried baking them in muffin tins for “lunchbox muffins” (don’t do that—the centers stay raw). But the square bar format? It’s the winner. These bars are sturdy enough to handle being shoved into a lunchbox, chewy enough to satisfy a sweet tooth, and packed with enough protein and fiber from the oats and peanut butter to keep growing kids full until snack time. If you’re looking for a back-to-school snack that doesn’t involve cutting up fresh fruit or worrying about melting chocolate, this is your answer. It’s basically a monster cookie in bar form, and it’s going to save your sanity this school year.
Why You’ll Love These Lunchbox Bars
There are about ten reasons I keep making these bars every single week, but here are the big ones that will change your morning routine.
Lunchbox Proof — Seriously. I’ve left these in backpacks in the car on hot July days, and they didn’t melt into a sticky mess. The structure is solid. They don’t get soggy from apple slices or dry out from air exposure. They stay chewy and fresh for days.
Five Ingredients, One Bowl — This is the holy grail of baking. You don’t need a stand mixer. You don’t need to cream butter and sugar. You just dump everything in a bowl and mix. I’ve taught my seven-year-old to make these while I’m folding laundry. It’s that simple.
Packed with Protein — Unlike those sugary granola bars that fall apart and leave your kid hungry an hour later, these bars have peanut butter and oats. That means sustained energy. My kids actually eat them. They don’t trade them. They don’t leave them in the lunchbox at the end of the day.
Customizable Chaos — My daughter hates coconut? Leave it out. My son loves Reese’s Pieces? Swap the M&Ms. These bars are a blank canvas for whatever candy or add-in your kids are currently obsessed with. It’s a great way to use up those weird leftover candy bags from Halloween or Easter.
Make-Ahead Friendly — I make a double batch on Sunday night. They keep in the fridge for a week or in the freezer for three months. I just grab a handful and throw them in the lunchbox the night before. No morning stress. No running out of time.
This is my go-to when I need a snack that just works. No complicated techniques, no weird ingredients, just reliable, delicious food that makes everyone happy. Plus, they taste like a monster cookie, which is basically the best cookie in the world.
Ingredients You’ll Need
Here’s the best part: you probably have most of this already. This recipe relies on pantry staples that most of us keep stocked, especially during back-to-school season when you’re doing a lot of cooking.
For the Base:
Butter (½ cup / 113g, softened) — This is your fat and flavor base. Use unsalted butter so you can control the salt. If you’re in a rush, microwave it for 15 seconds to soften it quickly. Don’t melt it completely—you want it creamy, not liquid.
Peanut Butter (½ cup / 128g) — This is the glue. Use creamy, natural peanut butter. If your natural PB is oily, stir it well before measuring. Skippy or Jif work great too if you want that classic sweet peanut butter taste. Avoid “no-stir” varieties with hydrogenated oils if you can—they can make the bars a bit dense.
Brown Sugar (1 cup / 200g) — Packed. This is what gives you that chewy, moist texture. White sugar makes them crispier; brown sugar keeps them soft. Don’t skimp on the packing. If you’re lazy, just dump it in and press it down with a spoon.
Granulated Sugar (½ cup / 100g) — This balances the sweetness and adds a little bit of structure. You can reduce this to ¼ cup if you want them less sweet, but I like the balance.
Eggs (2 large) — Room temperature works best. They bind everything together. Don’t skip them, or you’ll have a crumbly mess.
Vanilla Extract (1 teaspoon) — Pure vanilla. The artificial stuff tastes chemical and doesn’t pair well with peanut butter. If you’re out, it’s okay, but fresh is better.
For the Dry Mix:
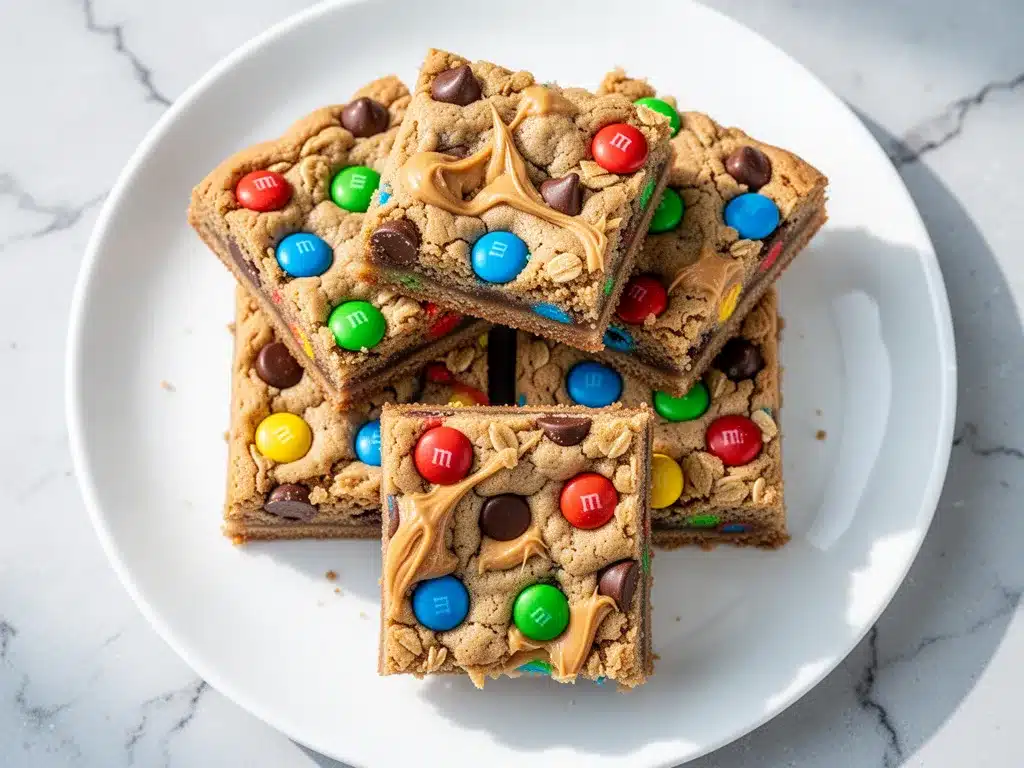
Old-Fashioned Rolled Oats (2 cups / 160g) — Not quick oats. Not steel-cut. Rolled oats give you that chewy, substantial texture. If you use quick oats, the bars will be cakey and dense. I buy the big canister of Quaker or Bob’s Red Mill—it lasts forever.
Whole Wheat Flour (1 cup / 120g) — I use whole wheat flour to add a bit of nuttiness and fiber. You can use all-purpose flour if that’s all you have, but the whole wheat version tastes deeper and richer. It’s a small swap for a big flavor boost.
Baking Soda (1 teaspoon) — This helps them rise slightly and gives them that chewy center. Make sure it’s fresh—if it’s been in your cabinet for two years, it might not work. Test it with a little vinegar if you’re unsure.
Salt (½ teaspoon) — Crucial. It balances the sweetness and enhances the peanut butter flavor. Don’t skip it.
For the Mix-Ins (The Monster Part):
Mini Chocolate Chips (1 cup / 170g) — Mini chips distribute evenly. You get a chip in every bite. Regular chips are okay, but they clump together. I use Ghirardelli or Nestlé Toll House mini chips.
M&Ms (½ cup / 85g) — The classic candy. I use the milk chocolate ones. You can use peanut M&Ms if you want extra peanut flavor, but regular M&Ms add a nice color contrast and crunch.
Shredded Coconut (½ cup / 40g) — Sweetened shredded coconut. This is what makes it a “monster” cookie. It adds a tropical chewiness that contrasts with the chocolate. If your kids hate coconut, you can skip it, but I recommend keeping it. It’s the secret ingredient.
Equipment Needed
You don’t need fancy equipment for this. Here’s what I actually use.
8×8 Inch Baking Pan — This is the perfect size for these bars. It gives you a good thickness—not too flat, not too tall. Grease it well with butter or cooking spray. I line it with parchment paper for easy lifting, but greasing is fine if you’re lazy.
Large Mixing Bowl — Any big bowl works. I use a glass bowl because I can see the bottom and know when everything is combined.
Wooden Spoon or Spatula — For mixing. A sturdy spoon is best because the dough is thick. A flimsy spoon will break. I have a specific wooden spoon I use for cookie dough—it feels good in the hand.
Measuring Cups and Spoons — Standard stuff. Dollar store versions work fine. Just make sure your measuring cups are clean and dry.
Pastry Brush or Paper Towel — For greasing the pan. I use a paper towel with a little butter—it’s easier than a brush and less wasteful.
Cooling Rack — Optional but helpful. If you cut the bars while they’re hot, they’ll fall apart. Let them cool completely on a rack. I usually let them cool in the pan, then transfer to a rack to finish cooling.
Sharp Knife or Pizza Cutter — For cutting. A pizza cutter makes clean squares without squishing the bars. A knife works too, but you have to be gentle. I use a pizza cutter—it’s faster and less messy.
How to Make It: Step-by-Step
Alright, let’s make this! I’m walking you through exactly how I do it, including the little tricks I’ve picked up.
Step 1: Prep Your Pan and Oven (2 minutes)
Preheat your oven to 350°F (175°C). Grease an 8×8 inch baking pan with butter or cooking spray. If you have parchment paper, line the pan and leave an overhang on the sides. This makes lifting the bars out later super easy. I don’t always use parchment because I’m lazy, but if you want clean cuts, use it.
Step 2: Cream the Wet Ingredients (3 minutes)
In a large bowl, combine the softened butter, peanut butter, brown sugar, and granulated sugar. Mix them together until they are smooth and combined. I use a wooden spoon for this. It takes about 2-3 minutes of elbow grease. Don’t worry about getting it perfectly creamy like you would for a cake—this is a bar, so rustic is fine. Add the eggs and vanilla extract. Mix until just combined. Don’t overmix here, or the bars can get tough.
Step 3: Add the Dry Ingredients (2 minutes)
Add the rolled oats, whole wheat flour, baking soda, and salt to the wet mixture. Stir until everything is evenly distributed. The dough will be thick and sticky. This is normal. If it’s too dry, add a tablespoon of milk. If it’s too wet, add a tablespoon of flour. But usually, it’s perfect as is.
Step 4: Fold in the Mix-Ins (2 minutes)
Stir in the mini chocolate chips, M&Ms, and shredded coconut. Use a spatula to fold them in gently. You want to distribute them evenly without crushing the M&Ms. I usually do this by hand if my arms are tired—it’s therapeutic, honestly.
Step 5: Press into Pan (2 minutes)
Transfer the dough to your prepared baking pan. Use your hands or the back of a spoon to press it down evenly. Make sure it’s flat and smooth. Don’t leave any gaps. If you have leftover bits, press them into the corners. The key is an even layer so they bake uniformly.
Step 6: Bake (20-25 minutes)
Bake in the preheated oven for 20-25 minutes. The edges should be golden brown, and the center should look set but still slightly soft. It will firm up as it cools. Don’t overbake them, or they’ll be dry. I usually pull them out at 22 minutes. If your oven runs hot, check them at 20.
Step 7: Cool and Cut (30 minutes)
Let the bars cool in the pan for at least 30 minutes. This is the hardest part. I want to eat them immediately, but if you cut them hot, they’ll fall apart. Once they’re cool, lift them out of the pan using the parchment paper (if you used it) or carefully pry them out with a knife. Cut into squares or rectangles. I usually cut them into 12-16 bars, depending on how hungry my kids are.
Total Time: About 40 minutes (15 minutes active, 25 minutes baking and cooling)
Expert Tips & Tricks
Here’s everything I’ve learned from making this dozens of times. These tips will save you from my mistakes.
Don’t Skip the Cooling Time
This is the #1 mistake people make. Hot bars = crumbly bars. Let them cool completely. I know it’s tempting, but patience pays off. The bars continue to cook in the residual heat, so pulling them out when they look slightly underdone is key.
Use Room Temperature Butter
If your butter is cold, it won’t mix well with the sugar and peanut butter. You’ll end up with lumps. Soften it in the microwave for 10-15 seconds. It should be soft enough to leave an indent with your finger, but not melted.
Press Firmly
When you press the dough into the pan, press it down firmly. Loose dough leads to loose bars. I use the bottom of a measuring cup to press it down evenly. It’s faster than using my hands and gives a flat surface.
Customize Your Mix-Ins
This is your canvas. Use Reese’s Pieces, butterscotch chips, white chocolate chips, or chopped nuts. I’ve even added crushed pretzels for a sweet-and-salty version. Just keep the total mix-in amount around 1.5 cups so the dough holds together.
Store Properly
These bars keep well in an airtight container at room temperature for up to 5 days. If it’s hot outside, store them in the fridge to prevent the chocolate from melting. They also freeze beautifully for up to 3 months.
Variations & Substitutions
Once you’ve nailed the basic version, here’s how you can mix it up. I’ve tried all of these.
Gluten-Free Monster Bars
Swap the whole wheat flour for a 1:1 gluten-free flour blend. Make sure your oats are certified gluten-free. The texture is almost identical. I’ve used Bob’s Red Mill GF flour and it works great.
Nut-Free Version
Swap the peanut butter for sunflower seed butter or soy nut butter. This is perfect for schools with nut-free policies. Sunflower seed butter (like SunButter) tastes very similar to peanut butter. You can also use almond butter if nuts are allowed.
Vegan Monster Bars
Use vegan butter (like Earth Balance) and a flax egg (1 tablespoon ground flaxseed mixed with 3 tablespoons water, let sit for 5 minutes). Use vegan chocolate chips and M&Ms. The texture is slightly different but still delicious.
Protein-Packed Version
Add 2 tablespoons of protein powder to the dry ingredients. I use vanilla whey or plant-based protein. It adds a bit of dryness, so you might need an extra tablespoon of milk or peanut butter. Great for post-practice snacks.
Double Chocolate
Swap the whole wheat flour for cocoa powder (reduce to ¾ cup) and add ½ cup more chocolate chips. It’s rich and decadent. My kids love this version, but it’s sweeter.
Chewy vs. Crispy
For chewier bars, bake for 20 minutes. For crispier edges, bake for 25-27 minutes. I prefer chewy, but my husband likes them a bit more set.
Serving & Storage
How to Serve:
I usually serve these straight from the container at the dinner table—they’re like little edible squares of joy. But here are other ways I’ve enjoyed them:
Side Dishes:
– Apple slices (classic combo)
– Carrot sticks (for a veggie crunch)
– A glass of cold milk (obviously)
Toppings Bar:
When I have guests, I put out extra M&Ms, chocolate chips, and crushed peanuts. Everyone customizes their bar. It’s fun for kids.
Storage Instructions:
Refrigerator:
Store in an airtight container for up to 5 days. If it’s hot, keep them in the fridge to prevent melting. They stay fresh and chewy.
Freezer:
These freeze beautifully! Wrap individual bars in plastic wrap, then put them in a freezer bag. They last up to 3 months. Thaw them in the fridge or at room temperature for 15 minutes. I freeze a batch every Sunday for the week ahead.
Meal Prep:
Make a double batch on Sunday. Cut them into lunchbox-sized squares. Pack them in the fridge overnight. In the morning, just grab one and go. It’s the ultimate time-saver.
Pro tip: If they start to dry out, microwave them for 10 seconds. It brings back the chewiness instantly.
Nutrition Information
I’m not a nutritionist, but here’s the breakdown if you’re tracking.
Per Serving (based on 12 bars):
- Calories: 280
- Protein: 6g
- Carbs: 38g
- Fiber: 3g
- Sugar: 22g
- Fat: 12g
- Saturated Fat: 5g
- Cholesterol: 25mg
- Sodium: 180mg
What’s Good:
– Decent protein from peanut butter and oats
– Fiber from whole wheat flour and oats
– Can add vegetables to boost nutrition (though these are treats)
What to Know:
– Higher in calories from butter and sugar
– Contains dairy, eggs, and nuts (or seeds)
– Moderate sodium (use low-sodium peanut butter if needed)
My Take:
Look, this is a dessert bar. It’s not a health food. But it’s way better than store-bought granola bars, which are mostly sugar and preservatives. When I want to make it lighter, I reduce the sugar and add more oats. But usually? I just eat a reasonable portion and enjoy it. It’s a treat, and that’s okay.
Final Thoughts
So that’s my Chewy Monster Cookie Lunchbox Bars! I’ve probably talked your ear off at this point, but when you make a recipe this often, you have a lot to say about it. This has saved my mornings more times than I can count. It’s my answer to “what’s in the lunchbox?” when I’m tired, don’t want to shop, and still want something that tastes really good. My kids are happy, my husband’s happy, and I’m happy because I’m not stressed about cooking.
Make it yours! Try different add-ins, swap in your favorite vegetables, adjust the sweetness. The best recipes are the ones you adapt to your family’s tastes. If you make this, drop a comment and let me know what you think! I love hearing how recipes turn out in your kitchen. And if something doesn’t work, tell me that too—I’m here to help troubleshoot.
Happy cooking! And I hope your kitchen smells half as good as mine does right now.
Frequently Asked Questions
Can I use quick oats instead of rolled oats?
You can, but the texture will be different. Quick oats are thinner and will make the bars more cakey and dense. Rolled oats give you that chewy, substantial texture that I love. If you must use quick oats, I recommend adding an extra tablespoon of flour to absorb the extra moisture. But rolled oats are the way to go.
Why did my bars fall apart when I cut them?
This usually happens if you cut them while they’re still warm. The bars need time to set. Let them cool completely in the pan, at least 30 minutes, before cutting. If they’re still crumbly, your dough might have been too dry. Next time, add a tablespoon of milk or peanut butter to the mix.
Can I make these ahead for the whole week?
Absolutely! I make a double batch on Sunday. They keep in the fridge for up to 5 days. Just store them in an airtight container. I also freeze extras for future weeks. They thaw quickly and taste just as good as fresh.
Can I use natural peanut butter?
Yes, but make sure it’s well-stirred. Natural peanut butter can be oily, which might make the bars greasy. If you use it, stir it very well before measuring. I prefer creamy, no-stir peanut butter for consistency, but natural works if you’re careful.
How do I store these in the lunchbox?
Place them in a small airtight container or a ziplock bag. They hold up well to being jostled around. If it’s hot outside, include an ice pack in the lunchbox to keep them fresh. They don’t melt like chocolate chips, but the butter can soften.
Can I double this recipe?
Yes, but you’ll need a 9×13 inch pan. Double the ingredients and bake for 25-30 minutes. Check them at 25 minutes to make sure they don’t overbake. The cooking time might vary slightly depending on your oven.
Are these safe for nut-free schools?
Not if you use peanut butter. Swap it for sunflower seed butter or soy nut butter. Most schools allow sunflower seed butter, but check your school’s policy. The rest of the ingredients are nut-free.
Pin This Recipe!
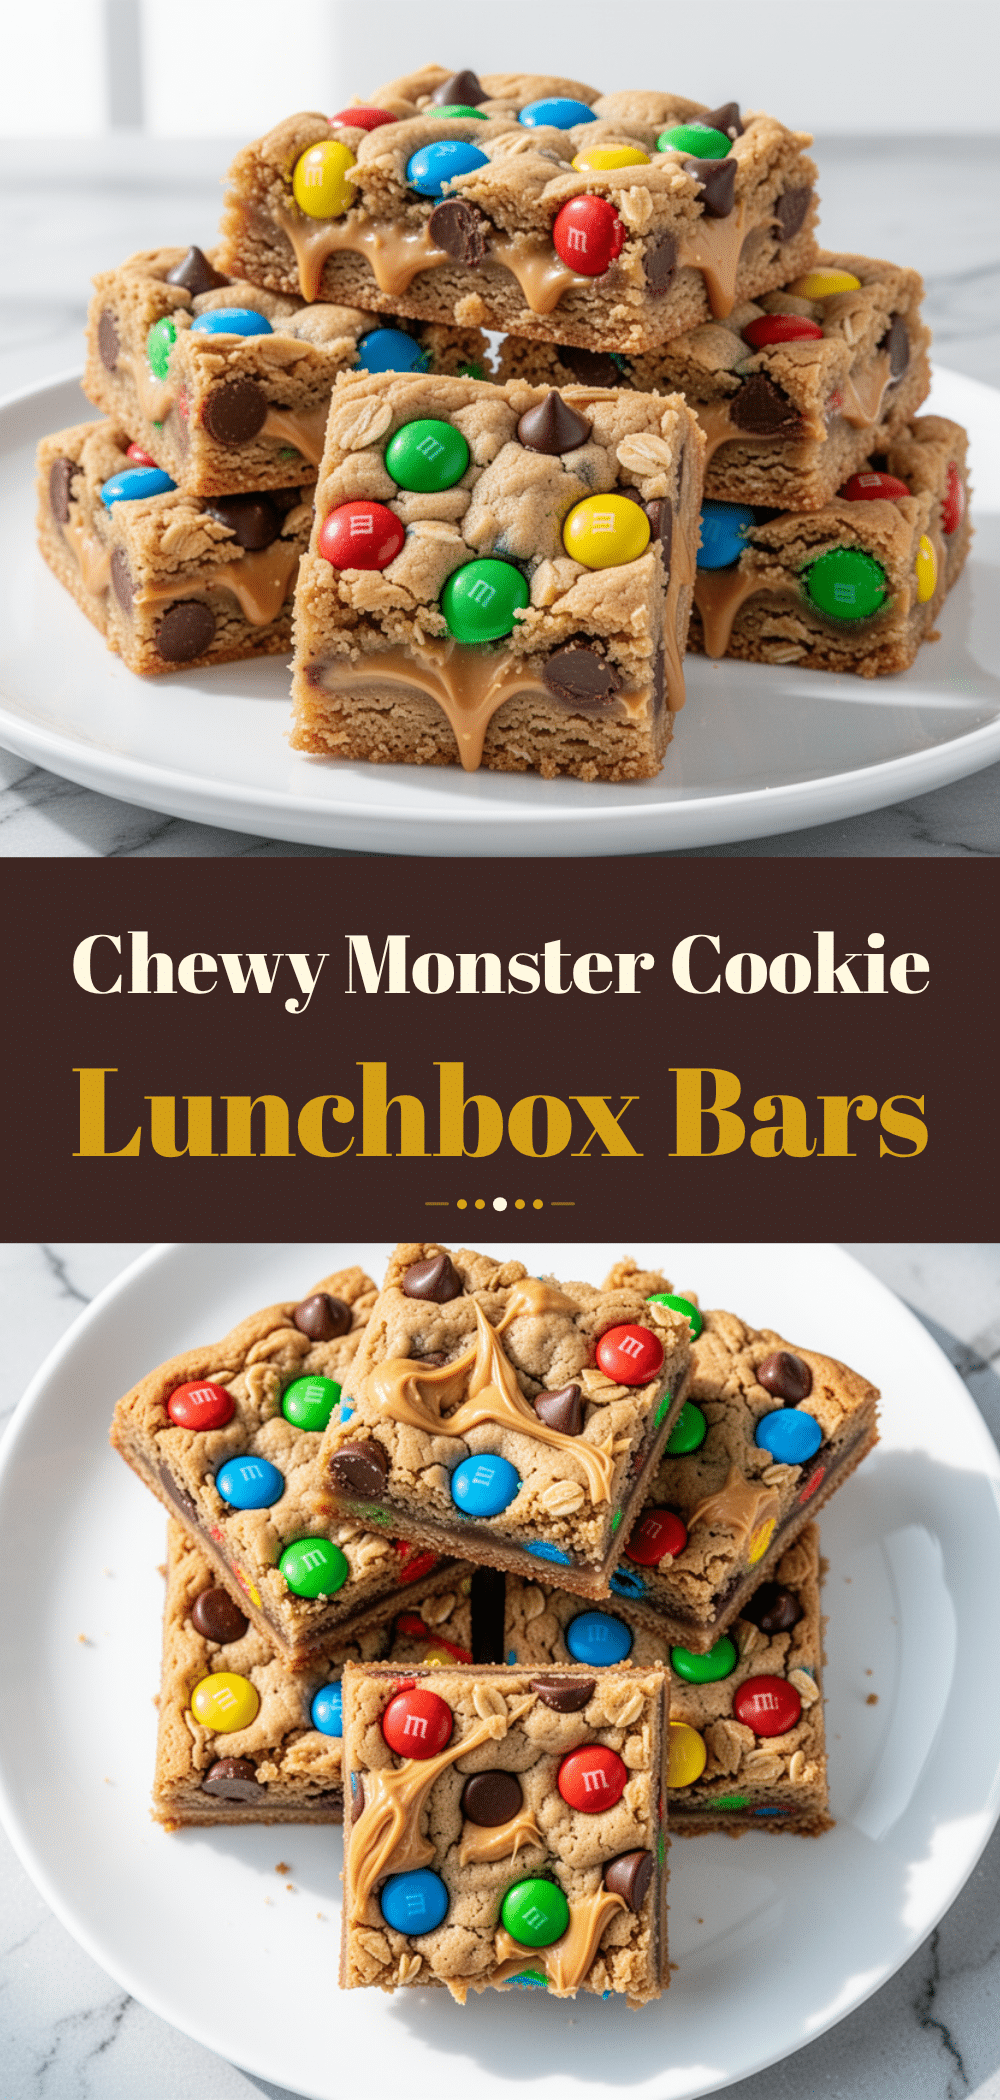
Chewy Monster Cookie Lunchbox Bars
- Total Time: 40 minutes
- Yield: 12 servings 1x
Description
A sturdy, chewy, and gooey bar made with pantry staples like peanut butter, oats, and chocolate chips. Designed to survive in a lunchbox without melting or drying out, these bars are easy to make in one bowl and perfect for back-to-school snacks.
Ingredients
- 1/2 cup (113g) unsalted butter, softened
- 1/2 cup (128g) creamy peanut butter
- 1 cup (200g) packed brown sugar
- 1/2 cup (100g) granulated sugar
- 2 large eggs, room temperature
- 1 teaspoon vanilla extract
- 2 cups (160g) old-fashioned rolled oats
- 1 cup (120g) whole wheat flour
- 1 teaspoon baking soda
- 1/2 teaspoon salt
- 1 cup (170g) mini chocolate chips
- 1/2 cup (85g) M&Ms
- 1/2 cup (40g) sweetened shredded coconut
Instructions
- Preheat oven to 350°F (175°C). Grease an 8×8 inch baking pan with butter or cooking spray, optionally lining with parchment paper for easy removal.
- In a large bowl, combine softened butter, peanut butter, brown sugar, and granulated sugar. Mix with a wooden spoon until smooth and combined (about 2-3 minutes).
- Add eggs and vanilla extract to the wet mixture. Mix until just combined, being careful not to overmix.
- Add rolled oats, whole wheat flour, baking soda, and salt to the bowl. Stir until evenly distributed. The dough will be thick and sticky.
- Fold in mini chocolate chips, M&Ms, and shredded coconut using a spatula or hands until evenly distributed.
- Transfer dough to the prepared pan. Press down firmly and evenly with the back of a spoon or measuring cup to create a flat surface.
- Bake for 20-25 minutes, until edges are golden brown and the center looks set but slightly soft. Do not overbake.
- Let bars cool in the pan for at least 30 minutes to allow them to set. Cut into 12-16 squares before serving.
Notes
Ensure butter is softened but not melted. Do not cut bars while hot as they will fall apart. For nut-free schools, substitute peanut butter with sunflower seed butter. For gluten-free, use certified GF oats and a 1:1 GF flour blend. Bars keep in an airtight container at room temperature for 5 days or freeze for 3 months.
- Prep Time: 15 minutes
- Cook Time: 25 minutes
- Category: Snack
- Cuisine: American
Nutrition
- Serving Size: 1 bar
- Calories: 280
- Sugar: 22
- Sodium: 180
- Fat: 12
- Saturated Fat: 5
- Carbohydrates: 38
- Fiber: 3
- Protein: 6
Keywords: monster cookie bars, lunchbox snacks, back to school recipes, peanut butter bars, no-bake alternative, easy baking, kid-friendly snacks, make-ahead snacks


