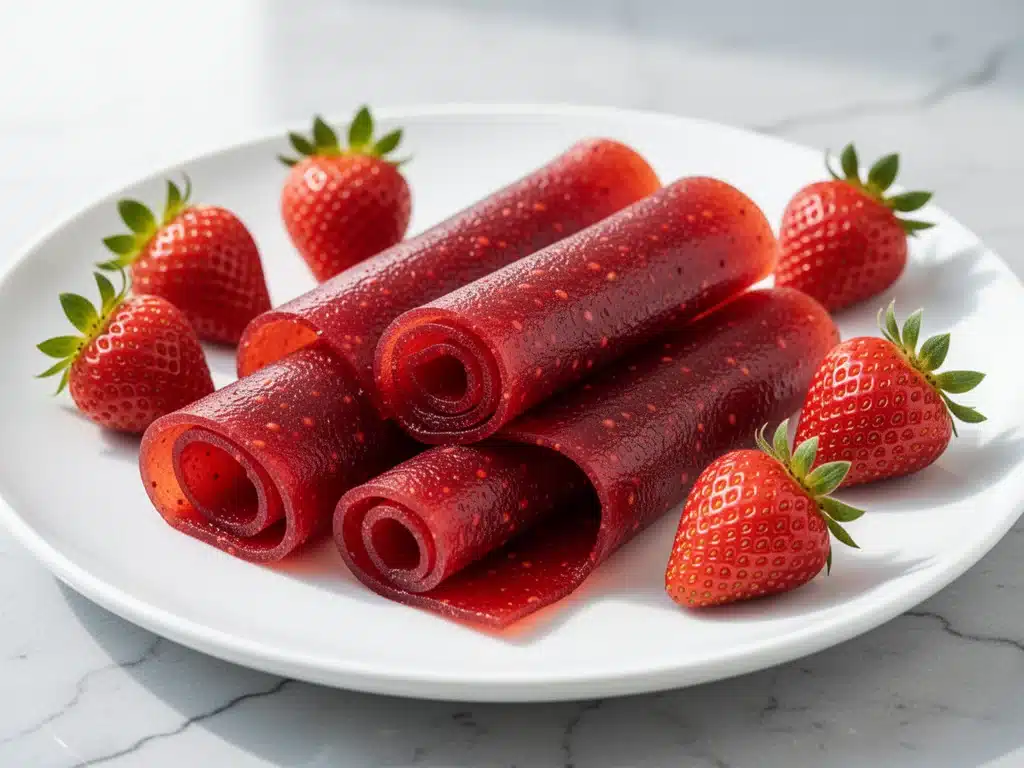
Last Tuesday, I was standing in the cereal aisle of our local grocery store, staring at a brightly colored box of fruit snacks. You know the kind—those neon red, orange, and green pouches that promise “real fruit juice” but taste more like sugar and wax. My daughter, who is currently in that phase where she will only eat things that are either crunchy or squishy, held up a package of the classic red roll-ups. “Can we get these?” she asked, eyes wide with the specific desperation only a seven-year-old can muster.
I looked at the ingredients list. High fructose corn syrup. Red 40. Yellow 5. Gelatin. And “fruit juice concentrate” listed so far down it was practically a footnote. I did the mental math. Those little rolls cost $4.50 for a pack of six. That’s 75 cents per roll. For something made mostly of sugar and plastic-like texture.
I said no. She threw a fit. I felt guilty. Then I went home and made these homemade fruit roll-ups with real strawberries instead. It took me 20 minutes of active work and four hours of drying time. When I handed her a warm, sticky, intensely fruity square, she didn’t even notice the difference. She just ate it. And then asked for another. And then another.
That was three weeks ago. Now, every Sunday, I make a batch of these homemade fruit roll-ups with real strawberries. They’ve become our go-to back-to-school snack. The kids love them because they’re sweet and chewy like the store-bought kind. I love them because I know exactly what’s in them: just strawberries, a little honey, and lemon juice. No artificial dyes. No mystery powders. Just real fruit.
If you’ve been looking for a way to sneak more actual nutrition into your kids’ lunches without them realizing they’re eating “healthy” food, this is it. It’s easier than you think, it’s cheaper than the brand names, and honestly? It tastes way better. Let me walk you through exactly how to make these magic squares.
Why You’ll Love This Homemade Fruit Roll-Ups Recipe
There are a dozen reasons I keep making these homemade fruit roll-ups with real strawberries, but let’s be real—it’s mostly because they save my sanity during the school run. Here’s why this recipe has earned a permanent spot in my kitchen rotation.
Ingredient Simplicity — Seriously, you only need three main ingredients. Strawberries, honey, and lemon juice. That’s it. You don’t need pectin, you don’t need gelatin, and you don’t need a degree in food science. If you can blend fruit, you can make this.
Customizable Sweetness — Store-bought snacks are cloyingly sweet because they’re trying to mask the lack of flavor. With these, you control the sugar. I use honey, but you can use maple syrup or agave if you prefer. You can also add less sweetener if your berries are ripe and sweet. It’s your snack, your rules.
No Artificial Junk — This is the big one. No Red 40. No Blue 1. No “natural flavors” that are actually lab-created. Just fruit. When you make homemade fruit roll-ups with real strawberries, you get that intense, authentic strawberry flavor that the store-bought versions just can’t mimic. They taste like summer.
Perfect for Lunchboxes — These dry down to a chewy, leathery texture that holds up perfectly in a lunchbox for days. They don’t get mushy. They don’t stick to each other if you wrap them in parchment paper. They’re portable, mess-free (mostly), and they don’t melt in the car seat like chocolate bars do.
Budget-Friendly — A pound of fresh strawberries costs about $3-$4 depending on the season. That makes roughly 20-25 individual rolls. That’s less than 20 cents per snack. Compare that to the $4.50 box of branded snacks, and you’re saving money while feeding your kids better food. Win-win.
Meal Prep Friendly — I make two batches on Sunday afternoon while the kids are playing outside. By Monday, they’re rolled up, wrapped, and ready to go. It takes the stress out of packing lunches because I’m not scrambling to find something healthy at 7:30 AM.
This recipe has completely changed our afternoon snack routine. The kids think they’re getting a treat, but I know they’re getting vitamins and fiber. It’s a small win, but it adds up over the school year.
Ingredients You’ll Need
Here’s the best part: you probably have most of this already. I’m particular about a few things here, mostly because the quality of the fruit makes or breaks this recipe. Since there’s nothing to hide the flavor, you want the strawberries to be good.
Fresh Strawberries (3 cups, hulled and chopped / about 450g) — This is the star. Use ripe, sweet strawberries. If they’re in season, great. If you’re using frozen strawberries, that works too, but you’ll need to thaw them completely and drain off the excess liquid before blending. I usually buy the 2-pound bags when they’re on sale and freeze them for this purpose.
Honey (2-3 tablespoons / 30-45ml) — I use honey because it adds a nice depth of flavor that sugar doesn’t. It also helps with the texture, keeping the roll-ups chewy rather than brittle. If you want a vegan option, use maple syrup. Agave nectar works too, but it’s thinner, so you might need a bit more.
Lemon Juice (1 tablespoon / 15ml) — Freshly squeezed is best. The lemon juice brightens up the strawberry flavor and adds a little tang that balances the sweetness. It also helps prevent the fruit from browning while it cooks. Don’t skip this—it makes a huge difference in the taste profile.
Water (2-3 tablespoons / 30-45ml) — You might not need all of this, but it helps get the blender going if your strawberries are thick. Add it gradually so you don’t make the puree too watery.
Powdered Sugar (1-2 tablespoons / optional / 15-30g) — I sometimes add a little powdered sugar if my strawberries aren’t super sweet. It dissolves completely, so you don’t get gritty bits. Use sparingly—you want the strawberry flavor to shine.
Extra Strawberries (Optional) — For decoration, I sometimes press a few thin slices of fresh strawberry onto the top of the puree before drying. It looks pretty for Pinterest, but it’s not necessary for the taste.
Parchment Paper — You’ll need this to line your drying trays. Don’t use wax paper; it will stick. Silicone mats work great too if you have them.
Quick Tip: I always buy the largest strawberries I can find. Smaller berries tend to be more watery and less flavorful, which means you’ll have to cook the puree longer to reduce it. Big, juicy berries mean less cooking time and better flavor.
Equipment Needed
You don’t need fancy equipment for this. Here’s what I actually use in my kitchen.
Blender or Food Processor — I use a high-speed blender like a Vitamix or Ninja for a silky smooth puree. If you don’t have one, a food processor works fine, but you might get a slightly chunkier texture. If you don’t mind seeds, blend it until smooth. If you want a seedless texture, strain it through a fine-mesh sieve after blending.
Large Saucepan — I use a 3-quart saucepan with a heavy bottom. This prevents burning. A thin-bottomed pan will scorch the sugar at the bottom faster than you can stir. Stainless steel or enameled cast iron are great choices.
Silicone Spatula — For stirring the puree. You need something that can scrape the sides and bottom of the pan effectively. Silicone is best because it won’t scratch your pan.
Dehydrator or Oven — This is the main piece of equipment. I have a Nesco dehydrator, and it’s perfect for this. It runs low and slow, giving you consistent results. If you don’t have a dehydrator, an oven works too, but you’ll need to prop the door open slightly to let moisture escape. A convection oven is better for this than a conventional one.
Sheet Pans or Dehydrator Trays — If using an oven, line your sheet pans with parchment paper or a silicone baking mat. If using a dehydrator, just use the standard trays.
Rolling Pin — Optional, but helpful if you need to flatten any lumps in the puree before spreading.
Kitchen Scale — Not strictly necessary, but helpful if you want to be precise with your ratios. I eyeball it most of the time.
Sharp Knife and Cutting Board — For hulling and chopping the strawberries. A paring knife is perfect for this.
Measuring Spoons — For the honey and lemon juice.
Cooling Rack — If you’re using the oven method, you might need a cooling rack to help with airflow.
Storage Containers — Airtight containers or ziplock bags for storing the finished roll-ups. Parchment paper squares are great for separating layers if you stack them.
How to Make It: Step-by-Step
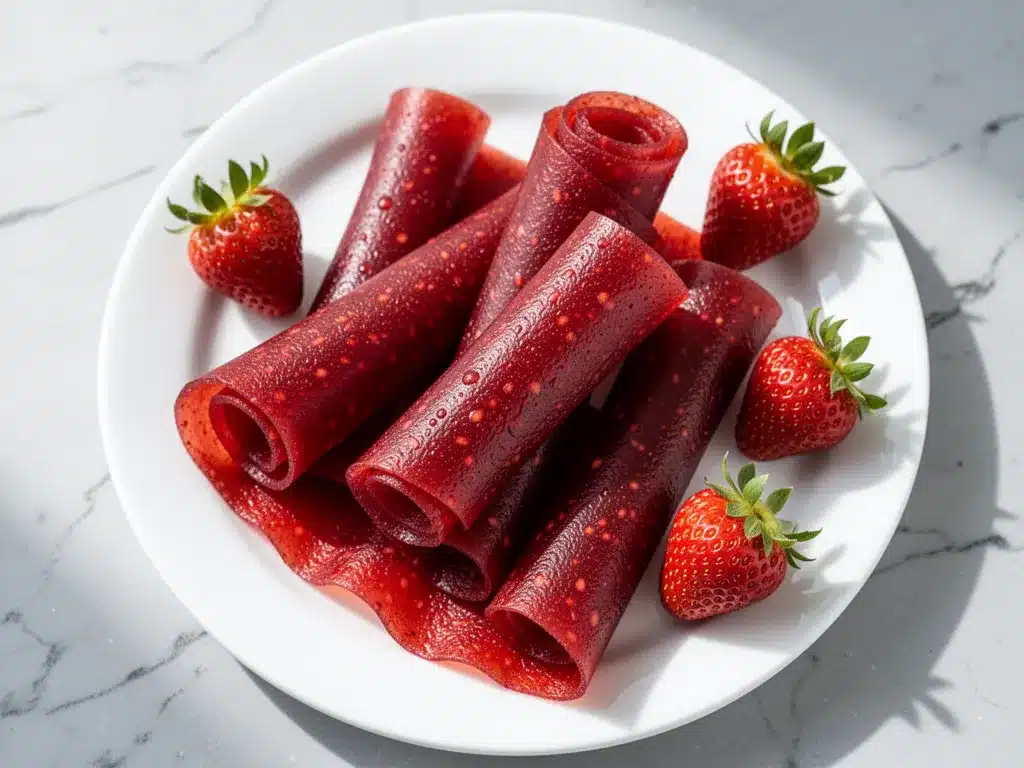
Alright, let’s make this! I’m walking you through exactly how I do it, including the little tricks I’ve picked up over the years. Making homemade fruit roll-ups with real strawberries is straightforward, but there are a few key steps that ensure they turn out chewy, not crunchy or sticky.
Step 1: Prep Your Strawberries (5 minutes)
Wash your strawberries thoroughly under cold water. Hull them by removing the green tops. If your strawberries are large, chop them into quarters. If they’re small, you can leave them whole. The goal is to get them into pieces that will blend easily. If you’re using frozen strawberries, thaw them in the fridge overnight or in a bowl of warm water for a few minutes. Drain off any excess liquid—this is crucial because too much water will make the drying process take forever.
Step 2: Blend the Puree (2 minutes)
Place the chopped strawberries in your blender or food processor. Add the honey and lemon juice. Pulse a few times to break up the fruit, then blend on high until you have a smooth puree. If it’s too thick to blend, add water one tablespoon at a time until it moves freely. Taste the puree. If it’s not sweet enough, add a little more honey or powdered sugar. If it’s too sweet, add a splash more lemon juice. Remember, the flavor will concentrate as it dries, so you want it to taste slightly sweeter than you like it now.
Step 3: Cook the Puree (10-15 minutes)
Pour the puree into your saucepan. Place it over medium-low heat. Bring it to a gentle simmer, stirring frequently. You want to cook out some of the water content to thicken the puree. This step is important because it reduces the drying time later. Cook for 10-15 minutes, stirring every few minutes to prevent burning. The puree should thicken slightly and become glossy. It shouldn’t be stiff like jam, but it should coat the back of a spoon heavily. If you dip a spoon in and the puree stays on the spoon without running off immediately, it’s ready.
Step 4: Spread the Puree (5 minutes)
While the puree is still warm (but not hot), prepare your drying trays. Line them with parchment paper or silicone mats. Pour the puree onto the trays. Use a silicone spatula to spread it out evenly. You want a uniform thickness of about 1/8 to 1/4 inch. If it’s too thick, it will take forever to dry and might get moldy. If it’s too thin, it will become brittle and crumble. Aim for a leather-like thickness. If you’re using fresh strawberry slices for decoration, press them gently into the puree now.
Step 5: Dry the Roll-Ups (4-6 hours)
Place the trays in your dehydrator. Set the temperature to 135°F (57°C). Dry for 4-6 hours. The exact time depends on your dehydrator and the humidity in your kitchen. The roll-ups are done when they are no longer sticky to the touch and can be peeled off the parchment paper easily. If you’re using an oven, set it to the lowest possible temperature (usually 170°F or 75°C) and prop the door open with a wooden spoon. Dry for 6-8 hours, checking every hour after the first 4.
Step 6: Roll and Store (10 minutes)
Once the roll-ups are fully dry, remove them from the trays. If they’re still slightly tacky, let them cool completely—they will firm up as they cool. Peel them off the parchment paper carefully. If you used fresh strawberry slices, they might be a bit delicate, so handle with care. Roll them up tightly. You can leave them as long strips or cut them into smaller squares. Wrap each piece in parchment paper or place them in an airtight container with parchment paper between layers. Store in a cool, dry place for up to 2 weeks, or in the fridge for up to a month.
Total Time: About 1 hour active, plus 4-6 hours drying time.
Built-in Troubleshooting:
- Puree is too runny: Cook it longer. The more water you remove, the better the texture.
- Roll-ups are sticky: They need more drying time. Check them every 30 minutes until they’re no longer tacky.
- Roll-ups are brittle: They dried too much or were spread too thin. Next time, reduce the drying time slightly.
- Mold appears: This means they weren’t dry enough or were stored in a humid environment. Ensure they are completely dry before storing.
Expert Tips & Tricks
Here’s everything I’ve learned from making these dozens of times. These tips will save you from my mistakes.
Strain for Smoothness
If you hate strawberry seeds, strain the puree through a fine-mesh sieve after blending. It takes an extra minute, but the result is silky smooth. My kids prefer it this way, even though the seeds add texture.
Don’t Skip the Cooking Step
I’ve tried making these without cooking the puree first, and the results were disappointing. The drying time doubled, and the flavor wasn’t as concentrated. Cooking the puree first ensures a better texture and more intense flavor.
Use Silicone Mats
Parchment paper works, but silicone mats are easier to clean and reuse. They also provide a smoother surface, which makes peeling the roll-ups off much easier. I keep a set just for this purpose.
Check for Dryness
The easiest way to test if they’re done is to touch the center. If it’s not sticky at all, they’re ready. If there’s any tackiness, keep drying. Sticky roll-ups will stick to each other and can spoil faster.
Cut Before Drying (Optional)
For younger kids, I sometimes cut the puree into squares before drying. It’s easier for them to handle smaller pieces. Just be careful not to make them too thin, or they’ll become chips instead of rolls.
Add Other Fruits
You can mix strawberries with other fruits. Raspberry, blueberry, or mango all work well. Just adjust the sweetness accordingly. A mix of strawberry and raspberry is my personal favorite—it’s tart and sweet.
Store Properly
Humidity is the enemy. Store your roll-ups in an airtight container in a cool, dry place. If you live in a humid climate, keep them in the fridge. They’ll last longer and stay chewy.
Variations & Substitutions
Once you’ve nailed the basic version, here’s how you can mix it up. I’ve tried all of these, and they’re all winners.
Raspberry Roll-Ups
Swap the strawberries for raspberries. Raspberries are more tart, so you might want to add a little more honey. The seeds are smaller, so straining is less necessary.
Mango Lime
Use mango puree instead of strawberries, and add lime juice instead of lemon. It’s tropical and refreshing. Great for summer snacks.
Apple Cinnamon
Use apple puree (cook the apples first until soft, then blend) and add a teaspoon of cinnamon. It tastes like apple pie in a snack form.
Banana Walnut
Blend ripe bananas with a little honey and stir in chopped walnuts after spreading. It’s more like a banana chip, but still chewy.
Dairy-Free
This recipe is naturally dairy-free. No substitutions needed.
Gluten-Free
This recipe is naturally gluten-free. Just ensure your honey and fruit are processed in a gluten-free facility if you have severe allergies.
Vegan
Replace honey with maple syrup or agave nectar. The texture and taste are almost identical.
Lower Sugar
Use unsweetened applesauce as a base. Mix it with the fruit puree for a lower-sugar option. It won’t be as chewy, but it’s still tasty.
Serving & Storage
How to Serve:
I serve these straight from the container. They’re perfect for lunchboxes, after-school snacks, or even as a dessert topping for yogurt. My kids love to eat them while watching cartoons. They’re also great for picnic lunches because they don’t melt.
Side Dishes:
Pair these with a cheese stick or some whole-grain crackers for a balanced snack. They also go well with a glass of milk or a smoothie.
Storage Instructions:
Store in an airtight container for up to 2 weeks at room temperature. For longer storage, keep them in the fridge for up to a month. They can also be frozen for up to 3 months. To freeze, wrap them tightly in plastic wrap and place in a freezer bag. Thaw at room temperature before eating.
Reheating:
You don’t need to reheat these. They’re best eaten at room temperature. If they’ve become too stiff, you can microwave them for 5-10 seconds to soften them up, but be careful not to melt them.
Nutrition Information
I’m not a nutritionist, but here’s the breakdown if you’re tracking. These are estimates based on the ingredients.
Per Serving (based on 1 roll-up, approx. 10g):
- Calories: 25
- Protein: 0g
- Carbs: 6g
- Fiber: 1g
- Sugar: 5g
- Fat: 0g
What’s Good:
– No artificial ingredients
– Contains vitamin C from strawberries
– Lower sugar than store-bought versions
– Portable and convenient
What to Know:
– Still contains natural sugars
– Not a protein source
– Moderate calorie count
My Take:
Look, these are still a treat. They’re not broccoli. But they’re a much healthier alternative to the store-bought kind. I use them as a reward or a special snack, not a daily staple. When I want to make them lighter, I use less honey and more tart fruits like raspberries.
Final Thoughts
So that’s my homemade fruit roll-ups with real strawberries recipe! I’ve probably talked your ear off at this point, but when you make a recipe this often, you have a lot to say about it.
This has saved our snack time more times than I can count. It’s my answer to “what’s for a snack?” when I’m tired, don’t want to buy junk food, and still want something my kids will actually eat. They’re happy, I’m happy, and we’re all eating better.
Make it yours! Try different fruits, adjust the sweetness, or add seeds for crunch. The best recipes are the ones you adapt to your family’s tastes.
If you make this, drop a comment and let me know what you think! I love hearing how recipes turn out in your kitchen. And if something doesn’t work, tell me that too—I’m here to help troubleshoot.
Happy snacking! And I hope your kitchen smells half as good as mine does right now.
Frequently Asked Questions
Can I use frozen strawberries?
Yes, absolutely. Just thaw them completely and drain off any excess liquid. Frozen strawberries are actually great for this because they’re often picked at peak ripeness. Just make sure you don’t add too much water when blending, as they’ll already be softer.
Why are my roll-ups sticky?
They probably need more drying time. Check them every 30 minutes until they’re no longer tacky to the touch. If they’re still sticky after the recommended time, your kitchen might be humid, or you spread them too thick. Try drying them a bit longer.
Can I make these without a dehydrator?
Yes, you can use an oven. Set it to the lowest temperature (usually 170°F) and prop the door open with a wooden spoon to let moisture escape. It will take longer, about 6-8 hours, but it works fine. Just keep an eye on them to make sure they don’t burn.
How long do they last?
Stored in an airtight container at room temperature, they last up to 2 weeks. In the fridge, up to a month. In the freezer, up to 3 months. They’re best eaten within the first week for optimal texture.
Can I add other fruits?
Yes! Raspberry, blueberry, mango, and apple all work well. Just adjust the sweetness accordingly. Some fruits are more tart than others, so you might need to add more honey or maple syrup.
Why did my roll-ups crack when I rolled them?
They were probably over-dried or spread too thin. Next time, reduce the drying time slightly and spread the puree a bit thicker. They should be leathery and flexible, not brittle.
Can I use artificial sweeteners?
You can, but they might affect the texture. Some artificial sweeteners don’t caramelize or thicken the same way sugar does. I recommend using maple syrup or agave for a natural alternative. If you use stevia or erythritol, you might need to add a thickener like chia seeds or psyllium husk.
Pin This Recipe!

Homemade Fruit Roll-Ups: 5 Real Strawberry Snacks
- Total Time: 4 hours 35 minutes
- Yield: 20-25 servings 1x
Description
A simple, healthy alternative to store-bought fruit snacks made with just three main ingredients: real strawberries, honey, and lemon juice. These chewy, natural treats are perfect for lunchboxes and free from artificial dyes or high fructose corn syrup.
Ingredients
- 3 cups fresh strawberries, hulled and chopped (about 450g)
- 2–3 tablespoons honey
- 1 tablespoon lemon juice
- 2–3 tablespoons water
- 1–2 tablespoons powdered sugar (optional)
- Parchment paper or silicone mats for lining trays
Instructions
- Wash, hull, and chop the strawberries. If using frozen strawberries, thaw and drain excess liquid.
- Blend strawberries, honey, and lemon juice until smooth. Add water gradually if needed to help blending.
- Pour puree into a saucepan and cook over medium-low heat for 10-15 minutes, stirring frequently, until it thickens and coats the back of a spoon.
- Line dehydrator trays or sheet pans with parchment paper or silicone mats.
- Spread the warm puree evenly onto the trays to a thickness of 1/8 to 1/4 inch.
- Dehydrate at 135°F (57°C) for 4-6 hours, or bake in an oven at the lowest setting (approx. 170°F) with the door propped open for 6-8 hours, until no longer sticky to the touch.
- Peel the dried sheets off the lining, roll them up, and store in an airtight container.
Notes
If you prefer a seedless texture, strain the puree through a fine-mesh sieve after blending. Ensure the roll-ups are completely dry before storing to prevent mold. They can be stored at room temperature for up to 2 weeks, in the fridge for a month, or frozen for 3 months.
- Prep Time: 20 minutes
- Cook Time: 15 minutes
- Category: Snack
- Cuisine: American
Nutrition
- Serving Size: 1 roll-up (approx. 1
- Calories: 25
- Sugar: 5
- Carbohydrates: 6
- Fiber: 1
Keywords: homemade fruit roll-ups, strawberry snacks, healthy kids snacks, dairy-free, gluten-free, vegan snacks, lunchbox ideas, natural fruit snacks


