Two years ago, I was standing in my kitchen at 6:45 PM on a Friday night, staring at a half-empty fridge and a guest list that included my mother-in-law, who is notoriously hard to please with desserts. I had promised to bring something homemade. The problem? I had zero hours to bake, my oven was already full for the main course, and I definitely didn’t want to serve store-bought cake that tastes like cardboard and regret.
I panicked. I really did. I rummaged through the pantry, grabbed a block of cream cheese, some heavy cream, a jar of vanilla beans (because I had splurged on them earlier that week), and a box of graham crackers. I threw them together without a real recipe, just winging it based on instinct and a desperate need to look like I had my life together.
The result? My mother-in-law took one bite, paused for a solid three seconds, and said, “This is better than the one from that fancy bakery downtown.” That was the moment my creamy no-bake vanilla bean cheesecake with graham crust was born. It wasn’t planned. It wasn’t fancy. It was just necessary.
Since then, I’ve made this dessert at least a dozen times. For birthdays. For holidays. For random Tuesday nights when I just want something sweet without turning my kitchen into a flour bomb. It has become my secret weapon. It’s the kind of dessert that looks like you spent all day in the kitchen, but honestly? It takes about 20 minutes of active work and a lot of patience in the fridge.
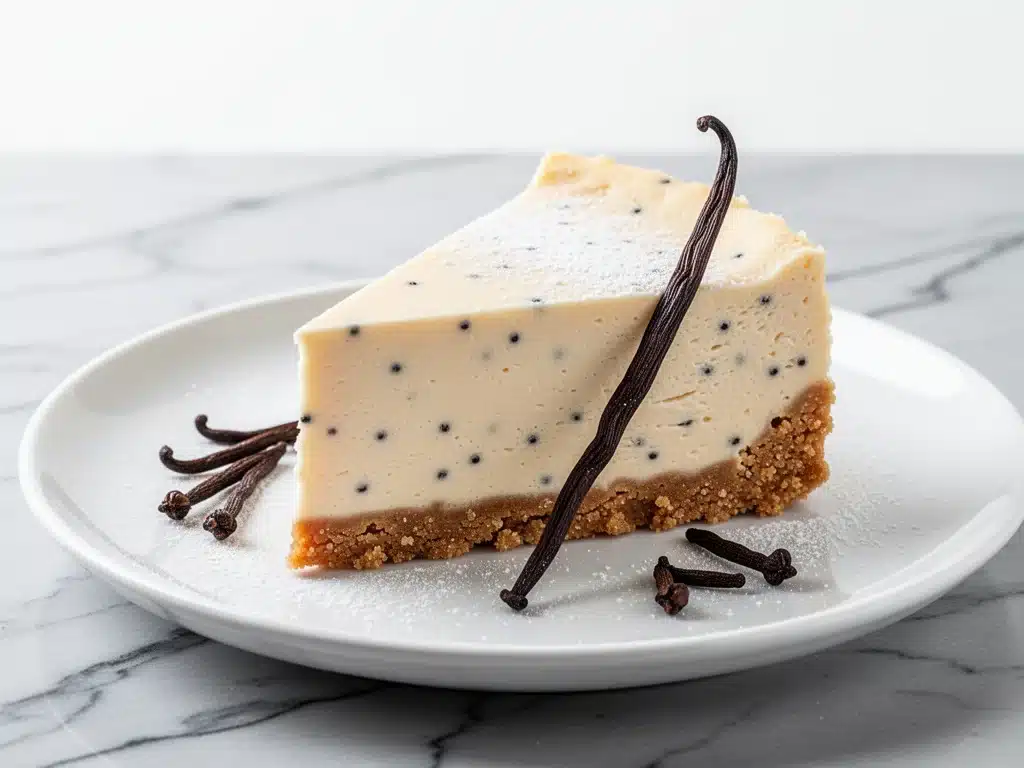
If you’ve been intimidated by cheesecake because you think it requires a water bath, a springform pan disaster, or a degree in pastry arts, let me save you the trouble. This no-bake version is silky, rich, and packed with real vanilla bean specks. It’s the kind of dessert that makes people ask for the recipe before they even finish their plate. And trust me, once you try it, you’ll never go back to the baked version.
Why You’ll Love This No-Bake Vanilla Bean Cheesecake
There are a million reasons to love cheesecake, but this specific version? It’s different. It’s easier. It’s less stressful. Here’s why this creamy no-bake vanilla bean cheesecake with graham crust has taken over my dessert rotation:
No Oven Required — Seriously. I’m not kidding. You don’t need to preheat anything. This is huge in the summer when you don’t want to heat up your house, or in the winter when you’re already dealing with a full oven for turkey or ham. It keeps your kitchen cool and your sanity intact.
Real Vanilla Flavor — Most recipes use vanilla extract. I use actual vanilla bean paste or scraped seeds. The difference is night and day. You get those beautiful little black specks throughout the filling, and the flavor is deeper, more floral, and infinitely more sophisticated. It tastes expensive, even though it’s cheap to make.
Crust That Actually Stays Together — I’ve made no-bake cheesecakes where the crust turns into dry sand the second you cut it. Not this one. I use a butter-to-cookie ratio that creates a crust that’s crunchy on the outside and just barely chewy on the inside. It holds up perfectly to a knife.
Make-Ahead Friendly — This is the ultimate stress-relief dessert. You can make it two days in advance. In fact, it tastes better the next day because the flavors have time to meld and the texture sets up perfectly. I love making it on Sunday so I don’t have to think about dessert on Friday night.
Lighter Than Traditional Cheesecake — Because there’s no baked egg structure, the texture is airy and mousse-like rather than dense and heavy. You can eat a generous slice and still feel good about yourself. (Okay, maybe not *that* good, but definitely better than a dense baked cheesecake.)
It’s reliable. It’s impressive. And it’s stupidly simple. If you can press cookies into a pan and whip cream, you can make this. I’ve taught my teenage nephew to make it, and he hasn’t burned it yet.
Ingredients You’ll Need
Here’s the good news: you probably have most of these ingredients already. This isn’t a recipe that requires a trip to three different specialty stores. It’s pantry-friendly, with just a few key items that make all the difference.
For the Graham Cracker Crust:
Graham cracker crumbs (1 ½ cups / 150g) — You can crush your own crackers in a food processor or zip-top bag, or just buy pre-made crumbs. I prefer crushing them myself for a slightly chunkier texture, but pre-made works fine if you’re in a rush.
Unsalted butter (6 tablespoons / 85g, melted) — This binds the crust. Don’t use margarine. It just doesn’t have the right flavor or structure. Salted butter works too, but reduce the pinch of salt I call for in the crust.
Granulated sugar (2 tablespoons / 25g) — Just a little bit to sweeten the crust. Graham crackers are already sweet, so we don’t need much.
Pinch of salt — Crucial. It balances the sweetness and enhances the buttery flavor. Don’t skip it.
For the Vanilla Bean Filling:
Full-fat cream cheese (24 ounces / 680g) — This is the base. It must be full-fat. Low-fat cream cheese will make your filling grainy and watery. Let it sit on the counter for 30 minutes before you start. Room temperature cream cheese blends smoothly. Cold cream cheese creates lumps, and we don’t want lumps.
Heavy cream (2 cups / 480ml) — Cold heavy cream. This is what gives the cheesecake its airy, light texture. Whipping it creates the structure. Use full-fat whipping cream, not half-and-half.
Vanilla bean paste (2 tablespoons) OR 1 large vanilla bean, scraped — This is the star. Vanilla bean paste is convenient and has the seeds already mixed in. If you have a real vanilla bean, split it lengthwise and scrape the seeds with the back of a knife. Those black specks are beautiful.
Confectioners’ sugar (1 cup / 120g) — Also called powdered sugar. It dissolves instantly in the cream, unlike granulated sugar which might leave gritty bits. Sift it if it’s clumpy.
Optional but recommended:
White chocolate chips (½ cup / 85g, melted) — I sometimes add a little melted white chocolate to the filling for extra richness and stability. It helps the slices hold their shape if you’re traveling with it.
For the Topping:
Whipped cream — Extra for serving.
Fresh berries — Raspberries or strawberries look stunning against the white cream and vanilla specks.
Equipment Needed
You don’t need fancy gadgets for this. Here’s what I actually use:
9-inch springform pan — This is the classic cheesecake pan. The sides come off, making it easy to remove the cake. If you don’t have one, you can use a 9-inch pie dish, but the presentation won’t be as tall or dramatic.
Food processor — For making the graham cracker crumbs quickly. If you don’t have one, put the crackers in a zip-top bag and crush them with a rolling pin. It takes more effort but works fine.
Hand mixer or stand mixer — You need to whip the heavy cream to stiff peaks and beat the cream cheese until smooth. A hand mixer works perfectly. A stand mixer with the paddle attachment is even easier.
Spatula — A rubber spatula is essential for folding the whipped cream into the cream cheese mixture without deflating it. Be gentle.
Measuring cups and spoons — Standard stuff. Accuracy matters here, especially with the sugar.
Refrigerator — Obviously. You need space for the cheesecake to set. If your fridge is crowded, clear a shelf before you start.
How to Make It: Step-by-Step
Alright, let’s make this! I’m walking you through exactly how I do it, including the little tricks I’ve picked up over the years.
Step 1: Prep Your Pan and Crust (10 minutes)
Start by greasing the bottom of your springform pan with a little butter or cooking spray. You don’t need to grease the sides, just the bottom. This helps the crust stick and makes it easier to remove later.
Crush your graham crackers into fine crumbs. If you’re using whole crackers, put them in a food processor and pulse until they’re like sand. If you’re using a bag, get ready for a workout. Mix the crumbs with the melted butter, sugar, and salt. It should look like wet sand. If it’s too dry, add a teaspoon more butter. If it’s too wet, add a tablespoon more crumbs.
Press the mixture firmly into the bottom of the pan. Use the bottom of a measuring cup to pack it down tight. You want an even layer. No cracks, no gaps. Place the pan in the freezer while you make the filling. This helps the crust set quickly.
Step 2: Beat the Cream Cheese (5 minutes)
Take your room-temperature cream cheese out of the fridge. If it’s still cold, let it sit for another 10 minutes. Cold cream cheese is the enemy of smooth cheesecake.
Place the cream cheese in your mixer bowl. Beat it on medium-high speed for about 2-3 minutes until it’s completely smooth and creamy. Scrape down the sides of the bowl with your spatula. Make sure there are no lumps. If you see lumps, keep beating. It takes a little extra time, but it’s worth it.
Add the confectioners’ sugar and the vanilla bean paste (or scraped vanilla seeds). Beat on low just until combined. Don’t overmix at this stage, or you’ll incorporate too much air, which can cause the cheesecake to rise and crack (even though it’s no-bake, it can still happen). Set this bowl aside.
Step 3: Whip the Heavy Cream (3 minutes)
In a separate large bowl, pour your cold heavy cream. Whip it with clean beaters on high speed. Watch it closely. It will go from liquid to soft peaks to stiff peaks very quickly. You want stiff peaks—when you lift the beaters, the cream should stand up straight without drooping. This usually takes 2-4 minutes.
Do not over-whip the cream into butter. Stop as soon as it holds its shape. If it looks grainy, you’ve gone too far.
Step 4: Fold It All Together (5 minutes)
This is the most important step. Take about a third of the whipped cream and fold it into the cream cheese mixture. This lightens the dense cream cheese, making it easier to mix in the rest. Use a rubber spatula and cut down the middle, scoop up the bottom, and fold over the top. Gentle motions.
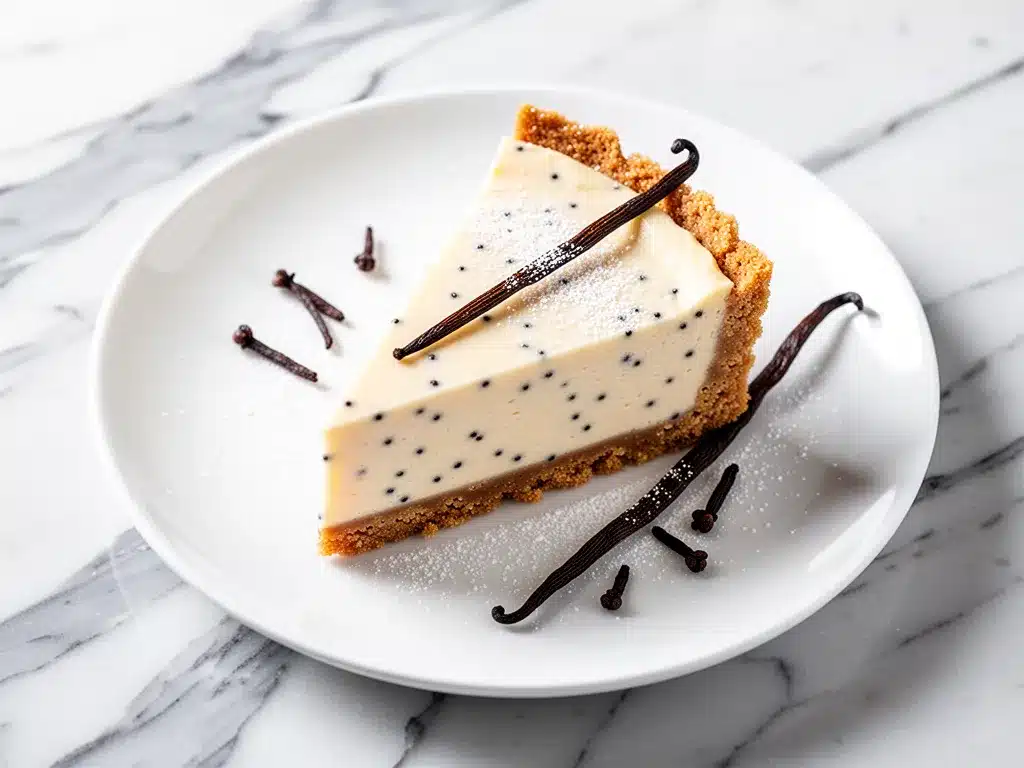
Once the cream cheese mixture is lightened, add the remaining whipped cream. Fold gently until there are no more white streaks. You want a uniform, pale yellow mixture with beautiful black vanilla specks. It should look fluffy and airy.
Step 5: Assemble and Chill (4+ hours)
Take your crust out of the freezer. Pour the filling over the crust. Use the spatula to smooth the top. Tap the pan gently on the counter a few times to release any air bubbles.
Cover the pan tightly with plastic wrap. Place it in the refrigerator. It needs to chill for at least 4 hours, but overnight is best. I usually make it the night before. The longer it chills, the firmer it gets and the better the flavor develops.
Expert Tips & Tricks
Here’s everything I’ve learned from making this dozens of times. These tips will save you from my mistakes.
Room Temperature is Key
I can’t stress this enough. Your cream cheese MUST be room temperature. If it’s cold, you will have lumps. If you forget to take it out, cut it into cubes and microwave it on low power for 10-second bursts until it’s soft to the touch. Don’t melt it, just soften it.
Cold Cream for Whipping
While the cream cheese needs to be warm, the heavy cream needs to be ice cold. If your kitchen is hot, chill your mixing bowl and beaters in the freezer for 15 minutes before whipping. It helps the cream whip faster and hold its shape better.
Don’t Overmix
Once you add the whipped cream, fold gently. Overmixing deflates the air you worked so hard to incorporate. Your cheesecake will be dense and heavy instead of light and fluffy. Think of it like folding egg whites into a batter—gentle hands only.
Use Good Vanilla
This recipe is all about vanilla flavor. Cheap vanilla extract tastes harsh and alcoholic. Good vanilla bean paste or a real vanilla bean makes a world of difference. It’s worth the extra few dollars.
Slice Cleanly
For clean slices, dip your knife in hot water and wipe it dry before each cut. The heat helps the knife glide through the cold cream cheese without squishing the sides. You’ll get perfect, restaurant-quality slices.
Variations & Substitutions
Once you’ve nailed the basic version, here’s how you can mix it up. I’ve tried all of these.
Berry Swirl
Warm up 1 cup of fresh or frozen berries with 1 tablespoon of sugar until they break down into a sauce. Let it cool, then swirl it into the filling before chilling. Raspberry or strawberry works best.
Chocolate Chip
Fold ½ cup of mini chocolate chips into the filling before pouring it into the crust. Simple, classic, and always a hit with kids.
Lemon Vanilla
Add the zest of one large lemon to the cream cheese mixture. It adds a bright, citrusy note that cuts through the richness. Delicious in the summer.
Gluten-Free
Use gluten-free graham crackers or even gluten-free vanilla wafers for the crust. Everything else is naturally gluten-free. I’ve used gluten-free crackers and they work just as well.
Dairy-Free
This is harder because cream cheese is the main ingredient. You can try using a vegan cream cheese alternative, but the texture will be different. Use coconut cream instead of heavy cream for whipping, but it will taste like coconut.
Serving & Storage
How to Serve:
I usually serve this straight from the fridge. It’s best cold. Top with a dollop of whipped cream, fresh berries, and a drizzle of honey if you want to be fancy. It looks stunning on a plate.
Side Dishes:
This is a dessert, so it stands alone. But if you’re serving it after a heavy meal, a simple green salad or some fruit helps balance it out. I also love serving it with a cup of coffee or tea.
Storage:
Keep the cheesecake covered in the refrigerator for up to 5 days. It actually gets better on day 2 or 3 as the flavors meld.
Freezing:
You can freeze this cheesecake! Wrap the entire pan (or individual slices) tightly in plastic wrap and then foil. It will keep for up to 2 months. Thaw it in the fridge overnight before serving. The texture might be slightly softer, but it’s still delicious.
Nutrition Information
I’m not a nutritionist, but here’s the breakdown if you’re tracking. This is a rich dessert, so a little goes a long way.
Per Serving (based on 12 slices):
- Calories: 380
- Protein: 6g
- Carbs: 28g
- Fiber: 1g
- Sugar: 22g
- Fat: 28g
- Saturated Fat: 17g
It’s high in fat and sugar, obviously. But it’s also made with real ingredients. If you’re watching your sugar, you can reduce the powdered sugar to ¾ cup. If you’re watching carbs, you can try a almond flour crust instead of graham crackers, though it won’t taste the same.
Look, this is comfort food. It’s sweet and rich. Enjoy it in moderation. It’s way better than processed store-bought cake, and you know exactly what’s in it.
Final Thoughts
So that’s my go-to creamy no-bake vanilla bean cheesecake with graham crust! I’ve probably talked your ear off at this point, but when you make a recipe this often, you have a lot to say about it.
This has saved me more times than I can count. It’s my answer to “what’s for dessert” when I’m tired, don’t want to bake, and still want something that tastes really good. My family is happy, my guests are impressed, and I’m happy because I’m not stressed about cooking.
Make it yours! Try different toppings, swap in your favorite berries, adjust the sweetness to your taste. The best recipes are the ones you adapt to your family’s tastes.
If you make this, drop a comment and let me know what you think! I love hearing how recipes turn out in your kitchen. And if something doesn’t work, tell me that too—I’m here to help troubleshoot.
Happy baking! Well, no-baking. Happy making! And I hope your kitchen smells half as good as mine does right now.
Frequently Asked Questions
Q: Can I use vanilla extract instead of vanilla bean paste?
A: Yes, you can. Use 2 teaspoons of good quality vanilla extract. You won’t get the pretty black specks, but the flavor will still be great. Vanilla bean paste is just nicer looking and has a deeper flavor.
Q: Why is my cheesecake runny?
A: Usually, this means it didn’t chill long enough. Cheesecake needs time to set. If you cut it after only 2 hours, it will be soft. Let it chill for at least 4 hours, preferably overnight. Also, make sure you didn’t over-whip the cream into butter, which can cause separation.
Q: Can I make this in a pie dish instead of a springform pan?
A: Yes! Just line the pie dish with parchment paper so it’s easier to lift out. The crust might be slightly thicker, but it works perfectly. It’s a great option if you don’t own a springform pan.
Q: How do I get clean slices?
A: Dip your knife in hot water and wipe it dry before each cut. The heat helps the knife glide through the cold filling without dragging the sides. Clean the knife between every slice for the best results.
Q: Can I use a different type of cookie for the crust?
A: Absolutely! Digestive biscuits, vanilla wafers, or even gingersnaps work great. Just crush them finely and mix with butter and sugar. Gingersnaps add a nice spice kick that pairs well with the vanilla.
Q: Why did my crust fall apart?
A: This usually means there wasn’t enough butter. The butter acts as the glue. If your crumbs are dry, add more melted butter until the mixture holds together when you squeeze it in your hand. Also, press the crust down firmly and evenly.
Q: Can I add fruit on top?
A: Yes! Fresh berries, sliced peaches, or even a berry compote work beautifully. Add the fruit right before serving so it doesn’t get soggy or weep into the cheesecake.
Pin This Recipe!
Creamy No-Bake Vanilla Bean Cheesecake with Graham Crust
- Total Time: 4 hours 20 minutes
- Yield: 12 servings 1x
Description
A silky, rich, no-bake cheesecake featuring real vanilla bean specks and a crunchy graham cracker crust. It requires no oven, is make-ahead friendly, and delivers a light, mousse-like texture that rivals traditional baked versions.
Ingredients
- 1 ½ cups (150g) graham cracker crumbs
- 6 tablespoons (85g) unsalted butter, melted
- 2 tablespoons (25g) granulated sugar
- Pinch of salt
- 24 ounces (680g) full-fat cream cheese, room temperature
- 2 cups (480ml) heavy cream, cold
- 2 tablespoons vanilla bean paste OR 1 large vanilla bean, scraped
- 1 cup (120g) confectioners’ sugar
- Optional: ½ cup (85g) white chocolate chips, melted
- Whipped cream for serving
- Fresh berries for serving
Instructions
- Grease the bottom of a 9-inch springform pan with butter or cooking spray.
- Crush graham crackers into fine crumbs. Mix with melted butter, sugar, and salt until it resembles wet sand.
- Press the crust mixture firmly and evenly into the bottom of the pan. Place in the freezer while preparing the filling.
- Beat the room-temperature cream cheese on medium-high speed for 2-3 minutes until completely smooth. Scrape down the sides.
- Add confectioners’ sugar and vanilla bean paste (or seeds). Beat on low just until combined. Set aside.
- In a separate large bowl, whip the cold heavy cream on high speed until stiff peaks form (2-4 minutes). Do not over-whip.
- Fold one-third of the whipped cream into the cream cheese mixture to lighten it. Then, gently fold in the remaining whipped cream until uniform and no white streaks remain.
- Pour the filling over the chilled crust and smooth the top. Tap the pan gently to release air bubbles.
- Cover tightly with plastic wrap and refrigerate for at least 4 hours, preferably overnight, until set.
- For clean slices, dip a knife in hot water and wipe dry before cutting. Serve topped with whipped cream and fresh berries.
Notes
Ensure cream cheese is at room temperature to avoid lumps. Keep heavy cream very cold for best whipping results. The cheesecake tastes better the next day as flavors meld. For gluten-free version, use gluten-free graham crackers. To freeze, wrap tightly in plastic and foil for up to 2 months.
- Prep Time: 20 minutes
- Cook Time: 0 minutes
- Category: Dessert
- Cuisine: American
Nutrition
- Serving Size: 1 slice
- Calories: 380
- Sugar: 22
- Fat: 28
- Saturated Fat: 17
- Carbohydrates: 28
- Fiber: 1
- Protein: 6
Keywords: no-bake cheesecake, vanilla bean cheesecake, graham cracker crust, easy dessert, make-ahead dessert, creamy cheesecake, summer dessert


