It was mid-October, and the sky outside was that specific shade of gray that makes you want to hibernate under three blankets. I had just dragged myself home from work, exhausted, with zero energy for anything complicated. The fridge was basically a graveyard of wilted spinach and half a jar of pickles. I was staring into the abyss, thinking, “Please let there be takeout.”
But then I saw them. Two pears. They were sitting on the counter, slightly bruised but definitely ripe. And next to them, a wedge of blue cheese I’d bought for a charcuterie board three weeks ago (RIP, the party that never happened).
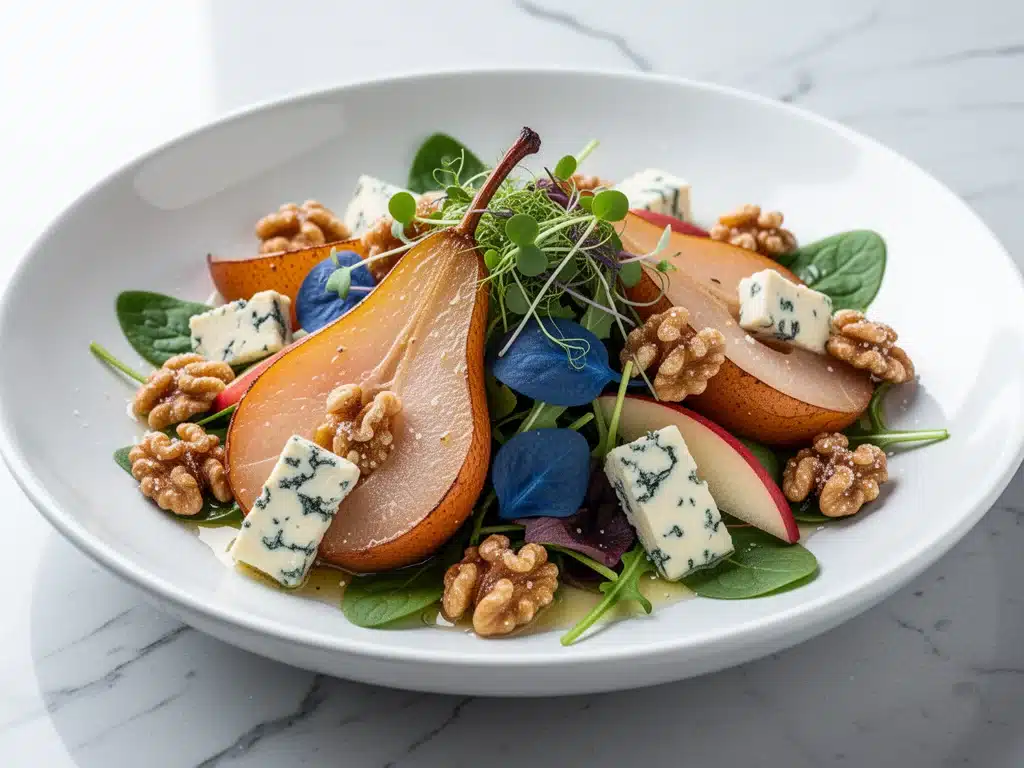
I didn’t have the energy to roast vegetables. I didn’t have the patience for a complex dressing. So I threw the pears in the oven with a little maple syrup and let them sit there while I stared at the wall. When they came out, caramelized and warm, I crumbled the cheese over them, tossed in some bagged greens, and drizzled on some walnut oil. I ate it standing over the sink.
It was perfect. Not because it was fancy, but because it tasted like comfort. It tasted like fall, even if it was raining sideways. That accidental dinner became my go-to when I had nothing in the fridge and no will to live. This fall roasted pear and blue cheese salad with simple ingredients is exactly that: five steps, minimal effort, maximum flavor. I’ve made it so many times that I can do it half-asleep now.
Why You’ll Love This Recipe
Look, I know salads can feel like a punishment. You know the ones: sad, wilted lettuce drowning in ranch, with cucumber slices that taste like water. This is not that. This fall roasted pear and blue cheese salad with simple ingredients is actually a meal. It’s substantial, it’s sweet and salty and creamy all at once, and it makes you feel like you’ve accomplished something, even if you barely tried.
Here’s why this has replaced my usual weeknight rotation:
- Stupid Simple — Seriously, if you can slice a pear and turn on an oven, you can make this. I’ve made it while holding a baby. It doesn’t require chopping kale or massaging greens.
- Lightning Fast — 25 minutes from start to finish. Most of that time is just the pears roasting, which is entirely hands-off. I throw this together on nights when I get home at 7pm and want to eat by 7:30.
- Pantry-Friendly — You probably have the dressing ingredients already. Olive oil, vinegar, honey. The pears and cheese are the only “fresh” buys, and they keep for a while in the fridge.
- Crowd-Pleaser — I’ve served this to my meat-eating brother and my vegan friend (with a sub). The sweet/salty combo is universal. Even my picky six-year-old ate it, which is a miracle in itself.
- Makes Amazing Leftovers — The pears get even softer and sweeter the next day. I deliberately make extra for lunch. It tastes better cold than it does warm, which is rare for roasted veggies.
- Budget-Smart — A bag of greens, two pears, and a small wedge of cheese costs about $10. That feeds two adults comfortably. Cheaper than a salad at a cafe, and way fresher.
This is my go-to when I need dinner to just work. No complicated techniques, no weird ingredients, just reliable, delicious food that makes everyone happy. It’s also a great way to use up those pears that are getting too soft, or that leftover blue cheese you don’t know what to do with. It’s the culinary equivalent of a warm hug.
Ingredients You’ll Need
Here’s the best part: you probably have most of this already. This fall roasted pear and blue cheese salad with simple ingredients relies on quality over quantity. You don’t need ten different spices or obscure oils. Just five good things.
For the Roasted Pears
Bosc or Anjou pears (2 large, firm but ripe) — I prefer Bosc pears because they hold their shape when roasted and have a nice, firm texture. Anjou works too, but they’re softer. Avoid red pears; they get mushy and sweet in a bad way. Look for pears that yield slightly to pressure at the neck.
Maple syrup (2 tablespoons) — Real maple syrup, not the pancake syrup stuff. It adds a deep, caramel-like sweetness that balances the sharp cheese. If you don’t have maple, honey works, but maple tastes more “fall.”
Butter (1 tablespoon, melted) — Not strictly necessary, but it helps the maple syrup caramelize and gives the pears a rich, golden color. I use unsalted so I can control the salt.
Cinnamon (½ teaspoon) — Just a pinch. You don’t want it to taste like pie. It’s a background note that makes the pears smell amazing.
For the Salad Base
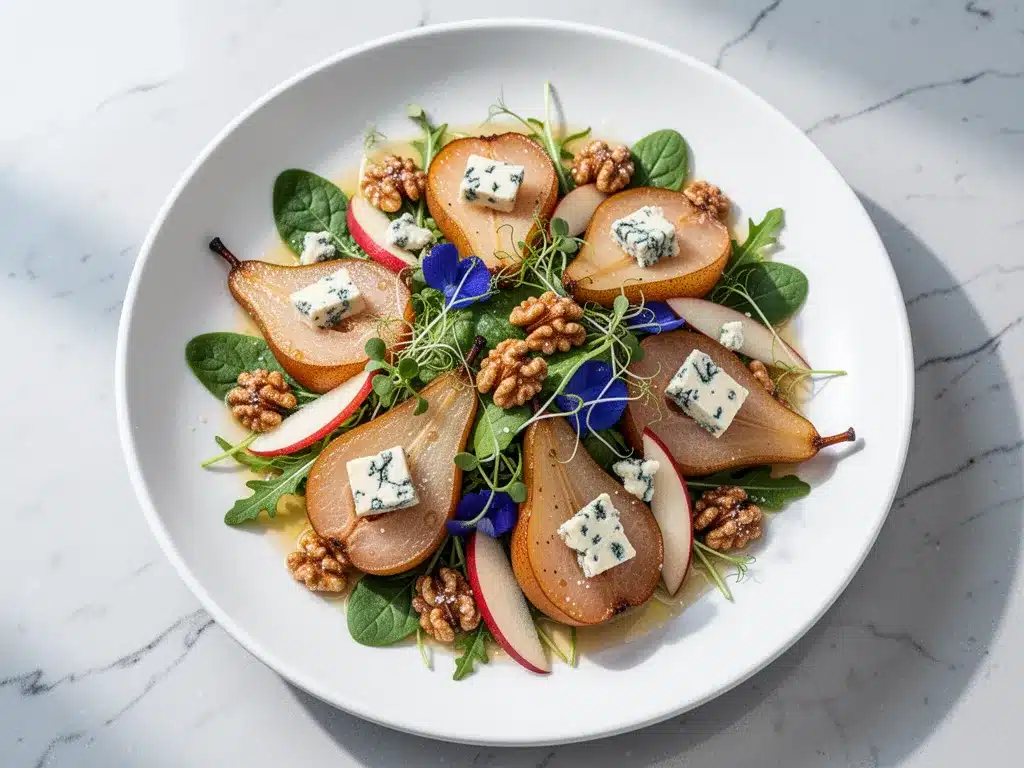
Mixed greens (5-6 ounces) — I use a spring mix or baby arugula. Arugula adds a nice peppery bite that cuts through the sweetness. If you’re not a fan of bitter greens, stick to a standard spring mix. Avoid iceberg; it’s too watery and boring for this.
Blue cheese (4 ounces, crumbled) — This is the star. I use Gorgonzola Dolce because it’s creamy and mild. If you like strong blue, use a standard Roquefort or Stilton. Don’t skimp here. The cheese is the contrast that makes the salad interesting.
Walnuts or pecans (½ cup, toasted) — Toasted nuts add crunch. I usually use walnuts, but pecans are also great. If you have candied pecans lying around from a snack project, those work too, but reduce the maple syrup in the dressing since they’re already sweet.
For the Simple Dressing
Extra virgin olive oil (3 tablespoons) — Use good quality. You’ll taste it. I keep a bottle in the pantry specifically for dressings.
Balsamic vinegar (1 tablespoon) — Adds acidity to balance the sweet pears. If you don’t have balsamic, apple cider vinegar works, but balsamic is classic.
Dijon mustard (1 teaspoon) — It sounds weird in a sweet salad, but it emulsifies the dressing and adds a subtle tang. You won’t taste the mustard; you’ll just taste “more.”
Salt and black pepper — To taste. Always season the dressing, not just the salad.
Pro Tip: I always buy pre-crumbled blue cheese when I’m lazy, but crumble it yourself for better texture. And toast your nuts in a dry pan for 2 minutes before adding them. It changes everything.
Equipment Needed
You don’t need fancy equipment for this. Here’s what I actually use.
Baking sheet — A standard half-sheet pan. Line it with parchment paper for easy cleanup. I’ve burned off maple syrup before; parchment saves your sanity.
Small bowl — For mixing the dressing. Any bowl works.
Whisk or fork — To emulsify the oil and vinegar. A fork works fine if you don’t want to wash a whisk.
Knife and cutting board — For slicing the pears. A serrated knife helps if the pears are soft.
Oven — Obviously. Preheat to 400°F (200°C).
Optional but nice: A small skillet for toasting nuts if you don’t want to use the oven. It’s faster than preheating the oven just for nuts.
How to Make It: Step-by-Step
Alright, let’s make this! I’m walking you through exactly how I do it, including the little tricks I’ve picked up.
Step 1: Prep the Pears (5 minutes)
Preheat your oven to 400°F (200°C). Line a baking sheet with parchment paper. Peel the pears (optional, but I prefer peeled for a smoother texture). Cut them in half, remove the core, and slice them into ½-inch wedges. Don’t make them too thin; they’ll shrink as they roast.
Step 2: Season and Roast (20 minutes)
In a small bowl, mix the melted butter, maple syrup, and cinnamon. Toss the pear wedges in this mixture until they’re evenly coated. Spread them out on the baking sheet in a single layer. Do not crowd them! If they’re touching, they’ll steam instead of roast. Roast for 15-20 minutes, flipping halfway through, until they’re golden brown and tender. They should be caramelized at the edges. Watch them closely in the last few minutes; sugar burns fast.
Step 3: Make the Dressing (2 minutes)
While the pears roast, whisk together the olive oil, balsamic vinegar, Dijon mustard, salt, and pepper in a small bowl. Whisk until it looks creamy and emulsified. It should coat the back of a spoon. Taste it. It should be tangy and slightly sweet. Adjust salt if needed.
Step 4: Toast the Nuts (2 minutes)
If your nuts aren’t already toasted, pop them in a dry skillet over medium heat for 2-3 minutes, shaking the pan frequently, until they smell nutty and look golden. Remove from heat immediately so they don’t burn. Let them cool slightly.
Step 5: Assemble the Salad (3 minutes)
Place the mixed greens in a large bowl or divide among plates. Top with the warm roasted pears. Crumble the blue cheese over the top. Sprinkle with the toasted nuts. Drizzle generously with the dressing. Toss gently if serving in a bowl, or leave it stacked for a pretty presentation.
Total Time: About 25 minutes (5 minutes prep, 20 minutes roasting)
Built-in Troubleshooting:
- Pears are too hard: Roast them for 5 more minutes.
- Pears are too soft: You roasted them too long. Next time, check at 15 minutes.
- Dressing is too thick: Add a teaspoon of water or more vinegar.
- Dressing is too thin: Add a teaspoon more mustard or olive oil.
Expert Tips & Tricks
Here’s everything I’ve learned from making this dozens of times. These tips will save you from my mistakes.
Choose the Right Pear
This is crucial. Bosc pears are tall and firm. Anjou are rounder and softer. Red pears are pretty but turn to mush. If you can’t find Bosc, Anjou is your best bet. Avoid ripe kiwis or bananas; they don’t work here.
Don’t Skip the Toasting
Raw nuts are fine, but toasted nuts add a depth of flavor that makes the salad feel expensive. It takes two minutes and makes a huge difference. I learned this the hard way with a sad, soft salad that lacked crunch.
Warm Pears, Cold Greens
The contrast between warm pears and cool greens is the best part. Don’t let the pears cool down completely before adding them to the salad. Serve them while they’re still slightly warm.
Blue Cheese Quantity
Start with 4 ounces. If you’re a blue cheese lover, go to 6 ounces. It’s the main flavor driver. Don’t be shy. If you’re sensitive to blue, use less and add more croutons for texture.
Emulsify the Dressing
Whisk the dressing vigorously until it’s creamy. This ensures the oil and vinegar stay together and coat every leaf. If you just pour them on, you’ll get a pool of oil at the bottom of the bowl.
Variations & Substitutions
Once you’ve nailed the basic version, here’s how you can mix it up. I’ve tried all of these.
Chicken Version
Add 2 cups diced cooked chicken (rotisserie works great) when you assemble. My husband prefers this version—makes it more filling. You can also add roasted chicken for extra flavor.
Veggie-Loaded
Toss in 1 cup of arugula and ½ cup of sliced radishes. The radishes add a nice crunch and peppery bite. This is how I get my kids to eat vegetables.
Cheese Swap
Not a fan of blue? Use feta or goat cheese. Feta is saltier, so reduce the salt in the dressing. Goat cheese is tangy and creamy. Both work well.
Nut Swap
Walnuts are classic, but pecans, almonds, or pistachios also work. If you have a nut allergy, skip them or use seeds like pumpkin seeds (pepitas) for crunch.
Dietary Modifications:
- Gluten-Free: This recipe is naturally gluten-free. Just check your blue cheese for any anti-caking agents (rare, but possible).
- Dairy-Free: Replace butter with olive oil in the pears, and use a dairy-free blue cheese alternative or nutritional yeast. The dressing is already dairy-free.
- Vegan: Use maple syrup instead of honey (if using honey), dairy-free cheese, and skip the butter. It’s not the same, but it’s still good.
Serving & Storage
How to Serve:
I usually serve this straight from the bowl at the dinner table—it looks rustic and stays warm. But here are other ways I’ve enjoyed it:
Side Dishes:
- Garlic bread (obviously)
- A simple charcuterie board with crackers and cured meats
- Roasted sweet potatoes
- A warm baked brie appetizer before the salad
Storage Instructions:
Refrigerator: Store in an airtight container for up to 2 days. The greens will wilt, so it’s best to store the pears and greens separately. The pears will get softer, which is fine.
Reheating: You can reheat the pears in the microwave for 30 seconds. Do not reheat the greens or the cheese. They’ll get weird.
Freezing: Do not freeze this salad. The greens will turn to slime, and the cheese will separate. Make it fresh.
Nutrition Information
I’m not a nutritionist, but here’s the breakdown if you’re tracking. Per serving (based on 4 servings):
| Nutrient | Amount |
|---|---|
| Calories | 320 |
| Protein | 12g |
| Carbs | 35g |
| Fiber | 6g |
| Fat | 18g |
| Sodium | 450mg |
It’s not a diet recipe. It has cheese and oil. But it’s packed with fiber from the pears and greens, and the healthy fats from the walnuts. It’s a balanced meal that keeps you full. When I want to make it lighter, I use less cheese and more greens. But usually? I just eat a reasonable portion and enjoy it.
Final Thoughts
So that’s my go-to fall roasted pear and blue cheese salad with simple ingredients. I’ve probably talked your ear off at this point, but when you make a recipe this often, you have a lot to say about it.
This has saved weeknight dinners more times than I can count. It’s my answer to “what’s for dinner” when I’m tired, don’t want takeout, and still want something that tastes really good. My kids are happy, my husband’s happy, and I’m happy because I’m not stressed about cooking.
Make it yours! Try different nuts, swap the cheese, adjust the sweetness. The best recipes are the ones you adapt to your family’s tastes. If you make this, drop a comment and let me know what you think! I love hearing how recipes turn out in your kitchen. And if something doesn’t work, tell me that too—I’m here to help troubleshoot.
Happy cooking! And I hope your kitchen smells half as good as mine does right now.
Frequently Asked Questions
Q: Can I use raw pears instead of roasted?
A: You can, but roasted pears are so much better. The caramelization adds a depth of flavor that raw pears just don’t have. If you’re in a rush, you can slice them thin and microwave them for 2 minutes to soften them slightly, but roasting is worth the wait.
Q: What kind of blue cheese is best?
A: Gorgonzola Dolce is my favorite because it’s creamy and mild. Roquefort is stronger and saltier. Stilton is crumbly and sharp. Choose based on your preference. If you’re new to blue cheese, start with Gorgonzola.
Q: Can I make this ahead for a dinner party?
A: Sort of. Roast the pears up to 2 days ahead and store in the fridge. Reheat them gently before serving. Make the dressing and toast the nuts the day of. Assemble right before serving so the greens don’t wilt.
Q: Why did my pears turn out mushy?
A: They were probably too ripe or you roasted them too long. Pears should be firm but yield slightly to pressure. Roast them for 15-20 minutes max. Flip them halfway through to ensure even cooking.
Q: Can I use honey instead of maple syrup?
A: Yes, honey works well. It’s sweeter and less complex than maple, but it still caramelizes nicely. I prefer maple for the fall flavor, but honey is fine.
Q: How do I reheat leftovers without it getting dry?
A: Reheat the pears in the microwave for 30 seconds. The greens and cheese should be served cold. If the greens are wilted, toss them with a little fresh oil before serving.
Q: Can I double this recipe?
A: Absolutely! Double everything and use two baking sheets. Make sure you don’t crowd the pears; they need space to roast. If you’re feeding a crowd, this is a great way to make a big batch.
Pin This Recipe!
Fall Roasted Pear and Blue Cheese Salad
- Total Time: 25 minutes
- Yield: 4 servings 1x
Description
A quick, 5-step weeknight salad featuring caramelized roasted pears, creamy blue cheese, and toasted nuts on a bed of mixed greens with a simple balsamic dressing.
Ingredients
- 2 large Bosc or Anjou pears, peeled, cored, and sliced into ½-inch wedges
- 2 tablespoons real maple syrup
- 1 tablespoon unsalted butter, melted
- ½ teaspoon cinnamon
- 5–6 ounces mixed greens (spring mix or baby arugula)
- 4 ounces blue cheese (such as Gorgonzola Dolce), crumbled
- ½ cup walnuts or pecans, toasted
- 3 tablespoons extra virgin olive oil
- 1 tablespoon balsamic vinegar
- 1 teaspoon Dijon mustard
- Salt and black pepper to taste
Instructions
- Preheat oven to 400°F (200°C). Line a baking sheet with parchment paper.
- In a small bowl, mix melted butter, maple syrup, and cinnamon. Toss pear wedges in the mixture to coat evenly.
- Spread pears in a single layer on the baking sheet. Roast for 15-20 minutes, flipping halfway, until golden brown and tender.
- While pears roast, whisk together olive oil, balsamic vinegar, Dijon mustard, salt, and pepper in a small bowl until emulsified.
- Toast nuts in a dry skillet over medium heat for 2-3 minutes until fragrant and golden. Let cool slightly.
- Place mixed greens in a large bowl or on plates. Top with warm roasted pears, crumbled blue cheese, and toasted nuts.
- Drizzle generously with dressing and serve immediately.
Notes
For best results, use firm but ripe pears like Bosc or Anjou. Avoid red pears as they become mushy. Toasting the nuts adds significant flavor. Serve pears while still warm for the best texture contrast with cold greens. Store leftovers separately to prevent wilting.
- Prep Time: 5 minutes
- Cook Time: 20 minutes
- Category: Salad
- Cuisine: American
Nutrition
- Serving Size: 1 bowl
- Calories: 320
- Sugar: 24
- Sodium: 450
- Fat: 18
- Saturated Fat: 5
- Carbohydrates: 35
- Fiber: 6
- Protein: 12
Keywords: fall salad, roasted pear, blue cheese salad, quick dinner, weeknight meal, healthy salad, vegetarian recipe


