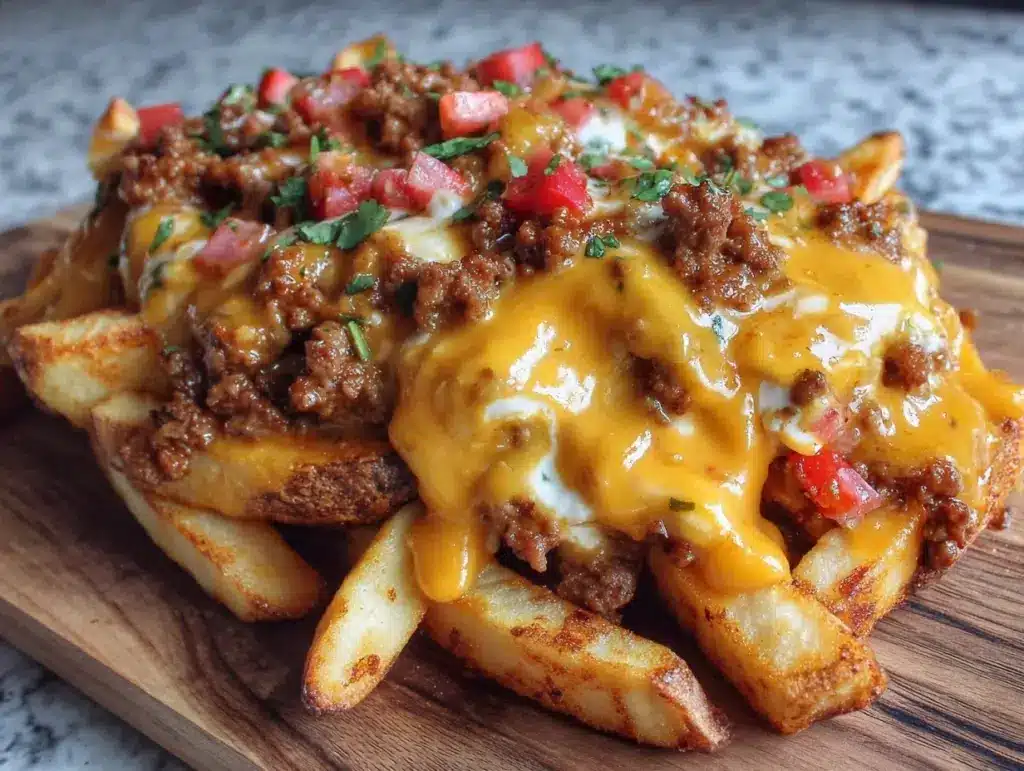
Last Sunday, the game was on, the house was loud, and I realized with horror that I had zero snacks. No chips. No dip. No anything. My kids were already raiding the pantry for cereal, and my husband was eyeing the leftover pizza crusts like they were gold bars. I needed something fast, something messy (in the best way), and something that would stop the snack hunger before the first quarter ended. So I did what any desperate home cook does: I dumped fries in a bowl, poured cheese on them, threw on some leftover seasoned beef, and called it a day.
It should have been mediocre. It should have been soggy and sad. Instead, it was the best thing we ate all week. I’m not exaggerating. My kids, who usually turn their noses up at “fancy” food, scraped their bowls clean. My husband asked me to make it again the next day. That’s when I knew I had struck gold. This loaded nacho cheese fries with seasoned beef recipe isn’t just a snack; it’s a lifeline for game day, movie night, or any night when you need dinner to feel like a cheat day without the guilt of ordering takeout.
I’ve tested this recipe at least a dozen times since that desperate Sunday. I’ve tried different cheeses, different beef seasonings, and different fry styles. Some worked better than others. But the version I’m sharing with you today? It’s the winner. It’s crispy, it’s cheesy, it’s packed with flavor, and it comes together in about 20 minutes. You don’t need to be a chef to pull this off. You just need to be hungry.
Why You’ll Love This Recipe
There are a million ways to eat fries, but this loaded nacho cheese fries with seasoned beef version hits a specific sweet spot. It’s hearty enough to be a meal, but fun enough to be a snack. Here’s why it keeps ending up on our table:
- Stupid Simple Assembly — Seriously, if you can boil water and microwave cheese, you can make this. I’ve made this while helping my middle schooler with math homework. The active cooking time is basically just heating up the beef and melting the cheese.
- Uses Up Leftovers — This is the best part. That seasoned beef? It’s perfect for tacos. But if you have a cup or two left over (or even just some ground beef you browned for another meal), this is the way to use it. It transforms leftovers into a star dish. If you don’t have leftover beef, browning fresh ground beef takes less than 10 minutes.
- Customizable to the Max — My son likes it with jalapeños. My daughter prefers it with just cheese and beef. My husband wants it with sour cream and green onions. This recipe is a blank canvas. You throw on whatever your family loves, and it works. It’s less fussy than making loaded nacho cheese wonton cups because you don’t have to worry about the cups breaking.
- Lightning Fast — From fridge to table in 20 minutes. That’s faster than waiting for a delivery driver. And it’s way cheaper. We spent about $8 on ingredients to feed four people with big appetites.
- Crowd-Pleaser — I’ve served this to picky eaters, carnivores, and even my vegetarian friend (who just skipped the beef and added extra beans). Everyone leaves happy. It’s the ultimate comfort food.
This is my go-to when I need dinner to just work. No complicated techniques, no weird ingredients, just reliable, delicious food that makes everyone happy. And let’s be real—game day snacks should be fun, not stressful. This recipe is stress-free.
Ingredients You’ll Need
Here’s the best part: you probably have most of this already. It’s pantry-friendly and freezer-friendly. I’m particular about three things here—the beef seasoning, the cheese quality, and the fry type—and I’ll tell you exactly why.
For the Beef Base
Ground beef (1 pound / 450g) — I use 80/20 lean-to-fat ratio. It’s juicy and flavorful. Leaner beef gets dry. If you’re using leftover cooked beef, about 1.5 cups works perfectly. Brown it first, then set aside.
Taco seasoning (1 packet / 1 ounce) — Or make your own! I keep a jar of homemade mix (cumin, chili powder, paprika, garlic powder, salt) ready to go. If you’re making your own, use about 2 tablespoons. It tastes fresher and you control the salt.
Water or broth (¼ cup / 60ml) — Just enough to help the seasoning stick to the beef and create a little sauce. I use broth for extra flavor, but water works fine.
Black beans (1 can / 15 ounces, drained and rinsed) — Optional but recommended. It adds bulk, protein, and that classic nacho texture. I always have a can in the pantry. If you’re skipping beans, add a little extra beef or some corn.
Corn (½ cup / 75g, frozen or canned) — Sweet corn adds a nice pop of texture and color. It’s not traditional in nachos, but it’s my secret weapon. It makes the dish feel more complete.
For the Fries
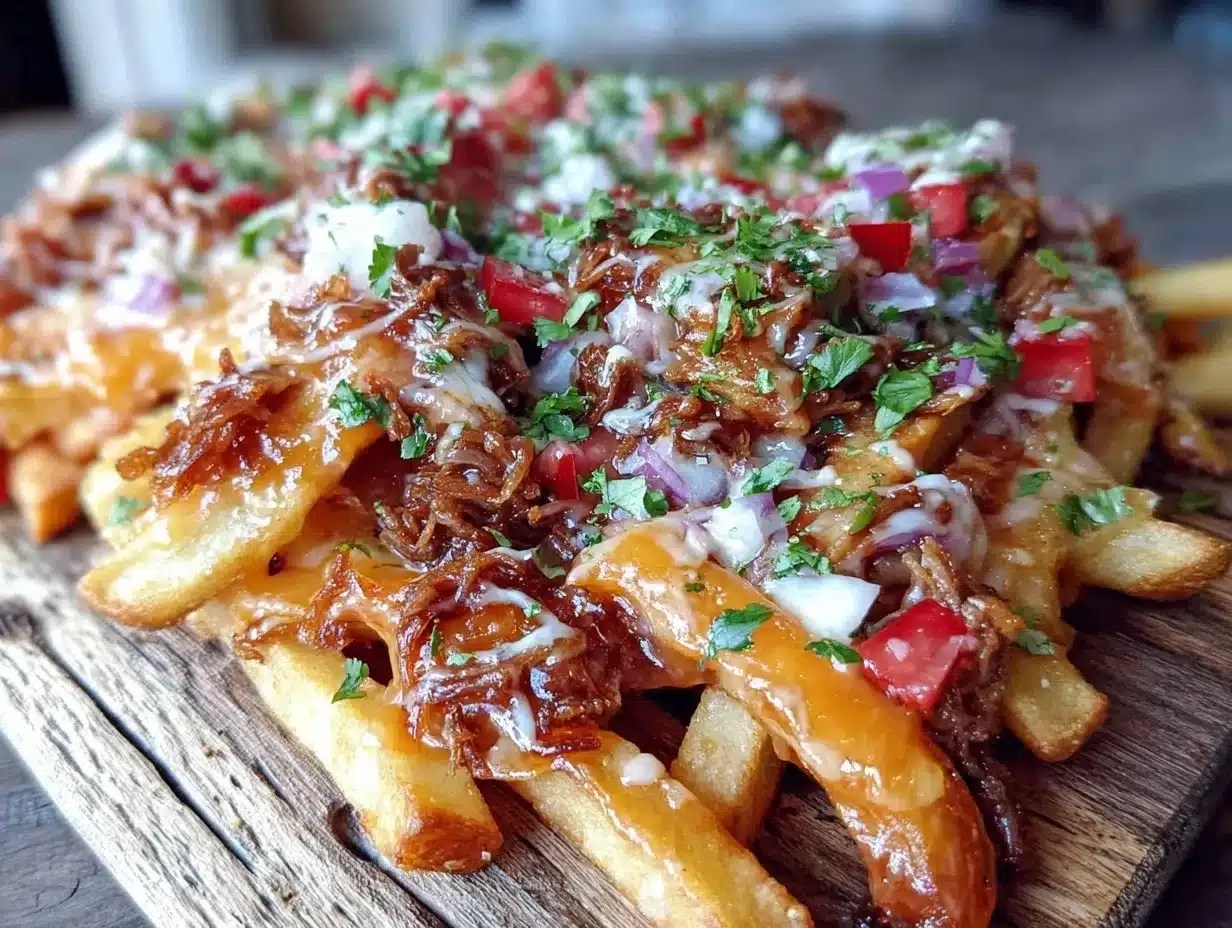
French fries (1 large bag / 2-3 pounds) — Here’s where I get picky. I use thick-cut frozen fries, like steak fries or crinkle-cut. Thin shoestring fries get soggy too fast under the cheese. You need something sturdy. I always buy store-brand thick-cut fries; they’re cheap and they hold up well. If you have time, make homemade fries, but for game day? Frozen is the way to go.
For the Cheese Sauce
Cheddar cheese (2 cups / 200g, freshly grated) — Buy a block and grate it yourself. Pre-grated cheese has anti-caking agents that prevent it from melting smoothly. You want that silky, gooey texture. Sharp cheddar tastes best. If you want a milder flavor, mix in some Monterey Jack.
Cream cheese (2 ounces / 56g, softened) — This is the secret ingredient. It makes the cheese sauce creamy and stable so it doesn’t separate. It’s not traditional in nacho cheese, but it works wonders. I learned this trick from a friend who runs a food truck. Trust me on this.
Milk (2-3 tablespoons / 30-45ml) — Just enough to thin the cheese sauce to a drizzle-able consistency. Whole milk works best, but any milk is fine.
For the Toppings
Sour cream (½ cup / 120g) — Cool and tangy, it cuts through the richness of the cheese and beef. Use full-fat for the best flavor.
Green onions (2-3 stalks, sliced) — Adds a fresh, oniony bite. It’s garnish, but it’s essential. It makes the dish look like you tried.
Jalapeños (½ cup / 75g, sliced) — Fresh or pickled, your choice. I like pickled jalapeños for their tang. If you can’t handle heat, skip them or use mild peppers.
Tomatoes (1 medium, diced) — Fresh diced tomatoes add brightness. If you’re in a rush, use jarred salsa instead. It’s easier and still delicious.
Equipment Needed
You don’t need fancy equipment for this. Here’s what I actually use.
Large skillet or frying pan — 10-12 inch works best. I use a stainless steel skillet because it browns the beef nicely. Non-stick works too if you’re worried about sticking.
Baking sheet or oven-safe dish — I like to pile the fries on a baking sheet so they stay crispy. If you’re serving family-style, a large platter works. Just make sure it’s big enough to hold all the fries.
Microwave-safe bowl — For melting the cheese sauce. I use a large glass measuring cup because it’s easy to pour. A small bowl works if you stir frequently.
Wooden spoon or spatula — For stirring the beef. Silicone works too.
Box grater — For grating the cheese. Or a food processor with a grating attachment if you’re grating lots of cheese. Grating takes 3 minutes, but it makes a huge difference.
Colander — For draining the beans and corn.
How to Make It: Step-by-Step
Alright, let’s make this! I’m walking you through exactly how I do it, including the little tricks I’ve picked up.
Step 1: Prep Your Beef (5-7 minutes)
Heat your large skillet over medium-high heat. Add the ground beef, breaking it up with a wooden spoon as it cooks. Cook until browned, about 5-6 minutes. Drain any excess fat if there’s a lot, but leave a little for flavor. Stir in the taco seasoning and water (or broth). Let it simmer for 1-2 minutes until the liquid reduces and coats the beef. Stir in the drained black beans and corn. Keep warm on low heat.
Step 2: Cook the Fries (15-20 minutes)
While the beef cooks, prepare the fries according to package directions. If using frozen fries, bake them in the oven until crispy and golden. I usually bake them at 425°F (220°C) for 15-20 minutes, flipping halfway through. If you’re using an air fryer, cook at 400°F (200°C) for 10-12 minutes. The key is to get them crispy. Soggy fries are the enemy. Once done, spread them out on a large baking sheet or platter.
Step 3: Make the Cheese Sauce (3-4 minutes)
In a microwave-safe bowl, combine the softened cream cheese, grated cheddar, and milk. Microwave in 30-second intervals, stirring well between each interval, until smooth and creamy. This usually takes about 1-2 minutes total. Be careful not to overheat, or the cheese can become grainy. Stir until it’s a smooth, pourable sauce. If it’s too thick, add another tablespoon of milk.
Step 4: Assemble the Loaded Fries (2 minutes)
Spread the hot, crispy fries evenly on your serving platter or baking sheet. Sprinkle the seasoned beef mixture over the fries, distributing it evenly. Then, drizzle the cheese sauce generously over the top. You want every fry to get some cheese. If you’re serving immediately, you can put the whole platter under the broiler for 1-2 minutes to melt the cheese even more and get it bubbly. Watch it closely so it doesn’t burn.
Step 5: Add Toppings and Serve
Once the cheese is melted, remove from heat. Immediately add the sour cream, diced tomatoes, sliced jalapeños, and green onions. Serve right away while everything is hot and crispy. These are best eaten with hands, so have plenty of napkins ready.
Total Time: About 25 minutes (5 minutes active prep, 20 minutes cooking)
Troubleshooting Tips
- Fries getting soggy? Don’t pile the toppings on too early. Let the fries cool slightly after baking before adding the heavy toppings. Or serve in small batches.
- Cheese sauce too thick? Add milk one teaspoon at a time. It should coat the back of a spoon but still drizzle easily.
- Cheese sauce too thin? Add more grated cheese and stir until it thickens. Or microwave for another 15 seconds.
Expert Tips & Tricks
Here’s everything I’ve learned from making this dozens of times. These tips will save you from my mistakes.
Grate Your Own Cheese
This is non-negotiable. Pre-grated cheese is coated in cellulose to keep it from clumping. That stuff doesn’t melt. It just sits there. Grate a block of sharp cheddar. It takes 3 minutes and makes the sauce silky smooth. My kids can tell the difference. They’ll ask, “Did you grate the cheese yourself?” If I say no, they lose interest.
Don’t Skimp on the Cream Cheese
I know it sounds weird in nacho cheese. But the cream cheese stabilizes the sauce. It prevents the cheese from breaking and becoming oily. It also adds a tangy creaminess that pairs perfectly with the sharp cheddar. Use softened cream cheese, or it won’t mix smoothly.
Keep the Fries Crispy
The biggest challenge with loaded fries is sogginess. To combat this, bake your fries on a wire rack set over a baking sheet. This allows air to circulate underneath, keeping the bottom crispy. If you don’t have a wire rack, bake them directly on the sheet but leave space between each fry. Don’t overcrowd the pan.
Season the Beef Well
The beef is the main protein, so it needs to taste good on its own. Don’t just sprinkle seasoning on top. Mix it in with the water or broth so it penetrates the meat. Taste it before you put it on the fries. Adjust salt and spice to your liking.
Make it Ahead (Sort Of)
You can prep the beef and cheese sauce ahead of time. Store the cooked beef in the fridge for up to 2 days. Reheat it gently before assembling. The cheese sauce can be made ahead and reheated, but it may thicken. Just add a splash of milk when reheating. But the fries should always be cooked fresh for best texture.
Variations & Substitutions
Once you’ve nailed the basic version, here’s how you can mix it up. I’ve tried all of these.
Turkey Version
Swap ground beef for ground turkey. Use 93% lean turkey for moisture. Season it the same way. It’s lighter but still delicious. My health-conscious sister loves this version.
Veggie Loaded
Skip the beef entirely. Add a can of refried beans or black beans to the skillet with the corn and seasonings. It’s hearty and filling. Add extra veggies like bell peppers and mushrooms when sautéing the beef (or skip that step). This is how I get my kids to eat vegetables.
Chicken Version
Use shredded rotisserie chicken instead of beef. Toss it with the taco seasoning and warm it through. It’s quicker and still tastes great. I do this when I have leftover chicken.
Spicy Kick
Add diced green chilies to the cheese sauce. Or use pepper jack cheese instead of cheddar. Add hot sauce to the beef. If you like heat, this version is for you.
Gluten-Free
This recipe is naturally gluten-free as long as you check your taco seasoning (some brands have wheat flour as a thickener) and use gluten-free fries. Most major brands are GF, but always check the label.
Dairy-Free
Use dairy-free cheddar shreds and dairy-free cream cheese. The texture might be slightly different, but it still works. I’ve made this for my lactose-intolerant friend, and she loved it. Just stir well to ensure the dairy-free cheese melts smoothly.
Serving & Storage
How to Serve:
I usually serve this straight from the oven at the dinner table—it looks rustic and stays warm. But here are other ways I’ve enjoyed it:
- Game Day Spread: Pair with a simple green salad or pickled red onions to cut the richness. Also great with everything bagel crackers for dipping.
- Movie Night: Serve in individual bowls so everyone can customize their own. Add extra napkins—these are messy in the best way.
- Wine Pairing: Not a wine expert, but a crisp IPA beer or a light Pinot Grigio works great with this.
Storage Instructions:
Refrigerator:
Store leftovers in an airtight container for up to 3 days. The fries will lose some crispiness, but they’re still good. The beef and cheese sauce keep well.
Reheating:
Best method: Spread fries on a baking sheet and reheat in a 400°F (200°C) oven for 5-7 minutes to restore crispiness. Warm the beef and cheese sauce separately in the microwave or on the stove. Reassemble with fresh toppings.
Microwave method: Heat in 30-second intervals, stirring between. The fries will get chewy, not crispy, but it’s faster. Add a splash of milk to the cheese sauce when reheating.
Freezing:
Honestly, this doesn’t freeze well. The fries get mushy when thawed and reheated, and the cheese sauce can separate. Make it fresh or store in the fridge for up to 3 days.
Pro tip: If you have leftovers, use the beef and cheese sauce to top baked potatoes the next day. It’s a great way to use them up.
Nutrition Information
I’m not a nutritionist, but here’s the breakdown if you’re tracking.
Per Serving (based on 6 servings):
– Calories: 520
– Protein: 22g
– Carbs: 45g
– Fiber: 4g
– Sugar: 3g
– Fat: 28g
– Saturated Fat: 12g
– Cholesterol: 65mg
– Sodium: 850mg
– Calcium: 300mg
What’s Good:
– High protein from beef and cheese
– Calcium from the cheese
– Fiber from beans and corn
– Can add vegetables to boost nutrition
What to Know:
– Higher in calories from fries and cheese
– Contains dairy and gluten (unless modified)
– Moderate sodium (use low-sodium taco seasoning and broth to reduce)
My Take:
Look, this is comfort food with fries and cheese. It’s not a diet recipe. But it’s way better than takeout, costs less, and I know exactly what’s in it. When I want to make it lighter, I use baked fries and turkey. But usually? I just eat a reasonable portion and enjoy it.
Final Thoughts
So that’s my loaded nacho cheese fries with seasoned beef! I’ve probably talked your ear off at this point, but when you make a recipe this often, you have a lot to say about it.
This has saved game day dinners more times than I can count. It’s my answer to “what’s for snacks” when I’m tired, don’t want to drive to the store, and still want something that tastes really good. My kids are happy, my husband’s happy, and I’m happy because I’m not stressed about cooking.
Make it yours! Try different add-ins, swap in your favorite vegetables, adjust the spice level. The best recipes are the ones you adapt to your family’s tastes. And if you’re looking for other easy party snacks, check out these crispy air fryer ravioli or bacon-wrapped water chestnuts for more crowd-pleasers.
If you make this, drop a comment and let me know what you think! I love hearing how recipes turn out in your kitchen. And if something doesn’t work, tell me that too—I’m here to help troubleshoot.
Happy cooking! And I hope your kitchen smells half as good as mine does right now.
Frequently Asked Questions
Q: Can I use sweet potato fries instead?
A: Absolutely! Sweet potato fries work great and add a nice sweetness. Just note that they might get softer faster than regular fries, so assemble them right before serving. I love the combo of sweet potato fries and spicy jalapeños.
Q: Can I make the cheese sauce ahead of time?
A: Yes, but it will thicken as it cools. When you reheat it, add a splash of milk and whisk until smooth. It’s best made fresh, but if you’re short on time, this works. Just don’t let it sit out for more than 2 hours.
Q: Why did my cheese sauce separate?
A: The heat was too high. Cheese sauce needs gentle heat. Always melt it in short intervals in the microwave or over low heat on the stove. Stir frequently. If it breaks, add a splash of cold milk and whisk vigorously to bring it back together.
Q: Can I use pre-shredded cheese?
A: You can, but the sauce won’t be as smooth. Pre-shredded cheese has anti-caking agents that prevent it from melting fully. If you must use it, add an extra tablespoon of cream cheese to help it emulsify. But grate your own if you can.
Q: How do I keep the fries crispy?
A: Bake them on a wire rack if possible. Don’t overcrowd the baking sheet. And don’t add the wet toppings (sour cream, tomatoes) until right before serving. The steam from hot toppings will make the fries soggy if they sit too long.
Q: Can I freeze the leftover beef?
A: Yes! The seasoned beef freezes well for up to 3 months. Store it in an airtight container or freezer bag. Thaw in the fridge and reheat before using in this recipe or for tacos.
Q: What’s the best taco seasoning to use?
A: I prefer homemade because you control the salt and spice level. But store-bought works fine too. Just check the label for additives if you’re watching sodium. McCormick is a reliable brand I’ve used many times.
Pin This Recipe!
Loaded Nacho Cheese Fries with Seasoned Beef
- Total Time: 25 minutes
- Yield: 6 servings 1x
Description
A fast, customizable, and crowd-pleasing game day snack or meal made with crispy fries, seasoned ground beef, and a creamy homemade cheese sauce.
Ingredients
- 1 pound (450g) ground beef (80/20 lean-to-fat ratio)
- 1 packet (1 ounce) taco seasoning (or 2 tablespoons homemade mix)
- ¼ cup (60ml) water or broth
- 1 can (15 ounces) black beans, drained and rinsed
- ½ cup (75g) corn (frozen or canned)
- 2–3 pounds thick-cut frozen french fries
- 2 cups (200g) freshly grated sharp cheddar cheese
- 2 ounces (56g) cream cheese, softened
- 2–3 tablespoons milk
- ½ cup (120g) sour cream
- 2–3 stalks green onions, sliced
- ½ cup (75g) jalapeños, sliced
- 1 medium tomato, diced
Instructions
- Heat a large skillet over medium-high heat. Add ground beef and cook until browned, breaking it up with a spoon (5-6 minutes). Drain excess fat if desired, leaving some for flavor.
- Stir in taco seasoning and water (or broth). Simmer for 1-2 minutes until liquid reduces and coats the beef.
- Add drained black beans and corn to the beef mixture. Keep warm on low heat.
- While beef cooks, prepare fries according to package directions. Bake at 425°F (220°C) for 15-20 minutes until crispy and golden, flipping halfway. Spread cooked fries on a baking sheet or platter.
- In a microwave-safe bowl, combine softened cream cheese, grated cheddar, and milk. Microwave in 30-second intervals, stirring well between each, until smooth and creamy (1-2 minutes total). Add more milk if needed for consistency.
- Spread hot fries evenly on the serving platter. Sprinkle seasoned beef mixture over the fries.
- Drizzle cheese sauce generously over the top. Optionally, broil for 1-2 minutes to melt cheese further, watching closely to prevent burning.
- Remove from heat and immediately top with sour cream, diced tomatoes, jalapeños, and green onions. Serve immediately.
Notes
Grate your own cheese for a smoother sauce; pre-grated cheese contains anti-caking agents that prevent melting. For crispier fries, bake on a wire rack. The recipe is naturally gluten-free if you verify your taco seasoning and fries. Dairy-free and turkey variations are available.
- Prep Time: 5 minutes
- Cook Time: 20 minutes
- Category: Main Course
- Cuisine: American
Nutrition
- Serving Size: 1 serving (approx. 1
- Calories: 520
- Sugar: 3
- Sodium: 850
- Fat: 28
- Saturated Fat: 12
- Carbohydrates: 45
- Fiber: 4
- Protein: 22
Keywords: loaded fries, nacho cheese fries, game day snack, seasoned beef, easy dinner, comfort food, party appetizer, quick meals


