It was 6:30 AM on a Saturday, and my house smelled like burnt sugar and regret. I had tried to be “healthy” by making those fancy fruit-and-nut waffles from the freezer, but they came out soggy in the middle and crispy on the edges in that weird, uneven way that makes you question your life choices. My husband was staring at his plate with that look—the one that says, “Is this it? Is this our weekend breakfast from now on?”
I was done. I was so done with breakfast that felt like an afterthought. I wanted something that tasted like a diner special but felt like I’d actually cared. I wanted crunch. I wanted sharp cheddar. I wanted something that didn’t require me to stand over a griddle for an hour while my kids demanded toast.
That’s when I grabbed a bag of frozen hash browns and a block of cheddar. I thought, “What if I put hash browns in the waffle iron?” It sounded ridiculous. It sounded like a hack you’d see on TikTok and immediately forget. But I threw them in, pressed down, and waited.
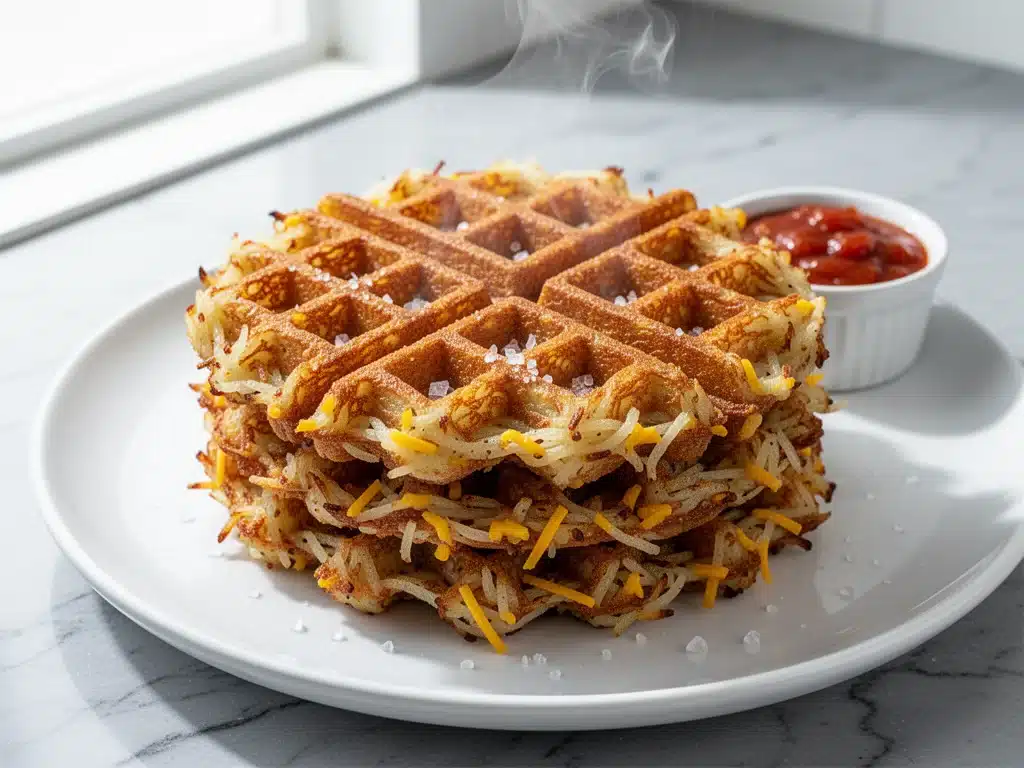
When the timer dinged, I opened the lid. The smell hit me first—earthy potatoes, salty cheese, and that unmistakable, comforting aroma of hot waffles. But when I lifted one out? It was golden, shatteringly crisp, and held together perfectly. It was, without a doubt, the best thing I’d eaten for breakfast in years. Better than takeout. Better than frozen. Better than any fancy cafe hash brown I’ve ever paid $12 for.
These Crispy Cheddar Hash Brown Waffles have become our Saturday ritual. They’re make-ahead friendly (yes, really), they reheat beautifully in a toaster, and they’ve completely replaced my old routine. I’ve tested this method at least fifteen times, tweaking the cheese ratio and the waffle iron temperature, and I’m finally confident enough to share the exact way to get that perfect crunch every single time. If you’re tired of bland, soggy breakfasts, this is your new obsession.
Why You’ll Love This Recipe
I know what you’re thinking: “Hash browns in a waffle iron? Really?” Trust me. Once you take that first bite, you’ll never look at breakfast the same way again. Here’s why this recipe has taken over my kitchen:
- Actually Crispy, Not Soggy — The waffle iron’s intense, direct heat crisps up the frozen hash browns in a way a skillet just can’t match. The ridges create more surface area for that golden-brown crunch. I’ve tried making them in a pan before, and they always steamed instead of crisped. This method? Pure magic.
- Zero Prep, Maximum Flavor — Seriously, if you can shred cheese and scoop potatoes, you can make this. No boiling, no frying, no mess. I keep frozen shredded hash browns stocked in my freezer specifically for this. It’s my “I don’t want to think but I want to eat well” hack.
- Make-Ahead Friendly — This is the game-changer. You can make a whole batch of waffles, let them cool on a wire rack, and freeze them. Reheat them in a toaster or toaster oven for 2-3 minutes, and they come out tasting freshly made. I make these on Sunday mornings for the rest of the week.
- Savory Satisfaction — Most breakfasts are carb-heavy and sweet. These are savory, salty, and cheesy. They pair perfectly with eggs, bacon, or even just a dollop of sour cream and chives. They feel indulgent but actually fuel you.
- Crowd-Pleaser Factor — My picky teenage son, who usually only eats pancakes, asks for these weekly. My husband loves them with his coffee. Even my vegetable-hating in-laws were impressed. It’s one of those dishes that just works.
This recipe has saved my weekends. It’s the answer to “what’s for breakfast?” when I want to feel fancy but also lazy. No complicated techniques, no weird ingredients, just reliable, delicious food that makes everyone happy.
Ingredients You’ll Need
Here’s the best part: you probably have most of this already. I’m particular about two ingredients here—the potatoes and the cheese—and I’ll tell you exactly why they matter.
For the Base:
Frozen shredded hash browns (20 oz / 565g) — Do not use diced hash browns. Do not use fresh potatoes unless you’re willing to grate them yourself and squeeze out every drop of water. I use the bag of frozen shredded hash browns found in the freezer section. They’re pre-cooked slightly, which helps them crisp up faster. Brands like Ore-Ida work great, but any plain shredded variety is fine.
Sharp cheddar cheese (1.5 cups / 150g, shredded) — I use sharp cheddar for the best flavor punch. Mild cheddar is too subtle and won’t stand up to the potatoes. Grate it yourself from a block. Pre-shredded cheese has anti-caking agents that prevent it from melting smoothly, and you want that gooey, stringy cheese experience. Trust me on this.
Large egg (1 large / ~50g) — This acts as the binder. It holds the hash browns and cheese together so they don’t fall apart in the waffle iron. Don’t skip it. Room temperature works best, but cold is fine.
For the Flavor:
Garlic powder (1 teaspoon / ~3g) — Adds a savory depth that pairs perfectly with the cheese. Fresh garlic can burn in the waffle iron, so powder is safer and more consistent.
Onion powder (1 teaspoon / ~3g) — Complements the garlic. Again, powder is better here than fresh, which can get too sharp or charred.
Smoked paprika (½ teaspoon / ~1g) — This is my secret weapon. It adds a subtle smokiness that makes the waffles taste like they were cooked over an open fire. It’s not spicy, just smoky. If you don’t have it, regular paprika works, but smoked is better.
Salt and black pepper (½ teaspoon salt, ¼ teaspoon pepper) — Adjust to taste. Since the cheese is salty, start with less salt and add more if needed.
For Cooking:
Cooking spray — Non-stick cooking spray is essential. Waffle irons can be sticky, especially with cheese. I use avocado oil spray because it has a high smoke point, but regular Pam works too.
Optional Add-ins:
Cooked bacon bits (½ cup / 50g) — Crumbled crispy bacon adds a salty, crunchy contrast. I add this if I have leftover bacon from dinner.
Chives (2 tablespoons, chopped) — Fresh chives added after cooking bring a bright, fresh note that cuts through the richness of the cheese.
Personal Tips:
- Brand recommendations: I always use Ore-Ida hash browns because they shred evenly and don’t clump. If you see a brand with large chunks, stick to the shredded kind.
- Shopping shortcuts: I buy the large family-sized bag of hash browns when they’re on sale. They keep forever in the freezer.
- Substitutions: No sharp cheddar? Pepper jack works if you want a little heat. Monterey Jack is too mild. For a dairy-free version, try a vegan cheddar-style shreds, though the melt won’t be quite the same.
- Storage: The cheese block keeps for weeks in the fridge. The hash browns keep indefinitely in the freezer.
Equipment Needed
You don’t need fancy equipment for this. Here’s what I actually use:
Standard Waffle Iron — I use a classic round Belgian-style waffle iron. It doesn’t need to be fancy. My old, slightly dented one from Target works perfectly. Just make sure it’s clean and well-seasoned (if it’s cast iron) or non-stick (if it’s aluminum). A mini waffle maker works too, but you’ll have to cook in smaller batches.
Bowl for Mixing — A medium-sized mixing bowl. Any size works, but make sure it’s big enough to toss the hash browns and cheese together without spilling.
Fork or Whisk — For beating the egg. A fork is fine. You don’t need an electric mixer for this.
Wire Cooling Rack — This is crucial if you’re making a batch ahead. Placing the cooked waffles on a wire rack prevents them from getting soggy. If you stack them on a plate, the steam will soften the bottom layer. I learned this the hard way.
Non-Stick Cooking Spray — Essential. Don’t skip this. Cheese sticks like crazy.
Optional but nice:
- Microplane grater — If you’re grating your own cheese, this makes it fast and easy.
- Toaster or Toaster Oven — For reheating leftovers. A regular toaster works, but a toaster oven gives more even heating.
How to Make It: Step-by-Step
Alright, let’s make these! I’m walking you through exactly how I do it, including the little tricks I’ve picked up to ensure maximum crispiness.
Step 1: Prep the Hash Browns (2 minutes)
Take the frozen shredded hash browns out of the freezer. You don’t need to thaw them completely, but if they’re in a big solid block, break them up with your hands or a fork until they’re loose shreds. If they’re still frozen solid, let them sit on the counter for 5-10 minutes. This makes them easier to mix.
Step 2: Mix the Ingredients (3 minutes)
In your medium bowl, combine the hash browns, shredded cheddar, egg, garlic powder, onion powder, smoked paprika, salt, and pepper. Use your hands or a fork to toss everything together until the cheese and seasonings are evenly distributed. The mixture should look like a loose, cheesy potato salad. If it feels too dry, add a tiny splash of milk or another egg, but usually, the hash browns have enough moisture.
Step 3: Preheat the Waffle Iron (5 minutes)
Plug in your waffle iron and let it preheat fully. This is important. If the iron isn’t hot enough, the hash browns will steam instead of crisp. Most irons have a light that turns green or a sound when they’re ready. Give it an extra minute or two just to be safe.
Step 4: Cook the Waffles (5-7 minutes)
Lightly spray the waffle iron with cooking spray. Scoop about ¾ to 1 cup of the hash brown mixture onto the center of the iron (amount depends on your iron’s size). Spread it out slightly to cover most of the surface, but don’t press it too flat—you want some thickness. Close the lid and cook for 5-7 minutes.
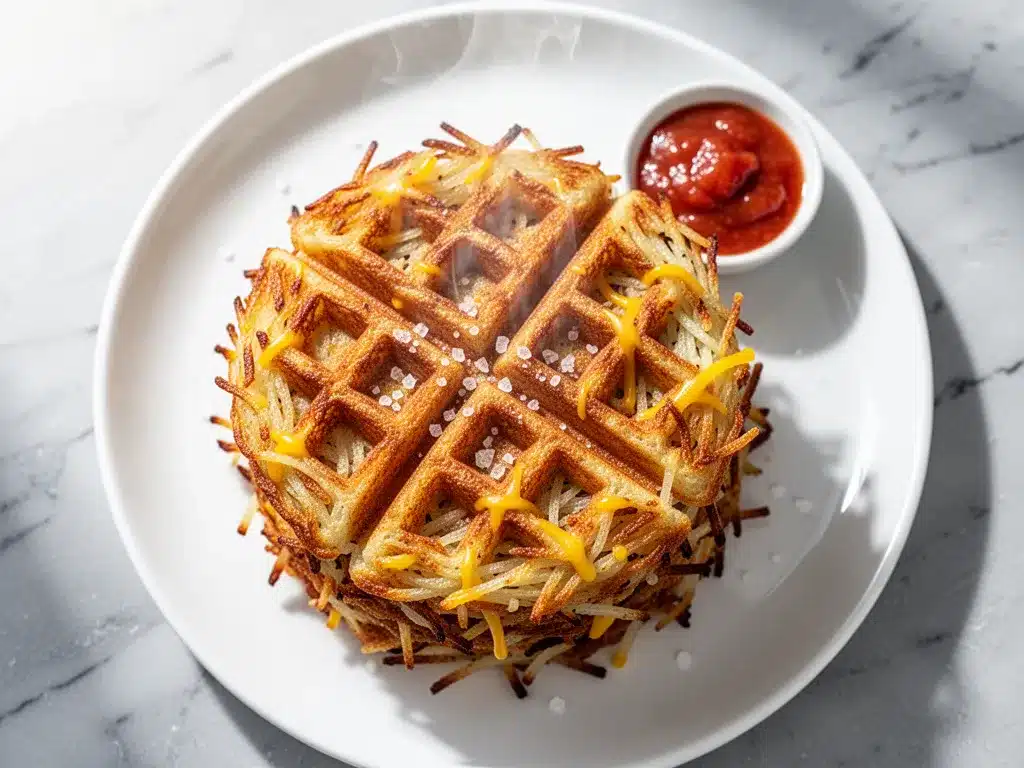
How do you know they’re done? Look for deep golden brown color and hear the sizzling stop. The edges should be crisp, and the cheese should be melted and slightly oozing out. If they’re still pale, give them another minute. Don’t rush this step.
Step 5: Remove and Cool (1 minute)
Use a fork or tongs to gently lift the waffle out. It should release easily if the iron was well-sprayed. Place the waffle on a wire cooling rack. Do not stack them yet. Let them cool for 1-2 minutes. This allows the steam to escape and keeps them crisp.
Step 6: Repeat and Serve
Spray the iron again before each batch. Cook the remaining mixture, spraying between each waffle. Serve immediately with sour cream, salsa, or just butter. They’re best hot and crispy.
Total Time: About 20-25 minutes for one batch (feeds 3-4 people).
Built-in Troubleshooting:
- Waffles sticking? Your iron wasn’t hot enough, or you didn’t spray it enough. Always spray between batches.
- Waffles falling apart? You didn’t use enough egg, or you didn’t mix well enough. The egg is the binder. If they break, just eat them with a fork—it’s still delicious.
- Not crispy enough? Cook them longer. The longer they stay in, the crispier they get. Also, make sure you’re using frozen hash browns, not fresh ones with high water content.
Expert Tips & Tricks
Here’s everything I’ve learned from making this dozens of times. These tips will save you from my mistakes.
Don’t Overcrowd the Iron
I’m tempted to pile it high, but if you put too much mixture in, the center won’t cook, and the edges will burn. Stick to about ¾ cup per waffle. It’s better to make more batches than to have undercooked middles.
Use a Wire Rack
This is the #1 tip for crispy leftovers. If you stack hot waffles on a plate, the steam gets trapped and makes them soggy within minutes. Always use a wire rack. It’s a small step that makes a huge difference.
Grate Your Own Cheese
I know pre-shredded is convenient, but it doesn’t melt the same. Block cheese melts into gooey strands that bind the hash browns better. Pre-shredded cheese stays granular. It’s worth the 3 minutes of grating.
Preheat Thoroughly
I used to think 3 minutes was enough. It’s not. Let your waffle iron heat for a full 5-7 minutes. The hotter the iron, the faster the water evaporates from the hash browns, which means more crispiness.
Freezing for Later
Once the waffles are completely cool, place them in a single layer on a baking sheet and freeze for 1 hour. Then transfer them to a freezer bag. They’ll keep for up to 3 months. Reheat in a toaster for 2-3 minutes. They’ll still be crisp!
Variations & Substitutions
Once you’ve nailed the basic version, here’s how you can mix it up. I’ve tried all of these.
Bacon & Egg Waffles
Add cooked, crumbled bacon and a beaten egg yolk to the mix. Top with a fried egg after cooking. This is my favorite for brunch.
Spicy Jalapeño Waffles
Swap the cheddar for pepper jack cheese. Add 1 diced jalapeño and a pinch of cayenne pepper. Great with salsa.
Veggie-Packed
Mix in ½ cup finely diced onions, bell peppers, or mushrooms. Sauté the veggies first to remove moisture, then add to the mix. This is how I sneak more veggies into breakfast.
Herb & Garlic
Add 1 tablespoon fresh chopped chives and 1 teaspoon dried dill. Skip the paprika. This is lighter and fresher.
Dairy-Free
Use vegan butter in the mix and dairy-free shreds. Add an extra egg or a tablespoon of flax egg for binding. It’s not quite the same, but still tasty.
Gluten-Free
Most hash browns are naturally gluten-free, but check the label. Use a certified gluten-free waffle iron if you’re sensitive. Everything else is GF.
Serving & Storage
How to Serve:
I usually serve these straight from the waffle iron. They’re rustic and hearty. Here are some ideas:
- Sour Cream & Chives: The classic pairing. The creaminess cuts the saltiness.
- Salsa: Great for a Mexican-inspired breakfast.
- Fried Egg: Top with a sunny-side-up egg. The yolk acts as a sauce.
- BBQ Sauce: Surprisingly good. Sweet and smoky.
Storage:
Refrigerator: Store in an airtight container for up to 3 days. They will soften, so reheat to crisp up.
Reheating: Best method: Toaster or toaster oven. 2-3 minutes at medium-high. Second best: Oven at 375°F for 10 minutes. Worst: Microwave. It will make them chewy and sad. Don’t do it.
Freezing: Freeze cooked waffles in a single layer, then bag them. Reheat in toaster. They freeze beautifully.
Nutrition Information
I’m not a nutritionist, but here’s the breakdown if you’re tracking. Per serving (based on 4 servings, 1 waffle each):
| Nutrient | Amount |
|---|---|
| Calories | 280 |
| Protein | 12g |
| Carbs | 32g |
| Fiber | 3g |
| Fat | 14g |
| Sodium | 450mg |
What’s Good: Decent protein from cheese and egg. Fiber from potatoes. What to Know: Higher in sodium due to hash browns and cheese. Use low-sodium hash browns if you’re watching salt. This is comfort food, not a diet recipe. Enjoy it!
Final Thoughts
So that’s my Crispy Cheddar Hash Brown Waffles! I’ve probably talked your ear off at this point, but when you make a recipe this often, you have a lot to say about it.
This has saved my weekends. It’s my answer to “what’s for breakfast?” when I want to feel fancy but also lazy. My kids are happy, my husband’s happy, and I’m happy because I’m not stressed about cooking.
Make it yours! Try different cheeses, add bacon, or swap the spices. The best recipes are the ones you adapt to your family’s tastes.
If you make this, drop a comment and let me know what you think! I love hearing how recipes turn out in your kitchen. And if something doesn’t work, tell me that too—I’m here to help troubleshoot.
Happy cooking! And I hope your kitchen smells half as good as mine does right now.
Frequently Asked Questions
Can I use fresh potatoes instead of frozen?
You can, but it’s trickier. You need to grate the potatoes and squeeze out all the water using a clean kitchen towel. If there’s any moisture, they’ll steam instead of crisp. Frozen hash browns are pre-cooked and dried, which is why they work so well. If you use fresh, expect a longer cook time and less crispiness.
Why did my waffles fall apart?
Usually, this means you didn’t use enough egg, or you didn’t mix the ingredients thoroughly. The egg is the binder. If the mixture is too loose, add another egg. Also, make sure you’re not overfilling the waffle iron. Too much mixture can cause it to spill and break.
Can I make these ahead for a dinner party?
Absolutely! Make the waffles, cool them on a wire rack, and freeze them. Reheat them in a toaster or oven right before serving. They’ll still be crisp and delicious. This is actually the best way to serve them for a crowd.
Can I use mild cheddar?
You can, but the flavor will be much milder. Sharp cheddar has a stronger, tangier taste that stands up to the potatoes. If you only have mild, use a bit more of it, or add some garlic powder and paprika to boost the flavor.
How do I reheat leftovers without them getting soggy?
Never use the microwave. Use a toaster, toaster oven, or regular oven. The dry heat will crisp them back up. If you use a microwave, they’ll become chewy and soft. Toaster oven at 375°F for 5-7 minutes is perfect.
Can I double this recipe?
Yes! Just make sure you have a large enough bowl to mix everything. You’ll also need to cook in more batches, so make sure your waffle iron stays hot between batches. Spray the iron between each batch to prevent sticking.
Are these gluten-free?
Most frozen shredded hash browns are naturally gluten-free, but always check the label. Some brands add wheat starch as an anti-caking agent. If you’re gluten-sensitive, look for a brand that certifies their product as GF. The other ingredients (cheese, egg, spices) are typically GF.
Pin This Recipe!

Crispy Cheddar Hash Brown Waffles: Easy Make-Ahead Breakfast
- Total Time: 20 minutes
- Yield: 4 servings 1x
Description
These savory, golden-brown waffles combine frozen shredded hash browns with sharp cheddar cheese for a crispy, diner-style breakfast that is easy to make and perfect for meal prepping.
Ingredients
- 20 oz frozen shredded hash browns
- 1.5 cups sharp cheddar cheese, shredded
- 1 large egg
- 1 teaspoon garlic powder
- 1 teaspoon onion powder
- 0.5 teaspoon smoked paprika
- 0.5 teaspoon salt
- 0.25 teaspoon black pepper
- Non-stick cooking spray
- Optional: 0.5 cup cooked bacon bits
- Optional: 2 tablespoons chopped chives
Instructions
- Break up frozen hash browns into loose shreds if they are in a solid block.
- In a medium bowl, combine hash browns, shredded cheddar, egg, garlic powder, onion powder, smoked paprika, salt, and pepper. Toss until evenly distributed.
- Preheat a standard waffle iron for 5-7 minutes until fully hot.
- Lightly spray the waffle iron with cooking spray.
- Scoop ¾ to 1 cup of the mixture onto the center of the iron and spread slightly.
- Close the lid and cook for 5-7 minutes until deep golden brown and crisp.
- Remove waffles with a fork or tongs and place on a wire cooling rack to prevent sogginess.
- Repeat with remaining mixture, spraying the iron between batches.
- Serve immediately with sour cream, salsa, or fried eggs.
Notes
Do not use diced hash browns or fresh potatoes unless you squeeze out all moisture. Grate cheese from a block for better melting. Always use a wire rack to keep waffles crisp. Reheat in a toaster or toaster oven; do not use a microwave.
- Prep Time: 5 minutes
- Cook Time: 15 minutes
- Category: Breakfast
- Cuisine: American
Nutrition
- Serving Size: 1 waffle
- Calories: 280
- Sugar: 2
- Sodium: 450
- Fat: 14
- Saturated Fat: 7
- Carbohydrates: 32
- Fiber: 3
- Protein: 12
Keywords: hash brown waffles, cheddar waffles, make-ahead breakfast, crispy breakfast, waffle iron recipes, savory waffles