There was a Tuesday last month that I will never forget, mostly because it involved flour on the ceiling, a very serious negotiation with a four-year-old, and the best decision I made all week. I had promised my daughter’s preschool class a treat for their “Spring Celebration.” Now, in my defense, I thought I had more time. But when the clock hit 4:00 PM and I was still staring at a messy kitchen, I realized I didn’t have time to bake twenty individual cookies. I needed something fast, something that looked festive, and most importantly, something that wouldn’t crumble into dust by the time it got to the school.
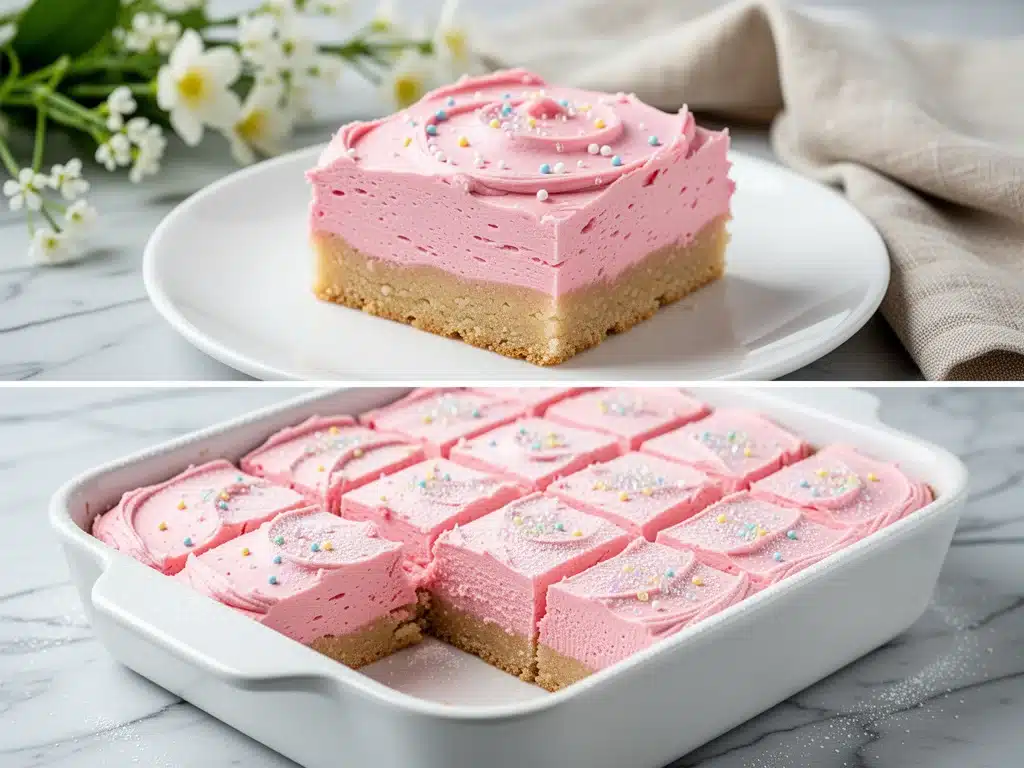
That’s when I decided to make these soft pink frosted sugar cookie bars. I’ve made sugar cookies for birthdays, holidays, and random Tuesday cravings for over a decade. But bars? Bars are different. They’re forgiving. They’re easy to cut. And honestly? They’re just as delicious as the round versions, but with half the cleanup drama. When I pulled that pan out of the oven, the whole house smelled like vanilla and warm butter. My kids didn’t even wait for it to cool completely. They were picking at the edges, icing and all. By the time I got them to the preschool, the other parents were asking for the recipe before the kids even had their juice boxes.
This isn’t just a recipe; it’s a lifesaver for busy parents and a hit with picky eaters. It’s my go-to when I need to impress without the stress. These bars are tender, buttery, and covered in a cloud-like pink frosting that kids absolutely devour. I’ve tested this recipe at least twelve times—sometimes with too much food coloring, sometimes with too little frosting (never too little frosting)—until I got it exactly right. The texture is perfect: soft enough to melt in your mouth, but sturdy enough to hold up in a lunchbox or a party favor bag.
If you’ve been looking for a dessert that combines the nostalgia of childhood sugar cookies with the convenience of a bar, you’ve found it. These soft pink frosted sugar cookie bars are about to become the star of your kitchen, and probably your kids’ favorite treat, period. Let’s get baking.
Why You’ll Love This Recipe
I know there are a million cookie recipes out there. So why this one? Why these bars? Here’s the real talk: this recipe solves the biggest problems parents face when baking with kids or baking for groups. It’s not just about taste (though it’s delicious); it’s about the experience.
- Zero Rolling Required — Seriously. If you can mix a bowl, you can make this. I’ve made these while helping my son with a very difficult math worksheet. No rolling pins, no chilling dough for hours, no fancy cutters. Just scoop, spread, and bake. It’s stupid simple.
- One Pan Wonder — Cleanup is usually the worst part of baking. With this recipe, you use one mixing bowl and one 9×13 baking dish. That’s it. I love that I don’t have to wash a dozen cookie sheets or line twenty parchment squares. One pan, done.
- Kid-Approved Aesthetics — These look like something from a bakery, but they’re homemade. The pastel pink frosting is irresistible to children. I’ve found that if it’s pink, it’s already halfway eaten. It’s a scientific fact. My daughter specifically asked for “pink cookies” for her birthday, and these were the only thing that satisfied her.
- Perfect Texture — Sugar cookies can sometimes be too crisp or too cakey. These bars hit the sweet spot (pun intended). They’re soft, chewy, and melt-in-your-mouth tender. The frosting adds a creamy contrast that keeps them moist for days.
- Makes Amazing Leftovers — And let’s be honest, there are almost always leftovers. These bars actually taste better the next day. The flavors meld together, and the frosting sets into a beautiful, fudgy layer. I deliberately make a double batch because we’ll eat them in two days flat.
- Budget-Friendly — Feeds a small army for under $10. Flour, sugar, butter, eggs, and a little pink food coloring. You probably have most of this in your pantry already. It’s way cheaper than buying a dozen fancy bakery bars, and infinitely better tasting.
This is my go-to when I need a dessert that just works. No complicated techniques, no weird ingredients, no stress. Just reliable, delicious, pink goodness that makes everyone happy.
Ingredients You’ll Need
Here’s the best part: you probably have most of this already. This isn’t a recipe that requires a special trip to three different specialty stores. It’s pantry-friendly, which means you can make it on a whim.
For the Cookie Bars
Unsalted Butter (1 cup / 226g) — Room temperature is key here. I take mine out about an hour before I start. If you’re in a rush, microwave it in 5-second bursts until it’s soft but not melted. Soft butter creams better with sugar, creating that tender crumb.
Granulated Sugar (1 ½ cups / 300g) — Standard white sugar. Don’t try to substitute with brown sugar unless you want a completely different flavor profile. We want that classic, clean sugar cookie taste.
Egg (1 large) — Room temperature eggs incorporate better. I usually just let mine sit on the counter while I prep the other ingredients.
Vanilla Extract (2 teaspoons) — Use real vanilla. I know it’s more expensive, but artificial vanilla tastes sharp and chemical in delicate sugar cookies. It’s worth the extra few dollars.
All-Purpose Flour (3 cups / 375g) — Spoon and level, don’t scoop. Scooping packs the flour down and leads to dry, crumbly bars. I always spoon it into my measuring cup and level it off with a knife.
Baking Powder (1 teaspoon) — Make sure it’s fresh! If your baking powder is older than six months, it might not rise properly. I keep a fresh can in my pantry specifically for baking.
Salt (½ teaspoon) — Even in sweet cookies, salt is crucial. It enhances the vanilla and balances the sweetness. Don’t skip it.
For the Pink Frosting

Butter (½ cup / 113g) — Room temperature again. Soft, spreadable butter is non-negotiable for fluffy frosting.
Powdered Sugar (3-4 cups / 360-480g) — Sifted. I know it’s a pain, but powdered sugar has tiny clumps. Sifting ensures your frosting is silky smooth, not grainy. Trust me on this.
Heavy Cream or Milk (2-3 tablespoons) — I prefer heavy cream for a richer, fluffier frosting, but whole milk works too. Add it gradually.
Vanilla Extract (1 teaspoon) — For that classic sugar cookie flavor.
Pink Food Coloring (Gel or liquid) — I use gel food coloring because it’s more vibrant and doesn’t water down the frosting. But liquid works fine if that’s all you have. Start with a tiny amount—you can always add more, but you can’t take it away.
Pink Sprinkles (Optional) — For the kids’ party vibe. I use jimmies or nonpareils. It’s the cherry on top.
Equipment Needed
You don’t need fancy equipment for this. Here’s what I actually use.
9×13 Inch Baking Dish — Glass or metal both work. I prefer glass because I can see the bottom browning. Make sure it’s clean and dry.
Electric Mixer — Hand mixer or stand mixer. I use a hand mixer because it’s faster for this amount of dough. You can mix by hand, but it takes serious arm muscle. Don’t do it unless you enjoy a workout.
Mixing Bowls — One large bowl for the dough, one medium for the frosting.
Measuring Cups and Spoons — Standard stuff. Dollar store versions work fine.
Spatula — A silicone spatula is great for scraping the bowl and spreading the dough evenly.
Parchment Paper — Optional, but I highly recommend lining the pan. It makes cleanup a breeze and helps the bars release easily. I use the “sling” method—leave extra paper hanging over the edges to lift the bars out later.
Sifter or Fine Mesh Strainer — For the powdered sugar. If you don’t have one, you can pulse the sugar in a food processor, but a sifter is cheaper and easier.
How to Make It: Step-by-Step
Alright, let’s make these soft pink frosted sugar cookie bars! I’m walking you through exactly how I do it, including the little tricks I’ve picked up over the years.
Step 1: Prep Your Oven and Pan (5 minutes)
Preheat your oven to 350°F (175°C). Line your 9×13 baking dish with parchment paper, leaving an overhang on the long sides. This is your handle for lifting the bars out later. Grease the parchment lightly with butter or cooking spray. This ensures nothing sticks.
Step 2: Cream the Butter and Sugar (3 minutes)
In your large mixing bowl, beat the softened butter and granulated sugar together on medium-high speed. You’re looking for a light, fluffy texture, about 2-3 minutes. This step incorporates air, which helps the bars rise and stay tender. Scrape down the sides of the bowl with a spatula to ensure everything is mixed evenly.
Step 3: Add Wet Ingredients (1 minute)
Add the egg and vanilla extract to the butter mixture. Beat on medium speed until just combined. Don’t overmix here. You just want it smooth and creamy.
Step 4: Mix Dry Ingredients (2 minutes)
In a separate bowl (or just measure directly into the mixer on low speed), whisk together the flour, baking powder, and salt. Add this to the wet ingredients. Mix on low speed until the flour disappears. Be careful not to overmix! Once the flour is incorporated, stop. Overmixing develops gluten, which makes the bars tough instead of tender. The dough will look thick and slightly crumbly—that’s perfect.
Step 5: Press into Pan (5 minutes)
Transfer the dough to your prepared baking dish. Use your hands (lightly greased) or a spatula to press the dough evenly into the pan. It should be flat and smooth. If it’s sticky, wet your hands slightly. Make sure the corners are filled in. This ensures even baking.
Step 6: Bake (20-25 minutes)
Place the pan in the preheated oven. Bake for 20-25 minutes. You’ll know they’re done when the edges are lightly golden and the center is set. It shouldn’t jiggle when you shake the pan. If the edges are browning too fast, cover them with foil for the last 10 minutes. Let the bars cool completely in the pan on a wire rack. This is the hardest part—waiting for them to cool. But warm bars + frosting = a melted, messy disaster.
Step 7: Make the Frosting (5 minutes)
While the bars cool, make the frosting. Beat the softened butter until creamy. Gradually add the sifted powdered sugar, one cup at a time, beating on low. Once all sugar is added, add the vanilla and 2 tablespoons of heavy cream. Beat on high for 2-3 minutes until fluffy. If it’s too thick, add another tablespoon of cream. If it’s too thin, add more powdered sugar.
Step 8: Color and Spread (5 minutes)
Add your pink food coloring. Start with a small amount (a toothpick dipped in gel works well). Beat until you reach your desired shade. Spread the frosting evenly over the completely cooled bars. Use an offset spatula for smooth edges, or just a knife for a rustic look.
Step 9: Garnish and Slice (5 minutes)
Sprinkle with pink sprinkles if desired. Let the frosting set for 10-15 minutes. Then, use a sharp knife to cut into squares. For clean cuts, wipe the knife between slices. Enjoy!
Expert Tips & Tricks
Here’s everything I’ve learned from making these dozens of times. These tips will save you from my mistakes.
Room Temperature Ingredients Matter — I can’t stress this enough. Cold butter doesn’t cream properly. Cold eggs can cause the mixture to curdle. Take your butter and eggs out 30-60 minutes before you start. If you forget, microwave the butter in short bursts and put the egg in a bowl of warm water for 5 minutes.
Don’t Overmix the Dough — Once you add the flour, mix until it *just* comes together. Overmixing makes tough cookies. I usually mix on low speed for 30 seconds after adding the flour, then stop. It’s okay if there are tiny streaks of flour; they’ll disappear when you press it into the pan.
Cool Completely Before Frosting — I know, I know. It’s torture. But if the bars are even slightly warm, the frosting will melt and soak into the cookie. You’ll end up with a soggy, messy bar. Patience pays off. I usually let them cool for at least an hour, or overnight.
Sift Your Powdered Sugar — If you skip this, you’ll have lumpy frosting. Lumpy frosting is not fun to spread. Sifting takes two minutes and makes a huge difference in texture.
Use Gel Food Coloring — It’s more potent, so you use less. Liquid food coloring can add too much water, making the frosting runny. Gel gives you vibrant color without changing the consistency.
Sharp Knife for Cutting — Use a sharp chef’s knife. Dull knives crush the bars and make messy edges. Wipe the blade clean between cuts for neat squares.
Variations & Substitutions
Once you’ve nailed the basic version, here’s how you can mix it up. I’ve tried all of these.
Lemon Sugar Cookie Bars — Swap the vanilla extract for lemon extract and add the zest of one lemon to the dough. Add a tablespoon of lemon juice to the frosting. Bright and refreshing.
Chocolate Chip Variation — Fold 1 cup of chocolate chips into the dough before pressing it into the pan. Kids love chocolate chip sugar cookies, and this makes it even easier.
Gluten-Free Version — Use a 1:1 gluten-free flour blend (like Bob’s Red Mill or King Arthur). The texture might be slightly more crumbly, but it still tastes great. Add a teaspoon of xanthan gum if your blend doesn’t have it.
Dairy-Free Option — Use dairy-free butter sticks (not tub margarine) and dairy-free milk in the frosting. Most powdered sugar is naturally dairy-free, but check the label. The bars will be slightly less rich, but still delicious.
Red Velvet Twist — Add 1 tablespoon of cocoa powder to the dry ingredients and use red food coloring. Top with cream cheese frosting instead of buttercream. It’s a fun holiday variation.
Flavored Extracts — Try almond extract, coconut extract, or peppermint extract in the dough. Almond extract pairs beautifully with the pink color for a “strawberry” vibe without using berries.
Serving & Storage
How to Serve:
I usually serve these at room temperature. They’re perfect for lunchboxes, school parties, or afternoon snacks. Cut them into 24 squares for a standard party, or 16 squares if you want bigger, indulgent bars.
Side Dishes:
These are sweet enough on their own, but they pair well with a glass of cold milk or a cup of tea. For a party, I serve them with fresh strawberries or pineapple chunks to balance the sweetness.
Storage Instructions:
Refrigerator:
Store in an airtight container at room temperature for up to 3 days. If your kitchen is very hot or humid, store them in the fridge. They’ll last up to 5 days refrigerated. Let them come to room temperature before eating for the best texture.
Freezer:
Yes, you can freeze these! Bake the bars and let them cool completely. Do not frost them yet. Wrap the pan tightly in plastic wrap and foil, or transfer the bars to a freezer-safe container. They’ll last for 2-3 months. Thaw overnight in the fridge, then frost when ready to serve. The frosting doesn’t freeze well; it can become grainy or separate.
Reheating:
You don’t need to reheat these. They’re best at room temperature. If you accidentally refrigerated them, let them sit out for 30 minutes before eating.
Pro Tip:
If you’re taking these to a party, cut them into squares but leave them in the pan. Cover tightly with plastic wrap. They’ll hold their shape perfectly, and you can just lift the whole sheet out onto a plate at the venue.
Nutrition Information
I’m not a nutritionist, but here’s the breakdown if you’re tracking. Keep in mind, this is an estimate based on standard ingredients.
Per Serving (based on 24 bars):
- Calories: 180
- Protein: 2g
- Carbs: 26g
- Fiber: 0g
- Sugar: 18g
- Fat: 8g
- Saturated Fat: 5g
- Cholesterol: 25mg
- Sodium: 90mg
What’s Good:
- Simple ingredients
- Easy to portion control
- Can be modified for dietary needs
What to Know:
- High in sugar and carbs (it’s a sugar cookie, after all!)
- Contains dairy and gluten
- Not suitable for low-sugar or keto diets without significant modifications
My Take:
Look, this is a treat. It’s meant to be enjoyed. I don’t stress about the calories when I make these; I stress about the joy they bring to my kids. When I want to make it slightly lighter, I reduce the sugar in the dough by ¼ cup, but the texture changes. Usually, I just enjoy a couple of squares and call it a day.
Final Thoughts
So that’s my go-to soft pink frosted sugar cookie bars! I’ve probably talked your ear off at this point, but when you make a recipe this often, you have a lot to say about it. These bars have saved me more times than I can count. They’re my answer to “what’s for the school party?” when I’m tired, don’t want takeout, and still want something that tastes really good. My kids are happy, the teachers are happy, and I’m happy because I’m not stressed about cooking.
Make it yours! Try different extract flavors, swap in your favorite sprinkles, or add chocolate chips. The best recipes are the ones you adapt to your family’s tastes. If you make this, drop a comment and let me know what you think! I love hearing how recipes turn out in your kitchen. And if something doesn’t work, tell me that too—I’m here to help troubleshoot.
Happy baking! And I hope your kitchen smells half as good as mine does right now.
Frequently Asked Questions
Can I use self-rising flour instead of all-purpose flour?
You can, but you’ll need to adjust the baking powder. Self-rising flour already contains baking powder and salt. If you use it, omit the baking powder and salt in the recipe. However, the texture might be slightly different. I prefer all-purpose flour for consistent results.
Why did my bars turn out dry?
This usually happens if you overbaked them or measured the flour incorrectly. Make sure you’re spooning and leveling your flour, not scooping. Also, check your oven temperature with an oven thermometer—ovens can run hot. Remove the bars from the oven when the edges are just starting to turn golden, not dark brown.
Can I make these ahead of time?
Yes! Bake the bars up to 3 days ahead. Let them cool completely, then store in an airtight container at room temperature. Frost them the day you plan to serve them. If you frost them ahead of time, they might get sticky in the container.
Why is my frosting too runny?
This usually means you added too much liquid or the butter was too warm. If it’s runny, add more powdered sugar, a quarter cup at a time, until it reaches the desired consistency. If the butter was melted, you’ll need to chill the frosting in the fridge for 15-20 minutes before using it.
Can I use liquid food coloring instead of gel?
Yes, but you’ll need to use more of it to get a vibrant pink color. This can make the frosting runny. If you use liquid coloring, add it drop by drop and beat well. You may need to add a bit more powdered sugar to compensate for the extra liquid.
How do I store leftovers?
Store in an airtight container at room temperature for up to 3 days. If your kitchen is hot, store them in the fridge. Let them come to room temperature before eating for the best texture.
Can I double this recipe?
Absolutely! Double everything and use a 9×13 pan. The cooking time might increase by 2-3 minutes. Keep an eye on them. I do this when I’m feeding a crowd, and it works perfectly.
Pin This Recipe!


Soft Pink Frosted Sugar Cookie Bars
- Total Time: 45 minutes
- Yield: 24 servings 1x
Description
Soft, chewy sugar cookie bars with a fluffy pink frosting. This easy one-pan recipe requires no rolling and is perfect for busy parents and school parties.
Ingredients
- 1 cup unsalted butter, room temperature
- 1 ½ cups granulated sugar
- 1 large egg, room temperature
- 2 teaspoons vanilla extract
- 3 cups all-purpose flour
- 1 teaspoon baking powder
- ½ teaspoon salt
- ½ cup butter, room temperature (for frosting)
- 3–4 cups powdered sugar, sifted
- 2–3 tablespoons heavy cream or milk
- 1 teaspoon vanilla extract (for frosting)
- Pink food coloring (gel or liquid)
- Pink sprinkles (optional)
Instructions
- Preheat oven to 350°F (175°C). Line a 9×13 inch baking dish with parchment paper, leaving an overhang on the long sides, and grease lightly.
- In a large mixing bowl, beat the softened butter and granulated sugar on medium-high speed for 2-3 minutes until light and fluffy. Scrape down the sides of the bowl.
- Add the egg and vanilla extract to the butter mixture. Beat on medium speed until just combined.
- In a separate bowl, whisk together the flour, baking powder, and salt. Add this to the wet ingredients and mix on low speed until the flour disappears. Do not overmix.
- Transfer the dough to the prepared baking dish. Press evenly into the pan using greased hands or a spatula.
- Bake for 20-25 minutes, or until edges are lightly golden and the center is set. Let cool completely in the pan on a wire rack.
- While bars cool, beat the frosting butter until creamy. Gradually add sifted powdered sugar, then add vanilla and 2 tablespoons of cream. Beat on high for 2-3 minutes until fluffy.
- Add pink food coloring and beat until desired shade is reached. Spread evenly over the completely cooled bars.
- Sprinkle with pink sprinkles if desired. Let frosting set for 10-15 minutes, then cut into squares.
Notes
Ensure ingredients are at room temperature for best results. Do not overmix the dough to keep bars tender. Cool bars completely before frosting to prevent melting. Sift powdered sugar for smooth frosting. Use gel food coloring for vibrant color without thinning the frosting.
- Prep Time: 20 minutes
- Cook Time: 25 minutes
- Category: Dessert
- Cuisine: American
Nutrition
- Serving Size: 1 square
- Calories: 180
- Sugar: 18
- Sodium: 90
- Fat: 8
- Saturated Fat: 5
- Carbohydrates: 26
- Protein: 2
Keywords: sugar cookie bars, pink frosting, easy dessert, kids favorite, school party treat, one pan baking, soft cookies


